


cxf springmvc
自Java 9发布最终将Project Jigsaw交付给大众以来,已经过去了整整一年的时间。 这是一段漫长的旅程,但是在那里,所以发生了什么变化? 这是一个很好的问题,答案并不明显和直接。
总的来说,拼图项目是一种颠覆性的变化,其原因很多。 尽管我们几乎所有现有应用程序都将在Java 10上运行(很快将由JDK 11取代),几乎没有变化,但Jigsaw项目给Java开发人员带来了深远的影响:拥抱Java的模块化应用程序平台方式。
由于存在无数出色的框架和库,因此将它们转换为Java模块肯定会花费很多时间,很多人将永远无法做到。 这条路是棘手的,但是即使在今天,某些事情也已经成为可能。 在这篇简短的文章中,我们将学习如何使用出色的Apache CXF项目使用最新的JDK 10以真正的模块化方式构建JAX-RS 2.1 Web API 。
从3.2.5版本开始,所有Apache CXF工件的清单都带有Automatic-Module-Name伪指令。 它并不能使它们成为完整的模块,但这是朝着正确方向迈出的第一步。 因此,让我们开始吧……
如果您使用Apache Maven作为选择的构建工具,在这里没有做太多更改,则依赖项的声明方式与以前相同。
<dependencies>
    <dependency>
        <groupId>org.apache.cxf</groupId>
        <artifactId>cxf-rt-frontend-jaxrs</artifactId>
        <version>3.2.5</version>
    </dependency>

    <dependency>
        <groupId>com.fasterxml.jackson.jaxrs</groupId>
        <artifactId>jackson-jaxrs-json-provider</artifactId>
        <version>2.9.6</version>
    </dependency>

    <dependency>
        <groupId>org.eclipse.jetty</groupId>
        <artifactId>jetty-server</artifactId>
        <version>9.4.11.v20180605</version>
    </dependency>

    <dependency>
        <groupId>org.eclipse.jetty</groupId>
        <artifactId>jetty-webapp</artifactId>
        <version>9.4.11.v20180605</version>
    </dependency>
</dependencies>uber-jar或fat-jar打包实际上不适用于模块化Java应用程序,因此我们必须自己收集模块,例如,在target / modules文件夹中。
<plugin>
    <artifactId>maven-jar-plugin</artifactId>
    <version>3.1.0</version>
    <configuration>
        <outputDirectory>${project.build.directory}/modules</outputDirectory>
    </configuration>
</plugin>

<plugin>
    <groupId>org.apache.maven.plugins</groupId>
    <artifactId>maven-dependency-plugin</artifactId>
    <version>3.1.1</version>
    <executions>
        <execution>
            <phase>package</phase>
            <goals>
                <goal>copy-dependencies</goal>
            </goals>
            <configuration>
                <outputDirectory>${project.build.directory}/modules</outputDirectory>
                <includeScope>runtime</includeScope>
            </configuration>
        </execution>
    </executions>
</plugin>很好,下一步是创建module-info.java并在其中列出我们的模块的名称(在本例中为com.example.cxf ),以及除其他外,它需要所有必需的模块才能正常运行。
module com.example.cxf {
    exports com.example.rest;

    requires org.apache.cxf.frontend.jaxrs;
    requires org.apache.cxf.transport.http;
    requires com.fasterxml.jackson.jaxrs.json;

    requires transitive java.ws.rs;

    requires javax.servlet.api;
    requires jetty.server;
    requires jetty.servlet;
    requires jetty.util;

    requires java.xml.bind;
}
您可能会马上发现, org.apache.cxf.frontend.jaxrs和org.apache.cxf.transport.http来自Apache CXF发行版(完整列表可在文档中找到),而java.ws.rs是JAX。 -RS 2.1 API模块。 之后,我们可以像以前一样继续实现我们的JAX-RS资源。
@Path("/api/people")
public class PeopleRestService {
    @GET
    @Produces(MediaType.APPLICATION_JSON)
    public Collection<Person> getAll() {
        return List.of(new Person("John", "Smith", "john.smith@somewhere.com"));
    }
}这看起来很简单,如何添加一些辣酱,例如服务器发送的事件( SSE )和RxJava ? 从依赖关系开始,让我们看看它有多容易。
<dependency>
    <groupId>org.apache.cxf</groupId>
    <artifactId>cxf-rt-rs-sse</artifactId>
    <version>3.2.5</version>
</dependency>

<dependency>
    <groupId>io.reactivex.rxjava2</groupId>
    <artifactId>rxjava</artifactId>
    <version>2.1.14</version>
</dependency>同样,我们不要忘记通过将requires指令添加到这些新模块来更新我们的module-info.java 。
module com.example.cxf {
    ...
    requires org.apache.cxf.rs.sse;
    requires io.reactivex.rxjava2;
    requires transitive org.reactivestreams;
    ...

}为了简单起见,我们的SSE端点只会广播通过API添加的每个新用户。 这是实现的代码段。
private SseBroadcaster broadcaster;
private Builder builder;
private PublishSubject<Person> publisher;

public PeopleRestService() {
    publisher = PublishSubject.create();
}

@Context
public void setSse(Sse sse) {
    this.broadcaster = sse.newBroadcaster();
    this.builder = sse.newEventBuilder();

    publisher
        .subscribeOn(Schedulers.single())
        .map(person -> createEvent(builder, person))
        .subscribe(broadcaster::broadcast);
}

@POST
@Produces(MediaType.APPLICATION_JSON)
@Consumes(MediaType.APPLICATION_JSON)
public Response add(@Context UriInfo uriInfo, Person payload) {
    publisher.onNext(payload);

    return Response
        .created(
            uriInfo
                .getRequestUriBuilder()
                .path(payload.getEmail())
                .build())
        .entity(payload)
        .build();
}

@GET
@Path("/sse")
@Produces(MediaType.SERVER_SENT_EVENTS)
public void people(@Context SseEventSink sink) {
    broadcaster.register(sink);
}
现在,当我们构建它时:
mvn clean package并使用模块路径运行它:
java --add-modules java.xml.bind \
           --module-path target/modules \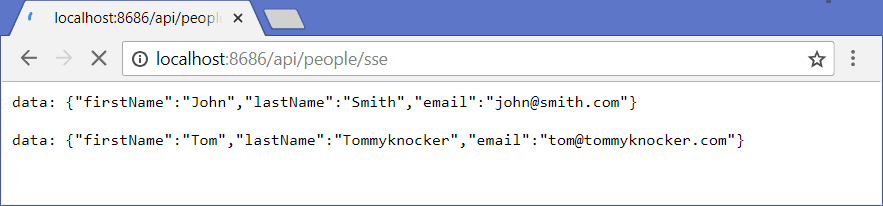
--module com.example.cxf/com.example.Starter我们应该能够对我们的JAX-RS API进行测试。 确保一切正常的最简单方法是在Google Chrome浏览器中导航到SSE端点http:// localhost:8686 / api / people / sse,并使用来自的旧伙伴卷曲通过POST请求添加一些随机的人命令行:
curl -X POST http://localhost:8686/api/people \
           -d '{"email": "john@smith.com", "firstName": "John", "lastName": "Smith"}' \
           -H "Content-Type: application/json"
curl -X POST http://localhost:8686/api/people \
-d '{"email": "tom@tommyknocker.com", "firstName": "Tom", "lastName": "Tommyknocker"}' \
-H "Content-Type: application/json"在Google Chrome浏览器中,我们应该能够看到由服务器推送的原始SSE事件(它们看起来不漂亮,但足以说明流程)。

那么,应用程序打包呢? Docker和容器当然是一个可行的选择,但是在Java 9及更高版本中,我们还有另一个参与者: jlink 。 它将一组模块及其依赖项组装并优化为一个自定义的,足够的运行时映像。 让我们尝试一下。
jlink --add-modules java.xml.bind,java.management \
            --module-path target/modules \
            --verbose \
            --strip-debug \
            --compress 2 \
            --no-header-files \
            --no-man-pages \
            --output target/cxf-java-10-app
在这里,我们正在碰壁。 不幸的是,由于我们应用程序的大多数依赖项都是自动模块,因此对于jlink来说是一个问题,并且从运行时映像运行时,我们仍然必须显式包括模块路径:
target/cxf-java-10-app/bin/java  \
           --add-modules java.xml.bind \
           --module-path target/modules \
           --module com.example.cxf/com.example.Starter
最终,事实并非如此可怕。 我们肯定处于JPMS采纳的初期,这仅仅是开始。 当我们使用的每个库,每个框架都在其工件(JAR)中添加module-info.java ,使它们成为真正的模块,尽管有许多怪癖,然后我们才能宣告胜利。 但是小小的胜利已经在发生,让自己的胜利!
该项目的完整资源可在Github上找到。
翻译自: https://www.javacodegeeks.com/2018/08/modular-java-platform-apache-cxf.html
cxf springmvc


 275
275

 被折叠的 条评论
为什么被折叠?
被折叠的 条评论
为什么被折叠?
 到【灌水乐园】发言


