


Spring Boot是进入Spring的强大起点。 它使您可以轻松地构建基于Spring的应用程序。
Aerospike是一个分布式和复制的内存数据库,经过优化可同时使用DRAM和本机闪存/ SSD。
Aerospike还具有很高的可靠性,并且符合ACID标准。 开发人员可以在不中断数据库服务的情况下将其数据库集群从两个节点快速扩展到二十个节点。
你会建立什么
本文将引导您使用Spring Boot创建一个简单的RESTful Web服务。
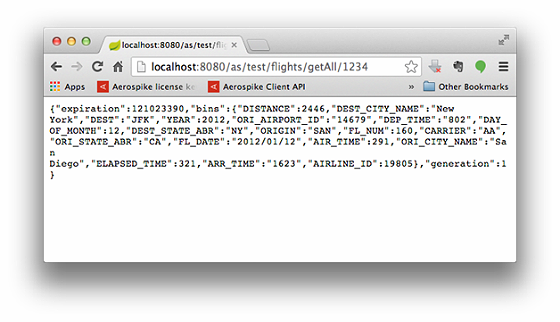
您将构建一个接受HTTP GET请求的服务。 它使用以下JSON进行响应:
{"expiration":121023390,"bins":{"DISTANCE":2446,"DEST_CITY_NAME":"New York","DEST":"JFK","YEAR":2012,"ORI_AIRPORT_ID":"14679","DEP_TIME":"802","DAY_OF_MONTH":12,"DEST_STATE_ABR":"NY","ORIGIN":"SAN","FL_NUM":160,"CARRIER":"AA","ORI_STATE_ABR":"CA","FL_DATE":"2012/01/12","AIR_TIME":291,"ORI_CITY_NAME":"San Diego","ELAPSED_TIME":321,"ARR_TIME":"1623","AIRLINE_ID":19805},"generation":1}您将使用的数据是商业航班的详细信息(包括在示例代码中(SP:将链接添加到zip文件中),是一个数据文件flight_from.csv,其中包含大约一百万个航班记录。
现成的应用程序中还添加了许多功能,用于在生产(或其他)环境中管理服务。 这在功能上来自Spring,(请参阅Spring指南: 构建RESTful Web服务 。)
您将需要什么
- 最喜欢的文本编辑器或IDE
- JDK 7或更高版本
- Maven 3.0+
- Aerospike Java SDK 3.0+
设置项目
使用Spring构建应用程序时,可以使用任何喜欢的构建系统,但是Maven代码包含在此处。 如果您不熟悉Maven,请参阅Spring指南: 使用Maven构建Java项目 。
您还将需要构建Aerospike Java客户端并将其安装到本地Maven存储库中。 下载源发行版,解压缩/解压缩并运行以下Maven命令:
- mvn install:安装文件-Dfile = client / depends / gnu-crypto.jar -DgroupId = org.gnu -DartifactId = gnu-crypto -Dversion = 2.0.1 -Dpackaging = jar
- MVN清洁
- mvn包
创建目录结构
在您选择的项目中,创建以下子目录结构:
->源
->主要
->的Java
-> com
->气钉
->客户
->休息
创建一个Maven pom
使用以下代码在项目的根目录中创建一个maven pom.xml文件:
<?xml version="1.0" encoding="UTF-8"?>
<project xmlns="http://maven.apache.org/POM/4.0.0"
xmlns:xsi="http://www.w3.org/2001/XMLSchema-instance"
    xsi:schemaLocation="http://maven.apache.org/POM/4.0.0 http://maven.apache.org/xsd/maven-4.0.0.xsd">
      <modelVersion>4.0.0</modelVersion>
      <groupId>com.aerospike</groupId>
      <artifactId>aerospike-restful-example</artifactId>
      <version>1.0.0</version>
    <parent>
        <groupId>org.springframework.boot</groupId>
        <artifactId>spring-boot-starter-parent</artifactId>
        <version>0.5.0.M4</version>
    </parent>
      <dependencies>
        <dependency>
            <groupId>org.springframework.boot</groupId>
            <artifactId>spring-boot-starter-web</artifactId>
        </dependency>
        <dependency>
            <groupId>org.springframework.boot</groupId>
            <artifactId>spring-boot-starter-actuator</artifactId>
        </dependency>
            <!-- Aerospike client. -->
        <dependency>
              <groupId>com.aerospike</groupId>
              <artifactId>aerospike-client</artifactId>
              <version>3.0.9</version>
        </dependency>
        <!-- Apache command line parser. -->
        <dependency>
              <groupId>commons-cli</groupId>
              <artifactId>commons-cli</artifactId>
              <version>1.2</version>
        </dependency>
  </dependencies>

  <properties>
      <start-class>com.aerospike.client.rest.AerospikeRESTfulService</start-class>
  </properties>

  <build>
      <plugins>
          <plugin>
              <artifactId>maven-compiler-plugin</artifactId>
              <version>2.3.2</version>
          </plugin>
          <plugin>
              <groupId>org.springframework.boot</groupId>
              <artifactId>spring-boot-maven-plugin</artifactId>
          </plugin>
      </plugins>
  </build>
  <repositories>
      <repository>
          <id>spring-snapshots</id>
          <name>Spring Snapshots</name>
          <url>http://repo.spring.io/libs-snapshot</url>
          <snapshots>
              <enabled>true</enabled>
          </snapshots>
      </repository>
  </repositories>
  <pluginRepositories>
      <pluginRepository>
          <id>spring-snapshots</id>
          <name>Spring Snapshots</name>
          <url>http://repo.spring.io/libs-snapshot</url>
          <snapshots>
              <enabled>true</enabled>
          </snapshots>
       </pluginRepository>
  </pluginRepositories>

</project>
它看起来很吓人,但实际上不是。
创建一个JSON转换器类
Aerospike API将返回Record对象,并将包含记录的生成,到期和bin值。 但是您希望这些值以JSON格式返回。 实现此目的的最简单方法是使用翻译器类。
使用以下代码创建翻译器类。 这是一个通用类,它将Aerospike Record对象转换为JSONObject。
src/main/java/com/aerospike/client/rest/JSONRecord.java
package com.aerospike.client.rest;
import java.util.Map;
import org.json.simple.JSONArray;
import org.json.simple.JSONObject;
import com.aerospike.client.Record;
/**
* JSONRecord is used to convert an Aerospike Record
* returned from the cluster to JSON format
*
*/
@SuppressWarnings("serial")
public class JSONRecord extends JSONObject {
      @SuppressWarnings("unchecked")
      public JSONRecord(Record record){
            put("generation", record.generation);
            put("expiration", record.expiration);
            put("bins", new JSONObject(record.bins));
            if (record.duplicates != null){
                  JSONArray duplicates = new JSONArray();
                  for (Map<String, Object> duplicate : record.duplicates){
                        duplicates.add(new JSONObject(duplicate));
                  }
                  put("duplicates", duplicates);
             }
       }
}
此类并不复杂,并且非常通用。 您可能希望专门针对特定记录进行JSON转换。
创建一个资源控制器
在Spring中,REST端点是Spring MVC控制器。 以下代码处理对/ as / {namespace} / {set} / getAll / 1234的GET请求,并返回键为1234的Flight记录,其中{namespace}是Aerospike命名空间的路径变量,而{set}是Aerospike集的路径变量。
src/main/java/com/aerospike/client/rest/RESTController.java
package com.aerospike.client.rest;
import java.io.BufferedReader;
import java.io.InputStreamReader;

import org.springframework.beans.factory.annotation.Autowired;
import org.springframework.stereotype.Controller;
import org.springframework.web.bind.annotation.PathVariable;
import org.springframework.web.bind.annotation.RequestMapping;
import org.springframework.web.bind.annotation.RequestMethod;
import org.springframework.web.bind.annotation.RequestParam;
import org.springframework.web.bind.annotation.ResponseBody;
import org.springframework.web.multipart.MultipartFile;
import com.aerospike.client.AerospikeClient;
import com.aerospike.client.Bin;
import com.aerospike.client.Key;
import com.aerospike.client.Record;
import com.aerospike.client.policy.Policy;
import com.aerospike.client.policy.WritePolicy;

@Controller
public class RESTController {
      @Autowired
      AerospikeClient client;
    @RequestMapping(value="/as/{namespace}/{set}/getAll/{key}", method=RequestMethod.GET)
    public @ResponseBody JSONRecord getAll(@PathVariable("namespace") String namespace,
            @PathVariable("set") String set,
            @PathVariable("key") String keyvalue) throws Exception {
    Policy policy = new Policy();
    Key key = new Key(namespace, set, keyvalue);
     Record result = client.get(policy, key);
     return new JSONRecord(result);
  }
}
面向人的控制器与REST端点控制器之间的区别在于,响应主体将包含数据,在您的情况下,该主体是表示从Aerospike读取的记录的JSON对象。
@ResponseBody注释告诉Spring MVC将返回的对象写入响应主体。
创建一个可执行的主类
实现main方法以创建Spring MVC控制器。 最简单的方法是使用SpringApplication helper类。
src/main/java/com/aerospike/client/rest/AerospikeRESTfulService.java
package com.aerospike.client.rest;
import java.util.Properties;
import javax.servlet.MultipartConfigElement;
import org.apache.commons.cli.CommandLine;
import org.apache.commons.cli.CommandLineParser;
import org.apache.commons.cli.Options;
import org.apache.commons.cli.ParseException;
import org.apache.commons.cli.PosixParser;
import org.springframework.boot.SpringApplication;
import org.springframework.boot.autoconfigure.EnableAutoConfiguration;
import org.springframework.context.annotation.Bean;
import org.springframework.context.annotation.ComponentScan;
import org.springframework.context.annotation.Configuration;

import com.aerospike.client.AerospikeClient;
import com.aerospike.client.AerospikeException;
@Configuration
@EnableAutoConfiguration
@ComponentScan
public class AerospikeRESTfulService {
      @Bean
      public AerospikeClient asClient() throws AerospikeException {
            Properties as = System.getProperties();
            return new AerospikeClient(as.getProperty("seedHost"),
                  Integer.parseInt(as.getProperty("port")));
      }
      @Bean
      public MultipartConfigElement multipartConfigElement() {
            return new MultipartConfigElement("");
      }
      public static void main(String[] args) throws ParseException {
             Options options = new Options();
             options.addOption("h", "host", true,
                   "Server hostname (default: localhost)");
             options.addOption("p", "port", true, "Server port (default: 3000)");
             // parse the command line args
             CommandLineParser parser = new PosixParser();
             CommandLine cl = parser.parse(options, args, false);
             // set properties
             Properties as = System.getProperties();
             String host = cl.getOptionValue("h", "localhost");
             as.put("seedHost", host);
             String portString = cl.getOptionValue("p", "3000");
             as.put("port", portString);
             // start app
             SpringApplication.run(AerospikeRESTfulService.class, args);
      }
}@EnableAutoConfiguration注释已添加:它提供了一系列默认值(例如嵌入式servlet容器),具体取决于您的类路径的内容以及其他内容。
它也用@ComponentScan注释,它告诉Spring扫描那些控制器的hello包(以及任何其他带注释的组件类)。
最后,使用@Configuration注释此类。 这使您可以将AerospikeClient的实例配置为Spring Bean。
还定义了一个MultipartConfigElement bean。 这使您可以使用此服务处理POST操作。
main方法的大多数主体仅读取命令行参数并设置系统属性以指定Aerospike群集的种子主机和端口。
太容易了!
上载资料
您可能需要将数据上传到此服务。 为此,您需要向RESTController类添加其他方法来处理上载的文件。 在此示例中,它将是一个包含飞行记录的CSV文件。
src/main/java/com/aerospike/client/rest/RESTController.java
@Controller
public class RESTController {
   . . . (code omitted) . . .
   /*
    * CSV flights file upload
    */
   @RequestMapping(value="/uploadFlights", method=RequestMethod.GET)
   public @ResponseBody String provideUploadInfo() {
       return "You can upload a file by posting to this same URL.";
   }
   @RequestMapping(value="/uploadFlights", method=RequestMethod.POST)
   public @ResponseBody String handleFileUpload(@RequestParam("name") String name,
          @RequestParam("file") MultipartFile file){
     if (!file.isEmpty()) {
           try {
                 WritePolicy wp = new WritePolicy();
                 String line = "";
                 BufferedReader br = new BufferedReader(new InputStreamReader(file.getInputStream()));
                 while ((line = br.readLine()) != null) {
                       // use comma as separator
                       String[] flight = line.split(",");

                       /*
                        * write the record to Aerospike
                        * NOTE: Bin names must not exceed 14 characters
                        */
                            client.put(wp,
                                  new Key("test", "flights",flight[0].trim() ),
                                  new Bin("YEAR", Integer.parseInt(flight[1].trim())),
                                  new Bin("DAY_OF_MONTH", Integer.parseInt(flight[2].trim())),
                                  new Bin("FL_DATE", flight[3].trim()),
                                  new Bin("AIRLINE_ID", Integer.parseInt(flight[4].trim())),
                                  new Bin("CARRIER", flight[5].trim()),
                                  new Bin("FL_NUM", Integer.parseInt(flight[6].trim())),
                                  new Bin("ORI_AIRPORT_ID", Integer.parseInt(flight[7].trim())),
                                  new Bin("ORIGIN", flight[8].trim()),
                                  new Bin("ORI_CITY_NAME", flight[9].trim()),
                                  new Bin("ORI_STATE_ABR", flight[10].trim()),
                                  new Bin("DEST", flight[11].trim()),
                                  new Bin("DEST_CITY_NAME", flight[12].trim()),
                                  new Bin("DEST_STATE_ABR", flight[13].trim()),
                                  new Bin("DEP_TIME", Integer.parseInt(flight[14].trim())),
                                  new Bin("ARR_TIME", Integer.parseInt(flight[15].trim())),
                                  new Bin("ELAPSED_TIME", Integer.parseInt(flight[16].trim())),
                                  new Bin("AIR_TIME", Integer.parseInt(flight[17].trim())),
                                  new Bin("DISTANCE", Integer.parseInt(flight[18].trim()))
                            );
                            System.out.println("Flight [ID= " + flight[0]
                                                    + " , year=" + flight[1]
                                                    + " , DAY_OF_MONTH=" + flight[2]
                                                    + " , FL_DATE=" + flight[3]
                                                    + " , AIRLINE_ID=" + flight[4]
                                                    + " , CARRIER=" + flight[5]
                                                    + " , FL_NUM=" + flight[6]
                                                    + " , ORIGIN_AIRPORT_ID=" + flight[7]
                                                    + "]");
                        }
                        br.close();
                        return "You successfully uploaded " + name;
                  } catch (Exception e) {
                        return "You failed to upload " + name + " => " + e.getMessage();
                  }
            } else {
                  return "You failed to upload " + name + " because the file was empty.";
              }
       }
}
新方法handleFileUpload()响应POST并一次读取一行上传流。 解析每一行,并构建一个Key对象和几个Bin对象以形成Aerospike记录。 最后,调用Aerospike put()方法将记录存储在Aerospike集群中。
另一个新方法ProvideUploadInfo()响应GET并返回一条消息,指示可以进行上传。
上载客户端应用程序
可以按照您想要的任何方式进行上传。 但是您可以使用以下独立的Java类将数据上传到此服务。
src/test/java/com.aerospike.client.rest/FlightsUploader.java
package com.aerospike.client.rest;
import org.junit.Before;
import org.junit.Test;
import org.springframework.core.io.FileSystemResource;
import org.springframework.util.LinkedMultiValueMap;
import org.springframework.util.MultiValueMap;
import org.springframework.web.client.RestTemplate;

public class FilghtsUploader {
      private static final String TEST_FILE = "flights_from.csv";
      @Before
      public void setUp() throws Exception {
      }

      @Test
      public void upload() {
        RestTemplate template = new RestTemplate();
        MultiValueMap<String, Object> parts = new LinkedMultiValueMap<String, Object>();
        parts.add("name", TEST_FILE);
        parts.add("file", new FileSystemResource(TEST_FILE));
        String response = template.postForObject(" http://localhost:8080/uploadFlights ",
                                                  parts, String.class);
        System.out.println(response);
      }
}
航班资料
这是2012年的真实数据。它包含大约100万条记录,因此请记住,上传它需要几分钟。
构建和运行服务
Maven pom.xml将服务打包到一个jar中。 使用命令:
mvn清洁包装
这将生成一个独立的Web服务应用程序,该应用程序打包到目标子目录中的可运行jar文件中。 该jar文件包含Tomcat的实例,因此您可以简单地运行jar,而无需将其安装在Application Server中。
java -jar aerospike-restful-example-1.0.0.jar
摘要
恭喜你! 您刚刚使用Spring开发了一个简单的RESTful服务并将其连接到Aerospike集群。
完整的示例代码
设计注意事项
访问控制当前由应用程序与数据库处理。 由于身份验证过程会降低数据库速度,因此实际上所有NoSQL数据库都不支持此功能。 与集成身份验证功能相比,我们的大多数客户都将提高速度作为优先事项。
另一个通常要求的功能是将两个不同的数据集结合在一起。 这是所有分布式数据库都面临的挑战,因为联接的数据是分布式的。 在这种情况下,开发人员必须在应用程序中实现联接。


 382
382

 被折叠的 条评论
为什么被折叠?
被折叠的 条评论
为什么被折叠?
 到【灌水乐园】发言


