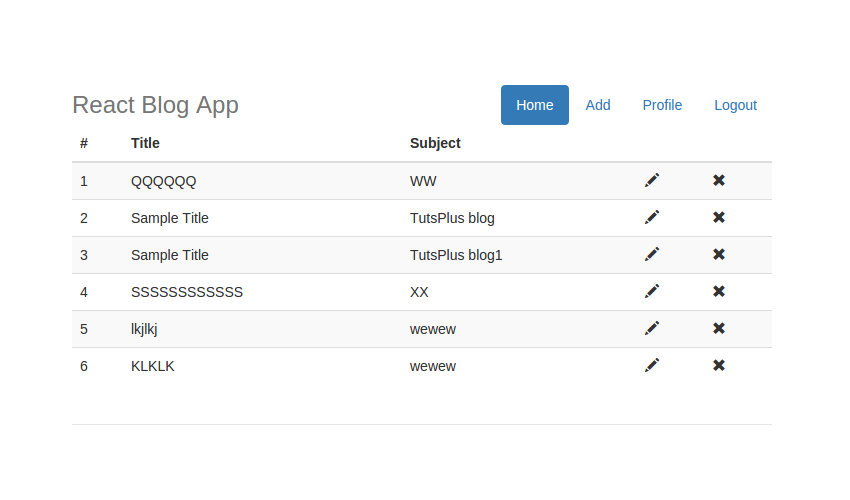
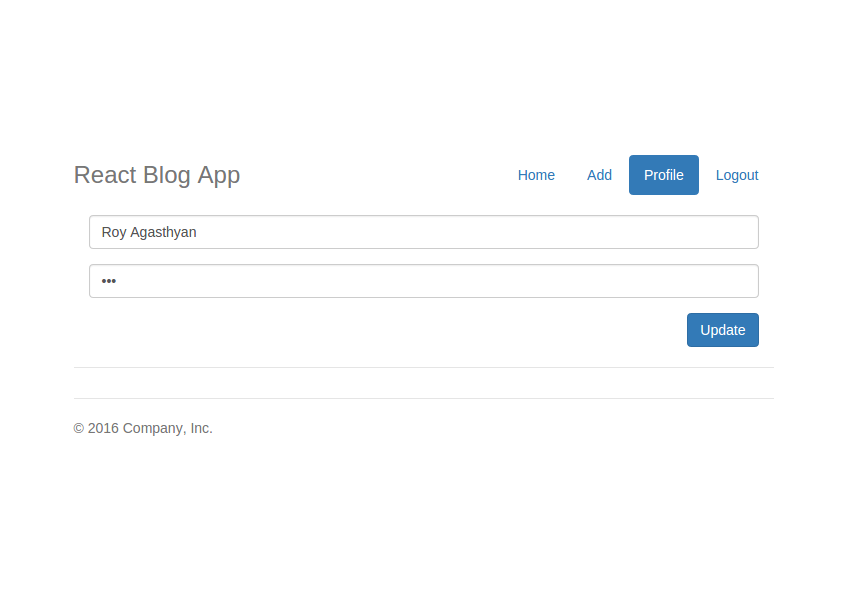
在本系列教程的前一部分中,您了解了如何为我们的React博客应用程序实现更新和删除帖子功能。 在本教程中,您将实现博客应用程序的配置文件页面。
入门
首先,从系列的最后一部分克隆源代码。
https://github.com/royagasthyan/ReactBlogApp-EditDelete克隆目录后,导航至项目目录并安装所需的依赖项。
cd ReactBlogApp-EditDelete
npm install启动Node.js服务器,您将在http:// localhost:7777 / index.html#/上运行该应用程序。
创建配置文件页面视图
首先,您需要在主页菜单中添加一个名为Profile的新菜单项。 在home.html页面上,为Profile页面添加一个新的ul元素,如下所示:
<ul class="nav nav-pills pull-right">
    <li role="presentation" id="homeHyperlink" class="active"><a href="#">Home</a></li>
    <li role="presentation" id="addHyperLink"><a href="/home#/addPost">Add</a></li>
    <li role="presentation" id="btnProfile"><a href="/home#/showProfile">Profile</a></li>
    <li role="presentation"><a href="#">Logout</a></li>
</ul>
保存以上更改,然后重新启动服务器。 将浏览器指向http:// localhost:7777 /并登录到该应用程序。 登录后,您将能够使用配置文件链接查看菜单列表。

为了使配置文件菜单链接起作用,您需要向home.jsx文件中的现有路由添加新路由。
ReactDOM.render(
    <Router history={hashHistory}>
        <Route component={ShowPost} path="/"></Route>
        <Route component={AddPost} path="/addPost(/:id)"></Route>
        <Route component={ShowProfile} path="/showProfile"></Route>
    </Router>,
document.getElementById('app')); 在home.jsx文件中,创建一个新组件ShowProfile 。 为name , password , email和Id添加一些状态变量。 在ShowProfile组件的render方法内,添加用于渲染配置文件详细信息HTML。 这是ShowProfile组件的外观:
class ShowProfile extends React.Component {
    constructor(props) {
      super(props);
      this.state = {
        name:'',
        email:'',
        password:'',
        id:''
      };

    }
    componentDidMount(){
      document.getElementById('addHyperLink').className = "";
      document.getElementById('homeHyperlink').className = "";
      document.getElementById('profileHyperlink').className = "active";
      this.getProfile();
    }
    updateProfile(){

    }

    getProfile(){

    }

    render() {
      return (
        <div className="col-md-5">
          <div className="form-area">
              <form role="form">
                <br styles="clear:both" />
                <div className="form-group">
                  <input value={this.state.name} type="text" onChange={this.handleNameChange} className="form-control" placeholder="Name" required />
                </div>
                <div className="form-group">
                  <input value={this.state.password} type="password" onChange={this.handlePasswordChange} className="form-control" placeholder="Password" required />
                </div>

                <button type="button" onClick={this.updateProfile} id="submit" name="submit" className="btn btn-primary pull-right">Update</button>
              </form>
          </div>
        </div>
      )
    }
}
加载配置文件页面时,您需要从数据库中获取详细信息,并将其填充在表单中。 在ShowProfile组件内部的getProfile方法中添加代码,以进行AJAX调用以获取有关用户的详细信息。
axios.post('/getProfile', {
})
.then(function (response) {

})
.catch(function (error) {
    console.log('error is ',error);
});
在响应中收到详细信息后,您需要为其更新状态变量。 这是ShowProfile组件的getProfile方法:
getProfile(){
  var self = this;
  axios.post('/getProfile', {
  })
  .then(function (response) {
    if(response){
      self.setState({name:response.data.name});
      self.setState({email:response.data.email});
      self.setState({password:response.data.password});
    }
  })
  .catch(function (error) {
    console.log('error is ',error);
  });
} 在app.js文件中,创建一个名为getProfile的方法,该方法将处理ShowProfile的getProfile方法中的POST方法调用。 app.js文件中的getProfile方法将改为调用user.js以从数据库中获取详细信息。 外观如下:
app.post('/getProfile', function(req,res){
  user.getUserInfo(sessions.username, function(result){
    res.send(result)
  })
}) 在user.js文件中,创建一个名为getUserInfo的方法,该方法将使用用户名查询MongoDB数据库以获取所需的详细信息。 这是getUserInfo方法的外观:
getUserInfo: function(username, callback){
	MongoClient.connect(url, function(err, db){

		db.collection('user').findOne( { email : username
		},function(err, result){
			if(result==null){
				callback(false)
			}
			else{
				callback(result);
			}
		});

	});
} 如上面的代码所示,您使用MongoClient调用MongoDB,以根据电子邮件地址查询用户集合。 收到结果后,它会返回到回调函数。
保存以上更改,然后重新启动Node.js服务器。 将浏览器指向http:// localhost:7777 /#/并登录到该应用程序。 单击菜单中的配置文件链接,您将能够查看页面上填充的配置文件详细信息。

更新用户资料
要处理名称和密码更改,您需要在ShowProfile组件中定义两个名为handleNameChange和handlePasswordChange方法。 这些方法将在文本更改时设置状态变量。 外观如下:
handleNameChange(e){
  this.setState({name:e.target.value})
}
handlePasswordChange(e){
  this.setState({password:e.target.value})
} 将方法绑定到ShowProfile构造函数中。
constructor(props) {
  super(props);
  this.handleNameChange = this.handleNameChange.bind(this);
  this.handlePasswordChange = this.handlePasswordChange.bind(this);
  this.updateProfile = this.updateProfile.bind(this);
  this.getProfile = this.getProfile.bind(this);
  this.state = {
    name:'',
    email:'',
    password:'',
    id:''
  };

} 定义一个名为updateProfile的方法,当用户单击“ Update按钮以更新用户详细信息时将调用该方法。 在updateProfile方法内部,对app.js文件中的updateProfile方法以及更改后的name和password进行POST调用。 这是ShowProfile组件中的updateProfile方法的外观:
updateProfile(){
  var self = this;
  axios.post('/updateProfile', {
    name: this.state.name,
    password: this.state.password
  })
  .then(function (response) {
    if(response){
      hashHistory.push('/')
    }
  })
  .catch(function (error) {
    console.log('error is ',error);
  });
}
从POST呼叫收到响应后,屏幕将导航到博客文章列表。
在app.js文件中,创建一个名为updateProfile的方法,该方法将解析传入的参数并调用MongoDB数据库。
app.post('/updateProfile', function(req, res){
  var name = req.body.name;
  var password = req.body.password;

  user.updateProfile(name, password, sessions.username, function(result){
      res.send(result);
  })
}) 如上面的代码所示,一旦在app.js文件的updateProfile方法中解析了参数, user.updateProfile使用更改后的name , password和username调用user.updateProfile方法。
让我们在user.js文件中定义user.updateProfile方法,该方法将调用MongoDB数据库并根据username更新name和password 。 这是user.js文件中的updateProfile方法的外观:
updateProfile: function(name, password, username, callback){
	MongoClient.connect(url, function(err, db) {
	  	db.collection('user').updateOne(
	  		{ "email": username },
	  		{ $set:
	  			{ "name" : name,
	  			  "password" : password
	  			}
	  		},function(err, result){

	    	if(err == null){
	    		callback(true)
	    	}
	    	else{
	    		callback(false)
	    	}
		});
	});
} 在上面的代码中,您使用updateOne方法基于电子邮件地址更新了用户详细信息。
保存以上更改,然后重新启动服务器。 登录到该应用程序,然后单击“ 配置文件”链接。 更改名称和密码,然后单击更新按钮。 尝试登录,您将可以使用新密码登录。
包起来
在本教程中,您实现了博客应用程序的配置文件页面。 您学习了如何从数据库中获取详细信息并使用React在页面上填充它。 您还实现了更新配置文件详细信息的功能。
该教程的源代码可在GitHub上获得 。 请在下面的评论中让我知道您的想法或任何建议。


 1188
1188

 被折叠的 条评论
为什么被折叠?


