


介绍
UIAlertController用于在应用程序中显示警报消息。 例如,如果发生错误,则警报可以显示说明和按钮以采取进一步的措施。 您可以使用警报来使用户登录或注册,显示他们执行的操作的结果或提供更多设置选项(例如,当您没有足够的空间容纳屏幕上的其他按钮但需要用户能够对应用程序中的特定对象执行更多操作。
从iOS 9开始,Apple用UIAlertController替换了UIAlertView 。 您不再需要将UIAlertViewDelegate添加到您的类中,现在可以根据需要设置警报的样式。 您可以自定义标题和消息字体,更改背景颜色以及添加文本字段。 在本教程中,我们创建了一个带有三个按钮的演示应用程序,每个按钮都会触发一个不同的自定义警报。 您可以从GitHub上的教程源库中下载它。 现在,让我们看看构建这些自定义警报有多么容易!
带有文本字段的警报
我们将要构建的第一个警报具有附加的TextField ,您可以在其中从iOS键盘输入任何所需内容。 为了初始化UIAlertController ,您必须从以下三行开始:
let alert = UIAlertController(title: "AlertController Tutorial",
        message: "Submit something",
        preferredStyle: .alert)
在第一行中,我们设置一个简单的字符串作为警报的标题。 第二行是将显示在标题正下方的消息字符串。 在第三行中,警报的类型设置为.alert 。 (另一个选项是.actionSheet ,但是您不能像警报一样自定义操作表。)
在警报控制器中,按钮定义为UIAlertAction元素。 因此,我们将创建一个UIAlertAction ,它将是警报左下角的第一个按钮。
// Submit button
    let submitAction = UIAlertAction(title: "Submit", style: .default, handler: { (action) -> Void in
        // Get 1st TextField's text
        let textField = alert.textFields![0]
        print(textField.text!)
}) 我们将此动作称为submitAction ,将其标题设置为"Submit" ,为其指定默认样式,并为其处理程序打印文本字段的内容。 由于警报中的文本字段具有索引,因此我们选择了位置0处的第一个文本索引。稍后,我们将看到如何向警报中添加多个文本字段。
在警报中点击“ 提交”按钮后,Xcode控制台将打印您输入的文本并关闭警报。
让我们创建一个按钮以仅隐藏我们的警报:
// Cancel button
    let cancel = UIAlertAction(title: "Cancel", style: .destructive, handler: { (action) -> Void in })
如您所见,此操作没有处理程序。 这是因为我们要关闭警报,并且不执行其他任何操作。 该按钮将显示一个红色的“ 取消”标题,因为我们将其样式设置为.destructive ,Apple API可以理解。
在将这两个动作添加到Alert之前,我们必须初始化我们的文本字段:
// Add 1 textField and customize it
    alert.addTextField { (textField: UITextField) in
        textField.keyboardAppearance = .dark
        textField.keyboardType = .default
        textField.autocorrectionType = .default
        textField.placeholder = "Type something here"
        textField.clearButtonMode = .whileEditing
} 如果您熟悉UITextField ,则会将它们识别为标准属性,这些属性设置诸如键盘外观和类型,自动更正类型,占位符消息和清除按钮之类的属性。 (我们将清除按钮设置为在您开始输入内容时显示。)
现在,让我们结束警报。
// Add action buttons and present the Alert
    alert.addAction(submitAction)
    alert.addAction(cancel)
present(alert, animated: true, completion: nil) UIAlertController不处理动作数组,因此我们必须一个接一个地添加它们。 最后,我们使用present()函数来像其他控制器一样显示警报。
在演示应用程序中,我们将上面的所有代码嵌入到Button中 ,因此,如果您运行该应用程序并点击它,您应该会看到类似以下内容:

如果您在空白文本字段中输入内容,然后点击Submit ,您的Xcode控制台将把它打印出来。
具有三个文本字段的警报
现在,让我们创建一个具有多个文本字段的新警报,以创建一个登录提示。 我们将从初始化警报的三行内容再次开始:
let alert = UIAlertController(title: "Login example",
        message: "Insert username, password & phone No.",
preferredStyle: .alert) 我们还有两个Buttons ,一个用于执行登录操作,另一个是cancel按钮:
// Login button
    let loginAction = UIAlertAction(title: "Login", style: .default, handler: { (action) -> Void in
        // Get TextFields text
        let usernameTxt = alert.textFields![0]
        let passwordTxt = alert.textFields![1]
        let phoneTxt = alert.textFields![2]

        print("USERNAME: \(usernameTxt.text!)\nPASSWORD: \(passwordTxt.text!)\nPHONE NO.: \(phoneTxt.text!)")
    })
如您所见,我们的警报具有三个文本字段。 这些按其位置索引。 我们将前一个作为用户名,中间一个作为密码,最后一个作为电话号码。
现在添加一个“ 取消”按钮:
// Cancel button
let cancel = UIAlertAction(title: "Cancel", style: .destructive, handler: { (action) -> Void in }) 接下来,我们将创建和自定义用户名Text Field :
// Add 1 textField (for username)
    alert.addTextField { (textField: UITextField) in
        textField.keyboardAppearance = .dark
        textField.keyboardType = .default
        textField.autocorrectionType = .default
        textField.placeholder = "Type your username"
        textField.textColor = UIColor.green
    }
上面的代码看起来与我们的第一个示例非常相似, textColor增加了textColor实例。
同样对于第二个文本字段:
// Add 2nd textField (for password)
    alert.addTextField { (textField: UITextField) in
        textField.keyboardAppearance = .dark
        textField.keyboardType = .default
        textField.placeholder = "Type your password"
        textField.isSecureTextEntry = true
        textField.textColor = UIColor.red
} 由于通常必须隐藏密码,因此我们在Text Field上设置了isSecureTextEntry属性。 该命令将用点替换您键入的字符,就像网站上的密码字段一样。 我们还将文本颜色设置为红色。
还有第三个文本元素,用于电话号码字段:
// Add 3rd textField (for phone no.)
    alert.addTextField { (textField: UITextField) in
        textField.keyboardAppearance = .dark
        textField.keyboardType = .numberPad
        textField.placeholder = "Type your phone no."
        textField.textColor = UIColor.blue
        textField.font = UIFont(name: "AmericanTypewriter", size: 14)
} 这里的keyboardType属性设置为.numberPad ,因此应用程序将仅显示数字键盘。 您可能还会注意到,我们在代码的最后一行中将此文本字段的字体更改为American Typewriter 。
我们差不多完成了,我们只需要添加操作并再次显示AlertController :
// Add action buttons and present the Alert
alert.addAction(loginAction)
alert.addAction(cancel)
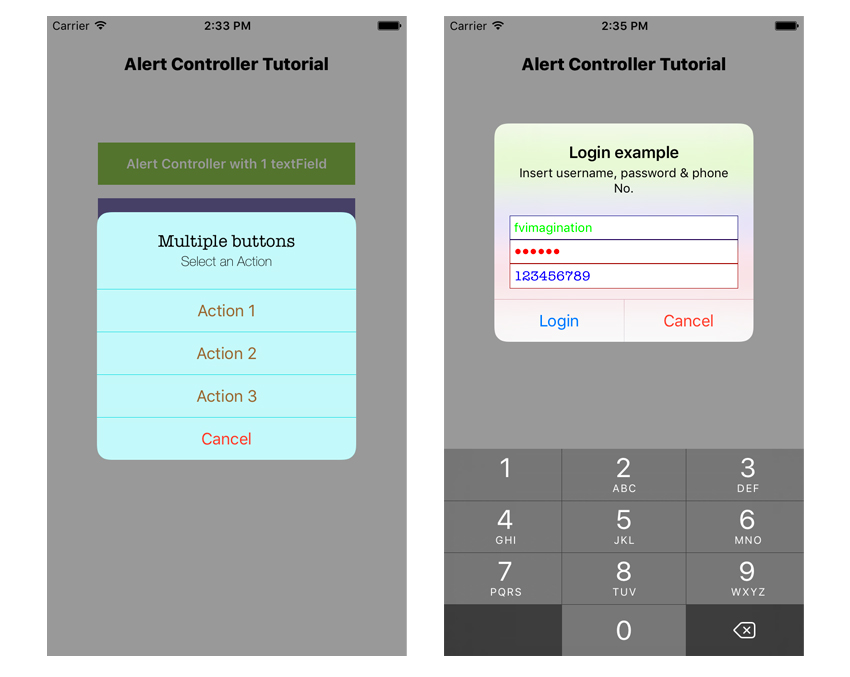
present(alert, animated: true, completion: nil) 现在,如果您运行该应用并触发此警报,您将看到以下内容:
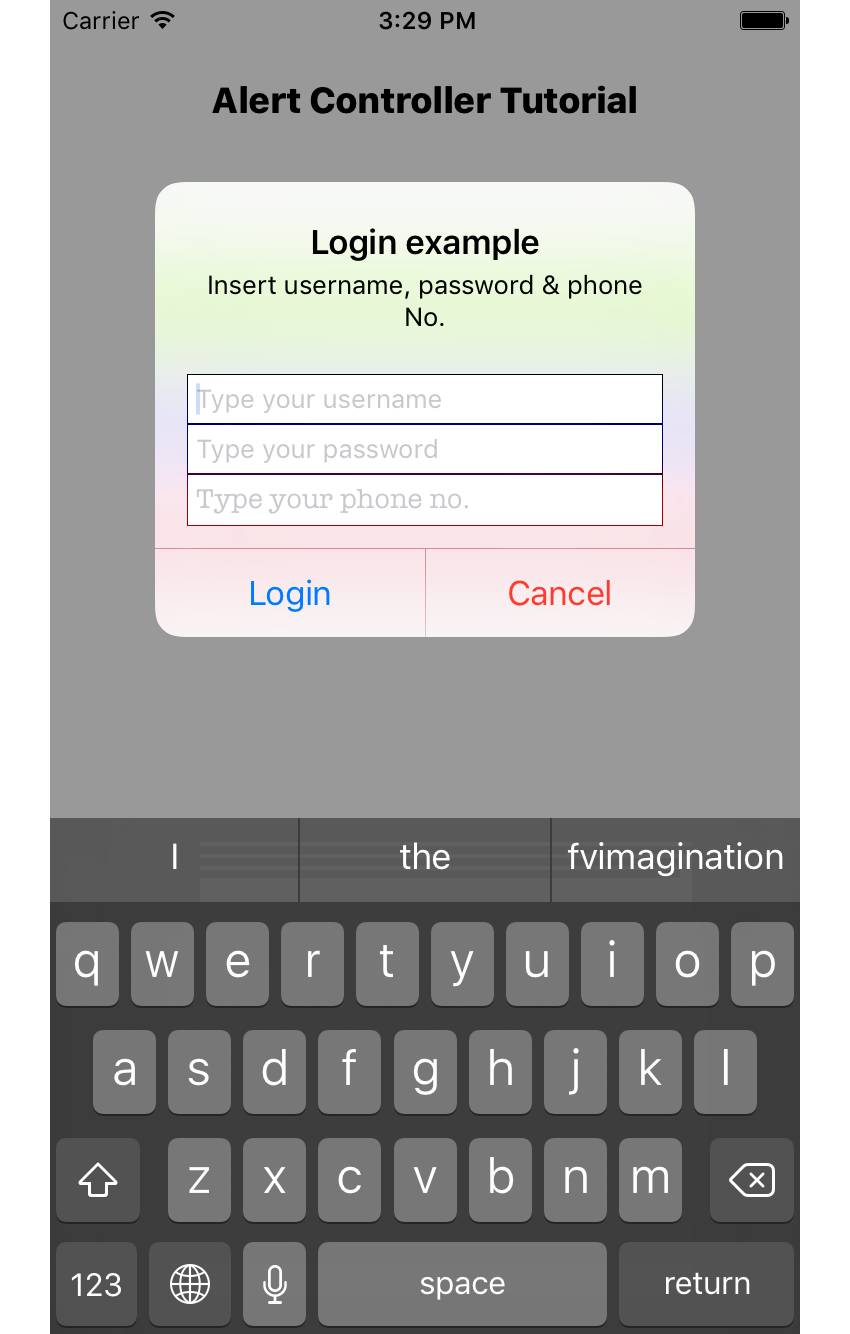
如果您尝试在文本字段中输入内容,则会看到我们应用的自定义样式。

带四个按钮的警报
作为最后一个示例,我将向您展示一个警报,其中包含四个操作和一些不同的样式。
由于稍后我们将自定义此警报的标题和消息属性,因此我们的初始化代码现在将具有空字符串:
let alert = UIAlertController(title: "",
        message: "",
        preferredStyle: .alert)
这是我们设置标题和消息字段的字体和大小的方法:
// Change font of the title and message
    let titleFont:[String : AnyObject] = [ NSFontAttributeName : UIFont(name: "AmericanTypewriter", size: 18)! ]
    let messageFont:[String : AnyObject] = [ NSFontAttributeName : UIFont(name: "HelveticaNeue-Thin", size: 14)! ]
    let attributedTitle = NSMutableAttributedString(string: "Multiple buttons", attributes: titleFont)
    let attributedMessage = NSMutableAttributedString(string: "Select an Action", attributes: messageFont)
    alert.setValue(attributedTitle, forKey: "attributedTitle")
alert.setValue(attributedMessage, forKey: "attributedMessage") 在前两行中,我们将字体名称和大小设置为NSFontAttributeName的Dictionary 。 请注意,您将必须输入要使用的字体的正确的PostScript名称,否则Xcode将无法识别它并将显示默认字体。 iOS字体站点是对正确字体名称的引用 。
在这里,我们还将使用NSMutableAttributedString实例设置标题和消息字符串。
让我们创建四个动作,包括默认的“ 取消”动作:
let action1 = UIAlertAction(title: "Action 1", style: .default, handler: { (action) -> Void in
        print("ACTION 1 selected!")
    })

    let action2 = UIAlertAction(title: "Action 2", style: .default, handler: { (action) -> Void in
        print("ACTION 2 selected!")
    })

    let action3 = UIAlertAction(title: "Action 3", style: .default, handler: { (action) -> Void in
        print("ACTION 3 selected!")
    })

    // Cancel button
    let cancel = UIAlertAction(title: "Cancel", style: .destructive, handler: { (action) -> Void in })
在将这些操作附加到我们的警报之前,让我们对其进行一些样式设置。
// Restyle the view of the Alert
    alert.view.tintColor = UIColor.brown  // change text color of the buttons
    alert.view.backgroundColor = UIColor.cyan  // change background color
alert.view.layer.cornerRadius = 25 // change corner radius 尽管UIAlertController API受到限制,但开发人员无法完全更改其默认结构,但可以像上面的代码一样编辑其样式。
最后,我们可以添加所有操作并显示警报:
// Add action buttons and present the Alert
alert.addAction(action1)
alert.addAction(action2)
alert.addAction(action3)
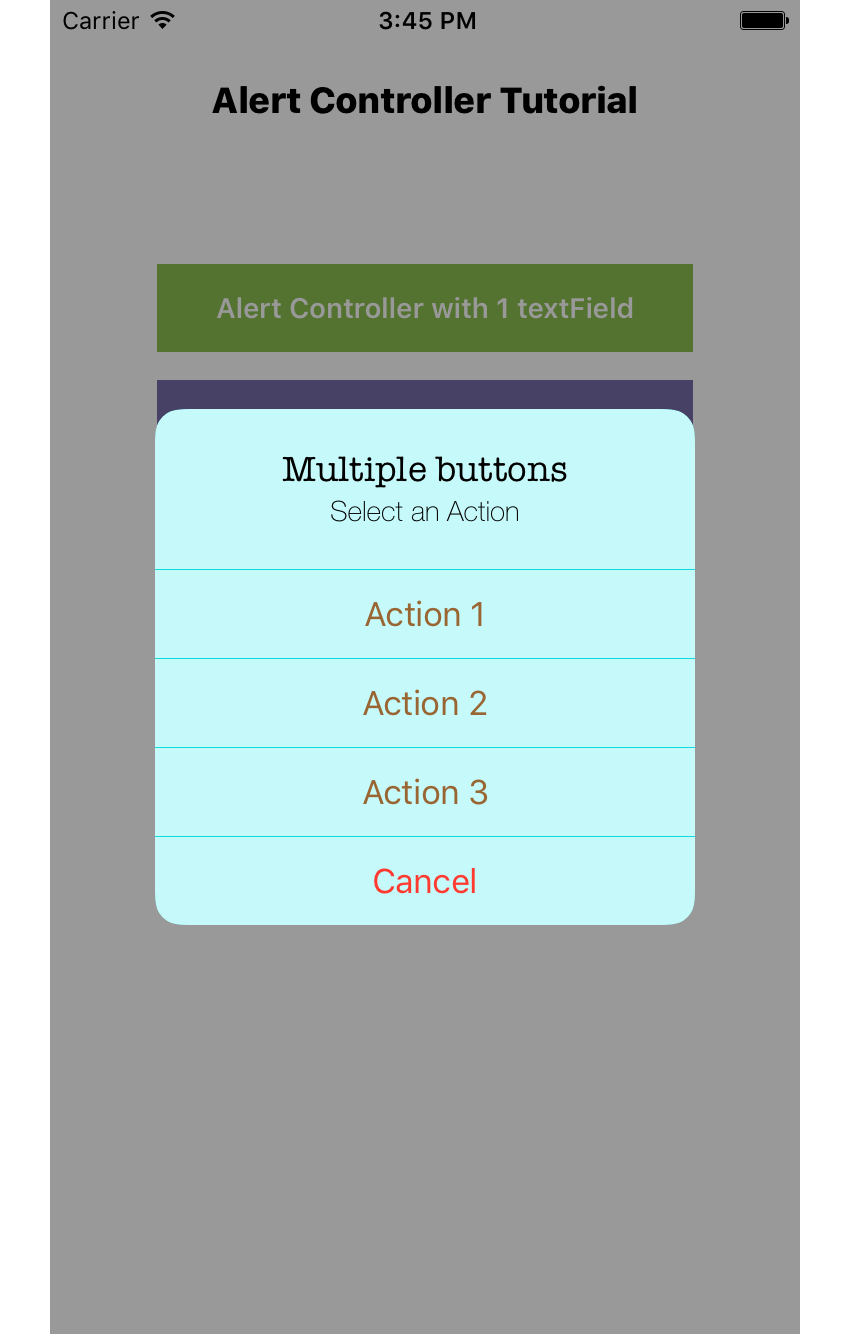
alert.addAction(cancel)
present(alert, animated: true, completion: nil)现在,如果您运行代码,您将获得以下内容:
结论
在本教程中,我们使用文本字段和自定义样式创建了一系列自定义UIAlertView 。 我希望您能够在下一个iOS应用中使用这些知识。
无论您是刚刚开始使用基础知识还是想探索更高级的主题,我们都构建了完整的指南来帮助您学习Swift 。
翻译自: https://code.tutsplus.com/tutorials/create-a-custom-alert-controller-in-ios-10-swift-3--cms-27589


 1875
1875

 被折叠的 条评论
为什么被折叠?
被折叠的 条评论
为什么被折叠?
 到【灌水乐园】发言


