


在过去的教程中,我向您展示了如何使用Go , Node.js和Ruby创建平面文件系统内容管理系统(CMS)。
在本教程中,我将采用相同的设计模型,并使用PHP构建服务器。 由于PHP本身并不是服务器,而是通常与Apache Web服务器配对,因此我将向您展示如何在Vagrant虚拟系统中设置Apache Web服务器。
设置和加载库
首先,您需要在系统上安装PHP。 转到PHP网站并下载适用于您系统的版本。 大多数Linux发行版和所有Mac OS X系统均已安装PHP。
接下来,安装Composer ,它是PHP的软件包管理器,类似于Node.js的npm。 要安装Composer,请在终端中键入以下内容:
php -r “readfile(‘https://getcomposer.org/installer’);” | php安装Composer后,接下来将为服务器安装库。 首先,使用“ 构建CMS:结构和样式”中的文件为项目创建目录,或提取本教程的下载内容。 设置完成后,转到该目录并键入:
composer require slim/slim “^3.0”
composer require erusev/parsedown
composer require zordius/lightncandy:dev-master
composer require “talesoft/tale-jade:*”
composer install
这些行安装了组成服务器的四个库: Slim Router是用于处理传入服务器请求的路由库, Parsedown将Markdown转换为HTML, Handlebars是模板库,而Jade Library是HTML的简写形式,我用来制作文章的索引页面。
创建index.php
在项目目录的顶部,创建文件index.php。 Apache服务器希望站点的主页具有该名称。 在此文件中,放置以下代码:
<?php
//
// Program:    phpPress
//
// Description:  This is a full flat file
//         system CMS that mimics the
//        organization of goPress.
//        Since goPress server can not
//        be run on a shared server,
//        phpPress will work there and
//        offer easy migration to
//        goPress if the site is moved
//        to a VPS.
//
require ‘vendor/autoload.php’;

//
// Load libraries used.
//

//
// HandleBars:   https://github.com/zordius/lightncandy
//
use LightnCandy\LightnCandy;

//
// Jade Library: https://github.com/Talesoft/tale-jade
//
use Tale\Jade;
require语句使PHP知道如何加载随Composer安装的不同库。 然后,您告诉PHP使用LightnCandy和Jade库。
//
// Slim Router:  http://www.slimframework.com/
//
use \Psr\Http\Message\ServerRequestInterface as Request;
use \Psr\Http\Message\ResponseInterface as Response;

$app = new \Slim\App;

//
// Set an Error Handler.
//
$c = $app->getContainer();
$c[‘errorHandler’] = function ($c) {
    return function ($request, $response, $exception) use ($c) {
        return $c[‘response’]->withStatus(400)
                             ->withHeader(‘Content-Type’, ‘text/html’)
                             ->write(ProcessPage($parts[‘layout’],“ErrorPage”));
    };
};

//
// This line will cause Slim not to catch errors. Please commit out for
// production server.
//
unset($app->getContainer()[‘errorHandler’]);
接下来,通过创建Slim应用程序对象的实例并设置错误处理程序来设置Slim路由器。 设置了错误处理程序后,当错误发生时,您将永远不会获得调试信息。 因此,在开发过程中,您需要取消设置错误处理程序。 但是对于生产,请注释掉未设置的最后一行。
//
// Get the server.json information in to global site variables.
//

$site = __DIR__ . ‘/site’;
$style = “Basic”;
$layout = “SingleCol”;
$styleDir = ‘./themes/styling/’ . $style;
$layoutDir = ‘./themes/layouts/’ . $layout;
$parts = Array();
$parts[“CurrentLayout”] = “SingleCol”;
$parts[“CurrentStyling”] = “Basic”;
$parts[“ServerAddress”] = “http://localhost:8080”;
$parts[“SiteTitle”] = “Test Site”;
$parts[“Sitebase”] = “./site/“;
$parts[“TemplatBase”] = “./themes/“;
$parts[“Cache”] = false;
$parts[“MainBase”] = ““;

//
// Load relevant items in the layouts directory.
//
$parts[“layout”] = file_get_contents($layoutDir . ‘/template.html’);

//
// Load relevant items in the styles directory.
//
$parts[“404”] = file_get_contents($styleDir . ‘/404.html’);
$parts[“footer”] = file_get_contents($styleDir . ‘/footer.html’);
$parts[“header”] = file_get_contents($styleDir . ‘/header.html’);
$parts[“sidebar”] = file_get_contents($styleDir . ‘/sidebar.html’);
$parts[“ErrorPage”] = “<h1 class=‘Error’>There was a server error!</h1>“;

//
// Load everything in the parts directory.
//
$d = dir($site . ‘/parts/‘);
while (false !== ($entry = $d->read())) {
    if((strcmp($entry,“..“)!=0)&&(strcmp($entry,“.“)!=0)) {
        $pathparts = pathinfo($entry);
        $parts[basename($pathparts[‘filename’])] = figurePage($site . ‘/parts/’ . $pathparts[‘filename’]);
    }
 }
$d->close(); 下一部分代码是创建$parts哈希表,用于存储模板中使用的信息。 然后,程序将站点的parts目录中的所有内容添加到哈希表中。 这样,您可以创建可重复使用的作品以添加到任何页面。
//
// Function:         SetBasicHeader
//
// Description:    This function will set the basic header
//                 information needed.
//
// Inputs:
//                 $response    The response object to be
//                              sent to the browser.
//
function SetBasicHeader($response) {
   $newResponse = $response->withAddedHeader(“Cache-Control”, “max-age=2592000, cache”);
   $newResponse = $newResponse->withAddedHeader(“Server”, “phpPress - a CMS written in PHP from Custom Computer Tools: http://customct.com.“);
   return($newResponse);
} SetBasicHeader()函数设置所有页面的返回标头。 这将设置缓存控制功能和服务器名称。 如果您需要更多标题信息,请在此处进行设置。
//
// Array of shortcodes and their functions.
//
$shcodes = Array(
   ‘box’ => function($args, $inside) {
      return(“<div class=‘box’>” . $inside . “</div>“);
   },
   ‘Column1’ => function($args, $inside) {
      return(“<div class=‘col1’>” . $inside . “</div>“);
   },
   ‘Column2’ => function($args, $inside) {
      return(“<div class=‘col2’>” . $inside . “</div>“);
   },
   ‘Column1of3’ => function($args, $inside) {
      return(“<div class=‘col1of3’>” . $inside . “</div>“);
   },
   ‘Column2of3’ => function($args, $inside) {
      return(“<div class=‘col2of3’>” . $inside . “</div>“);
   },
   ‘Column3of3’ => function($args, $inside) {
      return(“<div class=‘col3of3’>” . $inside . “</div>“);
   },
   ‘php’ => function($args, $inside) {
      return(“<div class=‘showcode’><pre type=‘syntaxhighlighter’ class=‘brush: php’>” . $inside . “</pre></div>“);
   },
   ‘js’ => function($args, $inside) {
      return(“<div class=‘showcode’><pre type=‘syntaxhighlighter’ class=‘brush: javascript’>” . $inside . “</pre></div>“);
   },
   ‘html’ => function($args, $inside) {
      return(“<div class=‘showcode’><pre type=‘syntaxhighlighter’ class=‘brush: html’>” . $inside . “</pre></div>“);
   },
   ‘css’ => function($args, $inside) {
      return(“<div class=‘showcode’><pre type=‘syntaxhighlighter’ class=‘brush: css’>” . $inside . “</pre></div>“);
   }
); $shcodes哈希表包含用于处理网页中项目的所有简码功能。 我在这里编写的函数很简单,但是如果需要,它们可以更复杂。 这提供了一种将更多动态代码嵌入到您的网页中的方法。
//
// Function:      processShortcodes
//
// Description:   This function will expand all
//          shortcodes in the page given to
//          it.
//
function processShortcodes($page) {
        global $shcodes;

        $result = ““;
        while(preg_match(“/\-\[(\w+)(.*)\]\-/i”, $page, $match) == 1) {
                $num = count($match);
                $command = $match[1];
                $cmdarg = ““;
                if($num > 2) {
                        $cmdarg = $match[2];
                }
                $spos = strpos($page,“-[{$command}“);
                $result .= substr($page, 0, $spos);
                $page = substr($page,$spos + 4 + strlen($command) + strlen( $cmdarg));
                $sepos = strpos($page,“-[/{$command}]-“);
                $inside = trim(substr($page, 0, $sepos));
                if(strcmp($inside,““) != 0) {
                        $inside = processShortcodes($inside);
                }
                $page = substr($page, $sepos + 5 + strlen($command));

                //
                // If the command name exists in the
                // shortcodes hash table, then run the
                // function.
                //
                if( array_key_exists($command, $shcodes) ) {
                        $result .= call_user_func($shcodes[$command], $cmdarg, $inside);
                }
        }
        $result .= $page;
        return($result);
} processShortCodes()函数将查找,执行并插入简码的结果。 此函数通过在封闭的内容和页面的其余部分上递归调用自身,从而找到页面中的所有短代码。
简码具有以下语法:
-[name arg]-
contents
-[/name]-
名称是简码的名称, arg是传递给简码的参数, contents是简码所包围的页面的一部分。 -[和]-行为类似于HTML中的<和> 。
//
// Create the HandleBar helpers array.
//
$helpers = Array(
      ‘flags’ => LightnCandy::FLAG_HANDLEBARS | LightnCandy::FLAG_ADVARNAME | LightnCandy::FLAG_EXTHELPER,
      ‘helpers’ => Array(
            ‘save’ => ‘save_helper’,
            ‘date’ => ‘date_helper’,
            ‘cdate’ => ‘cdate_helper’
         )
   );

//
// Function:         save_helper
//
// Description:      This helper will save the given text to
//                   the given name. That name can be use
//                   latter in the document.
//
// Inputs:
//                   $args    The arguments sent to the
//                            helper function.
//
function save_helper($args) {
   global $parts;

   $arg = implode(” “, $args);
   $hparts = explode(“|“, $arg);
   if(count($hparts) == 2) {
      $parts[$hparts[0]] = $hparts[1];

      return $hparts[1];
   } else {
      return $parts[$hparts[0]];
   }
}

//
// Function:     date_helper
//
// Description:  This function formats the current date
//               according to the formatting string given.
//
// Inputs:
//               $args      The arguments sent to the helper
//
function date_helper($args) {
   $dateFormat = implode(” “, $args);
   return date($dateFormat);
}

//
// Function:     cdate_helper
//
// Description:  This function formats the date given
//               according to the formatting string given.
//
// Inputs:
//               $args      The arguments sent to the helper
//
function cdate_helper($args) {
        return date($args[0], $args[1]);
}
下一部分包含将助手添加到Handlebars模板引擎的助手功能。 辅助函数为save , date和cdate 。 save功能需要一个名称和一些文本。 给定名称在宏中的任何位置,给定文本将替换它。 date函数采用当前日期,并根据给定的格式化字符串对其进行格式化。 cdate函数需要一个日期和一个格式字符串。 它将给定的日期设置为给定的格式。
//
// Function:        ProcessPage
//
// Description:     This function will process a page into
//                  the template, process all Mustache
//                  macros, and process all shortcodes.
//
// Inputs:
//                  $layout     The layout for the page
//                  $page       The pages main contents
//
function ProcessPage( $layout, $page ) {
   global $site, $parts, $helpers;

   //
   // We need a temporary file for creating the
   // Handlebars rendering function. You might
   // need to change this depending on your system.
   //
   $php_inc = “/var/tmp/handlebarsTemp.php”;

   //
   // Get the page contents.
   //
   $parts[‘content’] = figurePage($page);

   //
   // First pass on Handlebars.
   //
   $phpStr = LightnCandy::compile($layout, $helpers);
   file_put_contents($php_inc, $phpStr);
   $renderer = include($php_inc);
   $page = $renderer($parts);

   //
   // Process the shortcodes.
   //
   $pageShort = processShortcodes($page);

   //
   // Second pass Handlebars.
   //
   $phpStr = LightnCandy::compile($pageShort, $helpers);
   file_put_contents($php_inc, $phpStr);
   if($phpStr != ““) {
      $renderer = include($php_inc);
      $page = $renderer($parts);
   }

   //
   // Return the results.
   //
   return($page);
} 下一个函数是ProcessPage() 。 此功能获取页面的布局和页面的内容。 它将使用LightnCandy把手模板引擎将它们组合在一起。 然后在结果页面上搜索短代码。 之后生成的页面再次通过LightnCandy运行。 浏览器从LightnCandy接收输出。
//
// Setup the routes routines.
//

function page( $pageAddress ) {
   global $site,  $parts;

   $page = ProcessPage( $parts[‘layout’], “{$site}/pages/{$pageAddress}“);
   return($page);
} page()函数确定要发送给用户的页面。 该函数从路由器接收页面地址,并调用ProcessPage()创建页面。
function posts($postType, $blog, $pageAddress ) {
   global $site,  $parts;

   $page = ProcessPage( $parts[‘layout’],“{$site}/posts/{$postType}/{$blog}/{$pageAddress}“);
   return($page);
} posts()函数的工作原理与发布内容的page()函数类似。 路由器从路由中传递帖子类型,博客和页面地址值。 然后,此函数使用ProcessPage()创建要返回的页面。
function figurePage( $page ) {
   global $site, $parts;

   $result = ““;
   if(isset($parts[$page])) {
      //
      // A site partial was specified. Use it.
      //
      $result = $parts[$page];
   }else if(file_exists(“{$page}.html”)) {
      //
      // It is a html piece. Just get it and pass it on.
      //
      $result = file_get_contents(“{$page}.html”);
   } else if(file_exists(“{$page}.md”)) {
      //
      // It is a markdown piece. Process into HTML and pass
      // it on.
      //
      $Parsedown = new Parsedown();
      $result = file_get_contents(“{$page}.md”);
      $result = $Parsedown->text($result);
      $result = str_replace(“"“,“\““,$result);
   } else if(file_exists(“{$page}.amber”)) {
      //
      // It is a Jade (using the golang name for the
      // extension) page.
      //
      $jade = new Jade\Renderer();
      $jade->addPath(dirname($page));
      $result = $jade->render(basename($page));
   } else {

      $result = $parts[“404”] ;
   }
   //
   // give the resulting page content.
   //
   return($result);
} figurePage()函数根据给定的名称获取正确的页面内容。 该函数将查找扩展名为.html的文件。 如果存在,它将读入并将其发送到调用例程。
接下来,该函数查找.md扩展名。 如果存在,它将读取它,将Markdown转换为HTML,然后将其返回给调用例程。 接下来,该函数查看是否存在带有.amber扩展名的扩展名。 如果存在,它将读取它,将Jade语法转换为HTML,然后将其返回给调用函数。
//
// This route handles the main or home page.
//
$app->get(‘/‘, function(Request $request, Response $response) {
   $newResponse = SetBasicHeader($response);
   $newResponse = $newResponse->getBody()->write(page(‘main’));
   return($newResponse);
});
此路由功能映射网站的主页或主页。 这将触发所有带或不带“ /”的域名请求。
//
// This route handles the favicon loading.
//
$app->get(‘/favicon.ico’, function(Request $request, Response $response){
   global $site;

   $newResponse = SetBasicHeader($response);
   $newResponse = $newResponse->withAddedHeader(“Content-type”, “image/ico”);
   $newResponse->getBody()->write(file_get_contents(“{$site}/images/favicon.ico”));
   return($newResponse);
});
此路由定义映射到特定请求:/favicon.ico。 这提供了该网站的图标。 它在站点目录中返回图像“ /images/favicon.ico”。
//
// This route handles all the stylesheets loading as one
// sheet.
//
$app->get(‘/stylesheets’, function(Request $request, Response $response) {
   global $site;

   $newResponse = $response->withHeader(“Content-type”, “text/css”);
   $newResponse = SetBasicHeader($newResponse);
   $newResponse->getBody()->write(file_get_contents(“{$site}/css/final/final.css”));
   return($newResponse);
});
此路由获取已编译的样式表,并将其返回给请求者。 编译后的样式表始终为“ /css/final/final.css”。
//
// This route handles the loading of the scripts.
//
$app->get(‘/scripts’, function(Request $request, Response $response) {
   global $site;

   $newResponse = $response->withAddedHeader(“Content-type”, “text/javascript”);
   $newResponse = SetBasicHeader($newResponse);
   $newResponse->getBody()->write(file_get_contents(“{$site}/js/final/final.js”));
   return($newResponse);
});
此路由始终返回在“ /js/final/final.js”中找到的已编译JavaScript文件。
//
// This route handles all the image routes.
//
$app->get(‘/images/{image}‘, function(Request $request, Response $response) {
   global $site;

   $ext = pathinfo($request->getAttribute(‘image’), PATHINFO_EXTENSION);
   $newResponse = SetBasicHeader($response);
   $newResponse = $newResponse->withAddedHeader(“Content-type”, “image/$ext”);
   $newResponse->getBody()->write(file_get_contents(“{$site}/images/” . $request->getAttribute(‘image’)));
   return($newResponse);
});
此路由处理所有图像请求。 {image}告诉路由器代码将图像名称赋予功能。 $request->getAttribute()函数的调用检索该值。
//
// This route handles all the video items.
//
$app->get(‘/videos/{video}‘, function(Request $request, Response $response) {
   global $site;

   $newResponse = SetBasicHeader($response);
   $newResponse = $response->withAddedHeader(“Content-type”, “video/mp4”);
   $newResponse->getBody()->write(file_get_contents(“{$site}/video/” . $request->getAttribute(‘video’)));
   return($newResponse);
});
此路由获取所有视频请求,并将它们发送到浏览器。
//
// This route handles all the blog posts pages.
//
$app->get(‘/posts/blogs/{blog}‘, function( Request $request, Response $response) {
   $newResponse = SetBasicHeader($response);
   $newResponse->getBody()->write(posts(“blogs”,$request->getAttribute(‘blog’), “index”));
   return($newResponse);
});
此路由返回博客条目及其摘要的列表。 {blog}变量将是要列出其条目的博客名称。
$app->get(‘/posts/blogs/{blog}/{post}‘, function( Request $request, Response $response) {
   $newResponse = SetBasicHeader($response);
   $newResponse->getBody()->write(posts(“blogs”,$request->getAttribute(‘blog’), $request->getAttribute(‘post’)));
   return($newResponse);
});
这条路线将获得一个单独的博客条目。 {blog}是{blog}的名称, {post}是要获取的博客条目。
//
// This route handles all the news posts pages.
//
$app->get(‘/posts/news/{news}‘, function( Request $request, Response $response) {
   $newResponse = SetBasicHeader($response);
   $newResponse->getBody()->write(posts(“news”,$request->getAttribute(‘news’), “index”));
   return($newResponse);
});

$app->get(‘/posts/news/{news}/{post}‘, function( Request $request, Response $response) {
   $newResponse = SetBasicHeader($response);
   $newResponse->getBody()->write(posts(“news”,$request->getAttribute(‘news’), $request->getAttribute(‘post’)));
   return($newResponse);
});
新闻路由器的请求就像博客路由器的请求一样工作。
//
// This route will process all the pages. Since this should
// catch all types of routes other than the home page, this
// route should handle the unknown pages as well.
//
$app->get(‘/{page}‘, function( Request $request, Response $response) {
   $newResponse = SetBasicHeader($response);
   $newResponse->getBody()->write(page($request->getAttribute(‘page’)));
   return($newResponse);
});
这是通用页面路由。 与任何先前请求都不匹配的所有请求都将触发此请求。
//
// Respond to requests.
//
$app->run();

?>
最后的代码启动服务器。 此功能将对请求进行所有处理。 返回后,PHP解释器将结束并关闭与用户浏览器的连接。
该PHP服务器的工作方式与本系列的其他服务器完全不同。 该例程针对每个请求开始和结束,而其他服务器继续处理请求。 因此,由于例程的加载和卸载,此PHP服务器需要更长的时间来处理请求。
启动服务器
现在设置服务器。 获得Apache和PHP堆栈的最简单方法之一就是使用Vagrant 。 要在Mac上安装,请通过以下命令使用Homebrew :
brew cask install vagrant如果您使用Windows或Linux系统,请使用Vagrant网站上的安装程序。 该网站还具有适用于Mac的独立安装程序,但是通过使用Homebrew进行安装,您可以通过运行以下命令获得自动更新:
brew update安装后,在项目目录中创建一个名为Vagrant的文件。 在此文件中,放置以下代码:
Vagrant.configure(“2”) do |config|
  config.vm.box = “ubuntu/trusty64”
        config.vm.provision :shell, path: “bootstrap.sh”
        config.vm.network :forwarded_port, host: 8080, guest: 8080
        config.vm.synced_folder “/full/path/to/code/directory”, “/vagrant”
end
这是Vagrant的配置文件。 它告诉Vagrant要在哪个虚拟机框上构建,运行脚本以设置服务器的框,要映射到主计算机上端口的虚拟机中的哪些端口以及要同步到其中的/ vagrant文件夹的文件夹虚拟机。 您需要在计算机上设置目录的完整路径,而不是/full/path/to/code/directory 。
接下来,创建文件bootstrap.sh并添加以下脚本:
sudo apt-get update
sudo apt-get install -y apache2

#
# Setup modules in apache that will be needed.
#
sudo ln -s /etc/apache2/mods-available/headers.load /etc/apache2/mods-enabled/headers.load
sudo ln -s /etc/apache2/mods-available/rewrite.load /etc/apache2/mods-enabled/rewrite.load

#
# Setup apache on port 8080 and configure apache to read the .htaccess files for
# access changes.
#
sudo cat /etc/apache2/sites-available/000-default.conf | sed ‘s/80/8080/g’ > /var/tmp/sites.conf
sudo mv /var/tmp/sites.conf /etc/apache2/sites-available/000-default.conf
sudo cat /etc/apache2/ports.conf | sed ‘s/80/8080/g’ > /var/tmp/ports.conf
sudo mv /var/tmp/ports.conf /etc/apache2/ports.conf
sudo cat /etc/apache2/apache2.conf | sed ‘s/AllowOverride None/AllowOverride All/’ >/var/tmp/apache2.conf
sudo mv /var/tmp/apache2.conf /etc/apache2/apache2.conf

#
# setup php5
#
sudo apt-get install -y php5

#
# Setup the server root directory
#
sudo rm -rf /var/www/html
sudo ln -fs /vagrant /var/www/html

#
# reload apache
#
sudo service apache2 reload
该脚本将加载到Apache Web服务器中并对其进行配置。 配置Apache之后,它将安装PHP版本5,设置服务器的根目录,并启动Apache服务。 所有这些都将根据该项目的需要配置虚拟机,并使服务器的根目录从您的项目目录中获取文件。 您在项目目录中进行的任何编辑都可立即用于服务器。
在项目目录中,创建一个名为.htaccess的文件并放置以下代码:
RewriteEngine On
RewriteCond %{REQUEST_FILENAME} !-f
RewriteCond %{REQUEST_FILENAME} !-d
RewriteRule ^ index.php [QSA,L]

# 1 YEAR
<FilesMatch “\.(ico|pdf|flv)$“>
Header set Cache-Control “max-age=29030400, public”
</FilesMatch>

# 1 WEEK
<FilesMatch “\.(jpg|jpeg|png|gif|swf)$“>
Header set Cache-Control “max-age=604800, public”
</FilesMatch>

# 2 DAYS
<FilesMatch “\.(xml|txt|css|js)$“>
Header set Cache-Control “max-age=172800, proxy-revalidate”
</FilesMatch>

# 1 MIN
<FilesMatch “\.(html|htm|php)$“>
Header set Cache-Control “max-age=60, private, proxy-revalidate”
</FilesMatch>
这告诉Apache服务器如何处理对此站点的请求以及如何自动缓存请求。 index.php文件将每个请求都发送到服务器。
运行服务器
要启动服务器,请在项目目录中运行以下命令:
vagrant up如果虚拟机尚未安装在您的系统上,它将下载该虚拟机,运行配置脚本并启动服务器。 要查看该站点,请打开浏览器到http:// localhost:8080 。
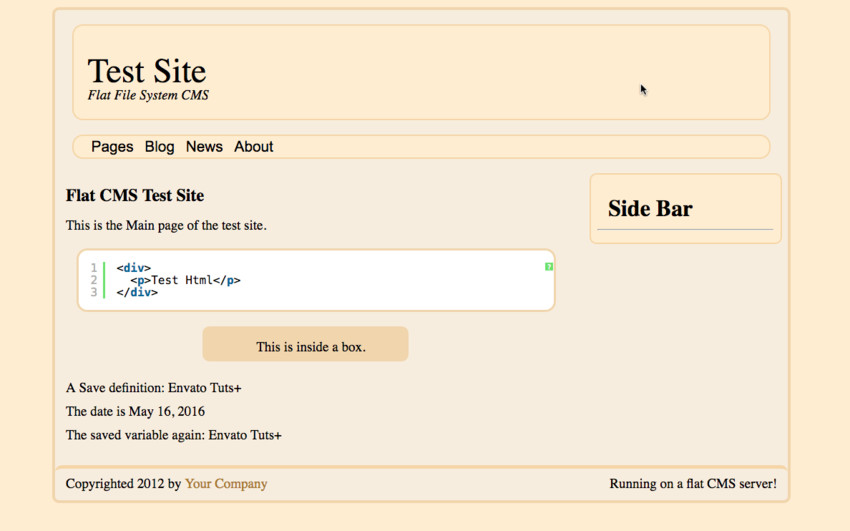
浏览器应显示以上页面。 该服务器现已联机,可以进行添加。
如果无法查看该网站,则应检查该网站中所有文件的权限。 OS X通常将它们设置为仅自己可读。 您需要在项目目录中使用以下命令使它们在全球范围内可读:
chmod -R a+r .这将确保虚拟机中的Apache服务器能够读取文件。
要停止服务器,请在项目目录中运行以下命令:
vagrant halt要了解有关使用Vagrant的更多信息,请阅读Vagrant文档 。 您也可以在Envato Tuts +上查看许多Vagrant教程 。 我使用工具Hobo来创建我的Vagrant文件。 它是在OS X上配置,运行和管理Vagrant系统的绝佳工具。
结论
既然您知道如何使用PHP语言构建简单而功能强大的Web服务器,那么该您该进行实验了。 创建新的页面,帖子,可嵌入的部分和简码。 这个简单的平台比使用WordPress快得多,而且完全由您控制。
与本系列中的其他Web服务器不同,此基于PHP的CMS可以在任何共享主机帐户上运行。 我正在其部的 DreamHost 网站上使用它。 我没有优化图片,但是效果仍然不错。 在下面的评论中告诉我有关您的服务器的信息。
翻译自: https://code.tutsplus.com/tutorials/building-a-cms-phppress--cms-26536


 1337
1337

 被折叠的 条评论
为什么被折叠?
被折叠的 条评论
为什么被折叠?
 到【灌水乐园】发言


