


1.概述
Spring是创建Web应用程序的非常流行的JEE框架。
通常,我们使用Spring技术将API公开给第三方集成。 当时,我们的API需要详细的规范,以帮助轻松集成。
在本教程中,我们将探索Springfox Java库,以为Spring应用程序生成基于Swagger的API规范。
2. Springfox
Springfox是一组Java库,它是从swagger-springmvc项目演变而来的。
它自动使用Spring框架实现了JSON API规范的生成。 此外,它还提供了用于集成Swagger UI与API交互的库。
Springfox在运行时检查Spring应用程序,并根据配置和注释生成API规范。
让我们探索Swagger 2与Spring REST API的集成。 另外,我们将介绍基本配置。
3.设定
让我们在Spring Boot应用程序中添加最新的springfox-swagger2 Maven依赖项:
<dependency>
    <groupId> io.springfox </groupId>
    <artifactId> springfox-swagger2 </artifactId>
    <version> 2.9.2 </version>
</dependency>
同样,我们可以将springfox-swagger2依赖项添加到基于Gradle的Spring项目中:
compile "io.springfox:springfox-swagger2:2.9.2"
4. @ EnableSwagger2
现在,我们已经设置了Springfox依赖项。 让我们启用Swagger 2来生成API规范。
为此,我们将@ EnableSwagger2批注添加到应用程序的主类中:
@EnableSwagger2
@SpringBootApplication
public class SpringfoxApplication {
    public static void main ( String [] args ) {
        SpringApplication . run ( SpringfoxApplication . class , args );
    }
}
让我们使用Maven命令启动应用程序:
mvn spring-boot:run
瞧! API规格已准备就绪。
结果,我们可以在localhost:8080 / v2 / api-docs中以JSON格式访问规范:

5. Swagger UI
JSON格式的API规范不可读且难以遵循。 因此,我们需要UI支持,以简化与API规范的交互。
因此,通过将springfox-swagger-ui依赖项添加到pom.xml中 ,让我们将Swagger UI集成到我们的应用程序中:
<dependency>
    <groupId> io.springfox </groupId>
    <artifactId> springfox-swagger-ui </artifactId>
    <version> 2.9.2 </version>
</dependency>
然后,我们将重新启动应用程序,并在localhost:8080 / swagger-ui.html中访问Swagger UI:
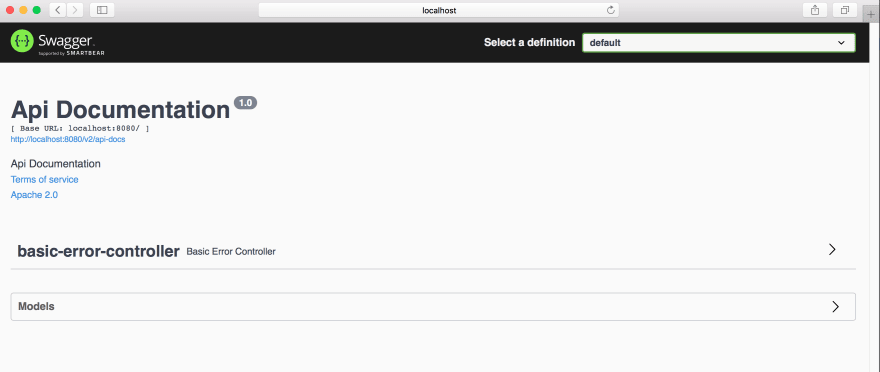
6. Spring REST API
让我们探索Swagger 2与Spring REST API的集成。
首先,让我们创建一个名为User的实体:
@Entity
public class User {
    @Id
    private Long id ;
    private String firstName ;
    private int age ;
    private String email ;

    //getters and setters
}
然后,我们将创建UserRepository以在User实体上添加CRUD操作:
@Repository
public interface UserRepository extends CrudRepository < User , Long > {
}
现在,我们将为REST API创建UserController :
@Controller
@RequestMapping ( value = "/api/user" , produces = MediaType . APPLICATION_JSON_VALUE )
public class UserController {
    @Autowired
    private UserRepository userRepository ;

    @PostMapping
    public @ResponseBody ResponseEntity < User > createUser ( @RequestBody User user ) {
        userRepository . save ( user );
        return new ResponseEntity <>( user , HttpStatus . OK );
    }

    @GetMapping
    public @ResponseBody ResponseEntity < User > getUser ( @RequestParam Long id ) {
        Optional < User > user = userRepository . findById ( id );
        return new ResponseEntity <>( user . get (), HttpStatus . OK );
    }
}
现在,我们已经有了实体,存储库和控制器。 让我们将所有内容集成到主类中:
@SpringBootApplication
@EnableSwagger2
public class SpringfoxApplication {
    // ...
}
然后,我们将重新启动应用程序以查看更改:
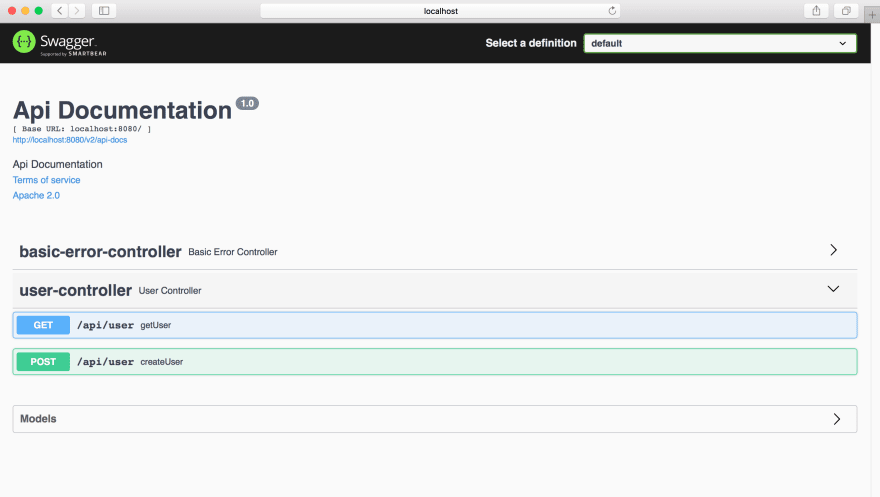
在这里,我们可以看到为UserController API生成的规范。
7.配置
让我们探索Springfox配置的基础。
我们可以使用Docket类配置API规范。 为此,我们应该在注册为bean的主类中创建一个方法,并返回Docket实例。
让我们创建的SpringfoxApplication一个springfoxAppInfo bean方法:
public class SpringfoxApplication {
    //...

    @Bean
    public Docket springfoxAppInfo () {
        return new Docket ( DocumentationType . SWAGGER_2 )
          . groupName ( "Springfox-api" )
          . select ()
          . paths ( paths ())
          . build ();
          . apiInfo ( apiInfo ());
    }

    private Predicate < String > paths () {
        return regex ( "/api/.*" );
    }

    private ApiInfo apiInfo () {
        return new ApiInfo (
          "Springfox API specification" ,
          "Spring REST APIs" ,
          "" ,
          "" ,
          null ,
          "License of API" ,
          "API license URL" ,
          Collections . emptyList ());
    }
}
在这里,我们更改了一些属性,例如groupName和apiInfo 。 另外,我们将API规范限制为/ api URI路径。
让我们重新启动应用程序,并检查规格差异:

在这里,我们可以看到API信息已更改。 另外,该规范仅可用于基于/ api URI路径的UserController 。
8.结论
在本文中,我们探索了Springfox库套件,用于生成使用Spring框架实现的API规范。
首先,我们创建了一个Spring Boot应用程序,并集成了Swagger 2 API以创建规范。 另外,我们已经看到了与Swagger UI的集成。
然后,我们研究了将Swagger集成到Spring REST API中的方法。
最后,我们介绍了Swagger UI配置的基础。
请在Github上找到整个代码实现。
很想听听您对这篇文章的想法。 有什么问题吗? 任何反馈? 请评论!!!
From: https://dev.to/smartyansh/introduction-to-springfox-48ng


 1万+
1万+

 被折叠的 条评论
为什么被折叠?
被折叠的 条评论
为什么被折叠?
 到【灌水乐园】发言


