


Microsoft Cognitive Toolkit-快速指南 (Microsoft Cognitive Toolkit - Quick Guide)
Microsoft认知工具包(CNTK)-简介 (Microsoft Cognitive Toolkit (CNTK) - Introduction)
In this chapter, we will learn what is CNTK, its features, difference between its version 1.0 and 2.0 and important highlights of version 2.7.
在本章中,我们将学习什么是CNTK,其功能,1.0和2.0版之间的区别以及2.7版的重要亮点。
什么是Microsoft认知工具包(CNTK)? (What is Microsoft Cognitive Toolkit (CNTK)?)
Microsoft Cognitive Toolkit (CNTK), formerly known as Computational Network Toolkit, is a free, easy-to-use, open-source, commercial-grade toolkit that enables us to train deep learning algorithms to learn like the human brain. It enables us to create some popular deep learning systems like feed-forward neural network time series prediction systems and Convolutional neural network (CNN) image classifiers.
Microsoft Cognitive Toolkit(CNTK),以前称为Computational Network Toolkit,是一种免费,易于使用的开源商业级工具包,使我们能够训练深度学习算法来像人脑一样学习。 它使我们能够创建一些流行的深度学习系统,例如前馈神经网络时间序列预测系统和卷积神经网络(CNN)图像分类器 。
For optimal performance, its framework functions are written in C++. Although we can call its function using C++, but the most commonly used approach for the same is to use a Python program.
为了获得最佳性能,其框架功能使用C ++编写。 尽管我们可以使用C ++调用其函数,但是最常用的方法是使用Python程序。
CNTK的功能 (CNTK’s Features)
Following are some of the features and capabilities offered in the latest version of Microsoft CNTK:
以下是最新版本的Microsoft CNTK中提供的一些功能:
内置组件 (Built-in components)
CNTK has highly optimised built-in components that can handle multi-dimensional dense or sparse data from Python, C++ or BrainScript.
CNTK具有高度优化的内置组件,可以处理来自Python,C ++或BrainScript的多维密集或稀疏数据。
We can implement CNN, FNN, RNN, Batch Normalisation and Sequence-to-Sequence with attention.
我们可以注意实现CNN,FNN,RNN,批处理规范化和序列到序列。
It provides us the functionality to add new user-defined core-components on the GPU from Python.
它为我们提供了从Python在GPU上添加新的用户定义的核心组件的功能。
It also provides automatic hyperparameter tuning.
它还提供自动超参数调整。
We can implement Reinforcement learning, Generative Adversarial Networks (GANs), Supervised as well as Unsupervised learning.
我们可以实施强化学习,生成对抗网络(GAN),监督学习和无监督学习。
For massive datasets, CNTK has built-in optimised readers.
对于海量数据集,CNTK具有内置的优化读取器。
有效利用资源 (Usage of resources efficiently)
CNTK provides us parallelism with high accuracy on multiple GPUs/machines via 1-bit SGD.
CNTK通过1位SGD在多个GPU /机器上为我们提供了高精度的并行性。
To fit the largest models in GPU memory, it provides memory sharing and other built-in methods.
为了适合GPU内存中最大的模型,它提供了内存共享和其他内置方法。
轻松表达我们自己的网络 (Express our own networks easily)
CNTK has full APIs for defining your own network, learners, readers, training and evaluation from Python, C++, and BrainScript.
CNTK具有完整的API,用于定义您自己的网络,学习者,读者,Python,C ++和BrainScript的培训和评估。
Using CNTK, we can easily evaluate models with Python, C++, C# or BrainScript.
使用CNTK,我们可以轻松地使用Python,C ++,C#或BrainScript评估模型。
It provides both high-level as well as low-level APIs.
它提供了高级和低级API。
Based on our data, it can automatically shape the inference.
根据我们的数据,它可以自动塑造推理。
It has fully optimised symbolic Recurrent Neural Network (RNN) loops.
它具有完全优化的符号递归神经网络(RNN)循环。
测量模型性能 (Measuring model performance)
CNTK provides various components to measure the performance of neural networks you build.
CNTK提供了各种组件来衡量您构建的神经网络的性能。
Generates log data from your model and the associated optimiser, which we can use to monitor the training process.
从您的模型和关联的优化器生成日志数据,我们可以使用它们来监视训练过程。
1.0版与2.0版 (Version 1.0 vs Version 2.0)
Following table compares CNTK Version 1.0 and 2.0:
下表比较了CNTK版本1.0和2.0:
| Version 1.0 | Version 2.0 |
|---|---|
| It was released in 2016. | It is a significant rewrite of the 1.0 Version and was released in June 2017. |
| It used a proprietary scripting language called BrainScript. | Its framework functions can be called using C++, Python. We can easily load our modules in C# or Java. BrainScript is also supported by Version 2.0. |
| It runs on both Windows and Linux systems but not directly on Mac OS. | It also runs on both Windows (Win 8.1, Win 10, Server 2012 R2 and later) and Linux systems but not directly on Mac OS. |
| 版本1.0 | 版本2.0 |
|---|---|
| 它于2016年发布。 | 它是对1.0版的重大重写,于2017年6月发布。 |
| 它使用了称为BrainScript的专有脚本语言。 | 可以使用C ++,Python调用其框架函数。 我们可以轻松地用C#或Java加载模块。 2.0版还支持BrainScript。 |
| 它可以在Windows和Linux系统上运行,但不能直接在Mac OS上运行。 | 它还可以在Windows(Win 8.1,Win 10,Server 2012 R2和更高版本)和Linux系统上运行,但不能直接在Mac OS上运行。 |
2.7版的重要亮点 (Important Highlights of Version 2.7)
Version 2.7 is the last main released version of Microsoft Cognitive Toolkit. It has full support for ONNX 1.4.1. Following are some important highlights of this last released version of CNTK.
2.7版是Microsoft Cognitive Toolkit的最后一个主要发行版本。 它完全支持ONNX 1.4.1。 以下是该CNTK的最新发行版的一些重要亮点。
Full support for ONNX 1.4.1.
完全支持ONNX 1.4.1。
Support for CUDA 10 for both Windows and Linux systems.
Windows和Linux系统均支持CUDA 10。
It supports advance Recurrent Neural Networks (RNN) loop in ONNX export.
它支持ONNX导出中的高级递归神经网络(RNN)循环。
It can export more than 2GB models in ONNX format.
它可以以ONNX格式导出2GB以上的模型。
It supports FP16 in BrainScript scripting language’s training action.
它在BrainScript脚本语言的训练操作中支持FP16。
Microsoft认知工具包(CNTK)-入门 (Microsoft Cognitive Toolkit (CNTK) - Getting Started)
Here, we will understand about the installation of CNTK on Windows and on Linux. Moreover, the chapter explains installing CNTK package, steps to install Anaconda, CNTK files, directory structure and CNTK library organisation.
在这里,我们将了解在Windows和Linux上CNTK的安装。 此外,本章还介绍了安装CNTK软件包,安装Anaconda,CNTK文件,目录结构和CNTK库组织的步骤。
先决条件 (Prerequisites)
In order to install CNTK, we must have Python installed on our computers. You can go to the link https://www.python.org/downloads/ and select the latest version for your OS, i.e. Windows and Linux/Unix. For basic tutorial on Python, you can refer to the link https://www.tutorialspoint.com/python3/index.htm.
为了安装CNTK,我们必须在计算机上安装Python。 您可以转到链接https://www.python.org/downloads/并为您的操作系统选择最新版本,即Windows和Linux / Unix。 有关Python的基本教程,您可以参考链接https://www.tutorialspoint.com/python3/index.htm 。

CNTK is supported for Windows as well as Linux so we will walk through both of them.
Windows和Linux支持CNTK,因此我们将逐步介绍它们。
在Windows上安装 (Installing on Windows)
In order to run CNTK on Windows, we will be using the Anaconda version of Python. We know that, Anaconda is a redistribution of Python. It includes additional packages like Scipy andScikit-learn which are used by CNTK to perform various useful calculations.
为了在Windows上运行CNTK,我们将使用Anaconda版本的Python。 我们知道,Anaconda是Python的重新分发。 它包括CNTK用于执行各种有用计算的其他软件包,例如Scipy和Scikit-learn 。
So, first let see the steps to install Anaconda on your machine −
因此,首先让我们看看在您的计算机上安装Anaconda的步骤-
Step 1−First download the setup files from the public website https://www.anaconda.com/distribution/.
步骤1-首先从公共网站https://www.anaconda.com/distribution/下载设置文件。
Step 2 − Once you downloaded the setup files, start the installation and follow the instructions from the link https://docs.anaconda.com/anaconda/install/.
步骤2-下载设置文件后,开始安装并按照链接https://docs.anaconda.com/anaconda/install/中的说明进行操作。
Step 3 − Once installed, Anaconda will also install some other utilities, which will automatically include all the Anaconda executables in your computer PATH variable. We can manage our Python environment from this prompt, can install packages and run Python scripts.
步骤3-一旦安装,Anaconda还将安装一些其他实用程序,这些实用程序将自动在您的计算机PATH变量中包含所有Anaconda可执行文件。 我们可以从此提示管理Python环境,可以安装软件包并运行Python脚本。
安装CNTK软件包 (Installing CNTK package)
Once Anaconda installation is done, you can use the most common way to install the CNTK package through the pip executable by using following command −
Anaconda安装完成后,可以使用以下命令通过最常见的方式通过pip可执行文件安装CNTK软件包-
pip install cntk
There are various other methods to install Cognitive Toolkit on your machine. Microsoft has a neat set of documentation that explains the other installation methods in detail. Please follow the link https://docs.microsoft.com/en-us/cognitive-toolkit/Setup-CNTK-on-your-machine.
还有多种其他方法可以在计算机上安装Cognitive Toolkit。 Microsoft提供了一套简洁的文档,详细介绍了其他安装方法。 请点击链接https://docs.microsoft.com/en-us/cognitive-toolkit/Setup-CNTK-on-your-machine 。
在Linux上安装 (Installing on Linux)
Installation of CNTK on Linux is a bit different from its installation on Windows. Here, for Linux we are going to use Anaconda to install CNTK, but instead of a graphical installer for Anaconda, we will be using a terminal-based installer on Linux. Although, the installer will work with almost all Linux distributions, we limited the description to Ubuntu.
Linux上CNTK的安装与Windows上的安装有些不同。 在这里,对于Linux,我们将使用Anaconda安装CNTK,但是我们将在Linux上使用基于终端的安装程序,而不是Anaconda的图形安装程序。 尽管该安装程序可与几乎所有Linux发行版一起使用,但我们仅将说明限于Ubuntu。
So, first let see the steps to install Anaconda on your machine −
因此,首先让我们看看在您的计算机上安装Anaconda的步骤-
安装Anaconda的步骤 (Steps to install Anaconda)
Step 1 − Before installing Anaconda, make sure that the system is fully up to date. To check, first execute the following two commands inside a terminal −
步骤1-在安装Anaconda之前,请确保系统是最新的。 要检查,首先在终端内执行以下两个命令:
sudo apt update
sudo apt upgrade
Step 2 − Once the computer is updated, get the URL from the public website https://www.anaconda.com/distribution/ for the latest Anaconda installation files.
步骤2-更新计算机后,从公共网站https://www.anaconda.com/distribution/获取URL,以获取最新的Anaconda安装文件。
Step 3 − Once URL is copied, open a terminal window and execute the following command −
步骤3-复制URL后,打开终端窗口并执行以下命令-
wget -0 anaconda-installer.sh url SHAPE \* MERGEFORMAT
     y


	             f


      x

|                     }
Replace the url placeholder with the URL copied from the Anaconda website.
用从Anaconda网站复制的URL替换url占位符。
Step 4 − Next, with the help of following command, we can install Anaconda −
步骤4-接下来,在以下命令的帮助下,我们可以安装Anaconda-
sh ./anaconda-installer.sh
The above command will by default install Anaconda3 inside our home directory.
默认情况下,以上命令将在我们的主目录中安装Anaconda3 。
安装CNTK软件包 (Installing CNTK package)
Once Anaconda installation is done, you can use the most common way to install the CNTK package through the pip executable by using following command −
Anaconda安装完成后,可以使用以下命令通过最常见的方式通过pip可执行文件安装CNTK软件包-
pip install cntk
检查CNTK文件和目录结构 (Examining CNTK files & directory structure)
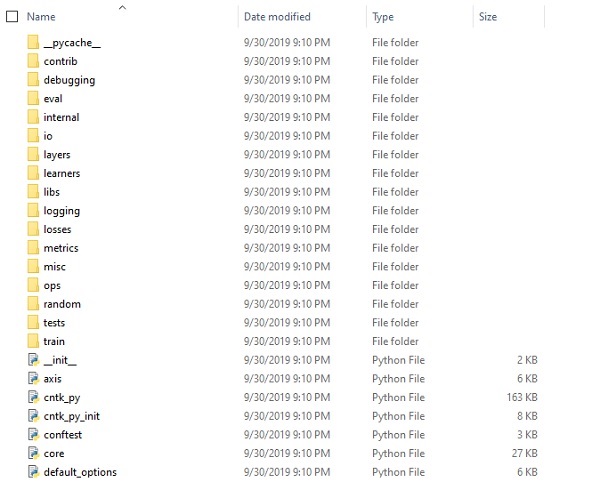
Once CNTK is installed as a Python package, we can examine its file and directory structure. It’s at C:\Users\ \Anaconda3\Lib\site-packages\cntk, as shown below in screenshot.
CNTK作为Python软件包安装后,我们可以检查其文件和目录结构。 在C:\ Users \ \ Anaconda3 \ Lib \ site-packages \ cntk, 如下面的屏幕快照所示。
验证CNTK安装 (Verifying CNTK installation)
Once CNTK is installed as a Python package, you should verify that CNTK has been installed correctly. From Anaconda command shell, start Python interpreter by entering ipython. Then, import CNTK by entering the following command.
将CNTK作为Python软件包安装后,您应验证CNTK已正确安装。 在Anaconda命令外壳中,通过输入ipython启动Python解释器。 然后,通过输入以下命令导入CNTK 。
import cntk as c
Once imported, check its version with the help of following command −
导入后,在以下命令的帮助下检查其版本-
print(c.__version__)
The interpreter will respond with installed CNTK version. If it doesn’t respond, there will be a problem with the installation.
解释器将响应已安装的CNTK版本。 如果没有响应,则说明安装存在问题。
CNTK图书馆组织 (The CNTK library organisation)
CNTK, a python package technically, is organised into 13 high-level sub-packages and 8 smaller sub-packages. Following table consist of the 10 most frequently used packages:
CNTK从技术上讲是python软件包,分为13个高级子软件包和8个较小的子软件包。 下表包含10个最常用的软件包:
| Sr.No | Package Name & Description |
|---|---|
| 1 | cntk.io Contains functions for reading data. For example: next_minibatch() |
| 2 | cntk.layers Contains high-level functions for creating neural networks. For example: Dense() |
| 3 | cntk.learners Contains functions for training. For example: sgd() |
| 4 | cntk.losses Contains functions to measure training error. For example: squared_error() |
| 5 | cntk.metrics Contains functions to measure model error. For example: classificatoin_error |
| 6 | cntk.ops Contains low-level functions for creating neural networks. For example: tanh() |
| 7 | cntk.random Contains functions to generate random numbers. For example: normal() |
| 8 | cntk.train Contains training functions. For example: train_minibatch() |
| 9 | cntk.initializer Contains model parameter initializers. For example: normal() and uniform() |
| 10 | cntk.variables Contains low-level constructs. For example: Parameter() and Variable() |
| 序号 | 包装名称和说明 |
|---|---|
| 1个 | cntk.io 包含读取数据的功能。 例如: next_minibatch() |
| 2 | 图层 包含用于创建神经网络的高级功能。 例如: Dense() |
| 3 | 学习者 包含培训功能。 例如: sgd() |
| 4 | 损失 包含测量训练误差的功能。 例如: squared_error() |
| 5 | 计量指标 包含测量模型误差的函数。 例如: classificatoin_error |
| 6 | cntk.ops 包含用于创建神经网络的底层函数。 例如: tanh() |
| 7 | 随机 包含生成随机数的函数。 例如: normal() |
| 8 | 火车 包含训练功能。 例如: train_minibatch() |
| 9 | cntk.initializer 包含模型参数初始化程序。 例如: normal()和uniform() |
| 10 | cntk.variables 包含低级构造。 例如: Parameter()和Variable() |
Microsoft认知工具包(CNTK)-CPU和GPU (Microsoft Cognitive Toolkit (CNTK) - CPU and GPU)
Microsoft Cognitive Toolkit offers two different build versions namely CPU-only and GPU-only.
Microsoft Cognitive Toolkit提供了两种不同的生成版本,即仅CPU和仅GPU。
仅CPU构建版本 (CPU only build version)
The CPU-only build version of CNTK uses the optimised Intel MKLML, where MKLML is the subset of MKL (Math Kernel Library) and released with Intel MKL-DNN as a terminated version of Intel MKL for MKL-DNN.
CNTK的仅CPU构建版本使用经过优化的Intel MKLML,其中MKLML是MKL(数学内核库)的子集,并与Intel MKL-DNN一起发布,作为MKL-DNN的Intel MKL的终止版本。
仅GPU构建版本 (GPU only build version)
On the other hand, the GPU-only build version of CNTK uses highly optimised NVIDIA libraries such as CUB and cuDNN. It supports distributed training across multiple GPUs and multiple machines. For even faster distributed training in CNTK, the GPU-build version also includes −
另一方面,仅GPU的CNTK构建版本使用高度优化的NVIDIA库,例如CUB和cuDNN 。 它支持跨多个GPU和多台机器的分布式培训。 为了在CNTK中进行更快的分布式培训,GPU构建版本还包括-
MSR-developed 1bit-quantized SGD.
MSR开发了1位量化的SGD。
Block-momentum SGD parallel training algorithms.
块动量SGD并行训练算法。
在Windows上使用CNTK启用GPU (Enabling GPU with CNTK on Windows)
In the previous section, we saw how to install the basic version of CNTK to use with the CPU. Now let’s discuss how we can install CNTK to use with a GPU. But, before getting deep dive into it, first you should have a supported graphics card.
在上一节中,我们了解了如何安装CNTK的基本版本以与CPU一起使用。 现在让我们讨论如何安装CNTK以与GPU一起使用。 但是,在深入研究它之前,首先应该拥有受支持的图形卡。
At present, CNTK supports the NVIDIA graphics card with at least CUDA 3.0 support. To make sure, you can check at https://developer.nvidia.com/cuda-gpus whether your GPU supports CUDA.
目前,CNTK支持至少具有CUDA 3.0支持的NVIDIA图形卡。 为了确保这一点,您可以在https://developer.nvidia.com/cuda-gpus上检查您的GPU是否支持CUDA。
So, let us see the steps to enable GPU with CNTK on Windows OS −
因此,让我们看看在Windows OS上启用具有CNTK的GPU的步骤-
Step 1 − Depending on the graphics card you are using, first you need to have the latest GeForce or Quadro drivers for your graphics card.
步骤1-根据所使用的显卡,首先需要为显卡使用最新的GeForce或Quadro驱动程序。
Step 2 − Once you downloaded the drivers, you need to install the CUDA toolkit Version 9.0 for Windows from NVIDIA website https://developer.nvidia.com/cuda-90-download-archive?target_os=Windows&target_arch=x86_64. After installing, run the installer and follow the instructions.
步骤2-下载驱动程序后,您需要从NVIDIA网站https://developer.nvidia.com/cuda-90-download-archive?target_os=Windows&target_arch=x86_64安装CUDA工具包9.0 for Windows。 安装后,运行安装程序并按照说明进行操作。
Step 3 − Next, you need to install cuDNN binaries from NVIDIA website https://developer.nvidia.com/rdp/form/cudnn-download-survey. With CUDA 9.0 version, cuDNN 7.4.1 works well. Basically, cuDNN is a layer on the top of CUDA, used by CNTK.
步骤3-接下来,您需要从NVIDIA网站https://developer.nvidia.com/rdp/form/cudnn-download-survey安装cuDNN二进制文件。 在CUDA 9.0版本中,cuDNN 7.4.1可以很好地工作。 基本上,cuDNN是CNTK使用的位于CUDA顶部的一层。
Step 4 − After downloading the cuDNN binaries, you need to extract the zip file into the root folder of your CUDA toolkit installation.
步骤4-下载cuDNN二进制文件后,您需要将zip文件解压缩到CUDA工具包安装的根文件夹中。
Step 5 − This is the last step which will enable GPU usage inside CNTK. Execute the following command inside the Anaconda prompt on Windows OS −
步骤5-这是最后一步,它将在CNTK中启用GPU使用。 在Windows OS上的Anaconda提示符内执行以下命令-
pip install cntk-gpu
在Linux上使用CNTK启用GPU (Enabling GPU with CNTK on Linux)
Let us see how we can enable GPU with CNTK on Linux OS −
让我们看看如何在Linux OS上使用CNTK启用GPU-
下载CUDA工具包 (Downloading the CUDA toolkit)
First, you need to install the CUDA toolkit from NVIDIA website https://developer.nvidia.com/cuda-90-download-archive?target_os=Linux&target_arch=x86_64&target_distro=Ubuntu&target_version=1604&target_type =runfilelocal.
首先,您需要从NVIDIA网站https://developer.nvidia.com/cuda-90-download-archive?target_os=Linux&target_arch=x86_64&target_distro=Ubuntu&target_version=1604&target_type = runfilelocal安装CUDA工具包。
运行安装程序 (Running the installer)
Now, once you have binaries on the disk, run the installer by opening a terminal and executing the following command and the instruction on screen −
现在,一旦磁盘上有二进制文件,就可以通过打开终端并执行以下命令和屏幕上的说明来运行安装程序:
sh cuda_9.0.176_384.81_linux-run
修改Bash配置文件脚本 (Modify Bash profile script)
After installing CUDA toolkit on your Linux machine, you need to modify the BASH profile script. For this, first open the $HOME/ .bashrc file in text editor. Now, at the end of the script, include the following lines −
在Linux机器上安装CUDA工具包之后,您需要修改BASH配置文件脚本。 为此,首先在文本编辑器中打开$ HOME / .bashrc文件。 现在,在脚本末尾,包括以下几行:
export PATH=/usr/local/cuda-9.0/bin${PATH:+:${PATH}}
export LD_LIBRARY_PATH=/usr/local/cuda-9.0/lib64\
${LD_LIBRARY_PATH:+:${LD_LIBRARY_PATH}}
Installing
安装cuDNN库 (Installing cuDNN libraries)
At last we need to install cuDNN binaries. It can be downloaded from NVIDIA website https://developer.nvidia.com/rdp/form/cudnn-download-survey. With CUDA 9.0 version, cuDNN 7.4.1 works well. Basically, cuDNN is a layer on the top of CUDA, used by CNTK.
最后,我们需要安装cuDNN二进制文件。 可以从NVIDIA网站https://developer.nvidia.com/rdp/form/cudnn-download-survey下载。 在CUDA 9.0版本中,cuDNN 7.4.1可以很好地工作。 基本上,cuDNN是CNTK使用的位于CUDA顶部的一层。
Once downloaded the version for Linux, extract it to the /usr/local/cuda-9.0 folder by using the following command −
下载适用于Linux的版本后,使用以下命令将其解压缩到/usr/local/cuda-9.0文件夹-
tar xvzf -C /usr/local/cuda-9.0/ cudnn-9.0-linux-x64-v7.4.1.5.tgz
Change the path to the filename as required.
根据需要将路径更改为文件名。
CNTK-序列分类 (CNTK - Sequence Classification)
In this chapter, we will learn in detail about the sequences in CNTK and its classification.
在本章中,我们将详细了解CNTK中的序列及其分类。
张量 (Tensors)
The concept on which CNTK works is tensor. Basically, CNTK inputs, outputs as well as parameters are organized as tensors, which is often thought of as a generalised matrix. Every tensor has a rank −
CNTK工作的概念是张量 。 基本上,CNTK的输入,输出以及参数被组织为张量 ,通常被认为是广义矩阵。 每个张量都有一个等级 -
Tensor of rank 0 is a scalar.
等级0的张量是标量。
Tensor of rank 1 is a vector.
等级1的张量是一个向量。
Tensor of rank 2 is amatrix.
等级2的张量是矩阵。
Here, these different dimensions are referred as axes.
在这里,这些不同的尺寸称为轴。
静态轴和动态轴 (Static axes and Dynamic axes)
As the name implies, the static axes have the same length throughout the network’s life. On the other hand, the length of dynamic axes can vary from instance to instance. In fact, their length is typically not known before each minibatch is presented.
顾名思义,静态轴在网络的整个生命周期中具有相同的长度。 另一方面,动态轴的长度可能因实例而异。 实际上,通常在呈现每个小批量之前不知道它们的长度。
Dynamic axes are like static axes because they also define a meaningful grouping of the numbers contained in the tensor.
动态轴就像静态轴一样,因为它们还定义了张量中包含的有意义的数字分组。
例 (Example)
To make it clearer, let’s see how a minibatch of short video clips is represented in CNTK. Suppose that the resolution of video clips is all 640 * 480. And, also the clips are shot in color which is typically encoded with three channels. It further means that our minibatch has the following −
为了更清楚一点,让我们看看如何在CNTK中表示一小段短视频剪辑。 假设视频剪辑的分辨率均为640 *480。并且,这些剪辑也以彩色拍摄,通常使用三个通道进行编码。 这进一步意味着我们的minibatch具有以下内容-
3 static axes of length 640, 480 and 3 respectively.
3个静态轴,分别为长度640、480和3。
Two dynamic axes; the length of the video and the minibatch axes.
两个动态轴; 视频和最小批量轴的长度。
It means that if a minibatch is having 16 videos each of which is 240 frames long, would be represented as 16*240*3*640*480 tensors.
这意味着如果一个微型批处理具有16个视频,每个视频的长度为240帧,则将表示为16 * 240 * 3 * 640 * 480张量。
在CNTK中使用序列 (Working with sequences in CNTK)
Let us understand sequences in CNTK by first learning about Long-Short Term Memory Network.
首先了解长期记忆网络,让我们了解CNTK中的序列。
长期记忆网络(LSTM) (Long-Short Term Memory Network (LSTM))

Long-short term memory (LSTMs) networks were introduced by Hochreiter & Schmidhuber. It solved the problem of getting a basic recurrent layer to remember things for a long time. The architecture of LSTM is given above in the diagram. As we can see it has input neurons, memory cells, and output neurons. In order to combat the vanishing gradient problem, Long-short term memory networks use an explicit memory cell (stores the previous values) and the following gates −
Hochreiter&Schmidhuber引入了长期短期记忆(LSTM)网络。 它解决了使基本的循环层能够长时间记住事物的问题。 LSTM的体系结构如上图所示。 如我们所见,它具有输入神经元,记忆细胞和输出神经元。 为了解决梯度消失的问题,长期短期存储网络使用显式存储单元(存储先前的值)和随后的门-
Forget gate − As the name implies, it tells the memory cell to forget the previous values. The memory cell stores the values until the gate i.e. ‘forget gate’ tells it to forget them.
忘记门 -顾名思义,它告诉存储单元忘记先前的值。 存储单元存储这些值,直到门(即“忘记门”)告诉它忘记它们为止。
Input gate − As name implies, it adds new stuff to the cell.
输入门 -顾名思义,它为单元添加了新内容。
Output gate − As name implies, output gate decides when to pass along the vectors from the cell to the next hidden state.
输出门 -顾名思义,输出门决定何时将矢量从单元传递到下一个隐藏状态。
It is very easy to work with sequences in CNTK. Let’s see it with the help of following example −
在CNTK中使用序列非常容易。 让我们借助以下示例进行查看-
import sys
import os
from cntk import Trainer, Axis
from cntk.io import MinibatchSource, CTFDeserializer, StreamDef, StreamDefs,\
   INFINITELY_REPEAT
from cntk.learners import sgd, learning_parameter_schedule_per_sample
from cntk import input_variable, cross_entropy_with_softmax, \
   classification_error, sequence
from cntk.logging import ProgressPrinter
from cntk.layers import Sequential, Embedding, Recurrence, LSTM, Dense
def create_reader(path, is_training, input_dim, label_dim):
   return MinibatchSource(CTFDeserializer(path, StreamDefs(
      features=StreamDef(field='x', shape=input_dim, is_sparse=True),
      labels=StreamDef(field='y', shape=label_dim, is_sparse=False)
   )), randomize=is_training,
   max_sweeps=INFINITELY_REPEAT if is_training else 1)
def LSTM_sequence_classifier_net(input, num_output_classes, embedding_dim,
LSTM_dim, cell_dim):
   lstm_classifier = Sequential([Embedding(embedding_dim),
      Recurrence(LSTM(LSTM_dim, cell_dim)),
      sequence.last,
      Dense(num_output_classes)])
return lstm_classifier(input)
def train_sequence_classifier():
   input_dim = 2000
   cell_dim = 25
   hidden_dim = 25
   embedding_dim = 50
   num_output_classes = 5
   features = sequence.input_variable(shape=input_dim, is_sparse=True)
   label = input_variable(num_output_classes)
   classifier_output = LSTM_sequence_classifier_net(
   features, num_output_classes, embedding_dim, hidden_dim, cell_dim)
   ce = cross_entropy_with_softmax(classifier_output, label)
   pe =      classification_error(classifier_output, label)
   rel_path = ("../../../Tests/EndToEndTests/Text/" +
      "SequenceClassification/Data/Train.ctf")
   path = os.path.join(os.path.dirname(os.path.abspath(__file__)), rel_path)
   reader = create_reader(path, True, input_dim, num_output_classes)
input_map = {
   features: reader.streams.features,
   label: reader.streams.labels
}
lr_per_sample = learning_parameter_schedule_per_sample(0.0005)
progress_printer = ProgressPrinter(0)
trainer = Trainer(classifier_output, (ce, pe),
sgd(classifier_output.parameters, lr=lr_per_sample),progress_printer)
minibatch_size = 200
for i in range(255):
   mb = reader.next_minibatch(minibatch_size, input_map=input_map)
trainer.train_minibatch(mb)
   evaluation_average = float(trainer.previous_minibatch_evaluation_average)
   loss_average = float(trainer.previous_minibatch_loss_average)
return evaluation_average, loss_average
if __name__ == '__main__':
   error, _ = train_sequence_classifier()
   print(" error: %f" % error)
average  since  average  since  examples
loss     last   metric   last
------------------------------------------------------
1.61    1.61    0.886     0.886     44
1.61     1.6    0.714     0.629    133
 1.6    1.59     0.56     0.448    316
1.57    1.55    0.479      0.41    682
1.53     1.5    0.464     0.449   1379
1.46     1.4    0.453     0.441   2813
1.37    1.28     0.45     0.447   5679
 1.3    1.23    0.448     0.447  11365

error: 0.333333
The detailed explanation of the above program will be covered in next sections, especially when we will be constructing Recurrent Neural networks.
上述程序的详细说明将在下一部分中介绍,尤其是当我们要构建递归神经网络时。
CNTK-Logistic回归模型 (CNTK - Logistic Regression Model)
This chapter deals with constructing a logistic regression model in CNTK.
本章涉及在CNTK中构建逻辑回归模型。
Logistic回归模型的基础 (Basics of Logistic Regression model)
Logistic Regression, one of the simplest ML techniques, is a technique especially for binary classification. In other words, to create a prediction model in situations where the value of the variable to predict can be one of just two categorical values. One of the simplest examples of Logistic Regression is to predict whether the person is male or female, based on person’s age, voice, hairs and so on.
Logistic回归是最简单的ML技术之一,是一种专门用于二进制分类的技术。 换句话说,在预测变量的值可能只是两个分类值之一的情况下创建预测模型。 Logistic回归的最简单例子之一是根据人的年龄,声音,头发等来预测该人是男性还是女性。
例 (Example)
Let’s understand the concept of Logistic Regression mathematically with the help of another example −
让我们借助另一个示例在数学上理解Logistic回归的概念-
Suppose, we want to predict the credit worthiness of a loan application; 0 means reject, and 1 means approve, based on applicant debt , income and credit rating. We represent debt with X1, income with X2 and credit rating with X3.
假设我们要预测贷款申请的信用价值; 根据申请人的债务,收入和信用等级 , 0表示拒绝,1表示批准。 我们用X1表示债务,用X2表示收入,用X3表示信用等级。
In Logistic Regression, we determine a weight value, represented by w, for every feature and a single bias value, represented by b.
在Logistic回归中,我们为每个特征确定一个权重值(用w表示)和一个偏置值(以b表示)。
Now suppose,
现在假设
X1 = 3.0
X2 = -2.0
X3 = 1.0
And suppose we determine weight and bias as follows −
并假设我们按以下方式确定权重和偏差-
W1 = 0.65, W2 = 1.75, W3 = 2.05 and b = 0.33
Now, for predicting the class, we need to apply the following formula −
现在,为了预测类别,我们需要应用以下公式-
Z = (X1*W1)+(X2*W2)+(X3+W3)+b
i.e. Z = (3.0)*(0.65) + (-2.0)*(1.75) + (1.0)*(2.05) + 0.33
= 0.83
Next, we need to compute P = 1.0/(1.0 + exp(-Z)). Here, the exp() function is Euler’s number.
接下来,我们需要计算P = 1.0 /(1.0 + exp(-Z)) 。 在这里,exp()函数是欧拉数。
P = 1.0/(1.0 + exp(-0.83)
= 0.6963
The P value can be interpreted as the probability that the class is 1. If P < 0.5, the prediction is class = 0 else the prediction (P >= 0.5) is class = 1.
P值可以解释为类别为1的概率。如果P <0.5,则预测为类别= 0,否则,预测(P> = 0.5)为类别= 1。
To determine the values of weight and bias, we must obtain a set of training data having the known input predictor values and known correct class labels values. After that, we can use an algorithm, generally Gradient Descent, in order to find the values of weight and bias.
要确定权重和偏倚的值,我们必须获得一组训练数据,该训练数据应具有已知的输入预测值和已知的正确类别标签值。 之后,我们可以使用一种算法(通常是“梯度下降”)来找到权重和偏差的值。
LR模型的实现实例 (LR model implementation example)
For this LR model, we are going to use the following data set −
对于此LR模型,我们将使用以下数据集-
1.0, 2.0, 0
3.0, 4.0, 0
5.0, 2.0, 0
6.0, 3.0, 0
8.0, 1.0, 0
9.0, 2.0, 0
1.0, 4.0, 1
2.0, 5.0, 1
4.0, 6.0, 1
6.0, 5.0, 1
7.0, 3.0, 1
8.0, 5.0, 1
To start this LR model implementation in CNTK, we need to first import the following packages −
要在CNTK中启动此LR模型实现,我们需要首先导入以下软件包-
import numpy as np
import cntk as C
The program is structured with main() function as follows −
该程序由main()函数构成,如下所示:
def main():
print("Using CNTK version = " + str(C.__version__) + "\n")
Now, we need to load the training data into memory as follows −
现在,我们需要按如下方式将训练数据加载到内存中:
data_file = ".\\dataLRmodel.txt"
print("Loading data from " + data_file + "\n")
features_mat = np.loadtxt(data_file, dtype=np.float32, delimiter=",", skiprows=0, usecols=[0,1])
labels_mat = np.loadtxt(data_file, dtype=np.float32, delimiter=",", skiprows=0, usecols=[2], ndmin=2)
Now, we will be creating a training program that creates a logistic regression model which is compatible with the training data −
现在,我们将创建一个训练程序,该程序将创建与训练数据兼容的逻辑回归模型-
features_dim = 2
labels_dim = 1
X = C.ops.input_variable(features_dim, np.float32)
y = C.input_variable(labels_dim, np.float32)
W = C.parameter(shape=(features_dim, 1)) # trainable cntk.Parameter
b = C.parameter(shape=(labels_dim))
z = C.times(X, W) + b
p = 1.0 / (1.0 + C.exp(-z))
model = p
Now, we need to create Lerner and trainer as follows −
现在,我们需要创建Lerner和Trainer,如下所示:
ce_error = C.binary_cross_entropy(model, y) # CE a bit more principled for LR
fixed_lr = 0.010
learner = C.sgd(model.parameters, fixed_lr)
trainer = C.Trainer(model, (ce_error), [learner])
max_iterations = 4000
LR模型训练 (LR Model training)
Once, we have created the LR model, next, it is time to start the training process −
一次,我们创建了LR模型,接下来,是时候开始训练过程了-
np.random.seed(4)
N = len(features_mat)
for i in range(0, max_iterations):
row = np.random.choice(N,1) # pick a random row from training items
trainer.train_minibatch({ X: features_mat[row], y: labels_mat[row] })
if i % 1000 == 0 and i > 0:
mcee = trainer.previous_minibatch_loss_average
print(str(i) + " Cross-entropy error on curr item = %0.4f " % mcee)
Now, with the help of the following code, we can print the model weights and bias −
现在,借助以下代码,我们可以打印模型权重和偏差-
np.set_printoptions(precision=4, suppress=True)
print("Model weights: ")
print(W.value)
print("Model bias:")
print(b.value)
print("")
if __name__ == "__main__":
main()
训练Logistic回归模型-完整示例 (Training a Logistic Regression model - Complete example)
import numpy as np
import cntk as C
   def main():
print("Using CNTK version = " + str(C.__version__) + "\n")
data_file = ".\\dataLRmodel.txt" # provide the name and the location of data file
print("Loading data from " + data_file + "\n")
features_mat = np.loadtxt(data_file, dtype=np.float32, delimiter=",", skiprows=0, usecols=[0,1])
labels_mat = np.loadtxt(data_file, dtype=np.float32, delimiter=",", skiprows=0, usecols=[2], ndmin=2)
features_dim = 2
labels_dim = 1
X = C.ops.input_variable(features_dim, np.float32)
y = C.input_variable(labels_dim, np.float32)
W = C.parameter(shape=(features_dim, 1)) # trainable cntk.Parameter
b = C.parameter(shape=(labels_dim))
z = C.times(X, W) + b
p = 1.0 / (1.0 + C.exp(-z))
model = p
ce_error = C.binary_cross_entropy(model, y) # CE a bit more principled for LR
fixed_lr = 0.010
learner = C.sgd(model.parameters, fixed_lr)
trainer = C.Trainer(model, (ce_error), [learner])
max_iterations = 4000
np.random.seed(4)
N = len(features_mat)
for i in range(0, max_iterations):
row = np.random.choice(N,1) # pick a random row from training items
trainer.train_minibatch({ X: features_mat[row], y: labels_mat[row] })
if i % 1000 == 0 and i > 0:
mcee = trainer.previous_minibatch_loss_average
print(str(i) + " Cross-entropy error on curr item = %0.4f " % mcee)
np.set_printoptions(precision=4, suppress=True)
print("Model weights: ")
print(W.value)
print("Model bias:")
print(b.value)
if __name__ == "__main__":
  main()
输出量 (Output)
Using CNTK version = 2.7
1000 cross entropy error on curr item = 0.1941
2000 cross entropy error on curr item = 0.1746
3000 cross entropy error on curr item = 0.0563
Model weights:
[-0.2049]
   [0.9666]]
Model bias:
[-2.2846]
使用经过训练的LR模型进行预测 (Prediction using trained LR Model)
Once the LR model has been trained, we can use it for prediction as follows −
一旦训练了LR模型,我们就可以将其用于预测,如下所示:
First of all, our evaluation program imports the numpy package and loads the training data into a feature matrix and a class label matrix in the same way as the training program we implement above −
首先,我们的评估程序导入numpy程序包,并将训练数据加载到特征矩阵和类标签矩阵中,方法与我们在上面实现的训练程序相同-
import numpy as np
def main():
data_file = ".\\dataLRmodel.txt" # provide the name and the location of data file
features_mat = np.loadtxt(data_file, dtype=np.float32, delimiter=",",
skiprows=0, usecols=(0,1))
labels_mat = np.loadtxt(data_file, dtype=np.float32, delimiter=",",
skiprows=0, usecols=[2], ndmin=2)
Next, it is time to set the values of the weights and the bias that were determined by our training program −
接下来,是时候设置由我们的训练计划确定的权重和偏差的值了-
print("Setting weights and bias values \n")
weights = np.array([0.0925, 1.1722], dtype=np.float32)
bias = np.array([-4.5400], dtype=np.float32)
N = len(features_mat)
features_dim = 2
Next our evaluation program will compute the logistic regression probability by walking through each training items as follows −
接下来,我们的评估程序将通过遍历每个训练项目来计算逻辑回归概率,如下所示:
print("item pred_prob pred_label act_label result")
for i in range(0, N): # each item
   x = features_mat[i]
   z = 0.0
   for j in range(0, features_dim):
   z += x[j] * weights[j]
   z += bias[0]
   pred_prob = 1.0 / (1.0 + np.exp(-z))
  pred_label = 0 if pred_prob < 0.5 else 1
   act_label = labels_mat[i]
   pred_str = ‘correct’ if np.absolute(pred_label - act_label) < 1.0e-5 \
    else ‘WRONG’
  print("%2d %0.4f %0.0f %0.0f %s" % \ (i, pred_prob, pred_label, act_label, pred_str))
Now let us demonstrate how to do prediction −
现在让我们演示如何进行预测-
x = np.array([9.5, 4.5], dtype=np.float32)
print("\nPredicting class for age, education = ")
print(x)
z = 0.0
for j in range(0, features_dim):
z += x[j] * weights[j]
z += bias[0]
p = 1.0 / (1.0 + np.exp(-z))
print("Predicted p = " + str(p))
if p < 0.5: print("Predicted class = 0")
else: print("Predicted class = 1")
完整的预测评估程序 (Complete prediction evaluation program)
import numpy as np
def main():
data_file = ".\\dataLRmodel.txt" # provide the name and the location of data file
features_mat = np.loadtxt(data_file, dtype=np.float32, delimiter=",",
skiprows=0, usecols=(0,1))
labels_mat = np.loadtxt(data_file, dtype=np.float32, delimiter=",",
skiprows=0, usecols=[2], ndmin=2)
print("Setting weights and bias values \n")
weights = np.array([0.0925, 1.1722], dtype=np.float32)
bias = np.array([-4.5400], dtype=np.float32)
N = len(features_mat)
features_dim = 2
print("item pred_prob pred_label act_label result")
for i in range(0, N): # each item
   x = features_mat[i]
   z = 0.0
   for j in range(0, features_dim):
     z += x[j] * weights[j]
   z += bias[0]
   pred_prob = 1.0 / (1.0 + np.exp(-z))
   pred_label = 0 if pred_prob < 0.5 else 1
   act_label = labels_mat[i]
   pred_str = ‘correct’ if np.absolute(pred_label - act_label) < 1.0e-5 \
     else ‘WRONG’
  print("%2d %0.4f %0.0f %0.0f %s" % \ (i, pred_prob, pred_label, act_label, pred_str))
x = np.array([9.5, 4.5], dtype=np.float32)
print("\nPredicting class for age, education = ")
print(x)
z = 0.0
for j in range(0, features_dim):
   z += x[j] * weights[j]
z += bias[0]
p = 1.0 / (1.0 + np.exp(-z))
print("Predicted p = " + str(p))
if p < 0.5: print("Predicted class = 0")
else: print("Predicted class = 1")
if __name__ == "__main__":
  main()
输出量 (Output)
Setting weights and bias values.
设置权重和偏差值。
Item  pred_prob  pred_label  act_label  result
0   0.3640         0             0     correct
1   0.7254         1             0      WRONG
2   0.2019         0             0     correct
3   0.3562         0             0     correct
4   0.0493         0             0     correct
5   0.1005         0             0     correct
6   0.7892         1             1     correct
7   0.8564         1             1     correct
8   0.9654         1             1     correct
9   0.7587         1             1     correct
10  0.3040         0             1      WRONG
11  0.7129         1             1     correct
Predicting class for age, education =
[9.5 4.5]
Predicting p = 0.526487952
Predicting class = 1
CNTK-神经网络(NN)概念 (CNTK - Neural Network (NN) Concepts)
This chapter deals with concepts of Neural Network with regards to CNTK.
本章讨论有关CNTK的神经网络概念。
As we know that, several layers of neurons are used for making a neural network. But, the question arises that in CNTK how we can model the layers of a NN? It can be done with the help of layer functions defined in the layer module.
众所周知,多层神经元被用于制造神经网络。 但是,出现的问题是,在CNTK中,我们如何对NN的各个层进行建模? 可以借助图层模块中定义的图层功能来完成。
图层功能 (Layer function)
Actually, in CNTK, working with the layers has a distinct functional programming feel to it. Layer function looks like a regular function and it produces a mathematical function with a set of predefined parameters. Let’s see how we can create the most basic layer type, Dense, with the help of layer function.
实际上,在CNTK中,使用这些层具有独特的功能编程感觉。 图层函数看起来像常规函数,它会生成带有一组预定义参数的数学函数。 让我们看看如何在图层功能的帮助下创建最基本的图层类型Dense。
例 (Example)
With the help of following basic steps, we can create the most basic layer type −
借助以下基本步骤,我们可以创建最基本的图层类型-
Step 1 − First, we need to import the Dense layer function from the layers’ package of CNTK.
步骤1-首先,我们需要从CNTK的图层包中导入Dense图层功能。
from cntk.layers import Dense
Step 2 − Next from the CNTK root package, we need to import the input_variable function.
步骤2-接下来从CNTK根包中,我们需要导入input_variable函数。
from cntk import input_variable
Step 3 − Now, we need to create a new input variable using the input_variable function. We also need to provide the its size.
步骤3-现在,我们需要使用input_variable函数创建一个新的输入变量。 我们还需要提供其大小。
feature = input_variable(100)
Step 4 − At last, we will create a new layer using Dense function along with providing the number of neurons we want.
步骤4-最后,我们将使用Dense函数创建一个新层,并提供所需的神经元数量。
layer = Dense(40)(feature)
Now, we can invoke the configured Dense layer function to connect the Dense layer to the input.
现在,我们可以调用已配置的Dense层函数以将Dense层连接到输入。
完整的实施示例 (Complete implementation example)
from cntk.layers import Dense
from cntk import input_variable
feature= input_variable(100)
layer = Dense(40)(feature)
自定义图层 (Customizing layers)
As we have seen CNTK provides us with a pretty good set of defaults for building NNs. Based on activation function and other settings we choose, the behavior as well as performance of the NN is different. It is another very useful stemming algorithm. That’s the reason, it is good to understand what we can configure.
 最低0.47元/天 解锁文章


 278
278


 被折叠的 条评论
为什么被折叠?
被折叠的 条评论
为什么被折叠?
 到【灌水乐园】发言


