


给个目标实现以下:
代码展示,
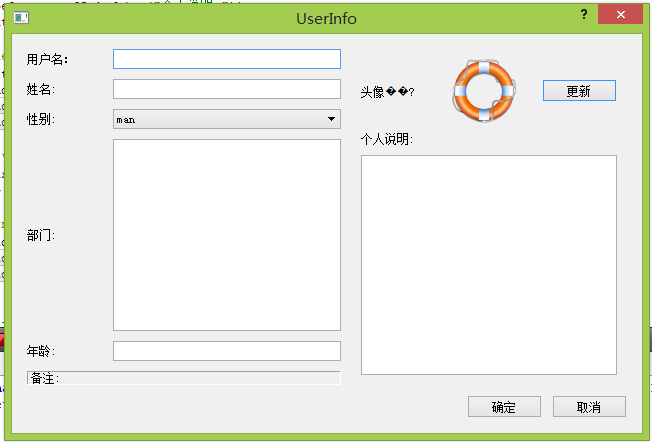
首先创建一个项目,不要界面,选择基类是QDialog这个,后面名字的话随便改改
我的类名是:UserInfo头文件dialog.h:
#ifndef DIALOG_H
#define DIALOG_H

#include <QDialog>
#include <QLabel>
#include <QLineEdit>
#include <QComboBox>    //多选行
#include <QTextEdit>
#include <QGridLayout>    //网格布局

class Dialog : public QDialog
{
  Q_OBJECT

public:
  Dialog(QWidget *parent = 0);
  ~Dialog();
private:
  //左边的布局使用的控件
  QLabel *UserNameLabel;    //用户名的label
  QLabel *NameLabel;  //名字标签
  QLabel *SexLabel;   //性别
  QLabel *DepartmentLabel;   //用户文本
  QLabel *AgeLabel; //年龄
  QLabel *OtherLabel; //其他备注
  QLineEdit *UserNameLineEdit;  //输入用户名的控件
  QLineEdit *NameLineEdit;  //名字
  QComboBox *SexComboBox; //性别
  QTextEdit *DepartmentTextEdit;  //部门
  QLineEdit *AgeLineEdit; //年龄
  QGridLayout *LeftLayout;    //网格布局


  //右边布局
  QLabel *HeadLabel;    //右上角
  QLabel *HeadIconLabel;  //图片
  QPushButton *UpdateHeadBtn;   //更新按钮
  QHBoxLayout *TopRightLayout;  //水平布局


  QLabel *IntroductionLabel;    //介绍信息
  QTextEdit *IntroductionTextEdit;
  QVBoxLayout *RightLayout;   //垂直布局


  //底部
  QPushButton *OkBtn;   //ok按钮
  QPushButton *CancelBtn;   //取消按钮
  QHBoxLayout *ButtomLayout;    //水平布局


};

#endif // DIALOG_H
定义文件
#include "dialog.h"
#include <QLabel>
#include <QLineEdit>
#include <QComboBox> //多选行
#include <QTextEdit>
#include <QGridLayout> //网格布局
#include <QFrame>
#include <QHBoxLayout>
#include <QPixmap>
#include <QPushButton>
Dialog::Dialog(QWidget *parent)
: QDialog(parent)
{
setWindowTitle(tr("UserInfo")); //设置窗口名字
/*************************************左侧************************************/
UserNameLabel = new QLabel(tr("用户名:"));
UserNameLineEdit = new QLineEdit;
NameLabel = new QLabel(tr("姓名:"));
NameLineEdit = new QLineEdit;
SexLabel = new QLabel(tr("性别:"));
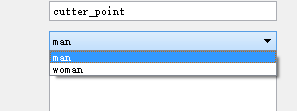
SexComboBox = new QComboBox;
SexComboBox->addItem(tr("man"));
SexComboBox->addItem(tr("woman"));
DepartmentLabel = new QLabel(tr("部门:"));
DepartmentTextEdit = new QTextEdit;
AgeLabel = new QLabel(tr("年龄:"));
AgeLineEdit = new QLineEdit;
OtherLabel = new QLabel(tr("备注:"));
OtherLabel->setFrameStyle(QFrame::Panel | QFrame::Sunken); //设置这个标签的展现形式,形状和阴影
LeftLayout = new QGridLayout();
//插入用户名
LeftLayout->addWidget(UserNameLabel, 0, 0);
LeftLayout->addWidget(UserNameLineEdit, 0, 1); //0行1列
//加入姓名
LeftLayout->addWidget(NameLabel, 1, 0);
LeftLayout->addWidget(NameLineEdit, 1, 1);
//性别
LeftLayout->addWidget(SexLabel, 2, 0);
LeftLayout->addWidget(SexComboBox, 2, 1);
//部门
LeftLayout->addWidget(DepartmentLabel, 3, 0);
LeftLayout->addWidget(DepartmentTextEdit, 3, 1);
//年龄
LeftLayout->addWidget(AgeLabel, 4, 0);
LeftLayout->addWidget(AgeLineEdit, 4, 1);
//其他
LeftLayout->addWidget(OtherLabel, 5, 0, 1, 2); //在第6行,1列,占用1行2列的大小
LeftLayout->setColumnStretch(0, 1);
LeftLayout->setColumnStretch(1, 3); //设置第0列和第1列比例是1:3
/*************************************右侧************************************/
HeadLabel = new QLabel(tr("头像: ")); //右上角部分
HeadIconLabel = new QLabel; //图像
QPixmap icon("312.png");
HeadIconLabel->setPixmap(icon);
HeadIconLabel->resize(icon.width(), icon.height()); //设置这个标签的大小
UpdateHeadBtn = new QPushButton(tr("更新")); //按钮
TopRightLayout = new QHBoxLayout();
TopRightLayout->setSpacing(20); //设置各个空间的间隔
TopRightLayout->addWidget(HeadLabel);
TopRightLayout->addWidget(HeadIconLabel);
TopRightLayout->addWidget(UpdateHeadBtn);
//右下角
IntroductionLabel = new QLabel(tr("个人说明:"));
IntroductionTextEdit = new QTextEdit;
RightLayout = new QVBoxLayout(); //垂直布局
RightLayout->setMargin(10); //设置对话框的边距是10
RightLayout->addLayout(TopRightLayout);
RightLayout->addWidget(IntroductionLabel);
RightLayout->addWidget(IntroductionTextEdit);
/*************************************底部************************************/
OkBtn = new QPushButton(tr("确定"));
CancelBtn = new QPushButton(tr("取消"));
ButtomLayout = new QHBoxLayout();
ButtomLayout->addStretch(); //在按钮之前插入一个占位符,使两个按钮右对齐,并保持按钮的大小不变
ButtomLayout->addWidget(OkBtn);
ButtomLayout->addWidget(CancelBtn);
/*-------------------------------------------------------------*/
QGridLayout *mainLayout = new QGridLayout(this); //整个页面的布局
mainLayout->setMargin(15); //设置对话框的边距是15
mainLayout->setSpacing(10); //设置各个空间的间距是10
mainLayout->addLayout(LeftLayout, 0, 0);
mainLayout->addLayout(RightLayout, 0, 1);
mainLayout->addLayout(ButtomLayout, 1, 0, 1, 2);
mainLayout->setSizeConstraint(QLayout::SetFixedSize); //设置最优化显示
}
Dialog::~Dialog()
{
}
主函数:
#include "dialog.h"
#include <QApplication>

int main(int argc, char *argv[])
{
  QApplication a(argc, argv);
  Dialog w;
  w.show();

  return a.exec();
}
结果展示:
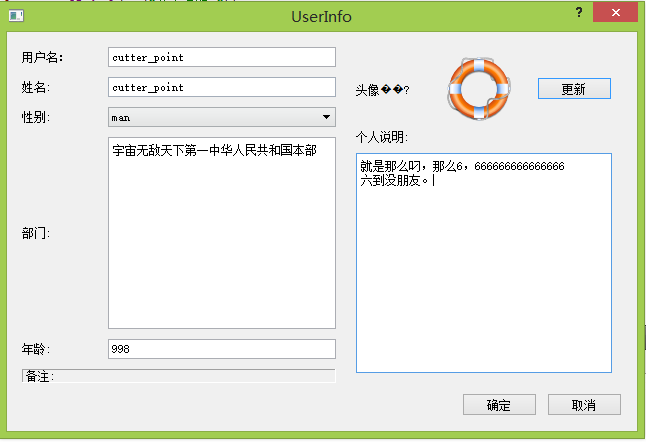
那个乱码不要问我为什么,我也不知道!!!


 119
119

 被折叠的 条评论
为什么被折叠?
被折叠的 条评论
为什么被折叠?
 到【灌水乐园】发言


