


本项目选型默认使用vue3 + typescript + vite
1. 使用vite初始化项目
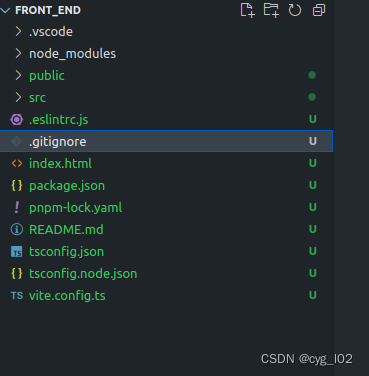
vite创建地址,创建完成后有一个基本的项目结构了,如下图
2. 配置vite.config.ts,配置详解
import { defineConfig } from 'vite'

import path from 'path';

import vue from '@vitejs/plugin-vue'

import vueJsx from '@vitejs/plugin-vue-jsx'


// https://vitejs.dev/config/

export default defineConfig({

  plugins: [vue(), vueJsx()],

  resolve: {

  //设置文件路径解析,需要配合tsconfig.json的paths结合解析

    alias: {

      '@': path.resolve(__dirname, 'src'),

      components: path.resolve(__dirname, 'src/components'),

    }

  },

  //相关打包配置

  build: {

    sourcemap: true,

    // Turning off gzip-compressed size display can slightly reduce packaging time

    reportCompressedSize: false,

    chunkSizeWarningLimit: 2000,

  },

  //服务器相关配置,vite3默认端口5173

  server: {

    host: true,

  }

})
发现报错了 Cannot find module path or its corresponding type declarations
那么需要安装@types/node并且在tsconfig.json中的types中添加’node’,如下配置
3. 配置tsconfig.json
{

  "compilerOptions": {

    "rootDir": ".", // 根目录地址

    "target": "ESNext", // 指定 ECMAScript 目标版本

    "useDefineForClassFields": true, // 对类字段使用定义

    "noImplicitAny": false, // 在表达式和声明上有隐含的 any类型时不报错

    "module": "ESNext", // 指定使用模块

    "moduleResolution": "Node", // 选择模块解析策略: 'node' (Node.js)

    "strict": true, // 启用所有严格类型检查选项

    "jsx": "preserve", // 指定 jsx 代码的生成

    "sourceMap": true, // 生成相应的 '.map' 文件

    "resolveJsonModule": true, // 解析 JSON 模块

    "isolatedModules": true, // 将每个文件作为单独的模块

    "esModuleInterop": true, // ES 模块互操作

    "lib": ["ESNext", "DOM"], // 指定要包含在编译中的库文件

    "skipLibCheck": true, // 过默认库检查

    "types": ["node", "naive-ui/volar"], // 需要包含的类型声明文件名列表

    "baseUrl": ".", // 用于解析非相对模块名称的基目录

    "importHelpers": true, // 导入帮助

    "strictNullChecks": true, // 启用严格的 null 检查

    "allowSyntheticDefaultImports": true, // 允许合成默认导入

    "allowJs": false, //允许js文件

    "noEmit": true, // 不要发出编译器输出文件

    "paths": { //路径映射

      "@/*": ["src/*"],

      "components/*": ["src/components/*"]

    }

  },

  //指定需要包含的文件

  "include": ["src/**/*.ts", "src/**/*.d.ts", "src/**/*.tsx", "src/**/*.vue"],

  "references": [{ "path": "./tsconfig.node.json" }] // 引用其他tsconfig配置,参考

}
4. 配置git提交检查
前端一般使用yorkie和husky来对git提交进行lint检查,差异可看yorkie的文档介绍
npm install yorkie lint-staged --save-dev

//在package.json中配置

"gitHooks": {

    "pre-commit": "lint-staged",

    "commit-msg": "node scripts/verifyCommit.js"

  },

 "lint-staged": {

    "*.{js,jsx,ts,tsx}": [

      "eslint --fix",

      "prettier --write"

    ],

    "package.json": [

      "prettier --write"

    ],

    "*.vue": [

      "eslint --fix",

      "prettier --write",

      "stylelint --fix"

    ],

    "*.{scss,less,styl,html}": [

      "stylelint --fix",

      "prettier --write"

    ],

    "*.md": [

      "prettier --write"

    ]

  }

scripts里面的erifyCommit.js和.github/commit-convention.md文件参考vue3
5. 配置eslint进行代码规范化
pnpm add -D eslint @antfu/eslint-config eslint-plugin-prettier eslint-config-prettier //直接安装使用即可

module.exports = {

  "extends": [

      "@antfu",

      "prettier" //eslint走prettier,关闭所有不必要或可能与Prettier冲突的规则,eslint-config-prettier

      "plugin:prettier/recommended" // 其实是一些已经配置好的规则插件等,使用recommended配置

  ]

}
6. 配置prettier进行代码格式化
prettier可配置规则
// prettier.config.js

module.exports = {

  printWidth: 120, // 设置每行显示最长的长度

  tabWidth: 2, // eslint/rules/indent 指定每个缩进级别的空格数

  useTabs: false, // 用 tabs 之后很多问
最低0.47元/天 解锁文章


 1724
1724


 被折叠的 条评论
为什么被折叠?
被折叠的 条评论
为什么被折叠?
 到【灌水乐园】发言


