


57-硅谷课堂3(讲师管理模块前端 + 腾讯云对象存储和课程分类管理)-- 笔记
笔记内容来源与尚硅谷教学视频
文章目录
笔记中涉及资源:
链接:https://pan.baidu.com/s/1fNdmp8CS9gx5K9QHoItsfQ
提取码:Coke
一、设置路由
①:修改路由
修改 src/router/index.js 文件,重新定义constantRouterMap
注意: 每个路由的name不能相同
export const constantRouterMap = [
{ path: '/login', component: () => import('@/views/login/index'), hidden: true },
{ path: '/404', component: () => import('@/views/404'), hidden: true },
// 首页
{
path: '/',
component: Layout,
redirect: '/dashboard',
name: 'Dashboard',
children: [{
path: 'dashboard',
component: () => import('@/views/dashboard/index'),
meta: { title: '硅谷课堂后台管理系统', icon: 'dashboard' }
}]
},
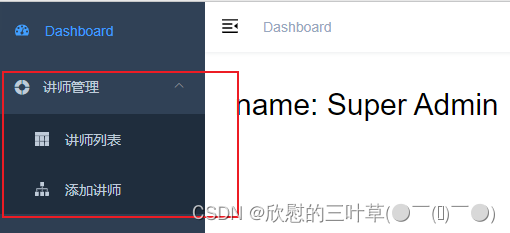
// 讲师管理
{
path: '/vod',
component: Layout,
redirect: '/vod/course/list',
name: 'Vod',
meta: {
title: '讲师管理',
icon: 'el-icon-bank-card'
},
alwaysShow: true,
children: [
{
path: 'teacher/list',
name: 'TeacherList',
component: () => import('@/views/vod/teacher/list'),
meta: { title: '讲师列表' }
},
{
path: 'teacher/create',
name: 'TeacherCreate',
component: () => import('@/views/vod/teacher/form'),
meta: { title: '添加讲师' },
hidden: true
},
{
path: 'teacher/edit/:id',
name: 'TeacherEdit',
component: () => import('@/views/vod/teacher/form'),
meta: { title: '编辑讲师' },
hidden: true
}
]
},
{ path: '*', redirect: '/404', hidden: true }
]
②:创建vue组件
在src/views文件夹下创建以下文件夹和文件
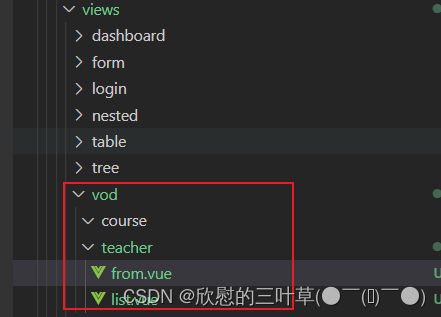
③:form.vue
<template>
  <div class="app-container">
    讲师表单
  </div>
</template>
④:list.vue
<template>
  <div class="app-container">
    讲师列表
  </div>
</template>
二、讲师分页列表
①:定义api
创建文件 src/api/vod/teacher.js
import request from '@/utils/request'
const path_profix = '/vod/teacher'

export default{
    // 定义讲师列表(根据条件查询并分页)
    // current当前页, limit每页记录数, searchObject条件对象
    pageList(current, limit, searchObject){
        return request({
            url: `${path_profix}/findQueryPage/${current}/${limit}`,
            method: 'post',
            // 使用普通格式传递 写法 params:searchObject
            // 使用json格式传递 写法 data:searchObject
            data: searchObject
          })
    }
}
②:初始化vue组件
src/views/vod/teacher/list.vue
<template>
  <div class="app-container">
    讲师列表
  </div>
</template>
<script>
import teacherApi from '@/api/vod/teacher'
export default {
  // 定义数据模型
  data() {
    return {
    }
  },
  // 页面渲染成功后获取数据
  created() {
    this.fetchData()
  },
  // 定义方法
  methods: {
    fetchData() {
    }
  }
}
</script>
③:定义data
  // 定义数据模型
  data() {
    return {
      list: [], // 讲师列表
      total: 0, // 总记录数
      page: 1, // 页码
      limit: 10, // 每页记录数
      searchObj: {}, // 查询条件
      multipleSelection: []// 批量删除选中的记录列表
    }
  },
④:定义methods
   methods:{ // 具体的方法
    fetchData(){
      // ajax
      teacherApi.pageList(this.page, this.limit, this.searchObject)
      .then(response => {
        console.log(response)
          this.list = response.data.records
          this.total = response.data.total
      })
    }
  }
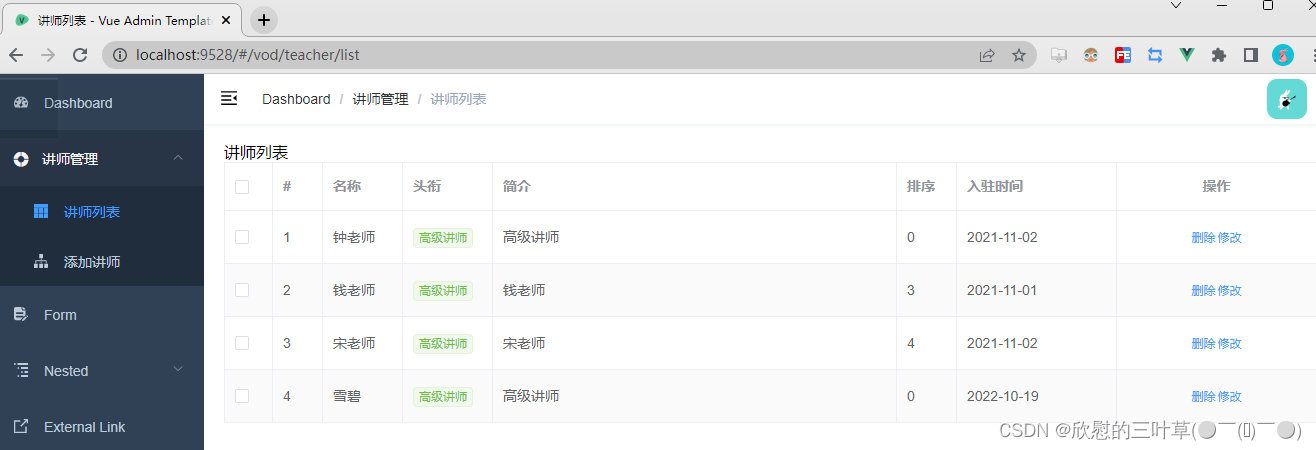
⑤:表格渲染
<!-- 表格 -->
<el-table
  :data="list"
  border
  stripe
  @selection-change="handleSelectionChange">
  <el-table-column type="selection"/>
  <el-table-column
    label="#"
    width="50">
    <template slot-scope="scope">
      {{ (page - 1) * limit + scope.$index + 1 }}
    </template>
  </el-table-column>
  <el-table-column prop="name" label="名称" width="80" />
  <el-table-column label="头衔" width="90">
    <template slot-scope="scope">
      <el-tag v-if="scope.row.level === 1" type="success" size="mini">高级讲师</el-tag>
      <el-tag v-if="scope.row.level === 0" size="mini">首席讲师</el-tag>
    </template>
  </el-table-column>
  <el-table-column prop="intro" label="简介" />
  <el-table-column prop="sort" label="排序" width="60" />
  <el-table-column prop="joinDate" label="入驻时间" width="160" />
  <el-table-column label="操作" width="200" align="center">
    <template slot-scope="scope">
      <el-button type="text" size="mini" @click="removeById(scope.row.id)">删除</el-button>
      <router-link :to="'/vod/teacher/edit/'+scope.row.id">
        <el-button type="text" size="mini">修改</el-button>
      </router-link>
    </template>
  </el-table-column>
</el-table>
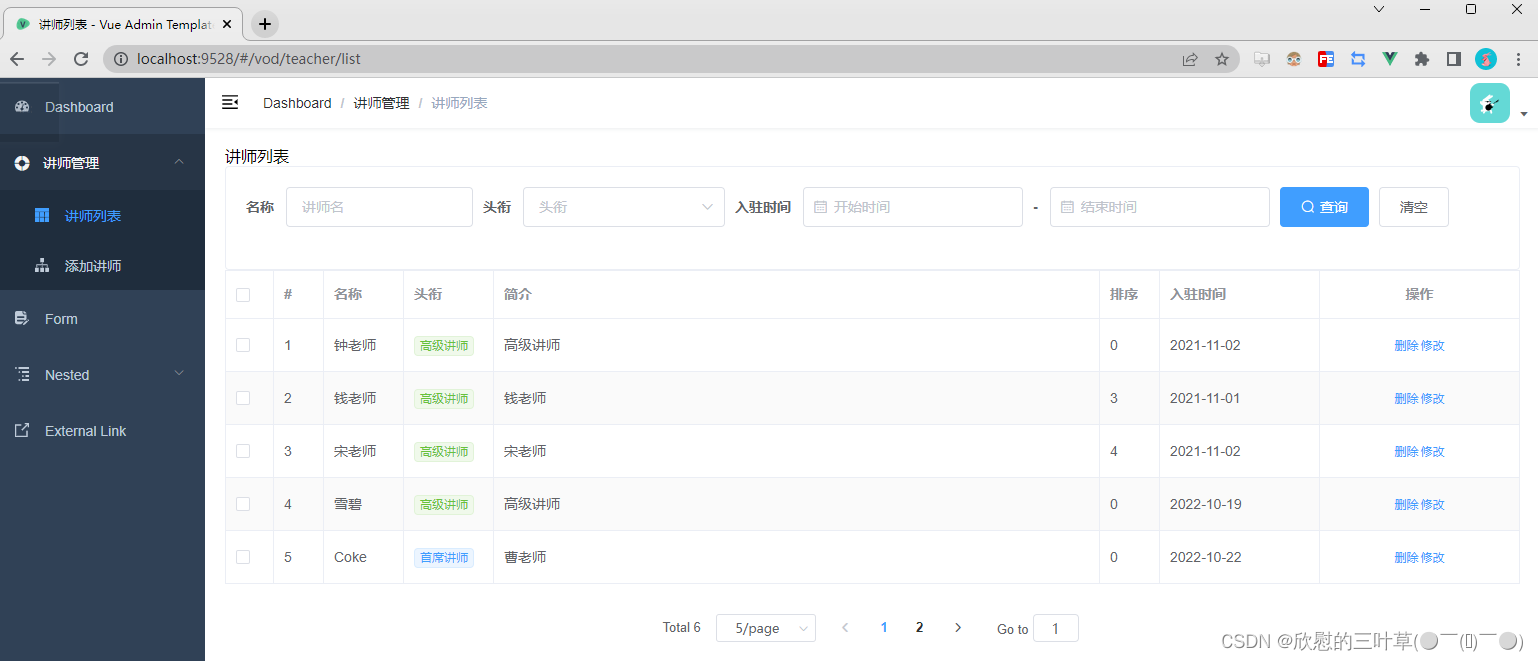
⑥:分页组件
  <!-- 分页组件 -->
  <el-pagination
    :current-page="page"
    :total="total"
    :page-size="limit"
    :page-sizes="[5, 10, 20, 30, 40, 50, 100]"
    style="padding: 30px 0; text-align: center;"
    layout="total, sizes, prev, pager, next, jumper"
    @size-change="changePageSize"
    @current-change="changeCurrentPage"
  />
⑦:顶部查询表单
    <!--查询表单-->
    <el-card class="operate-container" shadow="never">
      <el-form :inline="true" class="demo-form-inline">
        <el-form-item label="名称">
          <el-input v-model="searchObject.name" placeholder="讲师名" />
        </el-form-item>

        <el-form-item label="头衔">
          <el-select v-model="searchObject.level" clearable placeholder="头衔">
            <el-option value="1" label="高级讲师" />
            <el-option value="0" label="首席讲师" />
          </el-select>
        </el-form-item>

        <el-form-item label="入驻时间">
          <el-date-picker
            v-model="searchObject.joinDateBegin"
            placeholder="开始时间"
            value-format="yyyy-MM-dd"
          />
        </el-form-item>
        <el-form-item label="-">
          <el-date-picker
            v-model="searchObject.joinDateEnd"
            placeholder="结束时间"
            value-format="yyyy-MM-dd"
          />
        </el-form-item>

        <el-button type="primary" icon="el-icon-search" @click="fetchData()"
          >查询</el-button
        >
        <el-button type="default" @click="resetData()">清空</el-button>
      </el-form>
    </el-card>
分页和清空方法
    // 每页记录数改变,size:回调参数,表示当前选中的“每页条数”
    changePageSize(size) {
      this.limit = size
      this.fetchData()
    },

    // 改变页码,page:回调参数,表示当前选中的“页码”
    changeCurrentPage(page) {
      this.page = page
      this.fetchData()
    },

    // 重置表单
    resetData() {
      this.searchObj = {}
      this.fetchData()
    },
三、讲师删除
①:定义api
src/api/vod/teacher.js
    // 根据id删除讲师
    removeteacherId(id){
      return request({
        url: `${path_profix}/remove/${id}`,
        method: 'delete'
      })
    }
②:定义methods
src/views/vod/teacher/list.vue
使用MessageBox 弹框组件
    // 根据id删除讲师
    removeTeacherById(id) {
      this.$confirm("此操作将删除该讲师信息, 是否继续?", "提示", {
        confirmButtonText: "确定",
        cancelButtonText: "取消",
        type: "warning",
      })
        .then(() => {
          // 调用接口删除
          teacherApi.removeTeacherById(id)
          .then(response => {
            // 提示
            this.$message({
            type: "success",
            message: "删除成功!",
            });
            // 刷新
            this.fetchData()
          })
        })
    }
四、讲师新增
①:定义api
src/api/vod/teacher.js
    // 添加讲师
    saveTeacher(teacher){
      return request({
        url: `${path_profix}/saveTeacher`,
        method: 'post',
        data: teacher
      })
    }
②:初始化组件
src/views/vod/teacher/form.vue
<template>
  <div class="app-container">
    <!-- 输入表单 -->
    <el-form label-width="120px">
      <el-form-item label="讲师名称">
        <el-input v-model="teacher.name" />
      </el-form-item>
      <el-form-item label="入驻时间">
        <el-date-picker v-model="teacher.joinDate" value-format="yyyy-MM-dd" />
      </el-form-item>
      <el-form-item label="讲师排序">
        <el-input-number v-model="teacher.sort" :min="0"/>
      </el-form-item>
      <el-form-item label="讲师头衔">
        <el-select v-model="teacher.level">
          <!--
            数据类型一定要和取出的json中的一致,否则没法回填
            因此,这里value使用动态绑定的值,保证其数据类型是number
            -->
          <el-option :value="1" label="高级讲师"/>
          <el-option :value="2" label="首席讲师"/>
        </el-select>
      </el-form-item>
      <el-form-item label="讲师简介">
        <el-input v-model="teacher.intro"/>
      </el-form-item>
      <el-form-item label="讲师资历">
        <el-input v-model="teacher.career" :rows="10" type="textarea"/>
      </el-form-item>

      <!-- 讲师头像 -->
      <el-form-item label="讲师头像">
      </el-form-item>

      <el-form-item>
        <el-button type="primary" @click="saveOrUpdate()">保存</el-button>
      </el-form-item>
    </el-form>
  </div>
</template>
③:实现新增功能
<script>
import teacherApi from '@/api/vod/teacher'
export default {
  data() {
    return {
      BASE_API: 'http://localhost:8301',
      // 初始化讲师默认数据
      teacher: {
        sort: 0,
        level: 1
      },
      saveBtnDisabled: false // 保存按钮是否禁用,防止表单重复提交
    }
  },
  // 页面渲染成功
  created() {

  },
  methods: {
    saveOrUpdate() {
    // 禁用保存按钮
      this.saveBtnDisabled = true
      if (!this.teacher.id) {
        this.saveData()
      } else {
        this.updateData()
      }
    },
    // 新增讲师
    saveData() {
    // debugger
      teacherApi.save(this.teacher).then(response => {
        this.$message({
          type: 'success',
          message: response.message
        })
        this.$router.push({ path: '/vod/teacher/list' })
      })
    },
    // 根据id更新记录
    updateData() {

    }
  }
}
</script>

<style scoped>
  .avatar-uploader .avatar-uploader-icon {
    border: 1px dashed #d9d9d9;
    border-radius: 6px;
    cursor: pointer;
    position: relative;
    overflow: hidden;

    font-size: 28px;
    color: #8c939d;
    width: 178px;
    height: 178px;
    line-height: 178px;
    text-align: center;
  }
  .avatar-uploader .avatar-uploader-icon:hover {
    border-color: #409EFF;
  }
  .avatar-uploader img {
    width: 178px;
    height: 178px;
    display: block;
  }
</style>
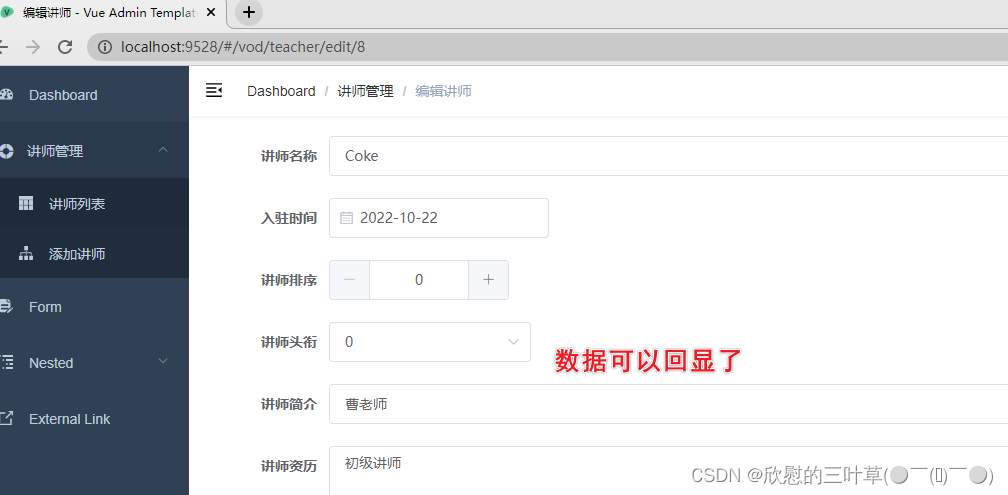
五、讲师修改-数据回显
①:修改路由
vue-admin-template\src\router\index.js
      {
        path: 'teacher/edit/:id',
        name: 'TeacherEdit',
        component: () => import('@/views/vod/teacher/from'),
        meta: { title: '编辑讲师' },
        hidden: true
      }
②:定义api
src/api/vod/teacher.js
    // 根据id查询讲师
    getTeacherById(id){
      return request({
        url: `${path_profix}/${id}`,
        method: 'get'
      })
    }
③:组件中调用api
methods中定义fetchDataById
// 根据id查询记录
fetchDataById(id) {
	teacherApi.getById(id).then(response => {
		this.teacher = response.data
	})
},
④:页面渲染前调用fetchDataById
  // 页面渲染成功
  created() {
    if (this.$route.params.id) {
      this.fetchDataById(this.$route.params.id)
    }
  },
六、讲师修改-更新
①:定义api
  updateById(teacher) {
    return request({
      url: `${api_name}`,
      method: `put`,
      data: teacher
    })
  },
②:组件中调用api
methods中定义updateData
// 根据id更新记录
updateData() {
  // teacher数据的获取
  teacherApi.updateById(this.teacher).then(response => {
    this.$message({
      type: 'success',
      message: response.message
    })
    this.$router.push({ path: '/vod/teacher/list' })
  })
},
③:完善saveOrUpdate方法
saveOrUpdate() {
	// 禁用保存按钮
  	this.saveBtnDisabled = true
  	if (!this.teacher.id) {
    	this.saveData()
  	} else {
    	this.updateData()
  	}
},
七、讲师批量删除
①:定义api
src/api/vod/teacher.js
batchRemove(idList) {
  return request({
    url: `${api_name}/batch-remove`,
    method: `delete`,
    data: idList
  })
},
②:初始化组件
src/views/vod/teacher/list.vue
在table组件上添加 批量删除 按钮
<!-- 工具按钮 -->
<el-card class="operate-container" shadow="never">
  <i class="el-icon-tickets" style="margin-top: 5px"></i>
  <span style="margin-top: 5px">数据列表</span>
  <el-button class="btn-add" @click="add()" style="margin-left: 10px;">添加</el-button>
  <el-button class="btn-add" @click="batchRemove()" >批量删除</el-button>
</el-card>
在table组件上添加复选框
<!-- 表格 -->
<el-table
  :data="list"
  border
  stripe
  @selection-change="handleSelectionChange">
  <el-table-column type="selection"/>
点击添加按钮实现跳转
  methods: {
    // 添加界面跳转
    add(){
      this.$router.push({path: "/vod/teacher/create"})
    },
}
③:实现功能
data定义数据
multipleSelection: []// 批量删除选中的记录列表
完善方法
    // 批量删除讲师
    handleSelectionChange(selection){
      this.multipleSelection = selection
    },
    batchRemove(){
      if(this.multipleSelection.length == 0){
        this.$message.warning('请选择要删除的记录!')
        return
      }
      this.$confirm("此操作将删除该讲师信息, 是否继续?", "提示", {
        confirmButtonText: "确定",
        cancelButtonText: "取消",
        type: "warning",
      })
      .then(() => {
        // 遍历selection,将id取出放入id列表
        var idList = []
        this.multipleSelection.forEach(item => {
          idList.push(item.id)
        })
        console.log(idList)
        // 调用接口删除
        teacherApi.batchRemove(idList)
          .then(response => {
            // 提示
            this.$message({
            type: "success",
            message: "删除成功!",
            });
            // 刷新
            this.fetchData()
          })
        })
    }
八、讲师管理模块整合腾讯云对象存储
①:腾讯云对象存储介绍
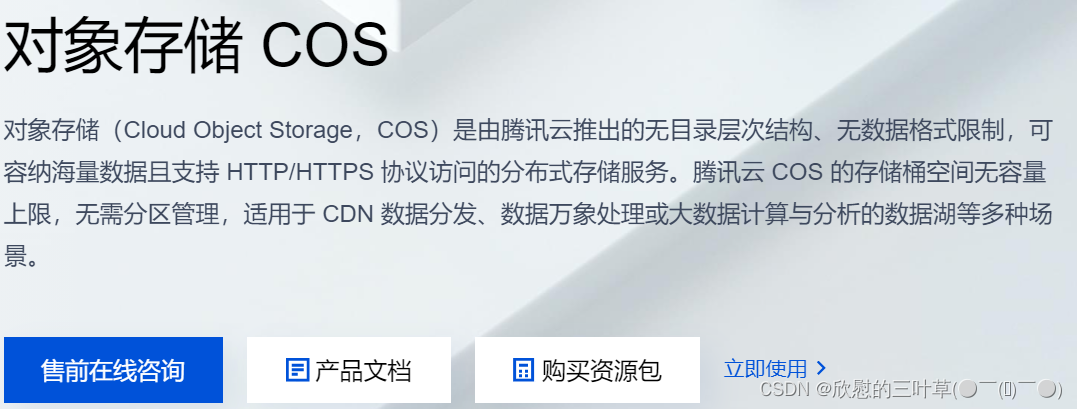
1. 开通“对象存储COS”服务
(1)申请腾讯云账号:https://cloud.tencent.com/
(2)实名认证
(3)开通“对象存储COS”服务
(4)进入管理控制台
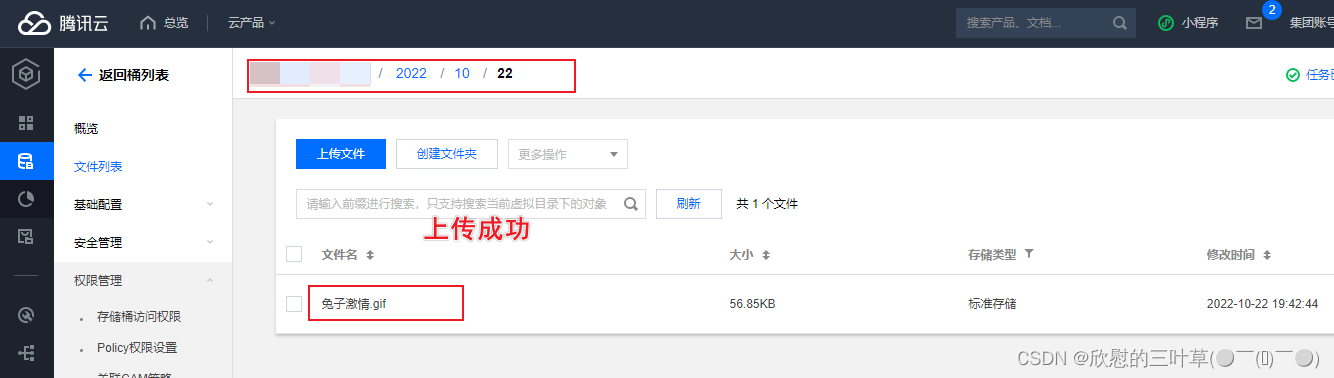
2. 创建Bucket
进入管理控制台,找到存储桶列表, 创建存储桶
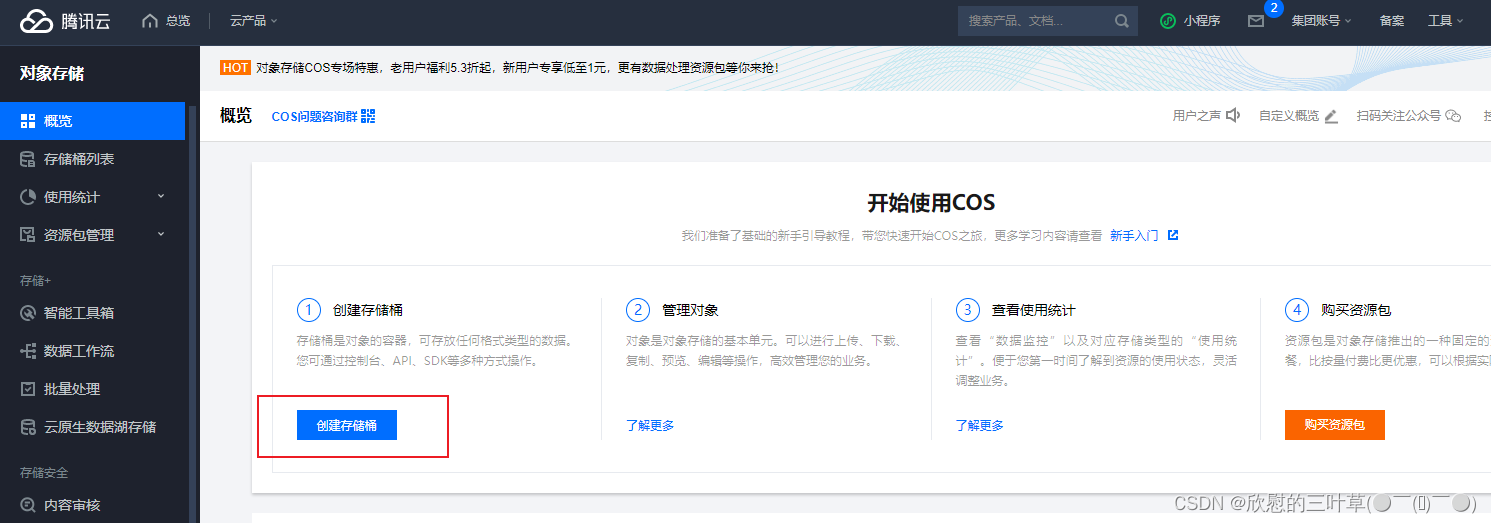
输入桶名称,选择:公有读取,其他默认
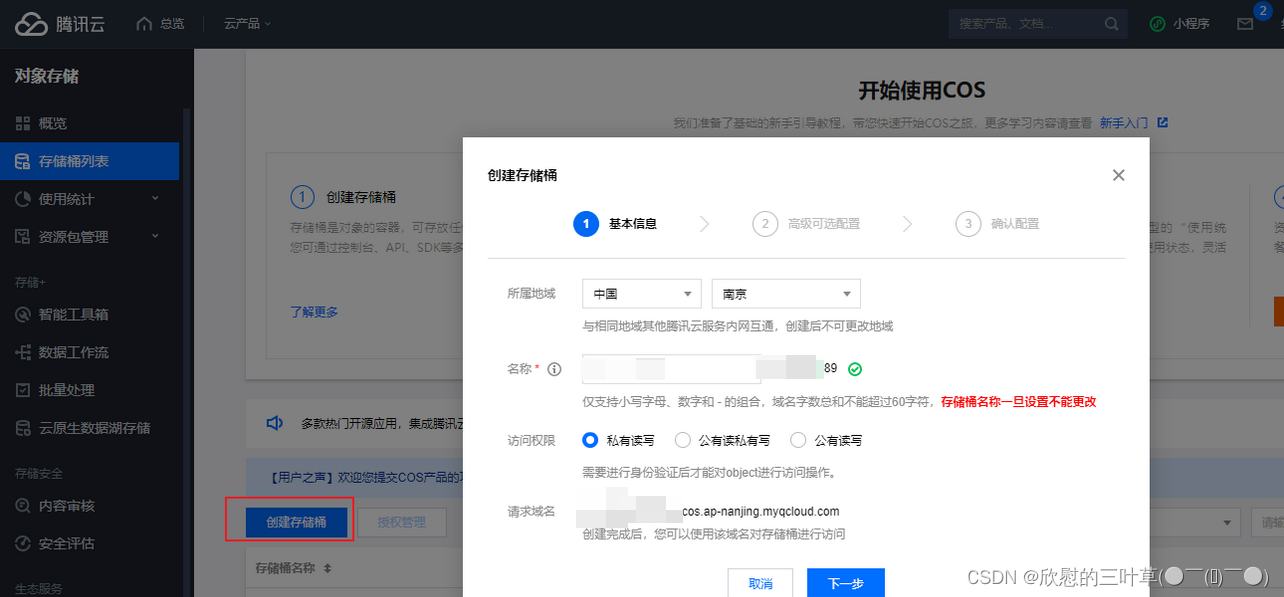
点击 桶名称,进入详情页,可测试上传文件
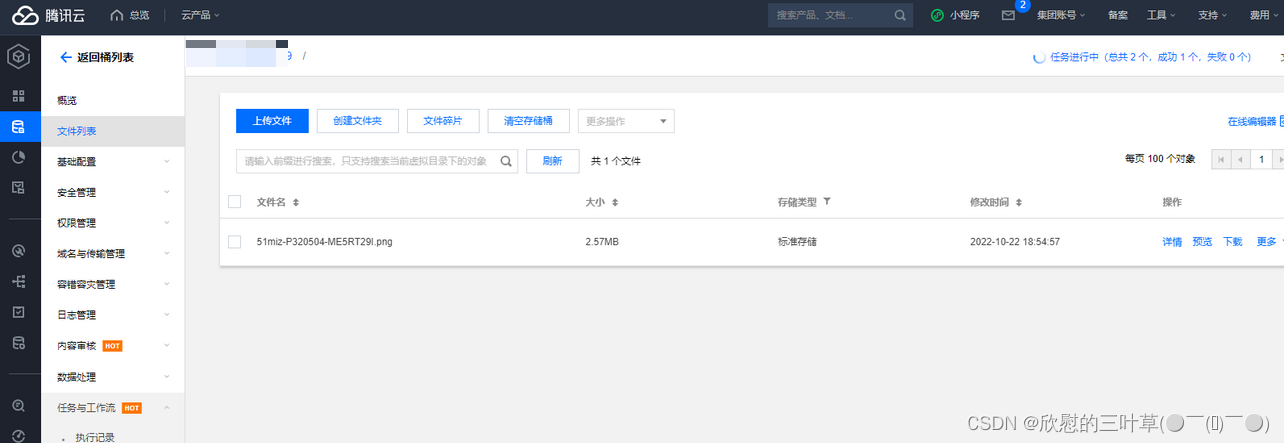
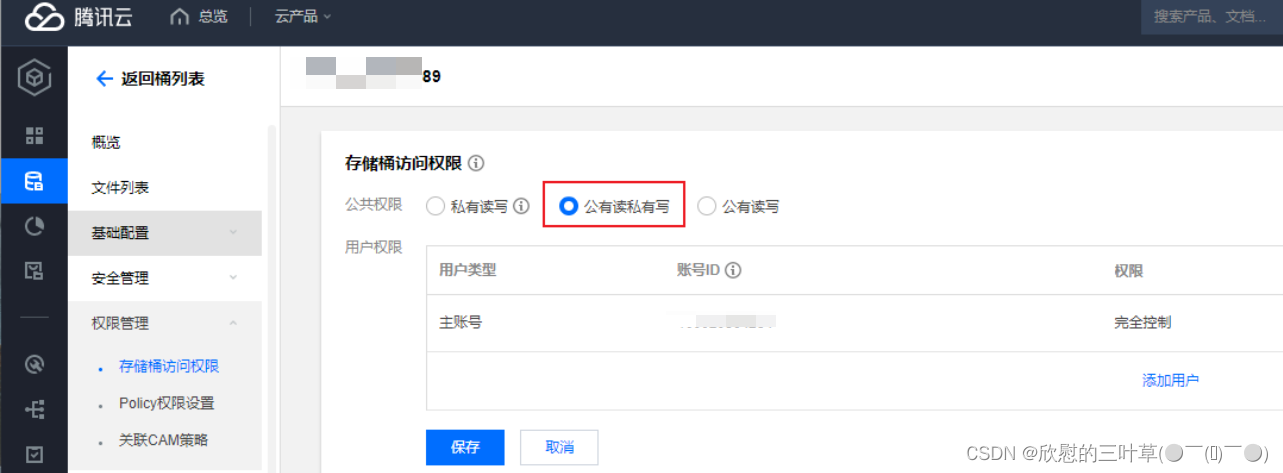
修改访问权限
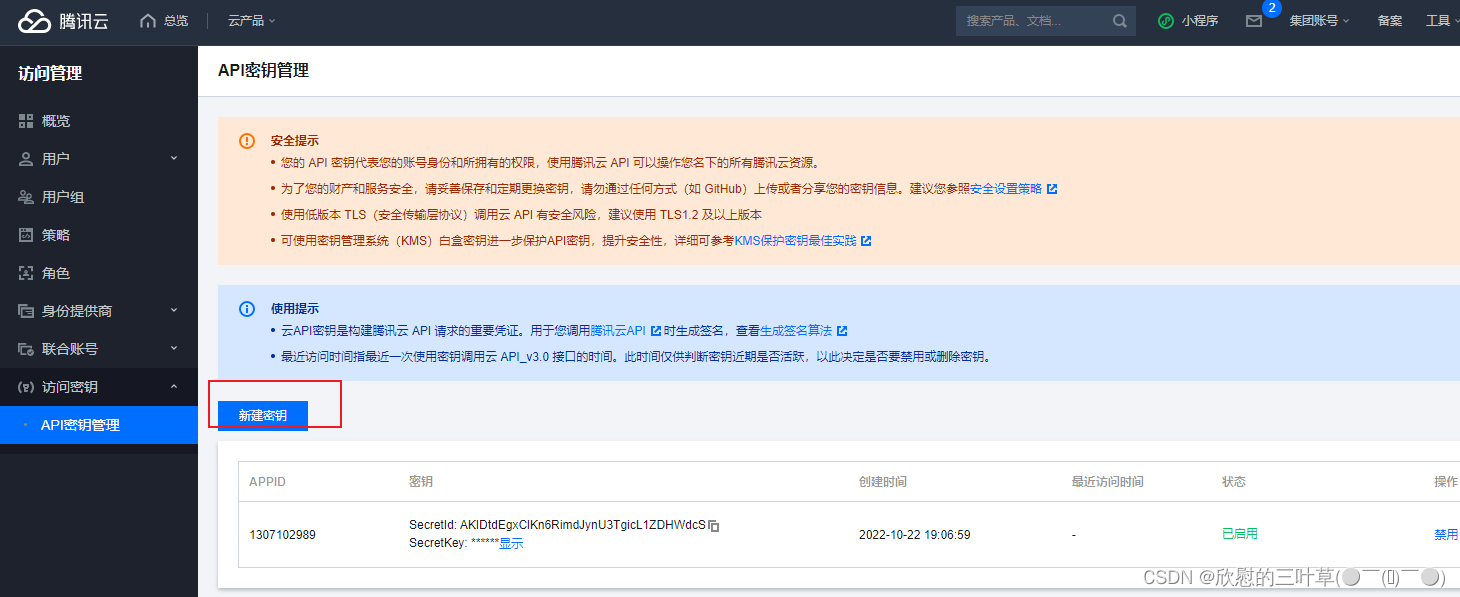
3. 创建API秘钥
进入API秘钥管理
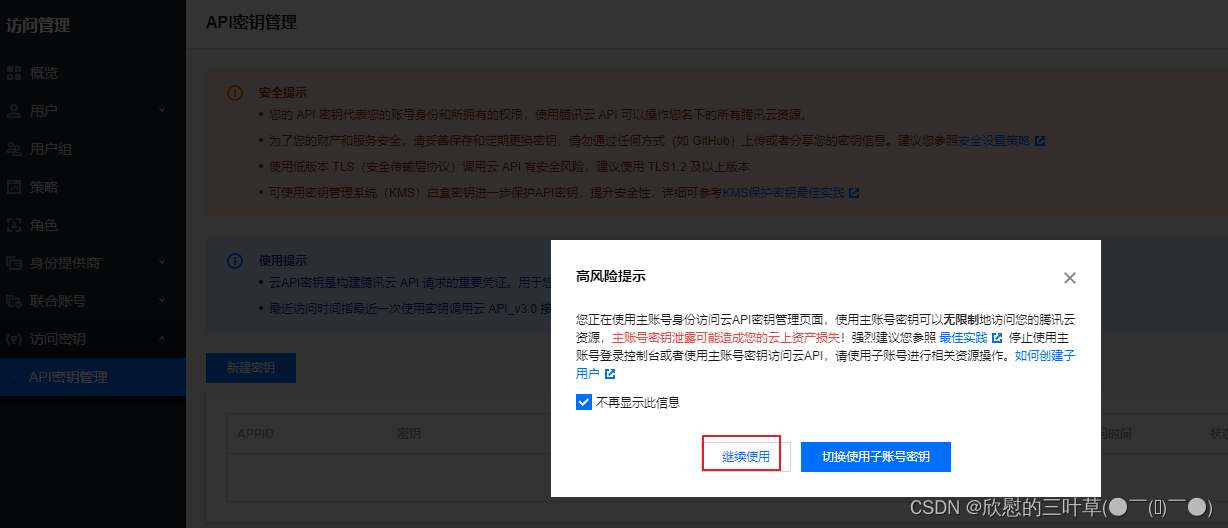
新建秘钥
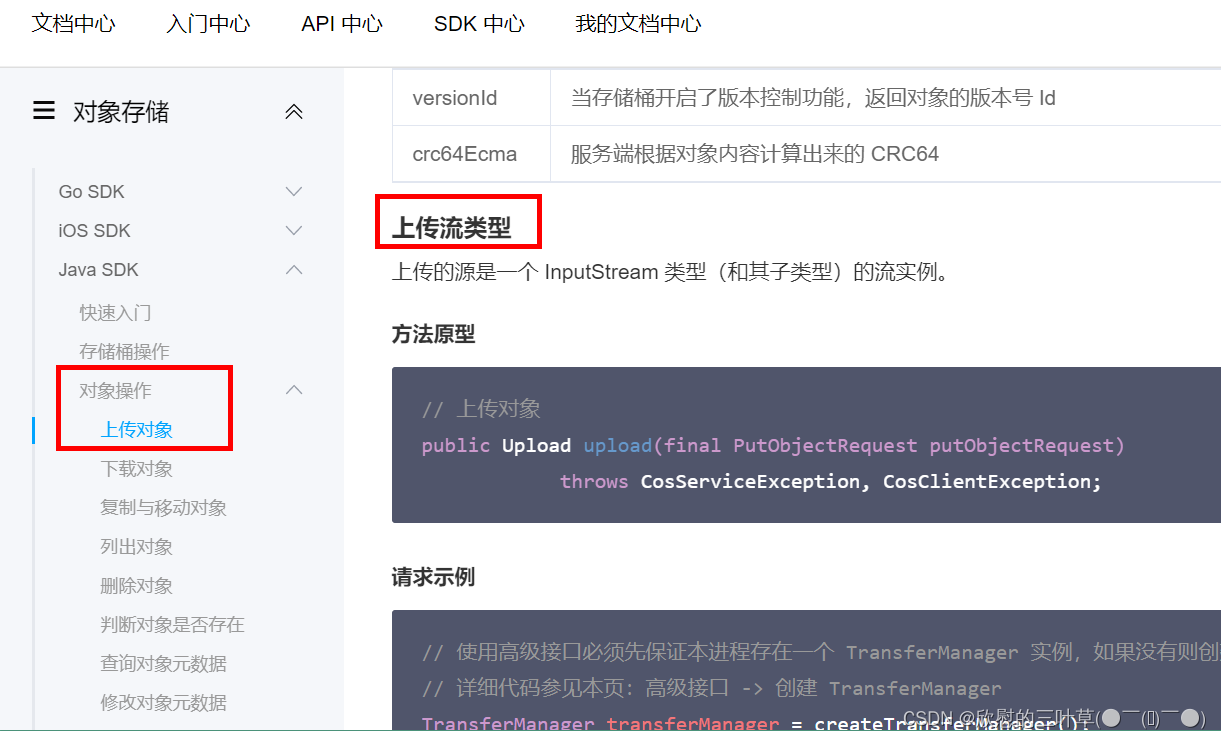
4. 快速入门
参考文档:https://cloud.tencent.com/document/product/436/10199
引入依赖(service_vod)
<dependency>
       <groupId>com.qcloud</groupId>
       <artifactId>cos_api</artifactId>
       <version>5.6.54</version>
</dependency>
测试上传
import com.alibaba.fastjson.JSON;
import com.qcloud.cos.COSClient;
import com.qcloud.cos.ClientConfig;
import com.qcloud.cos.auth.BasicCOSCredentials;
import com.qcloud.cos.auth.COSCredentials;
import com.qcloud.cos.exception.CosClientException;
import com.qcloud.cos.exception.CosServiceException;
import com.qcloud.cos.http.HttpProtocol;
import com.qcloud.cos.model.*;
import com.qcloud.cos.region.Region;

import java.io.File;

public class FileTest {

    public static void main(String[] args) {
        // 1 初始化用户身份信息(secretId, secretKey)。
        // SECRETID和SECRETKEY请登录访问管理控制台 https://console.cloud.tencent.com/cam/capi 进行查看和管理
        String secretId = "你的secretId";
        String secretKey = "你的secretKey";
        COSCredentials cred = new BasicCOSCredentials(secretId, secretKey);
        // 2 设置 bucket 的地域, COS 地域的简称请参照 https://cloud.tencent.com/document/product/436/6224
        // clientConfig 中包含了设置 region, https(默认 http), 超时, 代理等 set 方法, 使用可参见源码或者常见问题 Java SDK 部分。
        Region region = new Region("ap-nanjing");
        ClientConfig clientConfig = new ClientConfig(region);
        // 这里建议设置使用 https 协议
        // 从 5.6.54 版本开始,默认使用了 https
        clientConfig.setHttpProtocol(HttpProtocol.https);
        // 3 生成 cos 客户端。
        COSClient cosClient = new COSClient(cred, clientConfig);

        try{
            // 指定要上传的文件
            File localFile = new File("C:\Users\cao15\Pictures\Camera Roll\兔子激情.gif");
            // 指定文件将要存放的存储桶
            String bucketName = "你的bucketName";
            // 指定文件上传到 COS 上的路径,即对象键。例如对象键为folder/picture.jpg,则表示将文件 picture.jpg 上传到 folder 路径下
            String key = "2022/10/22/兔子激情.gif";
            PutObjectRequest putObjectRequest = new PutObjectRequest(bucketName, key, localFile);
            PutObjectResult putObjectResult = cosClient.putObject(putObjectRequest);
            System.out.println(JSON.toJSONString(putObjectResult));
        } catch (Exception clientException) {
            clientException.printStackTrace();
        }

    }
}
②:整合腾讯云对象存储
1. service_vod模块引入依赖
<dependencies>
    <!-- 腾讯云COS依赖 -->
    <dependency>
        <groupId>com.qcloud</groupId>
        <artifactId>cos_api</artifactId>
        <version>5.6.54</version>
    </dependency>
    <!-- 日期工具栏依赖 -->
    <dependency>
        <groupId>joda-time</groupId>
        <artifactId>joda-time</artifactId>
    </dependency>
</dependencies>
2. 配置application.properties
添加如下内容:
spring.servlet.multipart.max-file-size=1024MB
spring.servlet.multipart.max-request-size=1024MB

#不同的服务器,地址不同
tencent.cos.file.region=ap-beijing
tencent.cos.file.secretid=你的id
tencent.cos.file.secretkey=你的key
#bucket可以在控制台创建,也可以使用java代码创建
tencent.cos.file.bucketname=你的bucketName
3. 创建工具类
/**
 * 常量类,读取配置文件application.properties中的配置
 */
@Component
public class ConstantPropertiesUtil implements InitializingBean {

    @Value("${tencent.cos.file.region}")
    private String region;

    @Value("${tencent.cos.file.secretid}")
    private String secretId;

    @Value("${tencent.cos.file.secretkey}")
    private String secretKey;

    @Value("${tencent.cos.file.bucketname}")
    private String bucketName;

    public static String END_POINT;
    public static String ACCESS_KEY_ID;
    public static String ACCESS_KEY_SECRET;
    public static String BUCKET_NAME;

    @Override
    public void afterPropertiesSet() throws Exception {
        END_POINT = region;
        ACCESS_KEY_ID = secretId;
        ACCESS_KEY_SECRET = secretKey;
        BUCKET_NAME = bucketName;
    }
}
4. 创建Service
创建Interface:FileService.java
public interface FileService {
    //文件上传
    String upload(MultipartFile file);
}
实现:FileServiceImpl.java
@Service
public class FileServiceImpl implements FileService {
    @Override
    public String upload(MultipartFile file) {
        // Endpoint以杭州为例,其它Region请按实际情况填写。
        String endpoint = ConstantPropertiesUtil.END_POINT;

        String bucketName = ConstantPropertiesUtil.BUCKET_NAME;
        // 1 初始化用户身份信息(secretId, secretKey)。
        String secretId = ConstantPropertiesUtil.ACCESS_KEY_ID;
        String secretKey = ConstantPropertiesUtil.ACCESS_KEY_SECRET;
        COSCredentials cred = new BasicCOSCredentials(secretId, secretKey);

        // 2 设置 bucket 的地域
        // clientConfig 中包含了设置 region, https(默认 http),超时, 代理等 set 方法
        Region region = new Region(ConstantPropertiesUtil.END_POINT);
        ClientConfig clientConfig = new ClientConfig(region);
        // 这里建议设置使用 https 协议
        // 从 5.6.54 版本开始,默认使用了 https
        clientConfig.setHttpProtocol(HttpProtocol.https);
        // 3 生成 cos 客户端。
        COSClient cosClient = new COSClient(cred, clientConfig);

        try{
            // 指定要上传的文件
            InputStream inputStream = file.getInputStream();
            // 指定文件将要存放的存储桶
            // 指定文件上传到 COS 上的路径,即对象键。例如对象键为folder/picture.jpg,则表示将文件 picture.jpg 上传到 folder 路径下
            String key = UUID.randomUUID().toString().replaceAll("-","")+
                    file.getOriginalFilename();
            String dateUrl = new DateTime().toString("yyyy/MM/dd");
            key = dateUrl+"/"+key;

            ObjectMetadata objectMetadata = new ObjectMetadata();
            PutObjectRequest putObjectRequest =
                    new PutObjectRequest(bucketName, key, inputStream,objectMetadata);
            PutObjectResult putObjectResult = cosClient.putObject(putObjectRequest);
            System.out.println(JSON.toJSONString(putObjectResult));
            //https://ggkt-atguigu-1310644373.cos.ap-beijing.myqcloud.com/01.jpg
            String url = "https://"+bucketName+"."+"cos"+"."+endpoint+".myqcloud.com"+"/"+key;
            return url;
        } catch (Exception clientException) {
            clientException.printStackTrace();
            return null;
        }
    }
}
- 使用Swagger测试
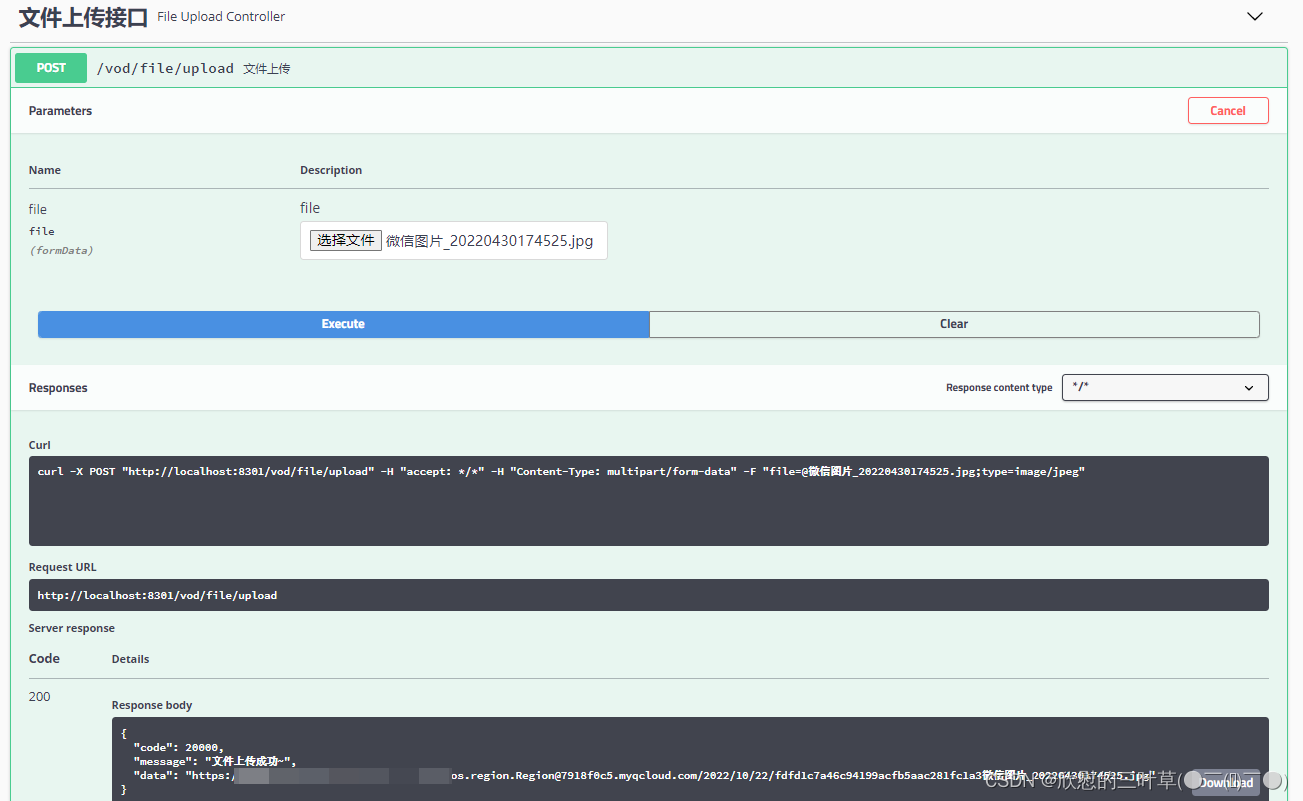
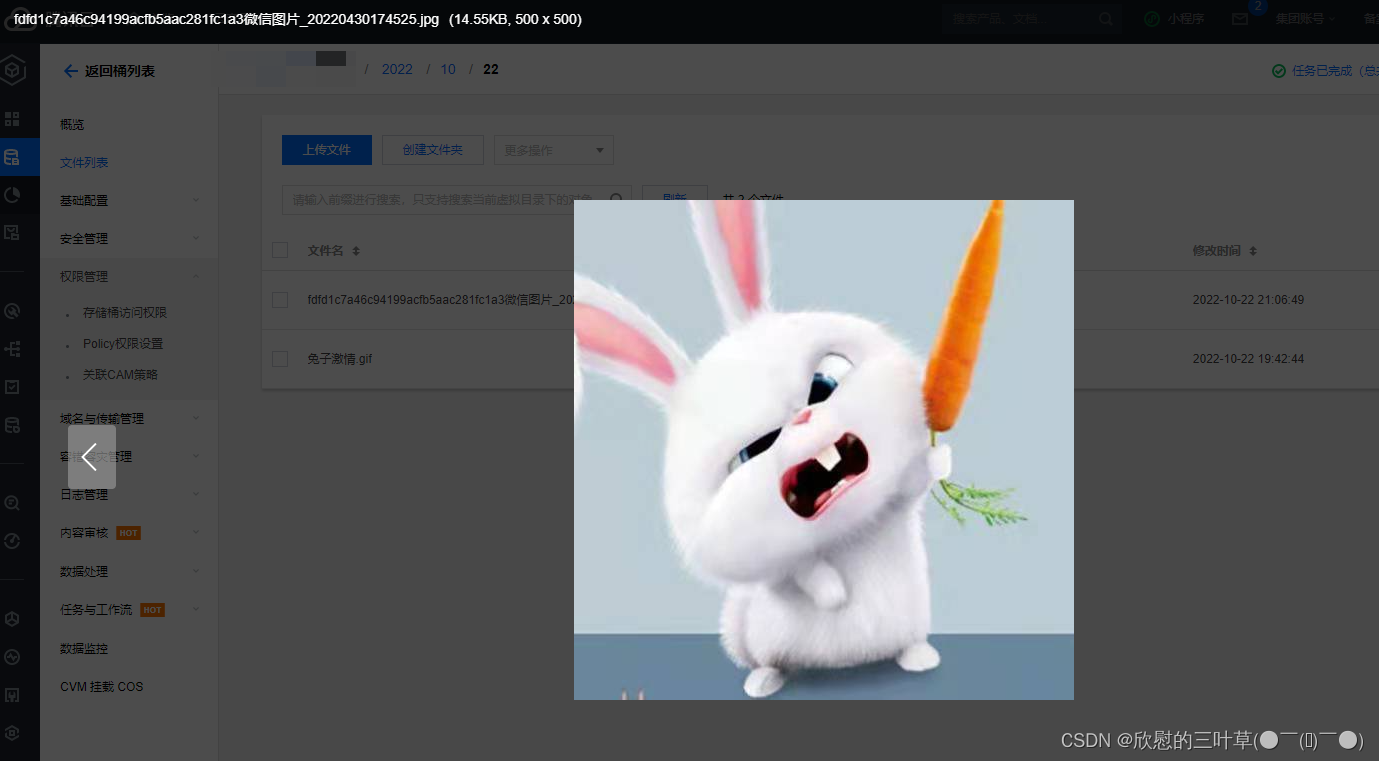
5. 创建Controller
FileUploadController.java
@Api(tags = "文件上传接口")
@RestController
@RequestMapping("/vod/file")
@CrossOrigin
public class FileUploadController {
    @Autowired
    private FileService fileService;
    /**
     * 文件上传
     */
    @ApiOperation(value = "文件上传")
    @PostMapping("upload")
    public Result upload(
            @ApiParam(name = "file", value = "文件", required = true)
            @RequestParam("file") MultipartFile file) {
        String uploadUrl = fileService.upload(file);
        return Result.ok(uploadUrl).message("文件上传成功");
    }
}
③:添加讲师前端完善
1. 添加上传组件
操作teacher目录下的form.vue页面
<!-- 讲师头像 -->
<el-form-item label="讲师头像">
  <el-upload
    :show-file-list="false"
    :on-success="handleAvatarSuccess"
    :before-upload="beforeAvatarUpload"
    :on-error="handleAvatarError"
    :action="BASE_API+'/admin/vod/file/upload?module=avatar'"
    class="avatar-uploader">
    <img v-if="teacher.avatar" :src="teacher.avatar">
    <i v-else class="el-icon-plus avatar-uploader-icon"/>
  </el-upload>
</el-form-item>
2. 添加上传方法
初始化访问路径
BASE_API: 'http://localhost:8301',
添加上传操作方法
// 上传成功回调
handleAvatarSuccess(res, file) {
  // console.log(res)
  if (res.code==200) {
    // console.log(res)
    this.teacher.avatar = res.data
    // 强制重新渲染
    this.$forceUpdate()
  } else {
    this.$message.error('上传失败 (非0)')
  }
},

// 错误处理
handleAvatarError() {
  console.log('error')
  this.$message.error('上传失败(http失败)')
},

// 上传校验
beforeAvatarUpload(file) {
  const isJPG = file.type === 'image/jpeg'
  const isLt2M = file.size / 1024 / 1024 < 2

  if (!isJPG) {
    this.$message.error('上传头像图片只能是 JPG 格式!')
  }
  if (!isLt2M) {
    this.$message.error('上传头像图片大小不能超过 2MB!')
  }
  return isJPG && isLt2M
}
九、后台管理系统-课程分类管理模块
①:课程分类管理模块需求
(1)课程分类列表功能
(2)课程分类导入功能
(3)课程分类导出功能
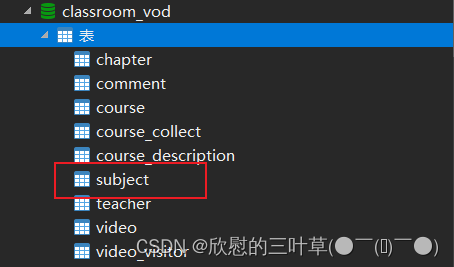
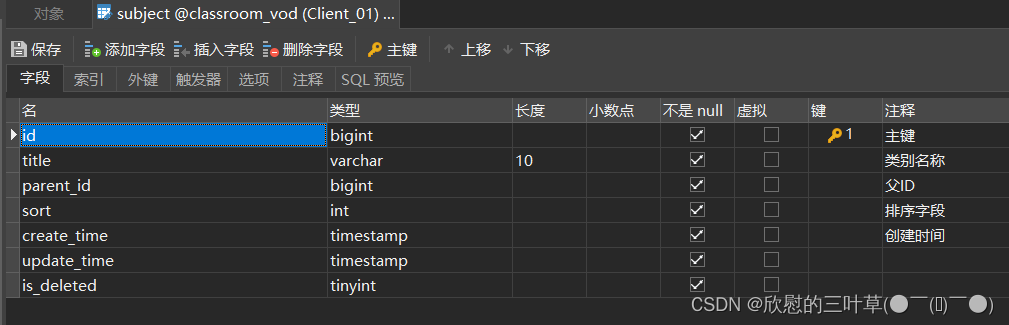
②:课程分类数据库设计
(1)创建课程分类表subject
(2)课程分类表结构分析
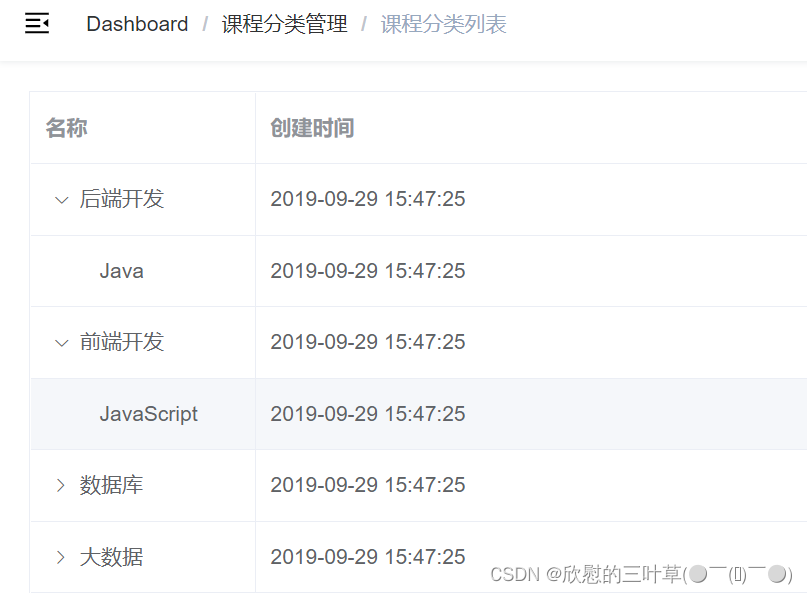
③:功能实现-课程分类列表
1. 接口实现分析
课程分类采用树形展示,我们使用“树形数据与懒加载”的方式展现数据列表,因此需要提供的接口如下:根据上级id获取下级数据,参考element-ui文档:https://element.eleme.cn/#/zh-CN/component/table,页面搜索:树形数据与懒加载


2. 编写SubjectController
@Api(tags = "课程分类管理")
@RestController
@RequestMapping(value="/admin/vod/subject")
//@CrossOrigin
public class SubjectController {

    @Autowired
    private SubjectService subjectService;

    //查询下一层课程分类
    //根据parent_id
    @ApiOperation("查询下一层的课程分类")
    @GetMapping("getChildSubject/{id}")
    public Result getChildSubject(@PathVariable Long id) {
        List<Subject> list = subjectService.selectList(id);
        return Result.ok(list);
    }
}
3. 编写SubjectService
public interface SubjectService extends IService<Subject> {

    //查询下一层课程分类
    List<Subject> findChildSubject(Long id);
}
4. 编写SubjectServiceImpl
- 方法一
@Service
public class SubjectServiceImpl extends ServiceImpl<SubjectMapper, Subject> implements SubjectService {

    //查询下一层课程分类
    @Override
    public List<Subject> selectList(Long id) {
        QueryWrapper<Subject> wrapper = new QueryWrapper<>();
        wrapper.eq("parent_id",id);
        List<Subject> subjectList = baseMapper.selectList(wrapper);
        //向list集合每个Subject对象中设置hasChildren
        for (Subject subject:subjectList) {
            Long subjectId = subject.getId();
            boolean isChild = this.isChildren(subjectId);
            subject.setHasChildren(isChild);
        }
        return subjectList;
    }
    //判断id下面是否有子节点
    private boolean isChildren(Long id) {
        QueryWrapper<Subject> wrapper = new QueryWrapper<>();
        wrapper.eq("parent_id",id);
        Integer count = baseMapper.selectCount(wrapper);
        return count>0;
    }
}
- 方法二
@Service
public class SubjectServiceImpl extends ServiceImpl<SubjectMapper, Subject> implements SubjectService {

    @Override
    public List<Subject> getNextSubject(Long id) {
        // SELECT * FROM `subject` WHERE parent_id = 0
        LambdaQueryWrapper<Subject> queryWrapper = new LambdaQueryWrapper<>();
        queryWrapper.eq(Subject ::getParentId,id);
        List<Subject> subjectList = baseMapper.selectList(queryWrapper);

        subjectList.stream().forEach(item -> {
            queryWrapper.clear();
            queryWrapper.eq(Subject ::getParentId,item.getId());
            //判断id下面是否有子节点
            Integer integer = baseMapper.selectCount(queryWrapper);
            //向list集合每个Subject对象中设置hasChildren
            item.setHasChildren(integer > 0);
        });
        return subjectList;
    }
}
5. 开发课程分类列表前端
(1)添加数据字典路由
修改router/index.js文件
  {
    path: '/subject',
    component: Layout,
    redirect: '/subject/list',
    name: '课程分类管理',
    alwaysShow: true,
    meta: { title: '课程分类管理', icon: 'example' },
    children: [
      {
        path: 'list',
        name: '课程分类列表',
        component: () => import('@/views/vod/subject/list'),
        meta: { title: '课程分类列表', icon: 'table' }
      }
    ]
  },
(2)定义数据字典列表接口
创建文件 src/api/vod/subject.js
import request from '@/utils/request'

const api_name = '/admin/vod/subject'

export default {
  getChildList(id) {
    return request({
      url: `${api_name}/getChildSubject/${id}`,
      method: 'get'
    })
  }
}
(3)编写subject/list.vue
<template>
    <div  class="app-container">
    <el-table
        :data="list"
        style="width: 100%"
        row-key="id"
        border
        lazy
        :load="load"
        :tree-props="{children: 'children', hasChildren: 'hasChildren'}">
        <el-table-column
        prop="title"
        label="名称"
        width="150">
        </el-table-column>
        <el-table-column
        prop="createTime"
        label="创建时间">
        </el-table-column>
    </el-table>
    </div>
</template>

<script>
import subjectApi from '@/api/vod/subject'
export default {
    data() {
        return {
            list:[] //数据字典列表数组
        }
    },
    created() {
        this.getSubList(0)
    },
    methods: {
        //数据字典列表
        getSubList(id) {
            subjectApi.getChildList(id)
                .then(response => {
                    this.list = response.data
                })
        },
        load(tree, treeNode, resolve) {
            subjectApi.getChildList(tree.id).then(response => {
                resolve(response.data)
            })
      }
    }
}
</script>
④:技术点-EasyExcel
1. EasyExcel介绍
官网:https://easyexcel.opensource.alibaba.com/docs/current/
EasyExcel是阿里巴巴开源的一个excel处理框架,以使用简单、节省内存著称。EasyExcel能大大减少占用内存的主要原因是在解析Excel时没有将文件数据一次性全部加载到内存中,而是从磁盘上一行行读取数据,逐个解析。
2. EasyExcel特点
- Java领域解析、生成Excel比较有名的框架有Apache poi、jxl等。但他们都存在一个严重的问题就是非常的耗内存。如果你的系统并发量不大的话可能还行,但是一旦并发上来后一定会OOM或者JVM频繁的full gc。
- EasyExcel采用一行一行的解析模式,并将一行的解析结果以观察者的模式通知处理(AnalysisEventListener)
- EasyExcel是一个基于Java的简单、省内存的读写Excel的开源项目。在尽可能节约内存的情况下支持读写百M的Excel。
3. EasyExcel写操作
(1)pom中引入xml相关依赖
<dependencies>
    <!-- https://mvnrepository.com/artifact/com.alibaba/easyexcel -->
    <dependency>
        <groupId>com.alibaba</groupId>
        <artifactId>easyexcel</artifactId>
        <version>2.1.1</version>
    </dependency>
</dependencies>
(2)创建实体类
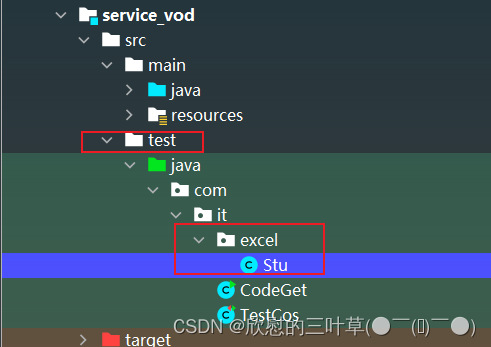
设置表头和添加的数据字段
@Data
public class Stu {
    //设置表头名称
    @ExcelProperty("学生编号")
    private int sno;
    //设置表头名称
    @ExcelProperty("学生姓名")
    private String sname;
}
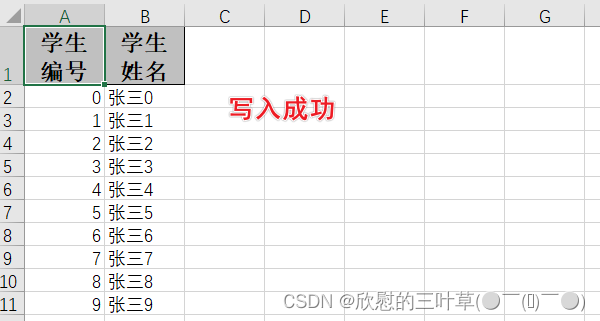
(3)实现写操作
创建测试方法循环设置要添加到Excel的数据
//循环设置要添加的数据,最终封装到list集合中
private static List<Stu> data() {
    List<Stu> list = new ArrayList<Stu>();
    for (int i = 0; i < 10; i++) {
        Stu data = new Stu();
        data.setSno(i);
        data.setSname("张三"+i);
        list.add(data);
    }
    return list;
}
实现最终的添加操作
public static void main(String[] args) throws Exception {
    // 写法1
    String fileName = "D:\\OOP\\java\\develop_idea\\09_IT_ClassRoom\\stu.xlsx";
    // 这里 需要指定写用哪个class去写,然后写到第一个sheet,名字为模板 然后文件流会自动关闭
    // 如果这里想使用03 则 传入excelType参数即可
    EasyExcel.write(fileName, DemoData.class).sheet("写入方法").doWrite(data());
}
4. EasyExcel读操作
(1)创建实体类
@Data
public class Stu {
    //设置表头名称
    //设置列对应的属性
    @ExcelProperty(value = "学生编号",index = 0)
    private int sno;
    //设置表头名称
    //设置列对应的属性
    @ExcelProperty(value = "学生姓名",index = 1)
    private String sname;
}
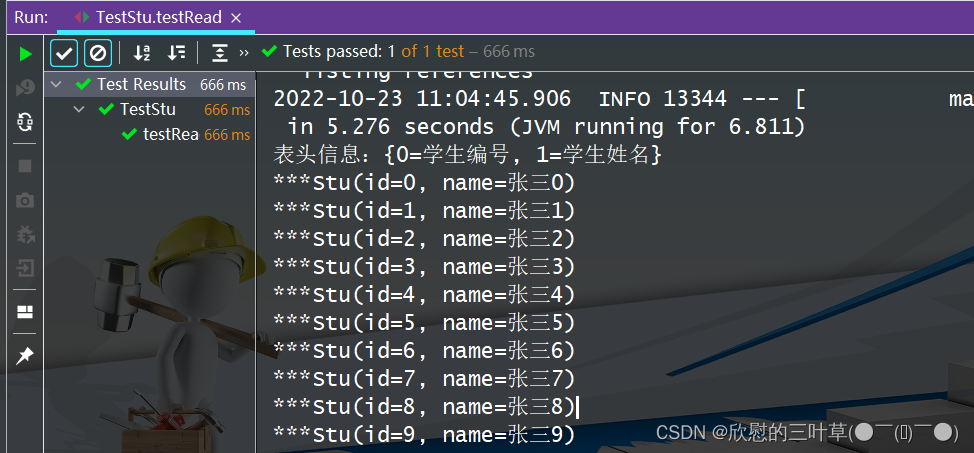
(2)创建读取操作的监听器
public class ExcelListener extends AnalysisEventListener<Stu> {
    //创建list集合封装最终的数据
    List<Stu> list = new ArrayList<Stu>();
    //一行一行去读取excle内容
    @Override
    public void invoke(Stu user, AnalysisContext analysisContext) {
        System.out.println("***"+user);
        list.add(user);
    }
    //读取excel表头信息
    @Override
    public void invokeHeadMap(Map<Integer, String> headMap, AnalysisContext context) {
        System.out.println("表头信息:"+headMap);
    }
    //读取完成后执行
    @Override
    public void doAfterAllAnalysed(AnalysisContext analysisContext) {
    }
}
(3)调用实现最终的读取
   public static void main(String[] args) throws Exception {
        String fileName = String fileName = "D:\\OOP\\java\\develop_idea\\09_IT_ClassRoom\\stu.xlsx";
        // 这里 需要指定读用哪个class去读,然后读取第一个sheet 文件流会自动关闭
        EasyExcel.read(fileName, Stu.class, new ExcelListener()).sheet().doRead();
}
⑤:功能实现-课程分类导出
1. 查看model实体类
在model模块查看实体:com.atguigu.ggkt.vo.vod.SubjectEeVo
@Data
public class SubjectEeVo {

  @ExcelProperty(value = "id" ,index = 0)
  private Long id;

  @ExcelProperty(value = "课程分类名称" ,index = 1)
  private String title;

  @ExcelProperty(value = "上级id" ,index = 2)
  private Long parentId;

  @ExcelProperty(value = "排序" ,index = 3)
  private Integer sort;
}
2. 编写SubjectService和实现
SubjectService
public interface SubjectService extends IService<Subject> {

    //查询下一层课程分类
    List<Subject> selectList(Long id);

    /**
     * 导出
     * @param response
     */
    void exportData(HttpServletResponse response);
}
SubjectServiceImpl
//课程分类导出
@Override
public void exportData(HttpServletResponse response) {
    try {
        response.setContentType("application/vnd.ms-excel");
        response.setCharacterEncoding("utf-8");
        // 这里URLEncoder.encode可以防止中文乱码 当然和easyexcel没有关系
        String fileName = URLEncoder.encode("课程分类", "UTF-8");
        response.setHeader("Content-disposition", "attachment;filename="+ fileName + ".xlsx");
        List<Subject> dictList = baseMapper.selectList(null);
        List<SubjectEeVo> dictVoList = new ArrayList<>(dictList.size());
        for(Subject dict : dictList) {
            SubjectEeVo dictVo = new SubjectEeVo();
            BeanUtils.copyProperties(dict,dictVo);
            dictVoList.add(dictVo);
        }
        EasyExcel.write(response.getOutputStream(), SubjectEeVo.class).sheet("课程分类").doWrite(dictVoList);
    } catch (IOException e) {
        e.printStackTrace();
    }
}
3. 添加Controller方法
@ApiOperation(value="导出")
@GetMapping(value = "/exportData")
public void exportData(HttpServletResponse response) {
    subjectService.exportData(response);
}
4. 数据字典导出前端
(1)list.vue页面添加导出按钮
<div class="el-toolbar">
    <div class="el-toolbar-body" style="justify-content: flex-start;">
      <el-button type="text" @click="exportData"><i class="fa fa-plus"/> 导出</el-button>
    </div>
</div>
(2)编写调用方法
exportData() {
        window.open("http://localhost:8301/vod/subject")
},
- 经测试导出功能正常
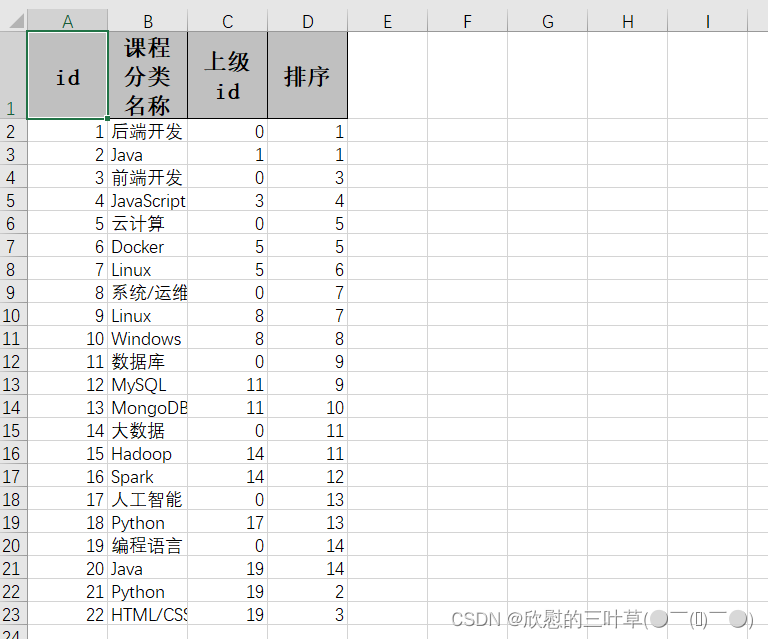
⑥:功能实现-课程分类导入
1. 创建读取监听器
@Component
public class SubjectListener extends AnalysisEventListener<SubjectEeVo> {
    @Autowired
    private SubjectMapper dictMapper;
    //一行一行读取
    @Override
    public void invoke(SubjectEeVo subjectEeVo, AnalysisContext analysisContext) {
        //调用方法添加数据库
        Subject subject = new Subject();
        BeanUtils.copyProperties(subjectEeVo,subject);
        dictMapper.insert(subject);
    }
    @Override
    public void doAfterAllAnalysed(AnalysisContext analysisContext) {
    }
}
2. 添加controller方法
@ApiOperation(value = "导入")
@PostMapping("importData")
public Result importData(MultipartFile file) {
    subjectService.importDictData(file);
    return Result.ok();
}
3. 添加service方法
@Autowired
private SubjectListener subjectListener;

//导入
@Override
public void importData(MultipartFile file) {
    try {
        EasyExcel.read(file.getInputStream(),
                       SubjectEeVo.class,subjectListener).sheet().doRead();
    } catch (IOException e) {
        e.printStackTrace();
    }
}
4、数据字典导入前端
(1)在list.vue页面添加导入按钮
<el-button type="text" @click="importData"><i class="fa fa-plus"/> 导入</el-button>
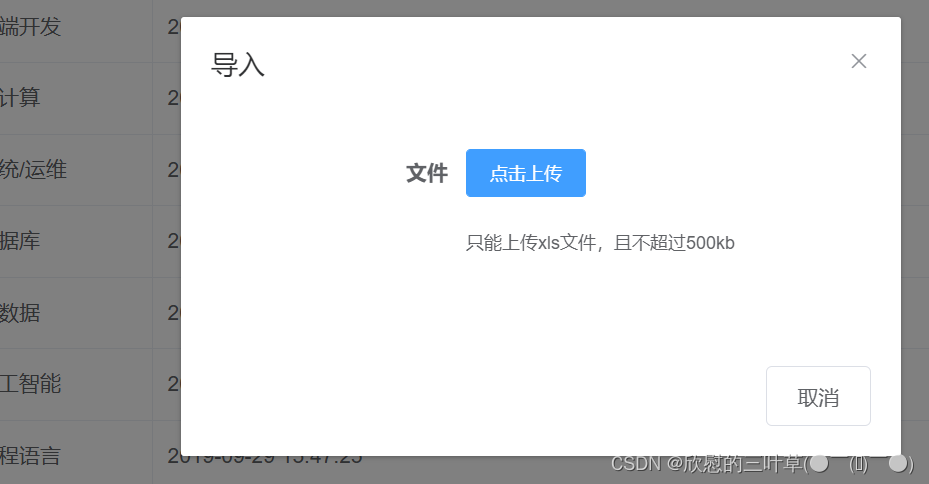
(2)添加导入弹出层
<el-dialog title="导入" :visible.sync="dialogImportVisible" width="480px">
    <el-form label-position="right" label-width="170px">
        <el-form-item label="文件">
            <el-upload
                       :multiple="false"
                       :on-success="onUploadSuccess"
                       :action="'http://localhost:8333/admin/vod/subject/importData'"
                       class="upload-demo">
                <el-button size="small" type="primary">点击上传</el-button>
                <div slot="tip" class="el-upload__tip">只能上传xls文件,且不超过500kb</div>
            </el-upload>
        </el-form-item>
    </el-form>
    <div slot="footer" class="dialog-footer">
        <el-button @click="dialogImportVisible = false">取消</el-button>
    </div>
</el-dialog>
(3)添加导入弹出层属性
data() {
    return {
        dialogImportVisible: false,
        list:[] //数据字典列表数组
    }
},
(4)添加导入方法
importData() {
    this.dialogImportVisible = true
},
onUploadSuccess(response, file) {
    this.$message.info('上传成功')
    this.dialogImportVisible = false
    this.getSubList(0)
},
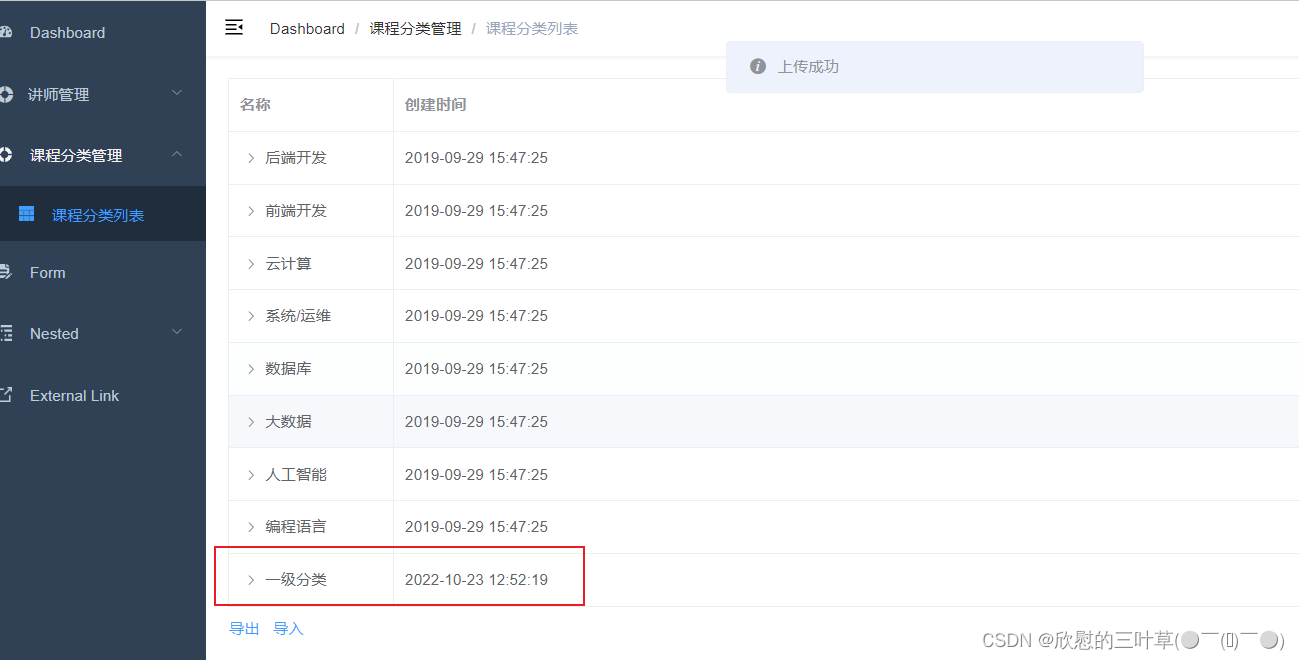
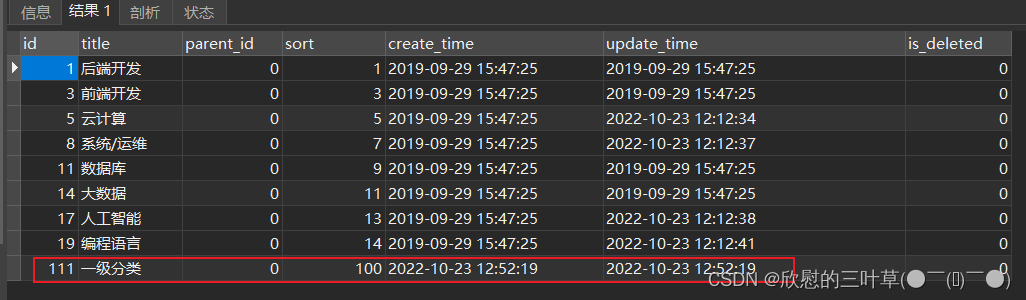
- 测试(导入成功)


 5545
5545


 被折叠的 条评论
为什么被折叠?
被折叠的 条评论
为什么被折叠?
 到【灌水乐园】发言


