


嫌麻烦的可以直接下载,放在项目下即可。
两个文件0积分下载:点击下载
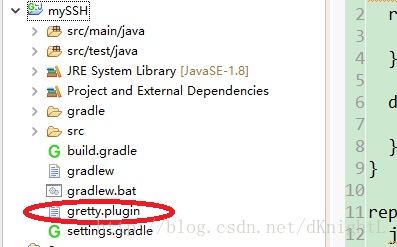
1.在项目中添加一个gretty.plugin文件
注意,是在项目下,不是在src下
gretty.plugin代码
buildscript {
  repositories {
    jcenter()
  }

  dependencies {
    classpath 'org.akhikhl.gretty:gretty:1.2.4'
  }
}

repositories {
  jcenter()
}

if (!project.plugins.findPlugin(org.akhikhl.gretty.GrettyPlugin))
  project.apply(plugin: org.akhikhl.gretty.GrettyPlugin)
2.在build.gradle中添加代码
添加apply from: ‘gretty.plugin’

build.gradle完整代码
/*
 * This build file was auto generated by running the Gradle 'init' task
 * by 'Administrator' at '17-4-20 下午8:21' with Gradle 2.11
 *
 * This generated file contains a sample Java project to get you started.
 * For more details take a look at the Java Quickstart chapter in the Gradle
 * user guide available at https://docs.gradle.org/2.11/userguide/tutorial_java_projects.html
 */

// Apply the java plugin to add support for Java
apply plugin: 'java'
apply plugin: 'war'
apply from: 'gretty.plugin'

// In this section you declare where to find the dependencies of your project
repositories {
    // Use 'jcenter' for resolving your dependencies.
    // You can declare any Maven/Ivy/file repository here.
    jcenter()
}

// In this section you declare the dependencies for your production and test code
dependencies {
    // The production code uses the SLF4J logging API at compile time
    compile 'org.slf4j:slf4j-api:1.7.14'

    // Declare the dependency for your favourite test framework you want to use in your tests.
    // TestNG is also supported by the Gradle Test task. Just change the
    // testCompile dependency to testCompile 'org.testng:testng:6.8.1' and add
    // 'test.useTestNG()' to your build script.
    testCompile 'junit:junit:4.12'
}

// 配置gretty
gretty {
    port = 8888
    contextPath =""
    servletContainer = 'tomcat8'
    debugPort = 5005      // default
    debugSuspend = true   // default
    httpsEnabled = true
    httpsPort = 4430
}


 937
937

 被折叠的 条评论
为什么被折叠?
被折叠的 条评论
为什么被折叠?
 到【灌水乐园】发言


