


tuts4you 注册
已经有一段时间了,但是今天,在这个大型教程的编码阶段,我们将开始主题HTML转换。 我们已经在Photoshop中设计了整个程序 ,因此现在来看将首页转换为有效HTML网页。
在整个转换阶段,我们将遵循最佳做法,使用有效HTML 5(doctype,尽管没有更新的spec元素)和CSS 2.1,以最大程度地支持浏览器。
游戏计划
我们将使用此一般过程,分三个阶段将Photoshop设计转换为HTML
阶段1
- 创建文档/文件夹/站点结构。
- 定义文档类型。
- 检查主要设计并弄清楚整体基本标记。
- 检查特定的页面部分以了解如何进行标记。
- 根据我们的标记思想插入HTML标签,并完成HTML编码。
阶段2
- 重置浏览器的默认样式。
- 为常见HTML元素添加一些默认样式。
- 从上到下并逐节依次定位和设计元素。
第三阶段
- 我们将在所有现代浏览器中检查我们的设计并补偿IE。
- 最后,我们将使用一些自定义和第三方jQuery插件和脚本在主题中添加一些行为。
我们的主题非常简单,因此我们需要从设计中分割出很少的图形。 当我们处理HTML和CSS时,将根据需要完成切片的图形。 请从头到尾认真地学习本教程,因为我将只讨论每个技巧。
用于该项目的资源
您可以根据需要使用自己的资源,但这是我在本教程中使用的图像和图标的完整列表:
- 图像-Lil Rhody Dan ,Flickr
- 圣诞快乐(照片)-来自PSDTuts flickr集团
- 社交图标– wefunction
- Twitter Bird – Webtreats
- jQuery-1.4.2 JavaScript库
- jQuery prettyPhoto插件
- jQuery 循环插件
通常,HTML转换包括三个独立的部分:
- 内容(HTML / XHTML)
- 演示文稿(CSS)和
- 行为(JS)
下面定义了今天的三个子部分。 如果您精通特定部分概述的特定技能,则可以随意来回跳动。
让我们将Photoshop设计转换为可工作HTML页面!
步骤A-1:创建网站结构
创建周到的文件夹结构对于任何Web开发工作都极为重要。 考虑到这一点,我们将首先创建文件夹结构。 使用图像A-1a作为创建文件夹结构的准则。
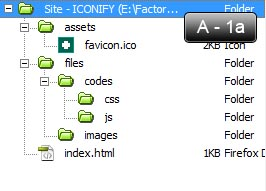
- 在资产文件夹中,我们将所有资产-图片,视频,Flash等。
- 在files文件夹中,有两个子文件夹,分别是code和images 。
- 名为code的文件夹用于css (样式表)和js (JavaScript)文件。
- 我们用于创建此主题的所有图像都将放置在images文件夹内。
- 我们HTML文件将直接位于ICONIFY文件夹内。
步骤A-2:第一个HTML文档
创建一个新HTML文件,并将其命名为index.html 。 在您喜欢HTML /代码编辑器中打开文件。 将以下内容放入index.html文件中。
<!DOCTYPE HTML>
<head>
	<meta http-equiv="Content-Type" content="text/html; charset=utf-8" />
	<meta name="author" content="Nuruzzaman Sheikh(palpaldal)" />
	<meta name="description" content="A brief description of this website or your business." />
	<meta name="keywords" content="keywords, or phrases, suited with each particular page, are best" />

    <title>ICONIFY :: Welcome</title>
	<!-- Favorites icon -->
	<link rel="shortcut icon" href="assets/favicon.ico" />

</head>
<body>

</body>
</html>
这是一个HTML 5文档,我们通过将其doctype设置为<!DOCTYPE HTML>来确保这一点。 在head ,我们放置了一些meta标记,例如author , description , keywords这些meta标记可帮助搜索引擎轻松地查找和索引我们的网页。 我们还要声明页面的title和图标。
步骤A-3:检查设计
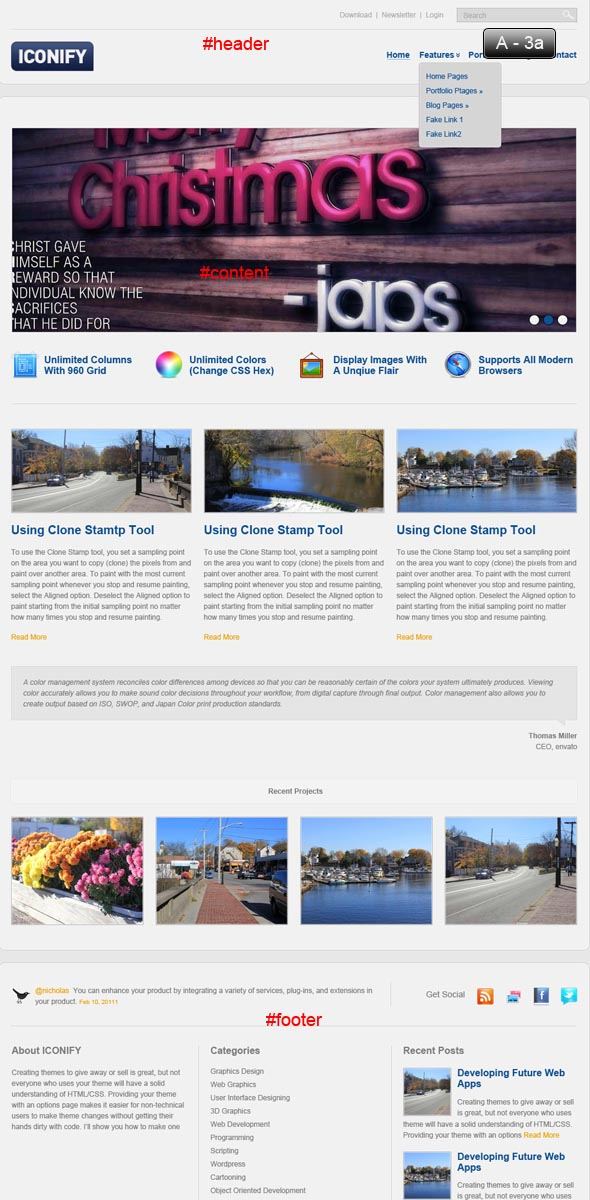
通过检查网页设计中,我们发现三个水平段: #header , #content和#footer 。 这三个部分中的两个(页眉,页脚)是静态的,因为在整个站点中它们将是相同的。 因此,根据设计中的初步标记思想,我们HTML标记将为:
<body>

    <div id="header">
        <div class="inner">
        header
        </div><!-- end of .inner -->
    </div><!-- end of #header -->

    <div id="content">
        <div class="inner">
        content
        </div><!-- end of .inner -->
    </div><!-- end of #content -->

    <div id="footer">
        <div class="inner">
        footer
        </div><!-- end of .inner -->
    </div><!-- end of #footer -->

</body>
</html> 我们的三个垂直部分是div#header , div#content和div#footer 。 还要注意,在每个部分中都有一个div.inner元素,用于每个部分的发光效果,我们还将所有元素都放在这些div.inner容器中。
在浏览器中,我们的文档现在如下图所示:
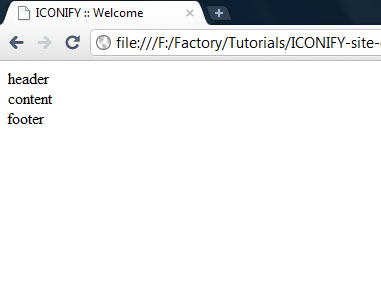
注意:每个结束标记都有一个关联的注释,该注释描述了要关闭的元素。 最佳做法是始终注释掉HTML文档中的重要部分。 今天我们将遵循这种做法。
现在让我们用HTML内容填充我们的三个部分,从头到尾依次
步骤A-4:填充标题
检查设计并在标题部分中找出HTML部分。 使用图像A-4a作为指导。
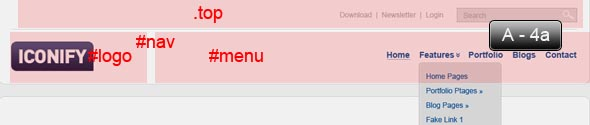
这是我们的标头设计,翻译为HTML标记:
<div id="header">
<div class="inner">
<ul class="top">
</ul><!-- end of .top -->
<div id="nav">
<div id="logo">
</div><!-- end of #logo -->
<ul id="menu">
</ul><!-- end of #menu -->
</div><!-- end of #nav -->
</div><!-- end of .inner -->
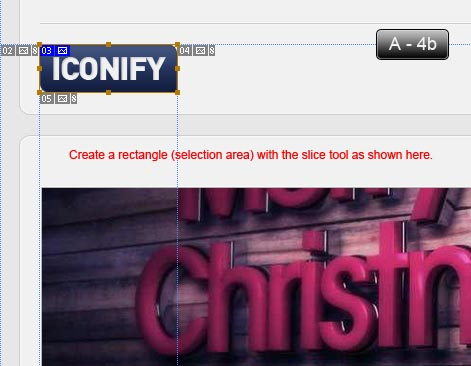
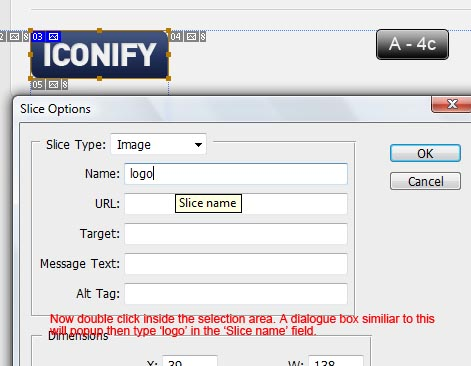
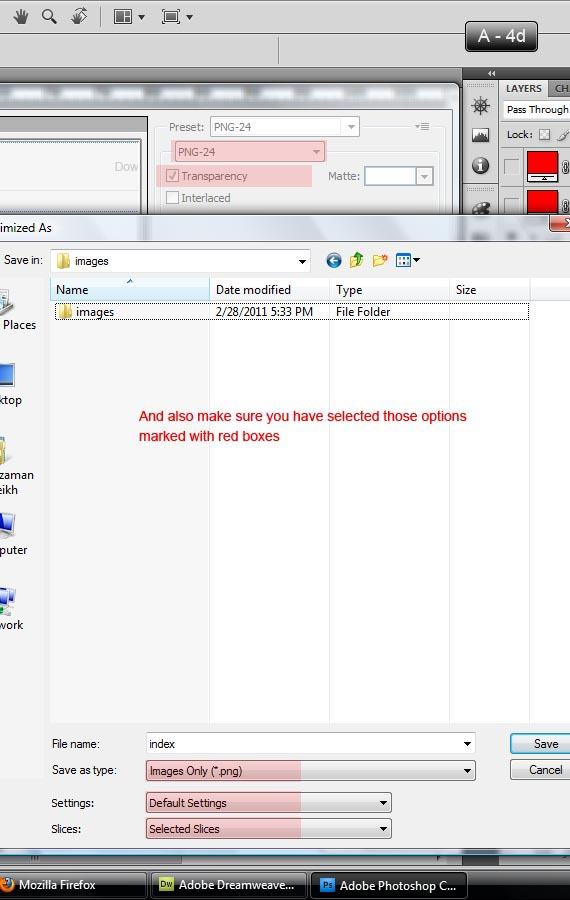
</div><!-- end of #header --> 我们将对第一个图像(徽标)进行切片,因此在Photoshop中打开索引设计。 从“ 裁剪工具”组中选择“ 切片”工具。 现在,使用图像A-4b和A-4c作为裁切徽标的准则。 然后转到File->Save for Web & Devices或从键盘按Alt+Shift+Ctrl+S调用Save for Web&Devices对话框。 选择“ PNG-24”和“ 透明”,然后保存到我们的Web根文件-> images文件夹,如图A-4d所示 。
我们将使用这些相同的技术/步骤来切片下一张图像。 从现在开始将仅提及尺寸。
让我们用相关的内容填充#header部分。 将以下内容复制到您的文档中:
<div id="header">
        <div class="inner">
            <ul class="top">
                <li><a href="#">Downloads</a></li>
                <li><a href="#">Newsletter</a></li>
                <li><a href="#">Login</a></li>
                <li>
                    <form action="#" method="get">
                        <fieldset>
                            <legend>Search Form</legend>
                            <label for="searchTerm">Search</label>
                            <input type="text" name="searchTerm" id="searchTerm" size="40" maxlength="150" />
                            <input type="submit" value="Search" />
                        </fieldset>
                    </form>
                </li>
            </ul><!-- end of .top -->
            <div id="nav">
                <div id="logo">
	            	<a href="#"><img src="http://webdesigntutsplus.s3.amazonaws.com/tuts/188_iconify/tutorial-coding-phase/files/images/logo.png" height="48" width="138" alt="ICONIFY" /></a>
                </div><!-- end of #logo -->
                <ul id="menu">
                    <li class="active"><a href="index.html">Home</a></li>
                    <li class="dropdown"><a href="#">Features</a></li>
                    <li><a href="portfolio.html">Portfolio</a></li>
                    <li><a href="blogs.html">Blog</a></li>
                    <li><a href="contact.html">Contact</a></li>
                </ul><!-- end of #menu -->
            </div><!-- end of #nav -->
        </div><!-- end of .inner -->
</div><!-- end of #header -->我们的ul.top是一个list元素,因此由li元素组成。 ul.top的最后一个孩子拥有我们的搜索表。 在div#nav内部,有两个直接子级: div#logo和ul#menu 。 ul#menu是一个列表元素,其所有子元素都是菜单项。 请注意,一个菜单项具有li.active类,一个菜单项具有li.dropdown类。 这些仅分别指示活动菜单项和下拉菜单项。
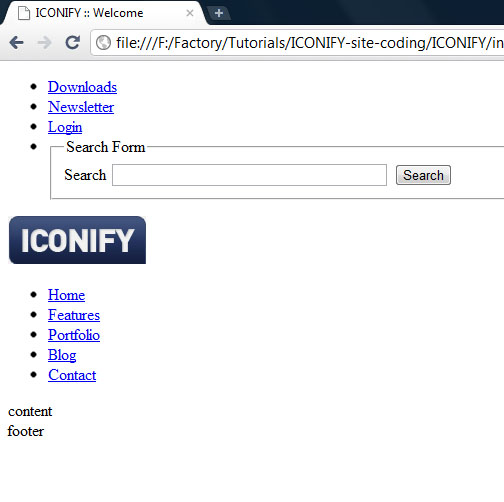
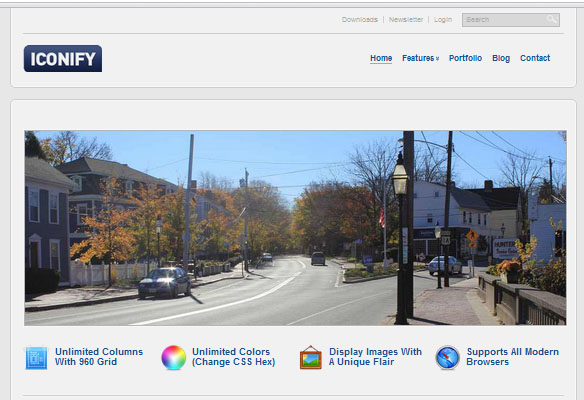
您的浏览器现在应该像这样呈现index.html
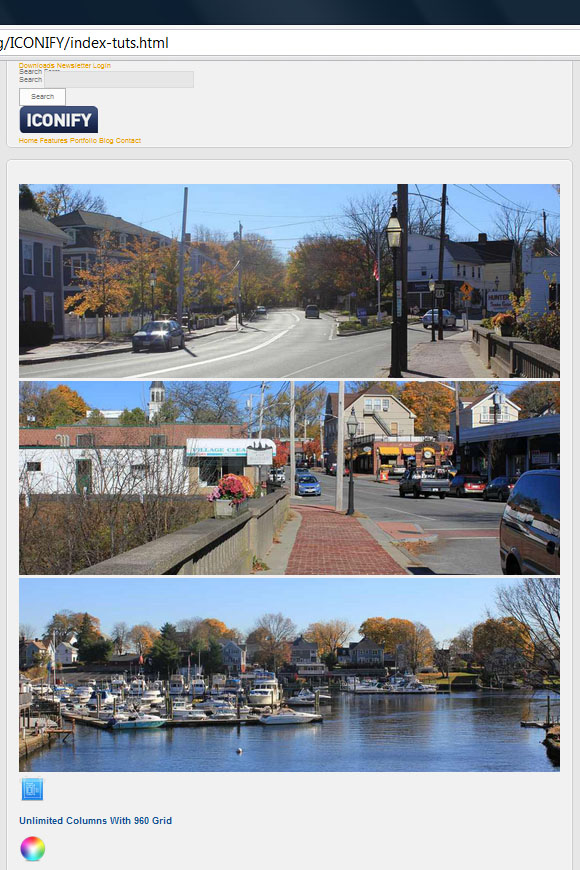
步骤A-5:填充#content
检查设计并在内容部分找到HTML部分。 使用以下图像作为指导。
在检查了设计中的内容部分之后,我们可以在#content部分中计划我们HTML子部分,如下所示。
<div id="content">
        <div class="inner">

            <div id="slider">
                <ul id="cycle">

                </ul>
                <div id="cyclePager"></div>
            </div><!-- end of #slider -->

            <ul class="promo-col-4">

            </ul><!-- end of .promo-col-4 -->

            <hr />

            <ul class="promo-col-3">

            </ul><!-- end of .promo-col-3 -->

            <div class="testimonial">

            </div><!-- end of .testimonial -->

            <div id="recentProjects">
                <div class="bar">

                </div><!-- end of .bar -->
                <ul class="">

                </ul><!-- end of . -->
            </div><!-- end of #recentProjects -->

        </div><!-- end of .inner -->
</div><!-- end of #content -->现在,我们要填补#内容部分的一些内容,顺序,从上到下。 将以下代码复制到您的html文档中。
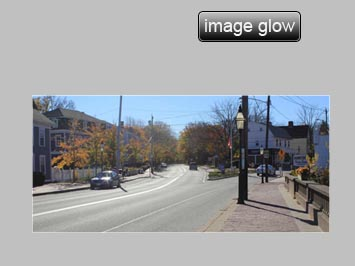
<div id="slider">
                <ul id="cycle">
                    <li><img src="http://webdesigntutsplus.s3.amazonaws.com/tuts/188_iconify/tutorial-coding-phase/assets/slides/1.jpg" height="336" width="936" alt="Slides" /></li>
                    <li><img src="http://webdesigntutsplus.s3.amazonaws.com/tuts/188_iconify/tutorial-coding-phase/assets/slides/2.jpg" height="336" width="936" alt="Slides" /></li>
                    <li><img src="http://webdesigntutsplus.s3.amazonaws.com/tuts/188_iconify/tutorial-coding-phase/assets/slides/3.jpg" height="336" width="936" alt="Slides" /></li>
                </ul>
                <div id="cyclePager"></div>
</div><!-- end of #slider -->在#slider内部,我们有三个图像链接,它们是我们的幻灯片。 还有一个div#cyclePager用于分页器或滑块导航。
<ul class="promo-col-4">
                <li class="">
                    <a href="#" title="Unlimited Columns With 960 Grid">
                    <img src="http://webdesigntutsplus.s3.amazonaws.com/tuts/188_iconify/tutorial-coding-phase/assets/icons/blueprint.png" height="48" width="48" alt="Blueprint" />
                    </a>
                    <h5><a href="#" title="Unlimited Columns With 960 Grid">Unlimited Columns With 960 Grid</a></h5>
                </li>
                <li class="">
                    <a href="#" title="Unlimited Colors (Change CSS Hex)">
                    <img src="http://webdesigntutsplus.s3.amazonaws.com/tuts/188_iconify/tutorial-coding-phase/assets/icons/colouralt.png" height="48" width="48" alt="Colors" />
                    </a>
                    <h5><a href="#" title="Unlimited Colors (Change CSS Hex)">Unlimited Colors (Change CSS Hex)</a></h5>
                </li>
                <li class="">
                    <a href="#" title="Display Images With A Unique Flair">
                    <img src="http://webdesigntutsplus.s3.amazonaws.com/tuts/188_iconify/tutorial-coding-phase/assets/icons/photos.png" height="48" width="48" alt="Photos" />
                    </a>
                    <h5><a href="#" title="Display Images With A Unique Flair">Display Images With A Unique Flair</a></h5>
                </li>
                <li class="">
                    <a href="#" title="Supports All Modern Browsers">
                    <img src="http://webdesigntutsplus.s3.amazonaws.com/tuts/188_iconify/tutorial-coding-phase/assets/icons/safari.png" height="48" width="48" alt="Browsers" />
                    </a>
                    <h5><a href="#" title="Supports All Modern Browsers">Supports All Modern Browsers</a></h5>
                </li>
            </ul><!-- end of .promo-col-4 -->
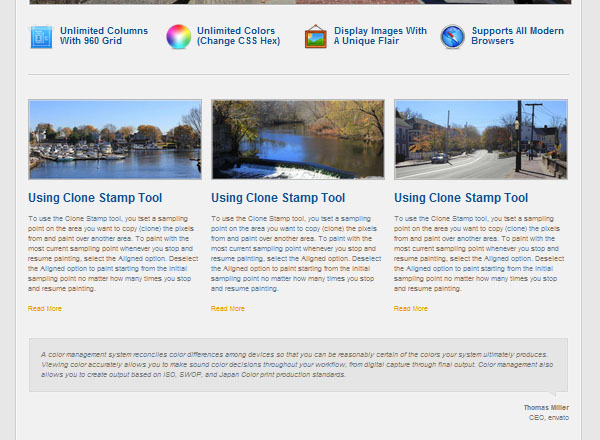
<hr />这是一个名为ul.promo-col-4的4列促销产品,我们将在CSS部分中了解如何根据我们的设计放置它们。 它的结构非常简单-只需将每列的元素放在ul.promo-col-4的li中即可 。
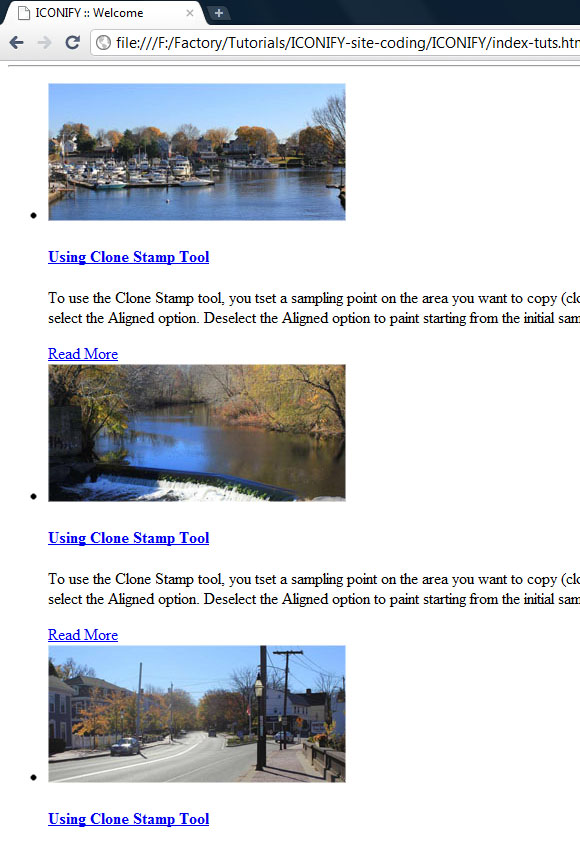
目前,我们的页面在浏览器中的呈现方式如下

<ul class="promo-col-3">
                <li class="">
                    <a href="#" title="Using Clone Stamp Tool">
                        <img src="http://webdesigntutsplus.s3.amazonaws.com/tuts/188_iconify/tutorial-coding-phase/assets/promo/1.jpg" class="border" height="138" width="298" alt="Promo Picture" />
                    </a>
                    <h4><a href="#">Using Clone Stamp Tool</a></h4>
                    <p>
                        To use the Clone Stamp tool, you tset a sampling point on the area you want to copy (clone) the pixels from and paint over another area. To paint with the most current sampling point whenever you stop and resume painting, select the Aligned option. Deselect the Aligned option to paint starting from the initial sampling point no matter how many times you stop and resume painting.
                    </p>
                    <a href="#" class="btn" title="Read More">Read More</a>
                </li>
                <li class="">
                    <a href="#" title="Using Clone Stamp Tool">
                        <img src="http://webdesigntutsplus.s3.amazonaws.com/tuts/188_iconify/tutorial-coding-phase/assets/promo/2.jpg" class="border" height="138" width="298" alt="Promo Picture" />
                    </a>
                    <h4><a href="#">Using Clone Stamp Tool</a></h4>
                    <p>
                        To use the Clone Stamp tool, you tset a sampling point on the area you want to copy (clone) the pixels from and paint over another area. To paint with the most current sampling point whenever you stop and resume painting, select the Aligned option. Deselect the Aligned option to paint starting from the initial sampling point no matter how many times you stop and resume painting.
                    </p>
                    <a href="#" class="btn" title="Read More">Read More</a>
                </li>
                <li class="">
                    <a href="#" title="Using Clone Stamp Tool">
                        <img src="http://webdesigntutsplus.s3.amazonaws.com/tuts/188_iconify/tutorial-coding-phase/assets/promo/3.jpg" class="border" height="138" width="298" alt="Promo Picture" />
                    </a>
                    <h4><a href="#">Using Clone Stamp Tool</a></h4>
                    <p>
                        To use the Clone Stamp tool, you tset a sampling point on the area you want to copy (clone) the pixels from and paint over another area. To paint with the most current sampling point whenever you stop and resume painting, select the Aligned option. Deselect the Aligned option to paint starting from the initial sampling point no matter how many times you stop and resume painting.
                    </p>
                    <a href="#" class="btn" title="Read More">Read More</a>
                </li>
</ul><!-- end of .promo-col-3 -->此促销部分与ul.promo-col-4相同 ,唯一的区别是它有3列。 并在浏览器中呈现如下:
<div class="testimonial">
<div class="inner">
<blockquote>
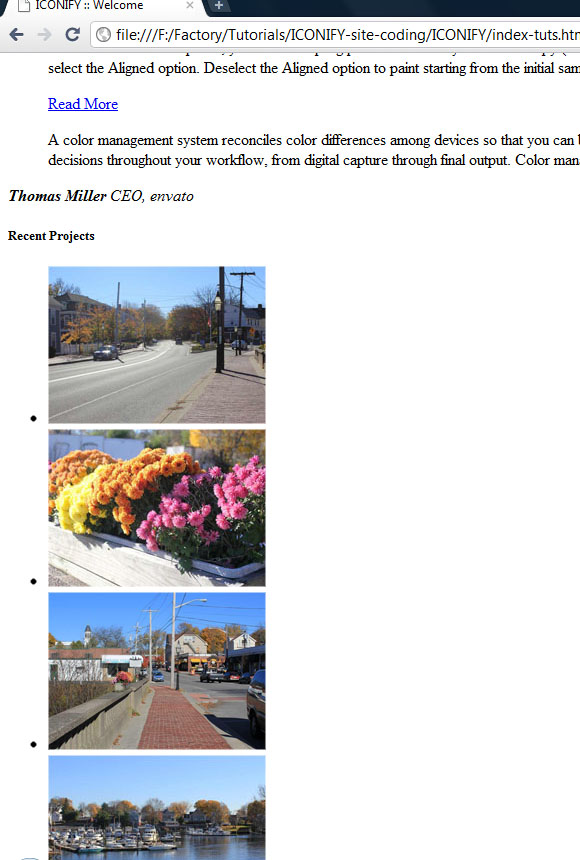
A color management system reconciles color differences among devices so that you can be reasonably certain of the colors your system ultimately produces. Viewing color accurately allows you to make sound color decisions throughout your workflow, from digital capture through final output. Color management also allows you to create output based on ISO, SWOP, and Japan Color print production standards.
</blockquote>
<span class="arrow"><!-- blockquote box arrow --></span>
</div>
<cite>
<strong>Thomas Miller</strong> CEO, envato
</cite>
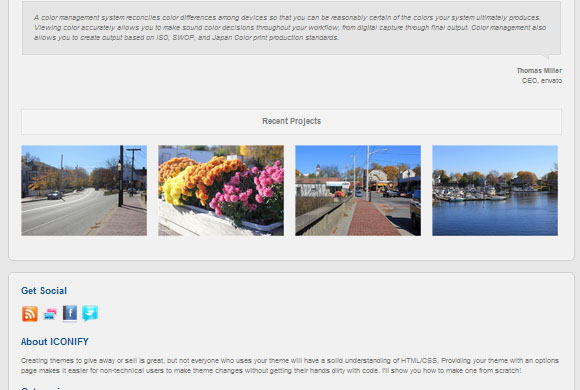
</div><!-- end of .testimonial -->这是主页中的特色证明框。 在div.testimonial父元素内,我们在div.inner元素内放置一个blockquote元素。 该div.inner元素用于证明框的内部较暗笔触。 我们将在CSS部分中使用一些技术来设计证明框。
<div id="recentProjects">
                <div class="bar">
                    <h5>
                        Recent Projects
                    </h5>
                </div><!-- end of .bar -->
                <ul class="">
                    <li class="">
                        <a href="#" >
                            <img src="http://webdesigntutsplus.s3.amazonaws.com/tuts/188_iconify/tutorial-coding-phase/assets/rcnt-projects/1.jpg" class="border" height="158" width="218" alt="Recent Project" />
                        </a>
                    </li>
                    <li class="">
                        <a href="#" >
                            <img src="http://webdesigntutsplus.s3.amazonaws.com/tuts/188_iconify/tutorial-coding-phase/assets/rcnt-projects/2.jpg" class="border" height="158" width="218" alt="Recent Project" />
                        </a>
                    </li>
                    <li class="">
                        <a href="#" >
                            <img src="http://webdesigntutsplus.s3.amazonaws.com/tuts/188_iconify/tutorial-coding-phase/assets/rcnt-projects/3.jpg" class="border" height="158" width="218" alt="Recent Project" />
                        </a>
                    </li>
                    <li class="">
                        <a href="#" >
                            <img src="http://webdesigntutsplus.s3.amazonaws.com/tuts/188_iconify/tutorial-coding-phase/assets/rcnt-projects/4.jpg" class="border" height="158" width="218" alt="Recent Project" />
                        </a>
                    </li>
                </ul><!-- end of .projects -->
</div><!-- end of #recentProjects -->div#recentProjects有两个子项: div.bar用于标题,而ul元素具有四个li子项用于最近项目的项目。 查看浏览器预览:
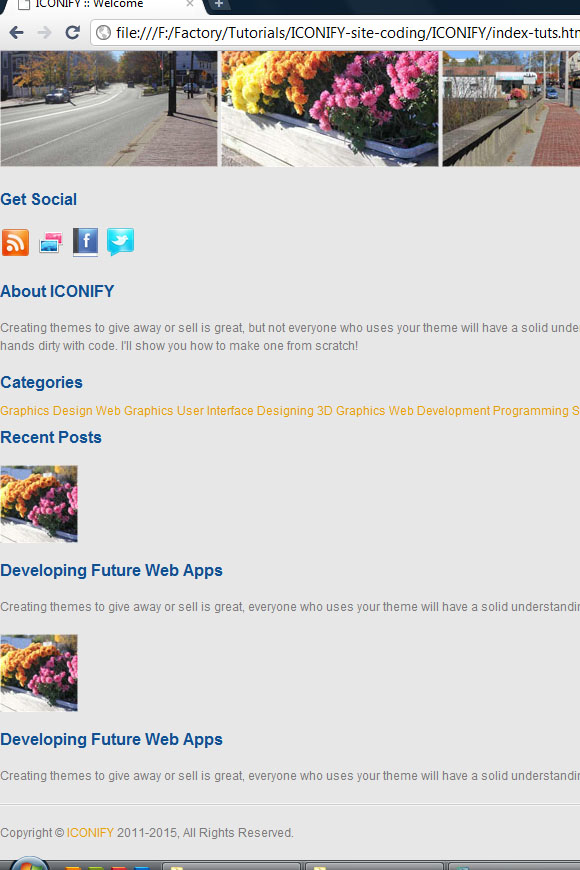
步骤A-6:填充页脚
与往常一样,检查设计并在页脚部分中找出HTML部分。 使用图像A-6a作为指导。

在检查完设计中的页脚部分后,我们可以在#footer部分中计划HTML子部分,如下所示。
<div id="footer" class="">
    <div class="inner">

        <div class="top">
        </div><!-- end of .top -->

        <ul class="content">
        </ul><!-- end of .content -->

        <div class="bottom">
        </div><!-- end of .bottom -->

    </div><!-- end of .inner -->
</div><!-- end of #footer -->
将以下代码复制到您的html文档中。
<div class="top">
        	<div id="twitter" class="">
            	<!-- Twitter plugin jQuery.getTwitter will automatically fillup this div -->
            </div><!-- end of #twitter -->
            <ul class="social">
            	<li><h5>Get Social</h5></li>
                <li>
                	<a href="#" title="RSS">
                    	<img src="http://webdesigntutsplus.s3.amazonaws.com/tuts/188_iconify/tutorial-coding-phase/assets/social-icons/rss.png" height="32" width="32" alt="RSS" />
					</a>
                </li>
                <li>
                	<a href="#" title="Flickr">
                    	<img src="http://webdesigntutsplus.s3.amazonaws.com/tuts/188_iconify/tutorial-coding-phase/assets/social-icons/flickr.png" height="32" width="32" alt="Flickr" />
					</a>
                </li>
                <li>
                	<a href="#" title="Facebook">
                    	<img src="http://webdesigntutsplus.s3.amazonaws.com/tuts/188_iconify/tutorial-coding-phase/assets/social-icons/facebook.png" height="32" width="32" alt="Facebook" />
					</a>
                </li>
                <li>
                	<a href="#" title="Twitter">
                    	<img src="http://webdesigntutsplus.s3.amazonaws.com/tuts/188_iconify/tutorial-coding-phase/assets/social-icons/twitter.png" height="32" width="32" alt="Twitter" />
					</a>
                </li>
            </ul><!-- end of .social -->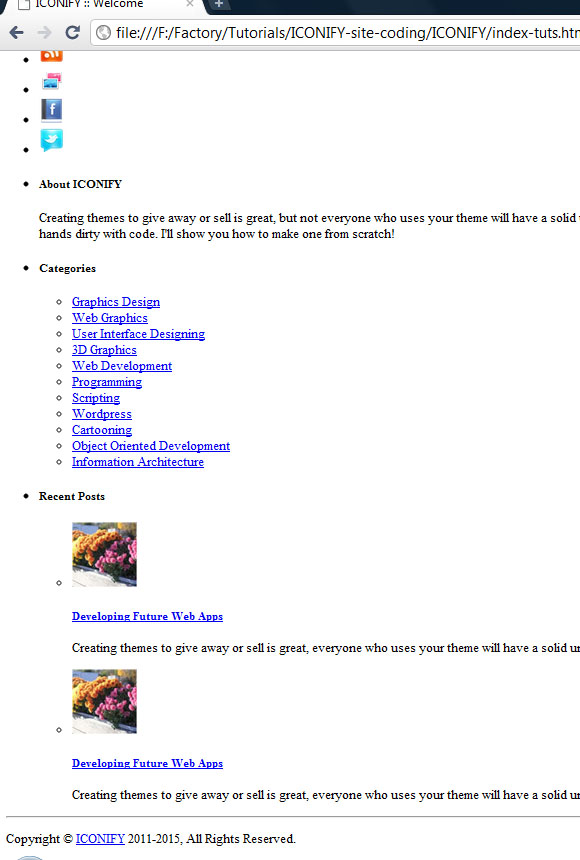
</div><!-- end of .top -->div.top内部有两个直子:一个用于我们名为div#twitter的可爱Twitter插件,另一个用于我们的社交链接ul.social 。
<ul class="content">
        	<li class="">
            	<h5>About ICONIFY</h5>
                <p>
                	Creating themes to give away or sell is great, but not everyone who uses your theme will have a solid understanding of HTML/CSS. Providing your theme with an options page makes it easier for non-technical users to make theme changes without getting their hands dirty with code. I'll show you how to make one from scratch!
                </p>
            </li>
            <li class="">
            	<h5>Categories</h5>
                <ul class="list">
                	<li><a href="#" title="Graphics Design">Graphics Design</a></li>
                	<li><a href="#" title="Web Graphics">Web Graphics</a></li>
                	<li><a href="#" title="User Interface Designing">User Interface Designing</a></li>
                	<li><a href="#" title="3D Graphics">3D Graphics</a></li>
                	<li><a href="#" title="Web Development">Web Development</a></li>
                	<li><a href="#" title="Programming">Programming</a></li>
                	<li><a href="#" title="Scripting">Scripting</a></li>
                	<li><a href="#" title="Wordpress">Wordpress</a></li>
                	<li><a href="#" title="Cartooning">Cartooning</a></li>
                	<li><a href="#" title="Object Oriented Development">Object Oriented Development</a></li>
                	<li><a href="#" title="Information Architecture">Information Architecture</a></li>
                </ul><!-- end of .cat -->
            </li>
            <li class="">
            	<h5>Recent Posts</h5>
                <ul class="blogList">
                	<li>
                    	<a href="#" title=""><img src="http://webdesigntutsplus.s3.amazonaws.com/tuts/188_iconify/tutorial-coding-phase/assets/80x80.jpg" class="border" height="78" width="78" alt="Blog Post" /></a>
                        <h5><a href="#">Developing Future Web Apps</a></h5>
                        <p>
                        	Creating themes to give away or sell is great, everyone who uses your theme will have a solid understanding of HTML/CSS. Providing your theme with an options <a href="#" title="Read More">Read More</a>
                        </p>
                    </li>
                </ul><!-- end of .blogList -->
            </li>
</ul><!-- end of .content -->ul.content是一个三列的节,每个li元素是一列。 我们将在CSS部分中使用一些技巧,以正确地设置样式和位置。
<div class="bottom">
<a href="#" id="toTop" title="Scroll To Top"></a>
<hr />
<p class="copyright">
Copyright © <a href="#" title="ICONIFY">ICONIFY</a> 2011-2015, All Rights Reserved.
<span style="float: right;">
Template By: <a href="http://themeforest.net/user/palpaldal/" title="palpaldal's Themeforest Profile">palpaldal</a>
</span>
</p>
</div><!-- end of .bottom -->div.bottom应该可以自我解释。 这是浏览器预览:
最终索引页HTML
<!DOCTYPE HTML>
<head>
<meta http-equiv="Content-Type" content="text/html; charset=utf-8" />
<meta name="author" content="Nuruzzaman Sheikh(palpaldal)" />
<meta name="description" content="A brief description of this website or your business." />
<meta name="keywords" content="keywords, or phrases, suited with each particular page, are best" />
<title>ICONIFY :: Welcome</title>
<!-- Favorites icon -->
<link rel="shortcut icon" href="assets/favicon.ico" />
</head>
<body>
<div id="header">
<div class="inner">
<ul class="top">
<li><a href="#">Downloads</a></li>
<li><a href="#">Newsletter</a></li>
<li><a href="#">Login</a></li>
<li>
<form action="#" method="get">
<fieldset>
<legend>Search Form</legend>
<label for="searchTerm">Search</label>
<input type="text" name="searchTerm" id="searchTerm" size="40" maxlength="150" />
<input type="submit" value="Search" />
</fieldset>
</form>
</li>
</ul><!-- end of .top -->
<div id="nav">
<div id="logo">
<a href="#"><img src="http://webdesigntutsplus.s3.amazonaws.com/tuts/188_iconify/tutorial-coding-phase/files/images/logo.png" height="48" width="138" alt="ICONIFY" /></a>
</div><!-- end of #logo -->
<ul id="menu">
<li class="active"><a href="index.html">Home</a></li>
<li class="dropdown"><a href="#">Features</a></li>
<li><a href="portfolio.html">Portfolio</a></li>
<li><a href="blogs.html">Blog</a></li>
<li><a href="contact.html">Contact</a></li>
</ul><!-- end of #menu -->
</div><!-- end of #nav -->
</div><!-- end of .inner -->
</div><!-- end of #header -->
<div id="content">
<div class="inner">
<div id="slider">
<ul id="cycle">
<li><img src="http://webdesigntutsplus.s3.amazonaws.com/tuts/188_iconify/tutorial-coding-phase/assets/slides/1.jpg" height="336" width="936" alt="Slides" /></li>
<li><img src="http://webdesigntutsplus.s3.amazonaws.com/tuts/188_iconify/tutorial-coding-phase/assets/slides/2.jpg" height="336" width="936" alt="Slides" /></li>
<li><img src="http://webdesigntutsplus.s3.amazonaws.com/tuts/188_iconify/tutorial-coding-phase/assets/slides/3.jpg" height="336" width="936" alt="Slides" /></li>
</ul>
<div id="cyclePager"></div>
</div><!-- end of #slider -->
<ul class="promo-col-4">
<li class="">
<a href="#" title="Unlimited Columns With 960 Grid">
<img src="http://webdesigntutsplus.s3.amazonaws.com/tuts/188_iconify/tutorial-coding-phase/assets/icons/blueprint.png" height="48" width="48" alt="Blueprint" />
</a>
<h5><a href="#" title="Unlimited Columns With 960 Grid">Unlimited Columns With 960 Grid</a></h5>
</li>
<li class="">
<a href="#" title="Unlimited Colors (Change CSS Hex)">
<img src="http://webdesigntutsplus.s3.amazonaws.com/tuts/188_iconify/tutorial-coding-phase/assets/icons/colouralt.png" height="48" width="48" alt="Colors" />
</a>
<h5><a href="#" title="Unlimited Colors (Change CSS Hex)">Unlimited Colors (Change CSS Hex)</a></h5>
</li>
<li class="">
<a href="#" title="Display Images With A Unique Flair">
<img src="http://webdesigntutsplus.s3.amazonaws.com/tuts/188_iconify/tutorial-coding-phase/assets/icons/photos.png" height="48" width="48" alt="Photos" />
</a>
<h5><a href="#" title="Display Images With A Unique Flair">Display Images With A Unique Flair</a></h5>
</li>
<li class="">
<a href="#" title="Supports All Modern Browsers">
<img src="http://webdesigntutsplus.s3.amazonaws.com/tuts/188_iconify/tutorial-coding-phase/assets/icons/safari.png" height="48" width="48" alt="Browsers" />
</a>
<h5><a href="#" title="Supports All Modern Browsers">Supports All Modern Browsers</a></h5>
</li>
</ul><!-- end of .promo-col-4 -->
<hr />
<ul class="promo-col-3">
<li class="">
<a href="#" title="Using Clone Stamp Tool">
<img src="http://webdesigntutsplus.s3.amazonaws.com/tuts/188_iconify/tutorial-coding-phase/assets/promo/1.jpg" class="border" height="138" width="298" alt="Promo Picture" />
</a>
<h4><a href="#">Using Clone Stamp Tool</a></h4>
<p>
To use the Clone Stamp tool, you tset a sampling point on the area you want to copy (clone) the pixels from and paint over another area. To paint with the most current sampling point whenever you stop and resume painting, select the Aligned option. Deselect the Aligned option to paint starting from the initial sampling point no matter how many times you stop and resume painting.
</p>
<a href="#" class="btn" title="Read More">Read More</a>
</li>
<li class="">
<a href="#" title="Using Clone Stamp Tool">
<img src="http://webdesigntutsplus.s3.amazonaws.com/tuts/188_iconify/tutorial-coding-phase/assets/promo/2.jpg" class="border" height="138" width="298" alt="Promo Picture" />
</a>
<h4><a href="#">Using Clone Stamp Tool</a></h4>
<p>
To use the Clone Stamp tool, you tset a sampling point on the area you want to copy (clone) the pixels from and paint over another area. To paint with the most current sampling point whenever you stop and resume painting, select the Aligned option. Deselect the Aligned option to paint starting from the initial sampling point no matter how many times you stop and resume painting.
</p>
<a href="#" class="btn" title="Read More">Read More</a>
</li>
<li class="">
<a href="#" title="Using Clone Stamp Tool">
<img src="http://webdesigntutsplus.s3.amazonaws.com/tuts/188_iconify/tutorial-coding-phase/assets/promo/3.jpg" class="border" height="138" width="298" alt="Promo Picture" />
</a>
<h4><a href="#">Using Clone Stamp Tool</a></h4>
<p>
To use the Clone Stamp tool, you tset a sampling point on the area you want to copy (clone) the pixels from and paint over another area. To paint with the most current sampling point whenever you stop and resume painting, select the Aligned option. Deselect the Aligned option to paint starting from the initial sampling point no matter how many times you stop and resume painting.
</p>
<a href="#" class="btn" title="Read More">Read More</a>
</li>
</ul><!-- end of .promo-col-3 -->
<div class="testimonial">
<div class="inner">
<blockquote>
A color management system reconciles color differences among devices so that you can be reasonably certain of the colors your system ultimately produces. Viewing color accurately allows you to make sound color decisions throughout your workflow, from digital capture through final output. Color management also allows you to create output based on ISO, SWOP, and Japan Color print production standards.
</blockquote>
<span class="arrow"><!-- blockquote box arrow --></span>
</div>
<cite>
<strong>Thomas Miller</strong> CEO, envato
</cite>
</div><!-- end of .testimonial -->
<div id="recentProjects">
<div class="bar">
<h5>
Recent Projects
</h5>
</div><!-- end of .bar -->
<ul class="">
<li class="">
<a href="#" >
<img src="http://webdesigntutsplus.s3.amazonaws.com/tuts/188_iconify/tutorial-coding-phase/assets/rcnt-projects/1.jpg" class="border" height="158" width="218" alt="Recent Project" />
</a>
</li>
<li class="">
<a href="#" >
<img src="http://webdesigntutsplus.s3.amazonaws.com/tuts/188_iconify/tutorial-coding-phase/assets/rcnt-projects/2.jpg" class="border" height="158" width="218" alt="Recent Project" />
</a>
</li>
<li class="">
<a href="#" >
<img src="http://webdesigntutsplus.s3.amazonaws.com/tuts/188_iconify/tutorial-coding-phase/assets/rcnt-projects/3.jpg" class="border" height="158" width="218" alt="Recent Project" />
</a>
</li>
<li class="">
<a href="#" >
<img src="http://webdesigntutsplus.s3.amazonaws.com/tuts/188_iconify/tutorial-coding-phase/assets/rcnt-projects/4.jpg" class="border" height="158" width="218" alt="Recent Project" />
</a>
</li>
</ul><!-- end of ul -->
</div><!-- end of #recentProjects -->
</div><!-- end of .inner -->
</div><!-- end of #content -->
<div id="footer">
<div class="inner">
<div class="top">
<div id="twitter" class="">
<!-- Twitter plugin jQuery.getTwitter will automatically fillup this div -->
</div><!-- end of #twitter -->
<ul class="social">
<li><h5>Get Social</h5></li>
<li>
<a href="#" title="RSS">
<img src="http://webdesigntutsplus.s3.amazonaws.com/tuts/188_iconify/tutorial-coding-phase/assets/social-icons/rss.png" height="32" width="32" alt="RSS" />
</a>
</li>
<li>
<a href="#" title="Flickr">
<img src="http://webdesigntutsplus.s3.amazonaws.com/tuts/188_iconify/tutorial-coding-phase/assets/social-icons/flickr.png" height="32" width="32" alt="Flickr" />
</a>
</li>
<li>
<a href="#" title="Facebook">
<img src="http://webdesigntutsplus.s3.amazonaws.com/tuts/188_iconify/tutorial-coding-phase/assets/social-icons/facebook.png" height="32" width="32" alt="Facebook" />
</a>
</li>
<li>
<a href="#" title="Twitter">
<img src="http://webdesigntutsplus.s3.amazonaws.com/tuts/188_iconify/tutorial-coding-phase/assets/social-icons/twitter.png" height="32" width="32" alt="Twitter" />
</a>
</li>
</ul><!-- end of .social -->
</div><!-- end of .top -->
<ul class="content">
<li class="">
<h5>About ICONIFY</h5>
<p>
Creating themes to give away or sell is great, but not everyone who uses your theme will have a solid understanding of HTML/CSS. Providing your theme with an options page makes it easier for non-technical users to make theme changes without getting their hands dirty with code. I'll show you how to make one from scratch!
</p>
</li>
<li class="">
<h5>Categories</h5>
<ul class="list">
<li><a href="#" title="Graphics Design">Graphics Design</a></li>
<li><a href="#" title="Web Graphics">Web Graphics</a></li>
<li><a href="#" title="User Interface Designing">User Interface Designing</a></li>
<li><a href="#" title="3D Graphics">3D Graphics</a></li>
<li><a href="#" title="Web Development">Web Development</a></li>
<li><a href="#" title="Programming">Programming</a></li>
<li><a href="#" title="Scripting">Scripting</a></li>
<li><a href="#" title="Wordpress">Wordpress</a></li>
<li><a href="#" title="Cartooning">Cartooning</a></li>
<li><a href="#" title="Object Oriented Development">Object Oriented Development</a></li>
<li><a href="#" title="Information Architecture">Information Architecture</a></li>
</ul><!-- end of .cat -->
</li>
<li class="">
<h5>Recent Posts</h5>
<ul class="blogList">
<li>
<a href="#" title=""><img src="http://webdesigntutsplus.s3.amazonaws.com/tuts/188_iconify/tutorial-coding-phase/assets/80x80.jpg" class="border" height="78" width="78" alt="Blog Post" /></a>
<h5><a href="#">Developing Future Web Apps</a></h5>
<p>
Creating themes to give away or sell is great, everyone who uses your theme will have a solid understanding of HTML/CSS. Providing your theme with an options <a href="#" title="Read More">Read More</a>
</p>
</li>
</ul><!-- end of .blogList -->
</li>
</ul><!-- end of .content -->
<div class="bottom">
<a href="#" id="toTop" title="Scroll To Top"></a>
<hr />
<p class="copyright">
Copyright © <a href="#" title="ICONIFY">ICONIFY</a> 2011-2015, All Rights Reserved.
<span style="float: right;">
Template By: <a href="http://themeforest.net/user/palpaldal/" title="palpaldal's Themeforest Profile">palpaldal</a>
</span>
</p>
</div><!-- end of .bottom -->
</div><!-- end of .inner -->
</div><!-- end of #footer -->
</body>
</html>B部分介绍
我们已经完成了本教程的标记部分,让我们继续讲CSS。
首先,在css文件夹中创建一些空白CSS文件。 您还需要分别从Nomarginsforerroe和960网站下载并链接prettyPhoto.css文件和960.css文件。 从文档头内部创建并链接CSS样式表,如下所示:
<head>
	<meta http-equiv="Content-Type" content="text/html; charset=utf-8" />
	<meta name="author" content="Nuruzzaman Sheikh(palpaldal)" />
	<meta name="description" content="A brief description of this website or your business." />
	<meta name="keywords" content="keywords, or phrases, suited with each particular page, are best" />

    <title>ICONIFY :: Welcome</title>
	<!-- Favorites icon -->
	<link rel="shortcut icon" href="assets/favicon.ico" />

<!-- CSS Files -->
	<!-- Resetting all default browser markups and styles.-->
    <link rel="stylesheet" type="text/css" href="files/codes/css/reset.css" media="all" />
	<!-- 960 Grid ( 12+16 cols) System for easy and flexible markups.-->
    <link rel="stylesheet" type="text/css" href="files/codes/css/960.css" media="all" />
    <!-- Default and template specific styles. -->
    <link rel="stylesheet" type="text/css" href="files/codes/css/default.css" media="all" />
    <!-- prettyPhoto jQuery plugin's CSS styles-->
    <link rel="stylesheet" type="text/css" href="files/codes/css/prettyPhoto.css" media="all" />


<!-- Weird IE specific codes -->
	<!--[if lt IE 8]>
    	<link rel="stylesheet" type="text/css" href="files/codes/css/ie7.css" media="all" />
    <![endif]-->
    <!--[if IE 8]>
    	<link rel="stylesheet" type="text/css" href="files/codes/css/ie8.css" media="all" />
    <![endif]-->

</head>
在底部,我们已经链接了两个专门用于IE浏览器的样式表文档。 我们将它们放置在只有IE浏览器可以理解的条件注释块中。
步骤B-1:重置默认样式
到此时您可能已经注意到,尽管我们尚未对文档应用任何CSS样式,但是我们的内容并未完全取消样式。 这些是默认的浏览器样式,它们应用于加载的每个页面。 为了正确定位和设计页面,我们必须应用一些基本样式来重置这些默认样式,从而创建一个空白板来应用我们自己的样式和位置。 我们将在reset.css文档中执行此操作。
在文本编辑器中打开reset.css文档。 然后将以下内容复制到文档中:
@charset "utf-8";
/* CSS Document */
/*

	~"~"~ ICONIFY ~"~"~ XHTML Template by palpaldal

	TABLE OF CONTENTS ------------------

		1.	Style resetting codes (using Eric Meyer's resetter)
				http://meyerweb.com/eric/tools/css/reset/
				v1.0 | 20080212

		2.	Default styles of some common XHTML tags/elements.
*/

/* ----------------- Resetting browser defaults ------------------- */
html, body, div, span, applet, object, iframe,
h1, h2, h3, h4, h5, h6, p, blockquote, pre,
a, abbr, acronym, address, big, cite, code,
del, dfn, em, font, img, ins, kbd, q, s, samp,
small, strike, strong, sub, sup, tt, var,
b, u, i, center,
dl, dt, dd, ol, ul, li,
fieldset, form, label, legend, button,
table, caption, tbody, tfoot, thead, tr, th, td {
	background: transparent;
	border: 0;
	font-size: 100%;
	margin: 0;
	outline: 0;
	padding: 0;
	vertical-align: baseline;
}

body{
	background: #e7e7e7;
	color: #7c7c7c;
	font: normal 12px/18px Arial, Helvetica, sans-serif;
}

ol, ul{list-style: none;}

ol li, ul li{
	display: inline;
	line-height: 0;
}

blockquote, q{quotes: none;}

blockquote:before,
blockquote:after,
q:before,
q:after{
	content: '';
	content: none;
}

:focus{outline: 0;}

/* ----------------- Applying default styles to common XHTML elements ------------------- */

a{
	color: #eaa000;
	text-decoration: none;
}

a:hover, a:focus{border-bottom: 1px solid;}

abbr{
	border-bottom: 1px dotted;
	letter-spacing: 0.2em;
}

acronym{
	border-bottom: 1px solid;
	letter-spacing: 0.1em;
}

h1, h2, h3, h4, h5, h6{
	color: #2e5bc3;
	font: bold 100%/1.2 Arial, Helvetica, sans-serif;
	margin: 18px 0;
}

h1 a, h2 a, h3 a, h4 a, h5 a, h6 a{color: #2e5bc3;}


h1{font-size: 32px;}

h2{font-size: 28px;}

h3{font-size: 24px;}

h4{font-size: 20px;}

h5{font-size: 16px;}

h6{
	font-size: 13px;
	text-transform: uppercase;
}

p{
	font-size: 12px;
	line-height: 18px;
	margin: 18px 0;
}

pre{
	font-family: consolas, "Courier New", Courier, monospace;
	font-size: 14px;
	line-height: 18px;
}

blockquote{
	font-size: 12px;
	font-style: italic;
	line-height: 18px;
	margin: 18px 0;
	padding-top: 6px;
}

blockquote+blockquote{
	background: none;
	padding: 0;
	text-indent: 0;
}

cite{
	display: block;
	font-style: normal;
	line-height: 18px;
	margin: 18px 0;
	text-align: right;
}

cite strong{display: block;}

strong,
b{font-weight: bold;}

em,
i{font-style: italic;}

del,
strike{text-decoration: line-through;}

small{font-size: .8em;}

big{font-size: 1.2em;}

code{
	font-family: consolas, "Courier New", Courier, monospace;
	padding: 2px 4px;
}

input[type="text"],
input[type="password"],
textarea{
	background: #e7e7e7;
	border: 1px solid #dbdbdb;
	font-size: 12px;
	line-height: 12px;
	margin: 0;
	padding: 8px 10px 7px;
}

input[type="text"]{
	color: #666666;
	font: normal 12px/1 Arial, Helvetica, sans-serif;
}

input[type="password"]{
	color: #666666;
	font: normal 12px/1 "Courier New", Courier, monospace;
}

textarea{
	color: #666666;
	font: normal 12px/18px Arial, Helvetica, sans-serif;
	overflow: auto;
}

input[type="text"]:focus,
input[type="text"]:hover,
input[type="password"]:focus,
input[type="password"]:hover,
textarea:focus,
textarea:hover{
	background-color: #dedede;
	border-color: #bbbbbb;
}

button,
input[type="submit"],
input[type="button"],
input[type="reset"]{
	background: #fcfcfc;
	border: 1px solid #b6b6b6;
	color: #7c7c7c;
	cursor: pointer;
	display: block;
	font-size: 12px;
	height: 32px;
	line-height: 12px;
	padding: 0 20px 3px 20px;
}

button:focus,
button:hover,
input[type="submit"]:focus,
input[type="submit"]:hover,
input[type="button"]:focus,
input[type="button"]:hover,
input[type="reset"]:focus,
input[type="reset"]:hover{
	background-color: #b6b6b6;
	color: #fff;
}

hr{
	background: #cdcdcd;
	border: none;
	border-bottom: 1px solid #f6f6f6;
	border-top: 1px solid #f6f6f6;
	display: block;
	padding-top: 1px; /* Chrome having trouble with height larger than 1px*/
	height: 0;
	margin: 18px 0;
}

/* tables still need 'cellspacing="0"' in the XHTML markup */
table{
	border: 1px solid #cecece;
	border-right: none;
	border-top: none;
	border-collapse: collapse;
	border-spacing: 0;
}

table caption{
	caption-side: top;
	font-style: italic;
	padding: 2px;
	text-align: right;
}

td,
th{
	border: 1px solid #cecece;
	border-bottom: none;
	border-left: none;
	padding: 4px;
}首先,我们声明字符集UTF8与用于HTML的字符集相同。
在重置部分,我们将重置默认浏览器的样式和位置。 我们还将默认的正文和文本颜色以及详细信息应用于正文选择器。 现在,如果您在任何浏览器中预览文档,您会注意到我们的主题正慢慢以我们自己的颜色和某些样式(从reset.css文件应用的样式)开始出现。
步骤B-2:位置和设计元素
我们将使用grid960库进行轻松定位。 从现在开始,我们将使用default.css文件来设计和定位内容。 确保在index.html head部分中已正确链接960.css文件。 我们不需要触摸960.css文件,我们只需要使用960.css库中的某些类即可轻松定位内容。
在文本编辑器中打开default.css文件。 现在,将以下内容复制粘贴到default.css文件中。
@charset "utf-8";
/* CSS Document */
/*

	~"~"~ ICONIFY ~"~"~ XHTML Template by palpaldal

	TABLE OF CONTENTS ------------------

		1.	Common Theme Elements (usually inline elements)
		2.	Theme Structure
		3.	Pages Common Content's Styles
			a.	Header
			b.	Menu
			c.	Breadcrumbs
			d.	Footer
			e.	Sidebar
			f.	Pagination
		4.	Pagewise Styles
			a.Home
			b.	Portfolio
				i.	Column 2
				ii.	Column 3
				iii.Column 4
			c.	Blog
				ii.	Comments
				iii.Comment Form
			d.	Contact
				i.	Contact Form
		5.	Others

*/

/* <<<<<<<<<<	1. Common Theme Elements (usually inline elements)	>>>>>>>>>> */


/* <<<<<<<<<<	2. Theme Structure	>>>>>>>>>> */

/* <<<<<<<<<<	3. Pages Common Content's Styles	>>>>>>>>>> */

	/* <<<<<<<<<<	a. Header	>>>>>>>>>> */

	/* <<<<<<<<<<	b. Menu	>>>>>>>>>> */

	/* <<<<<<<<<<	c. Breadcrumbs	>>>>>>>>>> */

	/* <<<<<<<<<<	d. Footer	>>>>>>>>>> */

	/* <<<<<<<<<<	e. Sidebar	>>>>>>>>>> */

	/* <<<<<<<<<<	f. Pagination	>>>>>>>>>> */

/* <<<<<<<<<<	4. Pagewise Styles	>>>>>>>>>> */

	/* <<<<<<<<<<	a.Home	>>>>>>>>>> */

	/* <<<<<<<<<<	b. Portfolio	>>>>>>>>>> */

		/* <<<<<<<<<<	a. Column 2	>>>>>>>>>> */

		/* <<<<<<<<<<	b. Column 3	>>>>>>>>>> */

		/* <<<<<<<<<<	c. Column 4	>>>>>>>>>> */

	/* <<<<<<<<<<	c. Blog	>>>>>>>>>> */

		/* <<<<<<<<<<	i. Comments	>>>>>>>>>> */

		/* <<<<<<<<<<	ii. Comment Form	>>>>>>>>>> */

	/* <<<<<<<<<<	d. Contact	>>>>>>>>>> */

		/* <<<<<<<<<<	i. Contact Form	>>>>>>>>>> */

/* <<<<<<<<<<	5. Others	>>>>>>>>>> */
步骤B-2a:三个主要部分
首先,我们要定位的三个主要水平sections- 的#header,# 内容 ,以及我们的主题的#footer的 。 我们将通过对每个部分应用类.container_16来做到这一点,如下所示:
<div id="header" <strong>class="container_16"</strong>>
        <div class="inner">
        	...
        </div><!-- end of .inner -->
    </div><!-- end of #header -->

    <div id="content" <strong>class="container_16"</strong>>
        <div class="inner">
        	...
        </div><!-- end of .inner -->
    </div><!-- end of #content -->

    <div id="footer" <strong>class="container_16"</strong>>
        <div class="inner">
        	...
        </div><!-- end of .inner -->
    </div><!-- end of #footer -->
现在,我们的三个主要部分浮在页面的中央。 .container_16是grid960的网格16 。 现在,我们所有三个部分的总宽度正好为940px。 但是,我们的设计为980像素宽,因此我们将在各个部分周围应用(左+右:20 + 20)像素填充。 我们还将在部分中应用其他样式。 在您的default.css文件的2.主题结构部分中键入这些规则,或复制并粘贴它们。
/* <<<<<<<<<<	2. Theme Structure	>>>>>>>>>> */

#header{
	background: #f1f1f1;
	border: 1px solid #cdcdcd;
	-moz-border-radius-bottomleft: 10px;
	-webkit-border-bottom-left-radius: 10px;
	border-bottom-left-radius: 10px;
	-moz-border-radius-bottomright: 10px;
	-webkit-border-bottom-right-radius: 10px;
	border-bottom-right-radius: 10px;
	border-top: none;
	padding: 0 10px;
	margin-bottom: 20px;
}

	#header .inner{
		border: 1px solid #f9f9f9;
		-moz-border-radius-bottomleft: 10px;
		-webkit-border-bottom-left-radius: 10px;
		border-bottom-left-radius: 10px;
		-moz-border-radius-bottomright: 10px;
		-webkit-border-bottom-right-radius: 10px;
		border-bottom-right-radius: 10px;
		border-top: none;
		margin: 0 -10px;
		padding: 0 20px;
	}

#content{
	background: #f1f1f1;
	border: 1px solid #cdcdcd;
	-moz-border-radius: 10px;
	-webkit-border-radius: 10px;
	border-radius: 10px;
	margin-bottom: 20px;
	margin-top: 20px;
	padding: 0 10px;
}

	#content .inner{
		border: 1px solid #f9f9f9;
		-moz-border-radius: 10px;
		-webkit-border-radius: 10px;
		border-radius: 10px;
		margin: 0 -10px;
		padding: 40px 20px;
	}

#footer{
	background: #f1f1f1;
	border: 1px solid #cdcdcd;
	-moz-border-radius-topleft: 10px;
	-webkit-border-top-left-radius: 10px;
	border-top-left-radius: 10px;
	-moz-border-radius-topright: 10px;
	-webkit-border-top-right-radius: 10px;
	border-top-right-radius: 10px;
	border-bottom: none;
	margin-top: 20px;
	padding: 0 10px;
}

	#footer .inner{
		border: 1px solid #f9f9f9;
		-moz-border-radius-topleft: 10px;
		-webkit-border-top-left-radius: 10px;
		border-top-left-radius: 10px;
		-moz-border-radius-topright: 10px;
		-webkit-border-top-right-radius: 10px;
		border-top-right-radius: 10px;
		border-bottom: none;
		margin: 0 -10px;
		padding: 1px 20px;
	}
这三个部分的所有规则几乎相同。 对于#header ,我们将应用背景色和外部边框颜色(使用滴管工具从您的设计中获取这些颜色值)。 .inner元素使内部发出白光。 在浏览器中检查进度,以确保所有样式均正确。 这是我们文档的浏览器预览:
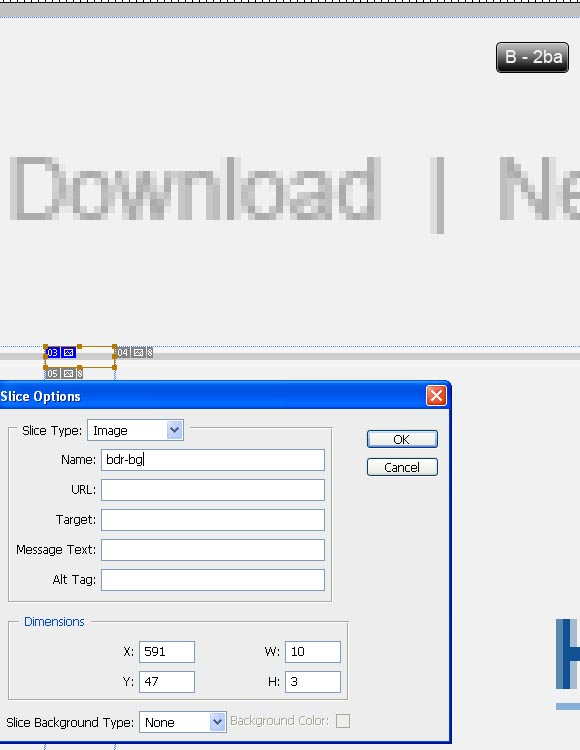
步骤B-2b:标题部分
从index.psd文件中切片并保存标题的分隔线水平标尺图形。 使用以下图像作为指导,并使用步骤A-4中所述的图像切片技术。 在整个主题中,我们将在很多地方使用此bdr-bg.png图片。
/* <<<<<<<<<< a. Header >>>>>>>>>> */
#header .top{
background: transparent url(../../images/bdr-bg.png) left bottom repeat-x;
overflow: hidden;
padding: 10px 0 13px 552px;
}
#header .top li{
color: #ababab;
display: block;
float: left;
line-height: 24px;
margin-right: 10px;
}
#header .top li a{
border: none;
border-left: 1px solid #d0d0d0;
color: #ababab;
padding: 0 0 0 10px;
}
#header .top li:last-child{margin: 0;}
#header .top li:first-child a{border: none; padding:0;}
#header .top li a:focus,
#header .top li a:hover{color: #eaa000;}
#header .top form{
margin-left: 10px;
position: relative;
}
#header .top legend{display: none;}
#header .top input[type="text"]{
background: #d8d8d8;
border: 1px solid #bdbdbd;
height: 14px;
width: 160px;
padding: 4px;
font-size: 12px;
line-height: 12px;
}
#header .top label{
display: none;
left: 8px;
position: absolute;
top: 0px;
}
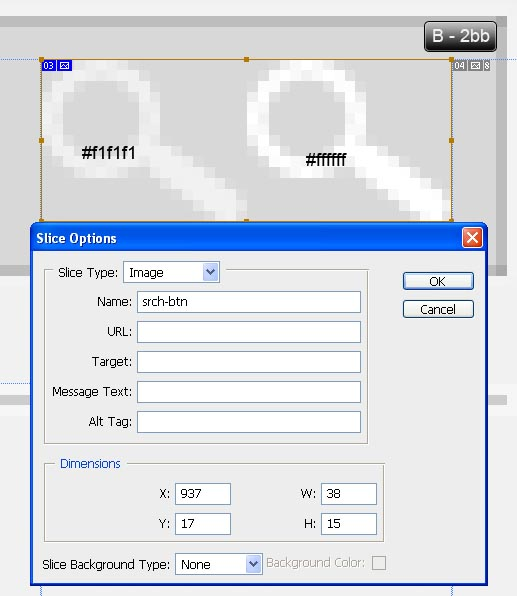
#header .top input[type="submit"]{
background: transparent url(../../images/srch-btn.png) 0 0 no-repeat;
border: none;
display: block;
font-size: 0;
height: 15px;
padding: 0;
position: absolute;
right: 4px;
text-indent: -999px; /* some browser shows 1px height texts like Safari even with font-size: 0 */
top: 4px;
width: 19px;
}
#header .top input[type="submit"]:focus,
#header .top input[type="submit"]:hover{background-position: -19px 0;}
#nav{padding: 20px 0;}
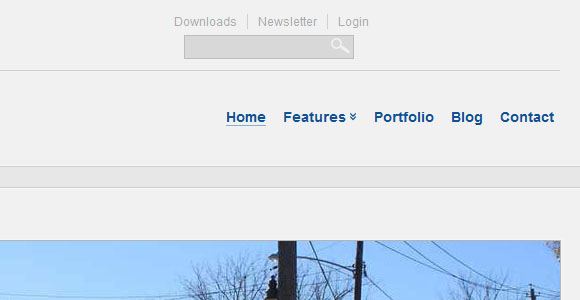
#logo a{border: none;}这是我们最近样式化的标头部分:
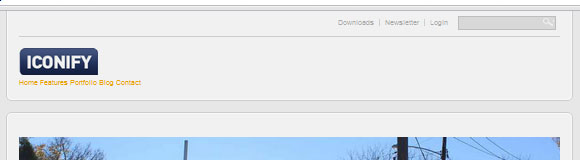
好的,最重要的代码块或技巧的总结,从上到下。
- #header .top-我们正在使用此元素来应用分隔线图像。
- #header .top li-这为该块应用了不同的文本颜色。 其较大的
line-height将帮助我们的文本停留在块的中间。 - #header .top li a-覆盖默认链接元素的样式,并为此块应用唯一的样式。
- #header .top li:last-child-选择#header .top元素的最后一个子元素,并将其边距清零以实现完美定位。
- #header .top li:第一个孩子 -覆盖#header .top第一个孩子的样式。
- #header .top表单 -设置表单
relative于其的position,以使其label适当浮动。 - #header .top图例 -隐藏显示的
legend元素 - #header .top标签 -我们将标签定位为一个字段值,以方便访问者轻松定义该字段的用途。 默认情况下,我们将其隐藏,但是将使用JS显示它。
- #header .top输入[type =“ submit”] -对于此按钮,请切片并保存我们的放大镜图标,并带有图像B-2bb中所示的指南。
步骤B-2c菜单
首先将以下内容复制到您的菜单部分。 您可以看到突出显示的内容有哪些更改:
<div id="nav" class="container_16 clearfix">
<div id="logo" class="grid_5 alpha">
<a href="#"><img src="http://webdesigntutsplus.s3.amazonaws.com/tuts/188_iconify/tutorial-coding-phase/files/images/logo.png" height="48" width="138" alt="ICONIFY" /></a>
</div><!-- end of #logo -->
<ul id="menu" class="grid_11 omega">
<li class="active"><a href="index.html">Home</a></li>
<li class="dropdown"><a href="#">Features</a>
<ul>
<li><a href="#">Home Pages</a></li>
<li><a href="#">Portfolio Pages </a> <span>»</span>
<ul>
<li><a href="portfolio.html">Column 2</a></li>
<li><a href="portfolio-col-3.html">Column 3</a></li>
<li><a href="portfolio-col-4.html">Column 4</a></li>
</ul>
</li>
<li><a href="#">Blog Pages</a> <span>»</span>
<ul>
<li><a href="blogs.html">Blog List</a></li>
<li><a href="blog-page.html">Blog</a></li>
</ul>
</li>
<li><a href="#">Fake Link 1</a></li>
<li><a href="#">Fake Link 2</a></li>
<li><a href="#">Fake Link 3</a></li>
</ul>
</li>
<li><a href="portfolio.html">Portfolio</a></li>
<li><a href="blogs.html">Blog</a></li>
<li><a href="contact.html">Contact</a></li>
</ul><!-- end of #menu -->
</div><!-- end of #nav --> 我们应用类名container_16和clearfix到div#nav元素妥善我们#logo和#menu定位。 我们将.grid_5和.alpha到DIV#标志给它一个空间等于5个电网和带班删除其左侧边缘.alpha 。 我们还将ul#menu应用.grid_11和.omega ,使其具有等于11个网格的空间,并使用.omega类删除其右边距。 最后,我们处理下拉菜单或多级菜单。 我们将使用CSS设计和定位菜单以及多级菜单。
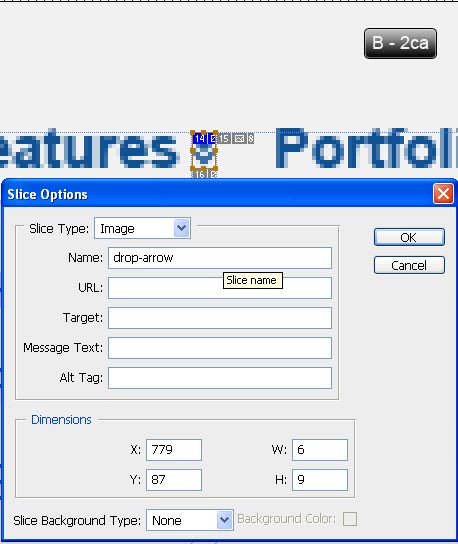
现在,将下拉菜单项的箭头切片并保存在files- files->images文件夹内,如图B-2ca所示
在default.css文件的菜单部分中复制或键入以下代码。
/* <<<<<<<<<<	b. Menu	>>>>>>>>>> */

#menu{
	padding: 16px 0 0 290px;
	width: 350px;
	z-index: 999;
}

#menu li{
	color: #0f5193;
	font-size: 14px;
	font-weight: bold;
	margin-left: 14px;
	position: relative;
}

#menu li.active a,
#menu li a:focus,
#menu li a:hover{border-bottom: 1px solid #88afd5;}

#menu>li.dropdown>a{
	border: none;
	background: transparent url(../../images/drop-arrow.png) right center no-repeat;
	padding-right: 10px;
}

#menu>li.dropdown.active>a{border-bottom: 1px solid #88afd5;}

#menu li a{color: #0f5193;}

#menu ul{
	background: #e4e4e4;
	border: 1px solid #b7b7b7;
	-moz-border-radius: 4px;
	-webkit-border-radius: 4px;
	border-radius: 4px;
	position: absolute;
	top: -999px;
	margin: 0;
	padding: 1px 11px;
	left: 0;
	width: 100px;
	z-index: 999;
}

#menu ul li{
	background: #d5d5d5;
	display: block;
	font-size: 12px;
	font-weight: normal;
	line-height: 1.6;
	margin: 0 -10px;
	padding: 4px 10px 0;
}

#menu ul li span{font-size: 14px;}


#menu ul li:first-child{padding-top: 8px;}

#menu ul li:last-child{padding-bottom: 6px;}

#menu li:hover ul{top: 16px;}

#menu li:hover li ul,
#menu li li:hover li ul,
#menu li li li:hover li ul,
#menu li li li li:hover li ul{top: -999px;}

#menu li li:hover ul,
#menu li li li:hover ul,
#menu li li li li:hover ul,
#menu li li li li li:hover ul{
	left: 121px;
	top: -2px;
}

#menu li li:hover ul{margin-left: 37px;}

#menu li li li:hover ul,
#menu li li li li:hover ul,
#menu li li li li li:hover ul{margin-left: 21px;}

#menu li li:hover>a{border-bottom: 1px solid #88afd5;}
我们在这里做了什么?
- #menu-额外填充以将菜单项推向右侧。
- #menu li-将其
position设置为relative对于正确放置多级菜单。 - #menu> li.dropdown> a-应用多级菜单的箭头,并为其添加一些额外的填充,以使箭头图形完全适合菜单项。
- #menu> li.dropdown.active> a-对
.active多层菜单项应用固定的边框。 - #menu ul-这是实际的多级菜单元素。 因此,我们将某些样式应用于装饰并定位多级菜单项。
- #menu ul li-其
background色显示为多级菜单的实际background色。 - #menu ul li span-给它更大的文本大小,因为
12px的箭头看起来有些奇怪。
注意:我们的多级菜单左侧有多余的空白。 稍后再应用superfish jQuery下拉菜单插件,一切都会很好。
步骤B-2d:内容区域
现在,我们将处理#content部分的内容。
图像滑块(jQuery.cycle插件)
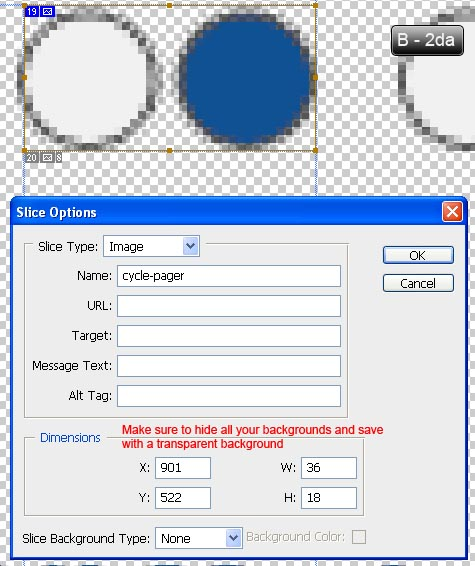
如图B-2da所示,将“图像”滑块的收音机定位,切片并保存在“文件” files->images文件夹中
将以下内容复制到default.css文件的a.Home小节中。
/* <<<<<<<<<<	a.Home	>>>>>>>>>> */

#slider{
	background: #b5b5b5;
	border: 1px solid #f8f8f8;
	height: 336px;
	margin-top: 10px;
	padding: 1px;
	width: 936px;
	overflow: hidden;
	position: relative;
}

#cyclePager{
	position: absolute;
	height: 18px;
	overflow: hidden;
	right: 20px;
	bottom: 20px;
	z-index: 99;
}

	#cyclePager a{
		background: transparent url(../../images/cycle-pager.png) 0 0 no-repeat;
		display: block;
		float: left;
		height: 18px;
		margin-left: 10px;
		text-indent: -9999px;
		width: 18px;
	}

	#cyclePager a:hover,
	#cyclePager a.activeSlide{background-position: -18px 0;}
样式很简单。 #slider的背景颜色需要显示为深色的内部发光颜色。 我们将通过在#slider元素内应用1px padding实现此#slider 。 我们应用position: relative对于我们的#cyclePager,以便它漂浮在#slider内部和幻灯片顶部。 a.activeSlide是当前活动幻灯片的一类,jQuery循环插件将自动应用该类。
四栏促销品
将这些类名称应用于.promo-col-4元素及其子元素:
<ul class="promo-col-4 <strong>container_16 clearfix</strong>">
                <li <strong>class="grid_4 alpha"</strong>>
                	...
                </li>
                <li <strong>class="grid_4"</strong>>
                	...
                </li>
                <li <strong>class="grid_4"</strong>>
					...
                </li>
                <li <strong>class="grid_4 omega"</strong>>
					...
                </li>
</ul><!-- end of .promo-col-4 -->在这里,我们将等于网格4的每一列都应用一个宽度,并使用clearfix类清除浮动错误。
在a.Home部分的#slider代码之后复制或键入以下样式。
.promo-col-4{margin: 30px 0 40px;}

	.promo-col-4 li{
		display: block;
		overflow: hidden;
	}

		.promo-col-4 li img{
			display: block;
			float: left;
			margin-right: 10px;
		}

		.promo-col-4 li h5{margin: 4px 0;}
此时,您的文档应在浏览器中呈现,如下图所示:
三栏式促销品
将这些类名称应用于.promo-col-3元素及其子元素:
<ul class="promo-col-3 <strong>container_12 clearfix</strong>">
                <li <strong>class="grid_4 alpha"</strong>>
					...
                </li>
                <li <strong>class="grid_4"</strong>>
					...
                </li>
                <li <strong>class="grid_4 omega"</strong>>
					...
                </li>
</ul><!-- end of .promo-col-3 -->..并在.home部分内的#promo-col-4代码之后复制此CSS规则。
.promo-col-3{margin: 40px 0;}我们的图像有两个边界:内部发光和较暗的边界。 我们可以直接从Photoshop中应用这些样式,但是使用CSS达到效果要灵活得多。 我们将应用Photoshop的内部辉光,并为这两个边界的图像应用一类.border 。 例如,请按照以下准则进行切片,应用样式,然后保存样式。
我们的.promo-col-3图片尺寸为300x140。 我们首先在Photoshop中创建一个298x138px的新文档(我们在图像周围保留了1px,以用CSS填充这些1px)。 现在放置图像,使用transform减小图像的大小。 点击Ctrl+A选择整个画布,转到Image->Crop 。 现在,从我们的任何图像中复制图层样式 ,现在将该图层样式应用于此新图像。 完成所有这些操作后,您应该会看到发光效果。 现在,将图像保存在资产文件夹中。 使用以下图像作为参考,对以后的图像应用相同的技术。
现在,对图像应用.border类,并将此代码粘贴到default.css文件的1. Common Theme Elements(通常为内联元素)部分中。
/* <<<<<<<<<<	1. Common Theme Elements (usually inline elements)	>>>>>>>>>> */

.border{border: 1px solid #b9b9b9;}
感言
在文件files->images文件夹中切片并保存testi-arrow.png图像,如图B-2db所示 。

将以下代码粘贴到a.Home部分中的#promo-col-3代码之后 。
.testimonial{margin: 40px 0;}

	#content .testimonial .inner{
		border: 1px solid #f3f3f3;
		-moz-border-radius: 0;
		-webkit-border-radius: 0;
		border-radius: 0;
		padding: 0;
		position: relative;
		margin: 0;
	}

		.testimonial blockquote{
			background: #e5e5e5;
			border: 1px solid #d9d9d9;
			margin: 0;
			padding: 20px;
		}

			.testimonial .arrow{
				background: transparent url(../../images/testi-arrow.png) 0 0 no-repeat;
				bottom: -10px;
				display: block;
				height: 12px;
				position: absolute;
				right: 20px;
				width: 16px;
			}
我们来了..
- #content .testimonial .inner-覆盖.inner元素的某些样式。
- > .testimonial blockquote-设置证明框的背景和内部边框颜色。
- > .testimonial .arrow-链接testi-arrow.png图像并适当定位。
让我们再次检查事物在浏览器中的呈现方式:
最近的项目框
将这些类名称应用于您的#recentProjects元素的子代:
<div id="recentProjects">
                <div class="bar">
                ...
                </div><!-- end of .bar -->
                <ul <strong>class="container_16 clearfix"</strong>>
                    <li <strong>class="grid_4 alpha"</strong>>
					...
                    </li>
                    <li <strong>class="grid_4"</strong>>
                    ...
                    </li>
                    <li <strong>class="grid_4"</strong>>
                    ...
                    </li>
                    <li <strong>class="grid_4 omega"</strong>>
                    ...
                    </li>
                </ul><!-- end of .container_16 -->
</div><!-- end of #recentProjects -->在.Home部分中的.testimonial代码后复制以下规则。
#recentProjects .bar{
	border: 1px solid #e5e5e5;
	margin: 0 0 18px 0;
}

	#recentProjects h5{
		color: #7c7c7c;
		background: #f3f3f3;
		border: 1px solid #f9f9f9;
		margin: 0;
		height: 38px;
		text-align: center;
		font-size: 14px;
		line-height: 36px;
}我们刚刚完成了#content部分的元素的设计和定位。 在浏览器中,我们的#recentProjects元素应完美呈现,如下所示。
步骤B-2e:页脚区域
让我们解决页脚..
该#footer的.top部分
将这些类名称应用于.top元素及其子元素:
<div class="top <strong>container_12 clearfix</strong>">
        	<div id="twitter" <strong>class="grid_8 alpha"</strong>>
			...
            </div><!-- end of #twitter -->
            <ul class="social <strong>grid_4 omega</strong>">
			...
            </ul><!-- end of .social -->
</div><!-- end of .top -->将以下代码粘贴到default.css文件的d中。 页脚小节。
/* <<<<<<<<<<	d. Footer	>>>>>>>>>> */

#footer .top{
	background: transparent url(../../images/bdr-bg.png) left bottom repeat-x;
	overflow: hidden;
	padding-bottom: 33px;
	width: 940px;
}

#twitter{
	background: transparent url(../../images/twitter-bird.png) 0 center no-repeat;
	margin-top: 30px;
	padding-left: 50px;
	width: 570px;
}


	#twitter h2,
	#twitter .profileLink{display: none;}

	#twitter li{
		display: block;
		line-height: 18px;
	}

.social{
	background: transparent url(../../images/v-bdr-bg.png) 1px 0 repeat-y;
	height: 32px;
	margin: 30px 0 0 0;
	padding: 0 0 0 10px;
	overflow: hidden;
}

	.social li{
		display: block;
		float: left;
		line-height: 18px;
		margin-right: 10px;
	}

	.social li:last-child{margin-right: 0;}

	.social h5{
		color: #7c7c7c;
		font-size: 14px;
		font-weight: normal;
		line-height: 32px;
		margin: 0 0 0 62px;
		width: 70px;
	}

	.social a{border: none;}
我们来了..
- #footer .top-使用其background属性应用边框。
- #twitter-应用我们的Twitter鸟作为背景图片。 我们还覆盖了一些样式并将其隐藏(我们的Twitter jQuery插件会将其添加到我们的文档中)。
- .social-我们为此元素应用了垂直边框。 对于您的垂直边框,请从index.psd文件中切片并保存该图形,如图B-2ea所示 。
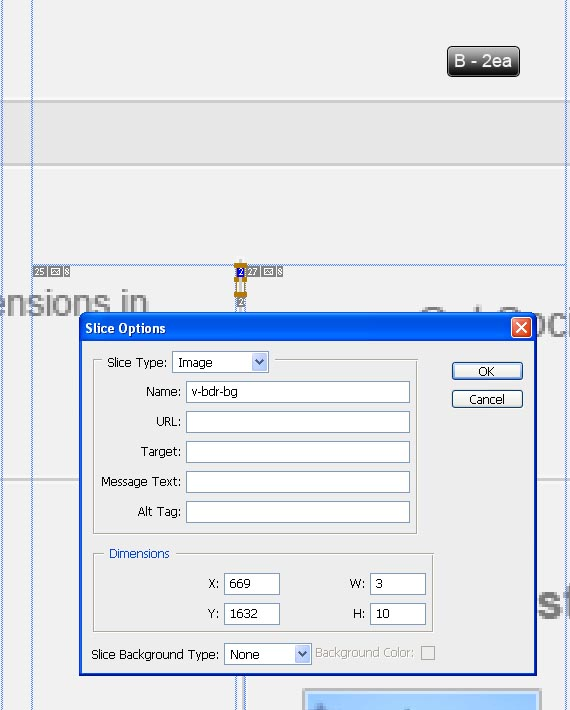
此时,我们的文档应呈现如下。 请注意,我们的Twitter部分为空,因为我们尚未对文档应用任何脚本。

#footer的.content部分
将这些类名称应用于.content元素及其子元素:
<ul class="content <strong>container_12</strong>">
        	<li <strong>class="grid_4 alpha"</strong>>
			...
            </li>
            <li <strong>class="grid_4"</strong>>
			...
            </li>
            <li <strong>class="grid_4 omega"</strong>>
			...
            </li>
</ul><!-- end of .content -->将以下代码粘贴到d中的.top规则之后。 页脚部分。
#footer .content{
	margin-top: 30px;
	width: 940px;
	overflow: hidden;
}

	#footer .content .grid_4{
		background: transparent url(../../images/v-bdr-bg.png) right top repeat-y;
		width: 287px;
		padding-bottom: 500px;
		padding-right: 20px;
		margin-bottom: -500px;
	}

	#footer .content li:last-child{
		padding-right: 0;
		background: none;
		width: 286px;
	}

		#footer .content h5{
			color: #7c7c7c;
			margin-top: 0;
		}

		#footer .blogList li{
			display: block;
			line-height: 18px;
			margin-bottom: 20px;
		}

		#footer .blogList li:last-child{margin: 0;}

			#footer .blogList img{
				display: block;
				float: left;
				margin: 0 10px 4px 0;
			}

			#footer .blogList h5{
				color: #2e5bc3;
				margin: 0;
			}

			#footer .blogList p{margin: 10px 0;}

#toTop{
	background: transparent url(../../images/to-top.png) 0 0 no-repeat;
	border: none;
	cursor: pointer;
	display: block;
	height: 10px;
	margin: 20px auto;
	width: 11px;
}

#toTop:focus,
#toTop:hover{background-position: -11px 0;}
#footer .content .grid_4会覆盖默认的.grid_4宽度,并应用其他样式。
对于#toTop的箭头切片,请从Photoshop文件中保存箭头,如图像B-2eb所示 。
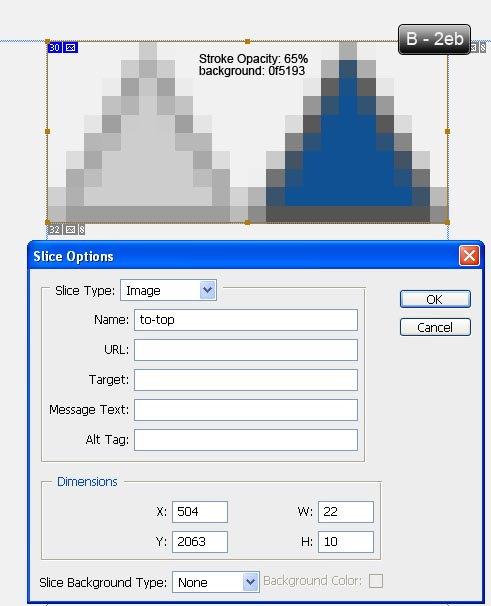
将以下代码复制到default.css文件的1. Common Theme Elements(通常为内联元素)部分中。
/* <<<<<<<<<<	1. Common Theme Elements (usually inline elements)	>>>>>>>>>> */

.border{border: 1px solid #b9b9b9;}

.list{margin: 18px 0;}

.list li{
	display: block;
	line-height: 18px;
	margin-bottom: 4px;
}

.list li a{color: #7c7c7c;}

.list li a:focus,
.list li a:hover{color: #eaa000;}
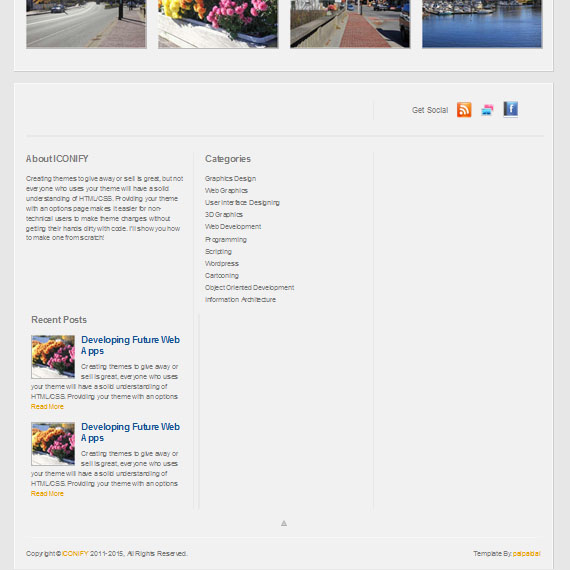
.btn{line-height: 18px;}您可能已经注意到,我们已将.list类应用于.content部分中的Categories项目。 该.list是常见的内联类,我们可以使用它在任何其他页面中显示其他列表项。 我们的最终页脚元素如下所示:

最后的润色
我们已经成功设计了主页,并且主题在IE之外的所有现代浏览器中均能正常运行。 对于IE,我们需要一些特殊CSS,因为它们不支持某些CSS伪类。 我们将编写一些IE特定代码来处理这些问题。
如果您此时在IE8中预览文档,则会发现以下错误呈现:
要解决这些错误渲染,请在ie8.css文件中复制或键入以下规则。
/* as IE8 having trouble supporting CSS pseudo class ":last-child" */
#header .top li+li+li+li{margin: 0;}

#footer .inner .content li+li+li{
	padding-right: 0;
	background: none;
	width: 286px;
}

.social li+li+li+li+li{margin-right: 0;}

.popularPost ul li+li{margin-right: 0;}
如果您在IE7中预览文档,则会发现与IE8及更高版本一样的浏览器翻译错误
要解决这些问题,请在ie7.css文件中复制或键入以下规则。
/* as IE7 having trouble supporting CSS pseudo class ":last-child" */

#header .top li+li+li+li{margin: 0;}

#footer .inner .content li+li+li{
	padding-right: 0;
	background: none;
	width: 286px;
}

.social li+li+li+li+li{margin-right: 0;}

#menu ul li:last-child{padding-bottom: 6px;}

#footer .content .grid_4{
	padding-bottom: 0;
	margin-bottom: 0;
}

hr{
	background: #cdcdcd;
	border: none;
	border-bottom: 1px solid #f6f6f6;
	border-top: 1px solid #f6f6f6;
	display: block;
	padding: 0;
	height: 3px;
	margin: 18px 0;
}

.popularPost ul li+li{margin-right: 0;}

#commentForm input[type="text"],
#commentForm textarea,
#contactForm input[type="text"],
#contactForm textarea{margin-left: -80px;}注意:我们的目标是一些尚不存在的元素。 稍后我们将使用这些选择器/元素。
步骤-C使用JavaScript定义交互
下载并链接这些JavaScript库。 jQuery JavaScript库v1.4.2 , jQuery.prettyPhoto v-2.5.6和jQuery.cycle v-2.80 。
<head>
	<meta http-equiv="Content-Type" content="text/html; charset=utf-8" />
	<meta name="author" content="Nuruzzaman Sheikh(palpaldal)" />
	<meta name="description" content="A brief description of this website or your business." />
	<meta name="keywords" content="keywords, or phrases, suited with each particular page, are best" />

    <title>ICONIFY :: Welcome</title>
	<!-- Favorites icon -->
	<link rel="shortcut icon" href="assets/favicon.ico" />

<!-- CSS Files -->
	<!-- Resetting all default browser markups and styles.-->
    <link rel="stylesheet" type="text/css" href="files/codes/css/reset.css" media="all" />
	<!-- 960 Grid ( 12+16 cols) System for easy and flexible markups.-->
    <link rel="stylesheet" type="text/css" href="files/codes/css/960.css" media="all" />
    <!-- Default and template specific styles. -->
    <link rel="stylesheet" type="text/css" href="files/codes/css/default.css" media="all" />
    <!-- prettyPhoto jQuery plugin's CSS styles-->
    <link rel="stylesheet" type="text/css" href="files/codes/css/prettyPhoto.css" media="all" />

<!-- JavaScript Files -->
	<!-- jQuery JavaScript Library Scripts -->
    <script src="http://webdesigntutsplus.s3.amazonaws.com/tuts/188_iconify/tutorial-coding-phase/files/codes/js/jquery-1.4.2.min.js"></script>
	<!-- cycle plugin jQuery library -->
    <script src="http://webdesigntutsplus.s3.amazonaws.com/tuts/188_iconify/tutorial-coding-phase/files/codes/js/jquery.cycle.all.min.js"></script>
	<!-- prettyPhoto library  -->
    <script src="http://webdesigntutsplus.s3.amazonaws.com/tuts/188_iconify/tutorial-coding-phase/files/codes/js/jquery.prettyPhoto.js"></script>

	<!-- This codes starts/initializes all js functionalities throughout this template. It's also some mini third party js libraries. -->
    <script src="http://webdesigntutsplus.s3.amazonaws.com/tuts/188_iconify/tutorial-coding-phase/files/codes/js/init.js"></script>

<!-- Weird IE specific codes -->
	<!--[if lt IE 8]>
    	<link rel="stylesheet" type="text/css" href="files/codes/css/ie7.css" media="all" />
    <![endif]-->
    <!--[if IE 8]>
    	<link rel="stylesheet" type="text/css" href="files/codes/css/ie8.css" media="all" />
    <![endif]-->

</head>现在打开您的init.js文件,并从以下插件复制源代码:
- jQuery.easing插件
- jQuery.scrollTo插件
- jQuery.supersubs下拉菜单插件
- jQuery.superfish下拉菜单插件
- jQuery.twitter插件
- jQuery.scrollToTop插件
- 自定义jQuery.tinyValidator验证表单字段
- 主题脚本初始化功能/代码
以上所有库均为第三方。 我们将它们合并为一个文件,以减少HTTP请求。 其中tinyValidator是我开发的一个迷你验证插件。 现在,我们将实际启动/初始化脚本。 将以下代码复制到init.js文件的“ 网站初始化JavaScript代码”部分中。
/*	<<<<<<<< Site Initialization JavaScript Codes >>>>>>>>	*/

;(function($){

	$(document).ready(function(){
		$('.border').parent('a').css('border', 'none');
	});

	/* jQuery ScrollToTop plugin */
	$(function() { $("#toTop").scrollToTop({speed:1000,ease:"easeInOutQuad",start:600}); });

	/* cycle plugin function declarations using 'cycle.js' jquery plugin */
	$(document).ready(function(){
		if ($('#cycle').length > 0){
			$('#cycle').cycle({
				fx: 'scrollLeft',
				speed: 500,
				timeout: 8000,
				randomizeEffects: false,
				easing: 'easeInOutQuad', //jquery.easing library/plugin is required for this functionality
				next:   '',
				prev:   '',
				pager:  '#cyclePager',
				cleartypeNoBg: true
			});
		}
	});

	/* altering search form label and using it's label as field's value */

	$(document).ready(function(){

		var $searchTerm = $('#searchTerm');

		if($searchTerm.val() == ''){
			$('label', '#header').css('display', 'inline');
		}

		$searchTerm.focus(function(){
			$searchTerm.siblings('label').hide();
		})
		.blur(function(){
			if($searchTerm.val() == ''){
				$searchTerm.siblings('label').show();
			}
		});
	});

	/*
	* dropdown menu function using 'superfish.js' and 'supersubs.js' jquery plugin
	*/
	$(document).ready(function(){
		if(jQuery.browser.msie && parseInt(jQuery.browser.version, 10) < 7){
			$('ul', '#nav').superfish({
				delay: 1000,
				animation: {opacity: 'show'},
				speed: 800,
				autoArrows: false
			})
		}
		else{
			$('ul', '#nav').supersubs({
				minWidth: 8,
				maxWidth: 10,
				extraWidth: 0
			}).superfish({
				delay: 1000,
				animation: {opacity: 'show'},
				speed: 800,
				autoArrows: false
			})
		}
	});

	/*
	* initializting twitter plugin
	* change 'userName' variable with yours and you are done.
	* you can also alter other settings as you need them.
	*/
	$(document).ready(function() {
		$("#twitter").getTwitter({
			userName: "jquery",
			numTweets: 1,
			loaderText: "Loading tweets...",
			slideIn: true,
			slideDuration: 750,
			showHeading: true,
			headingText: "",
			showProfileLink: true,
			showTimestamp: true
		});
	});
})(jQuery);
我们将所有站点初始化代码放入匿名函数中。
- 在第一步中,我们从
.border类的图像中删除悬停状态边框。 - 使用我们的#toTop元素初始化jQuery scrollToTop插件。
- 确保#cycle可用,然后初始化cycle插件。
- 更改搜索表单标签并将其标签用作字段的值。
- 使用'superfish.js'和'supersubs.js'jQuery插件初始化下拉菜单功能
- 初始化Twitter插件。 您可以通过仅更改userName变量来显示您的推文。
结论
! 我们已经完成了编码阶段最重要的部分。 您可能会注意到有些做法或技术被夸大了,但是这些只是为了演示目的而已。 我们将在下一部分中完成这个主题。 非常感谢您的阅读!
tuts4you 注册


 341
341

 被折叠的 条评论
为什么被折叠?
被折叠的 条评论
为什么被折叠?
 到【灌水乐园】发言


