


css di创建二级导航
大家好! 今天,我们将很高兴创建CSS3选项卡式导航。 在本教程中,我们将根据这些令人敬畏的选项卡提供的许多不同主题创建深色牛仔裤版本,因为...#1我们可以和#2,涉及更多的样式,并且我可以向您展示更简洁CSS3的技巧而不是其他样式。 如果您愿意,源文件中的主题要简单得多,因此可以随意跟随主题,因为结构几乎相同。
注意:那里支持IE7&8,但局限性在于该功能可以完美运行,但是某些叠加样式未得到正确处理。 如果不是因为出色而出色CSSPIE和Dean Edwards修复程序,将不支持IE9以外的任何版本。
好的,既然这已经成为现实,我想是时候开始了!
视频教程
我们以两种不同的格式提供本教程:视频和下面的完整书面教程。 遵循您喜欢的学习方法(或两者都选择):
书面教程
下面是逐步编写的教程。 确保也获取完整的可下载源!
步骤1建立标记
头部
对于第一个标记,我们将使用HTML5 doctype创建头部,插入样式表,并告诉IE 7和8可以使用CSS3。
<!DOCTYPE HTML>
<head>
<meta charset=utf-8 />
<title>CSS3 Tabs</title>

<!-- Styles !-->
<link rel="stylesheet" href="styles/themes/jean/darkwash.css" media="screen" />

<!--[if lt IE 9]>
<link rel="stylesheet" href="styles/ie.css" media="screen" />
<script src="http://ie7-js.googlecode.com/svn/version/2.1(beta4)/IE9.js"></script>
<![endif]-->

</head>

<body>

</body>
</html>
建造容器
在添加了头部之后,在body标签之间,我们需要为选项卡式导航创建一些容器。 让我们分解一下...
如您所见,第一个容器是id =“ container”。 这用于创建选项卡式导航的完整宽度并根据需要放置它。
最后是class =“ tab-container”,它是实际选项卡本身的包装程序,它有助于包含内容块。 这是一个非常重要的类,尽管我将在本教程的后面部分解释样式,但无需对其进行编辑。
<!-- Start Tab Area. Use the container for positioning and to increase the tab content width !-->

<div id="container">

<!-- Start Tabs !-->

<div class="tab-container">

Tabs will go here

</div><!-- Tab Container !-->

</div><!-- Container !-->

<!-- End Tab Area !-->
“最后一个是class =“ tab-container”。这是一个非常重要的类,无需对其进行编辑。”
创建第一个标签
我们要编写的最后一个标记是针对我们的实际标签及其内部的内容。
首先,我们要创建一个具有ID的div,以便在单击相应选项卡时可以知道要显示的内容。 看起来像这样...
<div id="c1">
//Next markup will go here
</div>
然后,我们将为该内容ID创建选项卡,并通过在链接中使用带有c1的哈希将其显示为ID为c1的div。 所以现在您的标记应该看起来像这样...
<div id="c1">
		<a href="#c1" title="First">First</a> <!-- This is your actual tab and the content is below it !-->
        //Next Markup will go here
</div>
现在让我们创建一个放置内容的地方。 为此,我们将简单地创建一个带有.tab-content类的div并插入一些虚拟文本,使您的标记现在看起来像这样...
<div id="c1">
		<a href="#c1" title="First">First</a> <!-- This is your actual tab and the content is below it !-->
			<div class="tab-content">  <!-- tab-container > div > div in the CSS !-->
            <h3>This is the first tab</h3>
            <p>Lorem ipsum dolor sit amet, consectetur adipiscing elit. porttitor est et rhoncus.Nam ipsum leo, ornare ac volutpat suscipit, convallis eu metus ipsum nunc.</p>
			<p>Suspendisse at aliquet turpis. Phasellus eu libero euismod leo imperdiet sagittis elementum ut erat. Nam euismod risus at sem consequat vestibulum. </p>
            </div>
	</div>
让我们完成标记
只需在您的第一个标签下添加以下内容(即:c1)
就是这样。 极好的标记式导航的标记很少。 这是其余选项卡,所有这些选项卡都与您刚创建的标记相符! 只需在第一个标签下添加以下内容(即:c1)...
注意:您添加的最后一个标签将始终是一个隐藏的标签,并且内容将首先显示,因此使其像简介一样。
<div id="c2">
<a href="#c2" title="Second">Second</a> <!-- This is your actual tab and the content is below it !-->
<div class="tab-content"> <!-- tab-container > div > div in the CSS !-->
<h3>Add as many tabs as you like</h3>
<p>Lorem ipsum dolor sit amet, consectetur adipiscing elit. porttitor est et rhoncus. Nam ipsum leo, ornare ac volutpat suscipit, convallis eu metus. ipsum nunc.</p>
<p>Suspendisse at aliquet turpis. </p>
<p>Lorem ipsum dolor sit amet, consectetur adipiscing elit. porttitor est et rhoncus. Nam ipsum leo, ornare ac volutpat suscipit, convallis eu metus. ipsum nunc.</p>
</div>
</div>
<div id="c3">
<a href="#c3" title="Third">Third</a> <!-- This is your actual tab and the content is below it !-->
<div class="tab-content"> <!-- tab-container > div > div in the CSS !-->
<h3>5 Preset Styles & Color Themes</h3>
<p>Consectetur adipiscing elit. porttitor est et rhoncus. Nam ipsum leo, ornare ac volutpat suscipit, convallis eu metus. ipsum nunc.</p>
<p>Suspendisse at aliquet turpis. Phasellus eu libero euismod leo imperdiet sagittis elementum ut erat. Nam euismod risus at sem consequat vestibulum. </p>
</div>
</div>
<div id="c4">
<a href="#c4" title="Fourth">Fourth</a> <!-- This is your actual tab and the content is below it !-->
<div class="tab-content"> <!-- tab-container > div > div in the CSS !-->
<h3>NO Javascript! NO Images!</h3>
<p>Consectetur adipiscing elit. porttitor est et rhoncus. Nam ipsum leo, ornare ac volutpat suscipit, convallis eu metus. ipsum nunc.</p>
<p>Suspendisse at aliquet turpis. Phasellus eu libero euismod leo imperdiet sagittis elementum ut erat.</p>
</div>
</div>
<div id="c5">
<div class="tab-content"> <!-- Having a hidden or opening tab is ideal when you don't want last tab to always show first when loading the page !-->
<h3>2 Tab Types - Regular and Newsreel</h3>
<p>If you have an opening tab like this, it should always be last in the list of tabs otherwise it won't show first when the page loads.</p>
<p>Text sometimes overlaps with hidden tabs in IE7 & 8</p>
</div>
</div>您的选项卡式导航应如下所示。 它的基本形式看起来不错,但让我们添加一些样式,让这个婴儿开始工作吧!
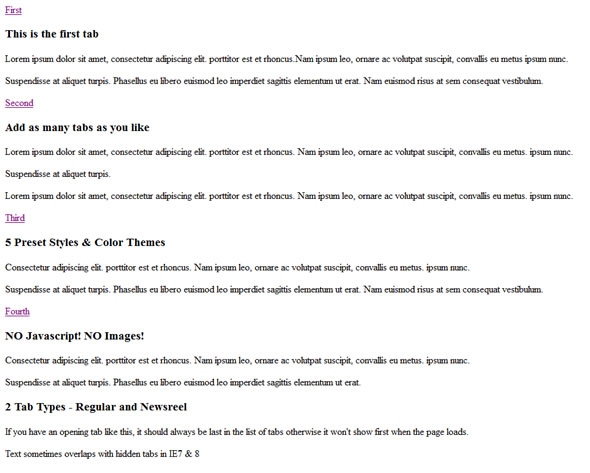
步骤2挖掘一些CSS
既然我们已经处理完所有标记,那么现在您将感觉像是赢家! 让我们更进一步,通过对刚创建的标记应用一些很棒CSS来建立信心……然后,您将真正值得夸耀!
全局标签
好的,就本教程而言,我们使用的是独立的选项卡式导航,因此让我们添加一些全局样式,例如body,p标签,heading等。
实施选项卡时,样式表中可能已经具有这些样式。 在这种情况下,您可以删除这些样式,也可以标记.tab容器以创建一些特定于标签的样式,以免覆盖您网站的样式。
body {
	font-size:13px;
	font-family:Arial, Helvetica, sans-serif;
	color:#E7E7E7;
}

p, .tab-content li, h1, h2, h3{ /* This insures that there's enough space between your paragraphs, headings, etc */
    margin-bottom: 10px;
}

a{
	text-decoration:none;
	color:#EFD24A;
}

a:hover{
	color:#AF9B41;
}

.tab-container h3{ /* Effects only the h3 headings inside the tabs */
	font-size:147%;
	color:#EFDFB3;
}
造型容器
现在,我们将样式化两个容器。 在本教程中,我们将使用margin:0 auto将主容器居中,将其宽度设置为480px,然后将其从顶部向下推约4%。
#container{ /* Use this to position the entire tab module */
	margin:0 auto;
	width:480px;
	margin-top:4%;
}
对于.tab容器,重要的是为每个选项卡内容块添加一个相对位置,以便在一个漂亮且包含空间的位置正确地相互重叠。 我们希望我们的宽度与主容器的宽度匹配100%,并且z-index为0,这将有助于IE避免在当前内容后面显示内容块的文本。
.tab-container {
position: relative;
width: 100%;
z-index:0;
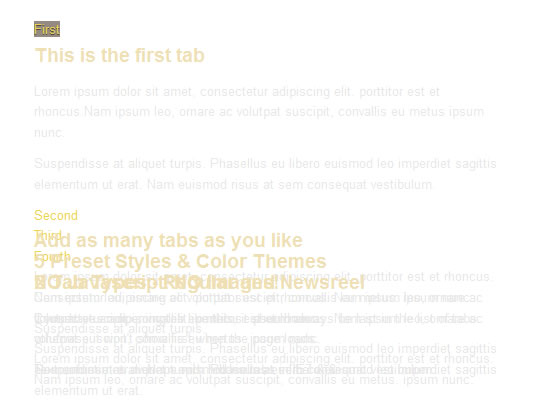
}此时,您应该有一个可用的选项卡式导航。 看起来还不漂亮,但是,嘿...正在工作! 如果很难看到我的道歉。
样式标签及其内容
好的,既然我们有工作选项卡,那么我们首先想做的就是将它们水平排列。 为此,我们只需在每个选项卡的第一个div处添加display:inline即可。
.tab-container > div {
	display: inline;
}
因此,现在我们需要向选项卡本身添加一些默认样式。 我们将添加一个相对位置,这对IE很重要。 我们还将显示内联块,以使其与标签内容正确对齐。 通过设置2px的边距,我们可以在每个标签周围添加一些空间以使其更整洁。 我们还将为每个浏览器添加渐变背景,以及边框半径和框阴影,以增加一些超赞的效果! 由于我们再次将CSSPIE用于IE 7和8,因此无需在渐变中使用讨厌的过滤器。
.tab-container > div > a {
	position: relative !important; /* Keeps the tabs in line with each other */
	text-decoration: none;
	color: #D7D7D7;
	display: inline-block;
	padding: 4px 14px;
	font-size:15px;
	font-family:"Trebuchet MS", Arial, Helvetica, sans-serif;
	font-weight:bold;
	text-transform:uppercase;
	margin:2px;
	background: #4C4648; /* old browsers */
	background: -moz-linear-gradient(top, #4C4648 0%, #474344 52%, #2F2D2E 100%); /* firefox */
	background: linear-gradient(top, #4C4648 0%, #474344 52%, #2F2D2E 100%); /* future browsers */
	-pie-background: linear-gradient(top, #4C4648 0%, #474344 52%, #2F2D2E 100%); /* pie for ie */
	background: -webkit-gradient(linear, left top, left bottom, color-stop(0%,#4C4648), color-stop(52%,#474344), color-stop(100%,#2F2D2E)); /* webkit */
	border:dashed 2px #CFA840;
	padding: 4px 14px;
	-moz-border-radius: 3px;
	-webkit-border-radius: 0px;
	border-radius: 3px;
    text-shadow: 0 -1px 0 #000000;
	-moz-box-shadow: 0 4px 10px -5px #000000;
	box-shadow: 0 4px 10px -5px #000000;
	-webkit-box-shadow: 0 4px 10px -5px #000000;
}
在列表的下一步,我们想让用户知道他们在哪个选项卡上。 为此,我们将使用目标选择器并使用Dean Edwards IE9.js使IE 7和8能够识别它。
所以.tab-container> div:target>表示,当选择第一个div(即div id =“ c1”等)或作为目标时,我们将更改该div内的按钮(即:a)会看起来像。
.tab-container > div:target > a {
    background: none repeat scroll 0 0 #948a81;
    text-shadow: 0 1px 0 #4C4648;
}
现在我们已经设置了选项卡按钮的样式,让我们继续,向内容区域添加一些字符。
我们在这里要做的是将.tab-container中的第二个div定位到div class =“ tab-content”,并将其最小高度设为250px,这一点很重要,因此所有内容div都位于目标后面div没有重叠。 因此,由于我们拥有的内容具有正确的高度,因此我们仍然需要将非活动内容div隐藏在目标对象的后面,并且只需添加z索引为-2即可。 另外,我们希望IE 7和8表现出色,因此我们将添加绝对位置。 所以这是重要的内容,其余的代码在那里添加了一些额外的样式,并为我们提供了很好的深色牛仔裤外观。
.tab-container > div > div { /* This is the container which holds the tab content */
	background: #4C4648; /* old browsers */
	background: -moz-linear-gradient(top, #4C4648 0%, #474344 84%, #2F2D2E 100%); /* firefox */
	background: linear-gradient(top, #4C4648 0%, #474344 84%, #2F2D2E 100%); /* future browsers */
	-pie-background: linear-gradient(top, #4C4648 0%, #474344 84%, #2F2D2E 100%); /* pie for ie */
	background: -webkit-gradient(linear, left top, left bottom, color-stop(0%,#4C4648), color-stop(84%,#474344), color-stop(100%,#2F2D2E)); /* webkit */
	-moz-box-shadow: 0 0 12px 1px #000000 inset;
	-webkit-box-shadow: 0 0 12px 1px #000000 inset;
	box-shadow: 0 0 12px 1px #000000 inset;
	z-index: -2;
	top: 50px;
	padding: 20px;
	border:solid 6px #4C4648;
	outline: 2px dashed #CFA840;
	outline-offset: -8px; /*Delete if you don't want an offset*/
	min-height:250px; /* Change this value if you need more or less content space */
	position:absolute; /* Fixes IE 7 & 8 */
}
设置了初始内容div的样式后,我们希望将目标对象放在最前面。 为此,我们只需使用z索引为3的目标选择器并将其设为重要即可。
.tab-container > div:target > div {
	position: absolute;
	z-index: 3 !important; /* Brings the content to the front depending on the tab that was clicked */
}
我们要做的最后一件事是,如果您想在标签内添加图片,请在内容中添加一些填充和默认样式。
附带说明一下,不要忘记在样式表的顶部导入reset.css文件,我们需要此文件来覆盖浏览器的默认设置。
div.tab-content{ /* Styles the inner content of the tabs */
padding-bottom: 70px;
padding-left: 20px;
padding-right: 20px;
}
.tab-content img{
margin:0 auto;
display:block;
padding-bottom: 20px;
padding-top: 10px;
}
/****** This imports other stylesheets so you don't have to call them in an html file *****/
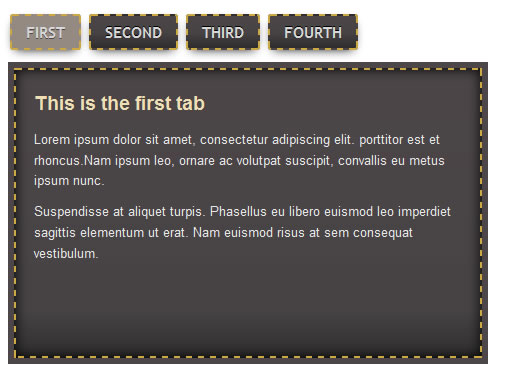
@import url('../../reset.css');完成所有这些操作后,您应该最终获得下图所示的内容。 如果您的外观不相同或相似,则您错过了某些东西或决定使用自己的样式,只需返回并重新检查您的工作,我确定那只是次要的事情。
还有一件事...
我们想告诉IE7和8,可以使用框阴影,圆角等。为此,我们只需将样式表中具有CSS3功能的元素添加到ie.css文件中,然后将行为用于CSSPIE像这样...
.tab-container > div > div, .tab-container > div > a{behavior: url(../styles/csspie/PIE.htc);}干得好...您完成了!
如果您已经走了那么远,那意味着您已经全部完成了...恭喜! 希望您喜欢本教程,就像我喜欢写它一样。 教大家可能不知道的新提示和技巧总是很高兴的。 话虽如此, 做好工作,要有耐心,并不断吸收尽可能多的知识,在您知道之前,您将成为一切工作的大师!
在下面留下您的评论和问题;)
翻译自: https://webdesign.tutsplus.com/articles/how-to-create-a-css3-tabbed-navigation--webdesign-3299
css di创建二级导航


 5208
5208

 被折叠的 条评论
为什么被折叠?
被折叠的 条评论
为什么被折叠?
 到【灌水乐园】发言


