


 本文详细介绍了如何在SpringBoot项目中进行模块化拆分,包括创建主模块、子模块(如admin、api、service、框架、common和system)、配置依赖及入口,以便于团队协作和管理。重点讲解了模块之间的依赖关系和打包流程。
文章目录
分模块
SpingBoot 分模块开发,便于协作,管理
mall 是域名
模块拆分
mall-crm-api     接口入口
mall-crm-admin   后台入口
mall-crm-service 服务层
mall-quartz      定时任务
mall-common      常用工具,分页,导出,支付,短信息发送,微信,Redis
mall-system      用户,角色,部门,菜单, 字典,日志等处理
mall-framework   国际化,鉴权,数据持久化
...
一般流程
1. 创建Spring Boot 项目, 确认主,子模块
2. 组合并引包
<!--删除了build,添加了packaging并且改为pom-->
<packaging>pom</packaging>
<modules>
	<module>mall-crm-admin</module>
	<module>mall-crm-api</module>
	<module>mall-crm-service</module>
	<module>mall-framework</module>
	<module>mall-common</module>
	<module>mall-system</module>
	<module>mall-quartz</module>
</modules>
3. 入口 admin,api 模块
配置模块间的依赖
添加依赖的子模块(一定要统一版本),修改打包build配置项
4. 不带入口子模块
删除其项目运行入口
删除不用的build 配置项
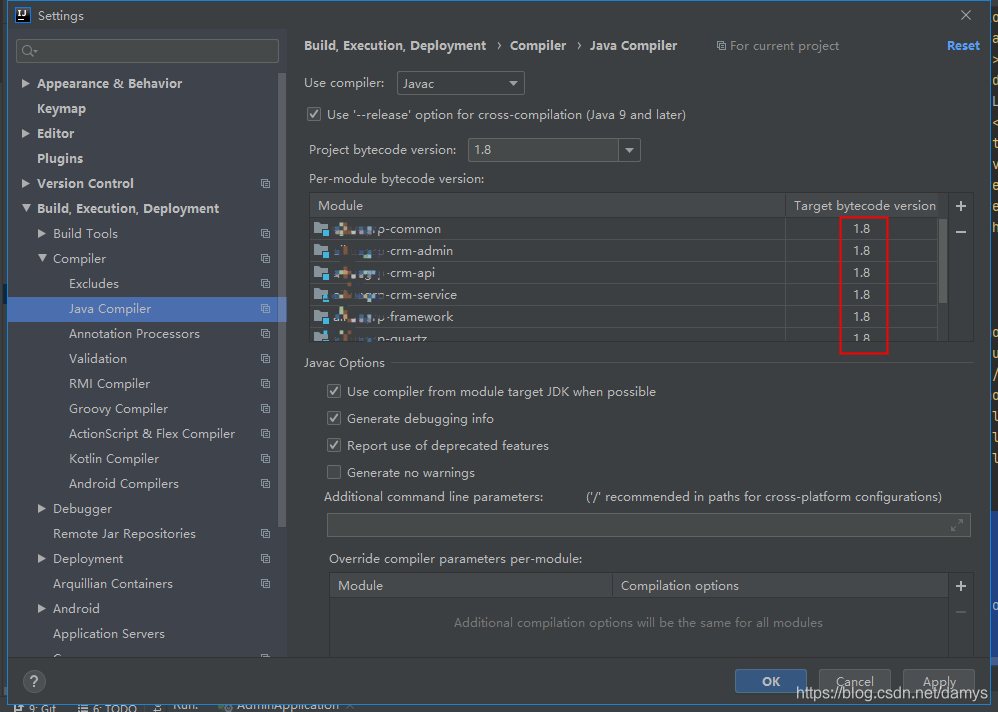
注意:如使用IEDA 工具要统一模块的版本(很重要),Setting---Build---Compiler---Java Complier
5. 打包
进入入口模块,项目右侧maven, 选择打包
模块创建
说明:只提供关键代码
模块引用
入口模块 引 框架模块
框架模块 引 系统模块
系统模块 引 通用模块
主模块配置
<properties>
	<java.version>1.8</java.version>
	<mall.version>1.0.1</mall.version>
	<project.build.sourceEncoding>UTF-8</project.build.sourceEncoding>
	<project.reporting.outputEncoding>UTF-8</project.reporting.outputEncoding>
	<spring-boot.version>2.3.7.RELEASE</spring-boot.version>
	<mybatis.spring.version>2.1.4</mybatis.spring.version>
	<fastjson.version>1.2.60</fastjson.version>
	<druid.version>1.1.10</druid.version>
	<jedis.version>3.0.1</jedis.version>
	<shiro.version>1.6.0</shiro.version>
	<kaptcha.version>2.3.2</kaptcha.version>
</properties>

<packaging>pom</packaging>
<modules>
	<module>mall-crm-admin</module>
	<module>mall-crm-api</module>
	<module>mall-crm-service</module>
	<module>mall-framework</module>
	<module>mall-common</module>
	<module>mall-system</module>
	<module>mall-quartz</module>
</modules>

<dependencies>
	<!-- Mysql驱动包-->
	<dependency>
		<groupId>mysql</groupId>
		<artifactId>mysql-connector-java</artifactId>
	</dependency>

	<!-- 阿里数据库连接池-->
	<dependency>
		<groupId>com.alibaba</groupId>
		<artifactId>druid</artifactId>
		<version>${druid.version}</version>
	</dependency>

	<dependency>
	...
	</dependency>
</dependencies>
framework模块
<parent>
	<groupId>com.mall</groupId>
	<artifactId>crm</artifactId>
	<version>1.0.1</version>
</parent>

<groupId>com.mall</groupId>
<artifactId>mall.framework</artifactId>
<version>1.0.1</version>
<name>framework</name>
<description>mall-framework</description>

<dependencies>
	<!-- web容器-->
	<dependency>
		<groupId>org.springframework.boot</groupId>
		<artifactId>spring-boot-starter-web</artifactId>
	</dependency>

	<dependency>
		<groupId>org.springframework.boot</groupId>
		<artifactId>spring-boot-starter</artifactId>
	</dependency>

	<!-- aop 拦截器-->
	<dependency>
		<groupId>org.springframework.boot</groupId>
		<artifactId>spring-boot-starter-aop</artifactId>
	</dependency>

	<!-- thymeleaf-->
	<dependency>
		<groupId>org.springframework.boot</groupId>
		<artifactId>spring-boot-starter-thymeleaf</artifactId>
	</dependency>

	<!-- mybatis-->
	<dependency>
		<groupId>org.mybatis.spring.boot</groupId>
		<artifactId>mybatis-spring-boot-starter</artifactId>
		<version>${mybatis.spring.version}</version>
	</dependency>

	<!-- redis-->
	<dependency>
		<groupId>org.springframework.boot</groupId>
		<artifactId>spring-boot-starter-data-redis</artifactId>
	</dependency>

	<dependency>
		<groupId>org.apache.shiro</groupId>
		<artifactId>shiro-spring</artifactId>
		<version>${shiro.version}</version>
	</dependency>

	<!-- lombok-->
	<dependency>
		<groupId>org.projectlombok</groupId>
		<artifactId>lombok</artifactId>
	</dependency>

	<dependency>
		<groupId>com.github.penggle</groupId>
		<artifactId>kaptcha</artifactId>
		<version>${kaptcha.version}</version>
	</dependency>

	<dependency>
		<groupId>com.mall</groupId>
		<artifactId>mall.system</artifactId>
		<version>${mall.version}</version>
	</dependency>

	<dependency>
	...
	<dependency>

</dependencies>
Admin, Api 模块
<parent>
	<groupId>com.mall</groupId>
	<artifactId>crm</artifactId>
	<version>1.0.1</version>
</parent>

<groupId>com.mall</groupId>
    <artifactId>mall.admin</artifactId>
    <version>1.0.1</version>
    <name>admin</name>
<description>mall-crm-admin</description>

<dependencies>
	<!-- framework-->
	<dependency>
		<groupId>com.mall</groupId>
		<artifactId>mall.framework</artifactId>
		<version>${mall.version}</version>
	</dependency>

	<!-- service-->
	<dependency>
		<groupId>com.mall</groupId>
		<artifactId>mall.service</artifactId>
		<version>${mall.version}</version>
	</dependency>

	<dependency>
		<groupId>org.springframework.boot</groupId>
		<artifactId>spring-boot-starter-test</artifactId>
		<scope>test</scope>
		<exclusions>
			<exclusion>
				<groupId>org.junit.vintage</groupId>
				<artifactId>junit-vintage-engine</artifactId>
			</exclusion>
		</exclusions>
	</dependency>

	<dependency>
	...
	<dependency>
</dependencies>
其它模块, 如共用模块配置
<parent>
	<groupId>com.mall</groupId>
	<artifactId>crm</artifactId>
	<version>1.0.1</version>
</parent>

<groupId>com.mall</groupId>
<artifactId>mall.common</artifactId>
<version>1.0.1</version>
<name>common</name>
<description>公用工具类</description>

<properties>
...
</properties>

<dependencies>
...
</dependencies>


 被折叠的 条评论
为什么被折叠?
被折叠的 条评论
为什么被折叠?
 到【灌水乐园】发言


