


规则:
星球  英文名     公转周期         光色     暗色
水星  Mercury     87.70 天     #A69697 #5C3E40
金星  Venus       224.701天    #C4BBAC #1F1315
地球  Earth       365.2422天   #78B1E8 #050C12
火星  Mars        686.98 日    #CEC9B6 #76422D
木星  Jupiter     4332.589天   #C0A48E #322222
土星  Saturn      10759.5 天   #F7F9E3 #5C4533
天王星 Uranus      30799.095日  #A7E1E5 #19243A
海王星 Neptune     164.8*365天  #0661B2 #1E3B73
html:
<canvas id="canvas" width="1000" height="1000" style="background:#000">
    您的浏览器不支持canvas标签
</canvas>
js:
<script>
    var cxt=document.getElementById('canvas').getContext('2d');

    //轨道
    function drawTrack(){
        for(var i=0;i<8;i++){
            cxt.beginPath();
            cxt.arc(500,500,(i+1)*50,0,Math.PI*360,false);
            cxt.closePath();
            //设置笔触的颜色
            cxt.strokeStyle="#fff";
            cxt.stroke();
        }

    }
    drawTrack();

    //星球--画出星球需要哪些属性
    function Star(x,y,radius,cycle,sColor,eColor){
        this.x=x;   //星球的坐标点
        this.y=y;
        this.radius=radius;//星球的半径
        this.cycle=cycle;//公转周期
        this.sColor=sColor;//星球的颜色(开始色,结束色)
        this.eColor=eColor;
        this.color=null;//新建一个渐变颜色空对象

        this.time=0;//设置一个计时器

        this.draw=function(){
            cxt.save();//保存之前的画布内容
            cxt.translate(500,500);//重置0,0坐标点
            cxt.rotate(this.time*(360/this.cycle)*Math.PI/180);//设置旋转角度
            cxt.beginPath();//画星球
            cxt.arc(this.x,this.y,this.radius,0,360,false);
            cxt.closePath();
            this.color=cxt.createRadialGradient(this.x,this.y,0,this.x,this.y,this.radius);
            this.color.addColorStop(0,this.sColor); //渐变开始点和颜色
            this.color.addColorStop(1,this.eColor); //渐变结束点和颜色
            cxt.fillStyle=this.color;   //将渐变对象复制给填充画笔
            cxt.fill();
            cxt.restore();  //恢复之前保存的画布内容
            this.time+=1;//执行完毕之后时间增加
        }
    }

    //创建一个太阳对象的构造函数
    function Sun(){ Star.call(this,0,0,20,0,"#F00","#f90")}

    //水星
    function Mercury(){ Star.call(this,0,-50,10,87.70,"#A69697","#5C3E40")}

    //金星
    function Venus(){ Star.call(this,0,-100,10,224.701,"#C4BBAC","#1F1315")}

    //地球
    function Earth(){ Star.call(this,0,-150,10,365.224,"#78B1E8","#050C12")}

    //火星
    function Mars(){ Star.call(this,0,-200,10,686.98,"#CEC9B6","#76422D")}

    //木星
    function Jupiter(){ Star.call(this,0,-250,10,4332.589,"#C0A48E","#322222")}

    //土星
    function Saturn(){ Star.call(this,0,-300,10,10759.5,"#F7F9E3","#5C4533")}

    //天王星
    function Uranus(){ Star.call(this,0,-350,10,30799.095,"#A7E1E5","#19243A")}

    //海王星
    function Neptune(){ Star.call(this,0,-400,10,60152,"#0661B2","#1E3B73")}


    //创建太阳对象实例
    var sun=new Sun();
    var water=new Mercury();
    var gold=new Venus();
    var diqiu=new Earth();
    var fire=new Mars();
    var wood=new Jupiter();
    var soil=new Saturn();
    var god=new Uranus();
    var sea=new Neptune();

    function move(){
        cxt.clearRect(0,0,1000,1000); //清除画布
        drawTrack();    //画出轨道

        sun.draw();     //调用-画出每个星球
        water.draw();
        gold.draw();
        diqiu.draw();
        fire.draw();
        wood.draw();
        soil.draw();
        god.draw();
        sea.draw();
    }

    //使个星球进行运动
    setInterval(move,10);
</script>
github
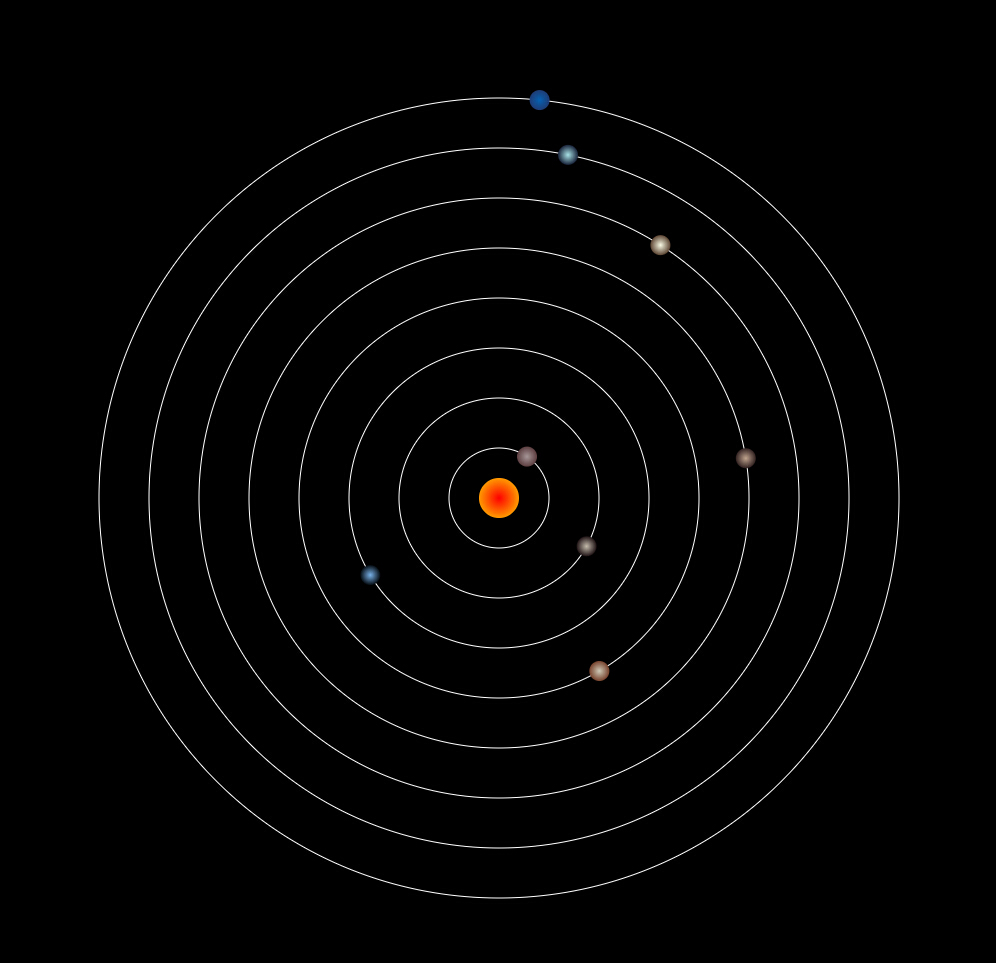
效果图:


 1491
1491

 被折叠的 条评论
为什么被折叠?
被折叠的 条评论
为什么被折叠?
 到【灌水乐园】发言


