


Android设计支持库引入了一些重要的新小部件 ,这些小部件可帮助开发人员遵循材料设计准则来创建一致的UI。
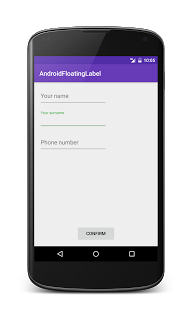
Android设计支持库提供的新组件之一是TextInputLayout,用于为EditText标签设置动画 。 为了完成这项工作,TextInputLayout使用了一个名为hint的EditText属性。为了显示如何使用TextInputLayout和EditText ,我们将创建一个如下所示的android应用程序: 
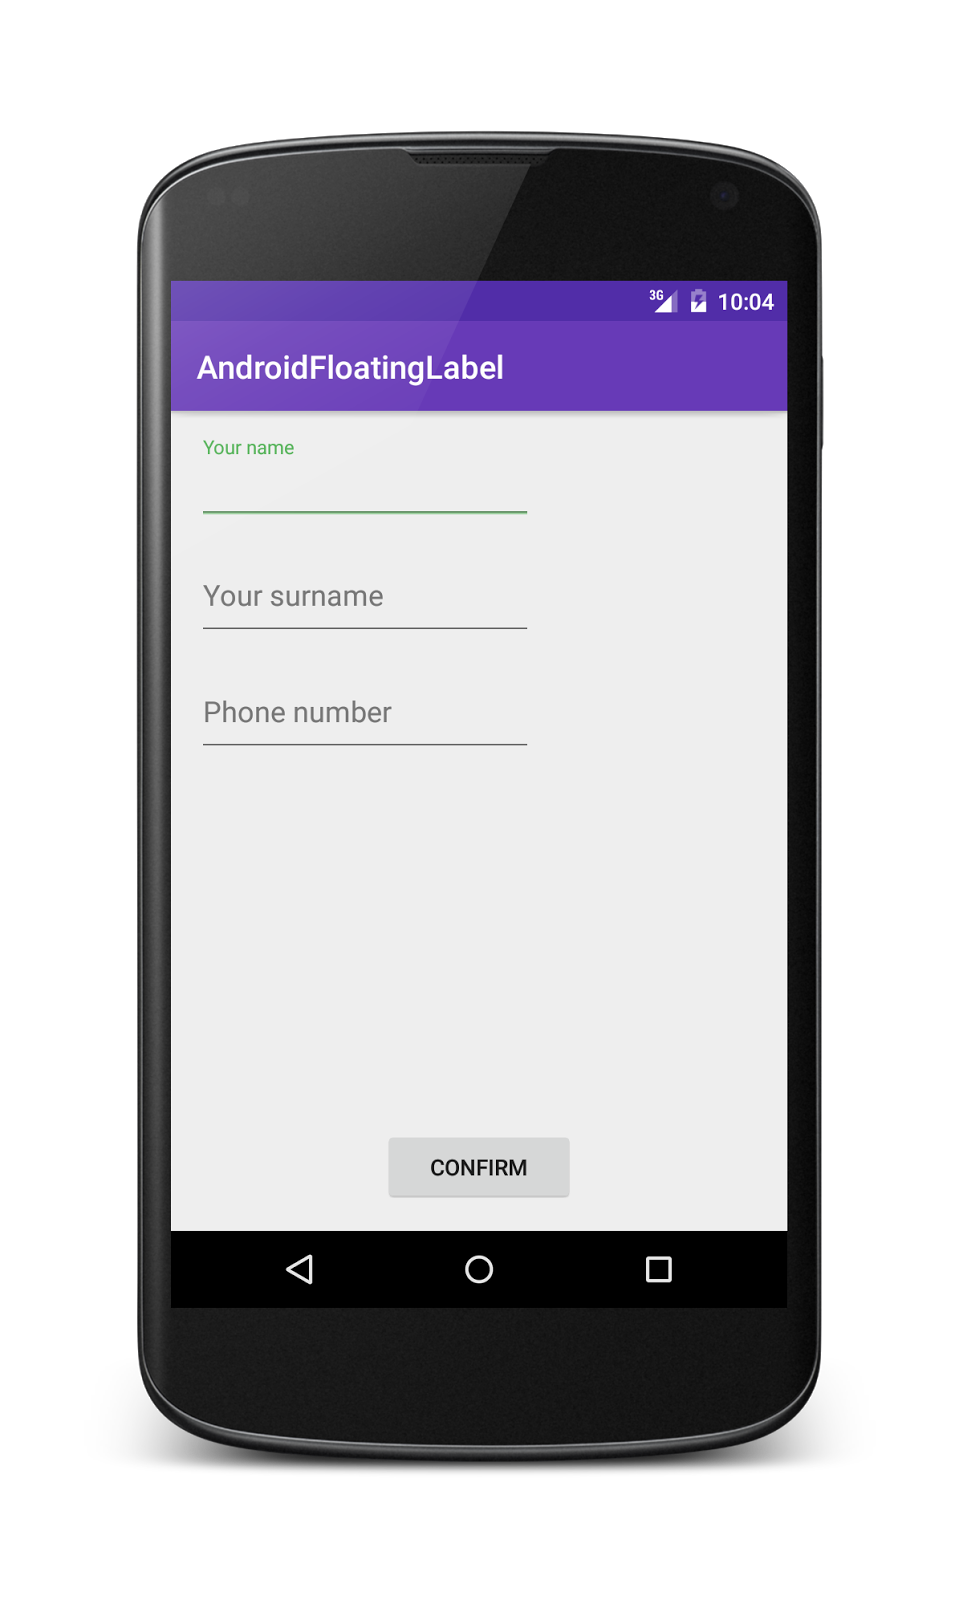
使用TextInputLayout并将EditText包裹在TextInputLayout中,可以控制此提示,以便一旦用户开始写文本并将其“移动”到标签位置, 该提示就会消失:
另一个重要功能是错误处理。 使用TextInputLayout可以在EditText附近显示错误消息。
如何使用TextInputLayout和EditText
如前所述, TextInputLayout包装EditText,以便它控制EditText行为 。 让我们假设我们有三个不同的EditText和三个TextInputLayout。 为了将注意力集中在此EditText的第一个上,必须使用TextInputLayout对其进行包装,以便可以使用浮动标签。
<?xml version="1.0" encoding="utf-8"?>
<RelativeLayout xmlns:android="http://schemas.android.com/apk/res/android"
    xmlns:tools="http://schemas.android.com/tools"
    xmlns:app="http://schemas.android.com/apk/res-auto" android:layout_width="match_parent"
    android:layout_height="match_parent" android:paddingLeft="@dimen/activity_horizontal_margin"
    android:paddingRight="@dimen/activity_horizontal_margin"
    android:paddingTop="@dimen/activity_vertical_margin"
    android:paddingBottom="@dimen/activity_vertical_margin"
    app:layout_behavior="@string/appbar_scrolling_view_behavior"
    tools:showIn="@layout/activity_main" tools:context=".MainActivity">

    <android.support.design.widget.TextInputLayout
    android:layout_width="wrap_content"
    android:layout_height="wrap_content" android:id="@+id/til1">

     <EditText
        android:layout_width="wrap_content"
        android:layout_height="wrap_content"
        android:id="@+id/edtName"
        android:ems="10"
        android:hint="@string/hintName"/>
    </android.support.design.widget.TextInputLayout>

    <android.support.design.widget.TextInputLayout
        android:layout_width="wrap_content"
        android:layout_height="wrap_content"
        android:id="@+id/til2"
        android:layout_below="@id/til1"
        android:layout_marginTop="20dp">

        <EditText
            android:layout_width="wrap_content"
            android:layout_height="wrap_content"
            android:id="@+id/edtSurname"
            android:ems="10"
            android:hint="@string/hintSurname"/>
    </android.support.design.widget.TextInputLayout>

    <android.support.design.widget.TextInputLayout
        android:layout_width="wrap_content"
        android:layout_height="wrap_content"
        android:id="@+id/til3"
        android:layout_below="@id/til2"
        android:layout_marginTop="20dp">

        <EditText
            android:layout_width="wrap_content"
            android:layout_height="wrap_content"
            android:id="@+id/edtPhone"
            android:ems="10"
            android:hint="@string/hintPhone"
            android:inputType="phone"/>
    </android.support.design.widget.TextInputLayout>


    <Button
            android:layout_width="120dp"
            android:layout_height="wrap_content"
            android:id="@+id/btn"
            android:text="@string/btnConfirm"
            android:layout_alignParentBottom="true"
            android:layout_centerHorizontal="true"
            android:elevation="2dp"
            />

</RelativeLayout> android:hint是由TextInputLayout管理的浮动标签。 通过这种布局和简单的活动,就有可能获得上面显示的应用程序。
Android表单验证
TextInputLayout的另一个有趣用途是在表单验证中 。 如前所述, 此组件处理错误消息,以便它们出现在EditText附近 。
当应用必须验证用户插入的某些数据时,此功能非常有用。 为了说明如何使用TextInputLayout处理EditText错误,我们可以假设具有一个带有提交按钮的简单表单,如下图所示。
当用户按下按钮时,应用会验证结果,如果出现问题,则应用会在导致该结果的EditText附近显示错误消息。
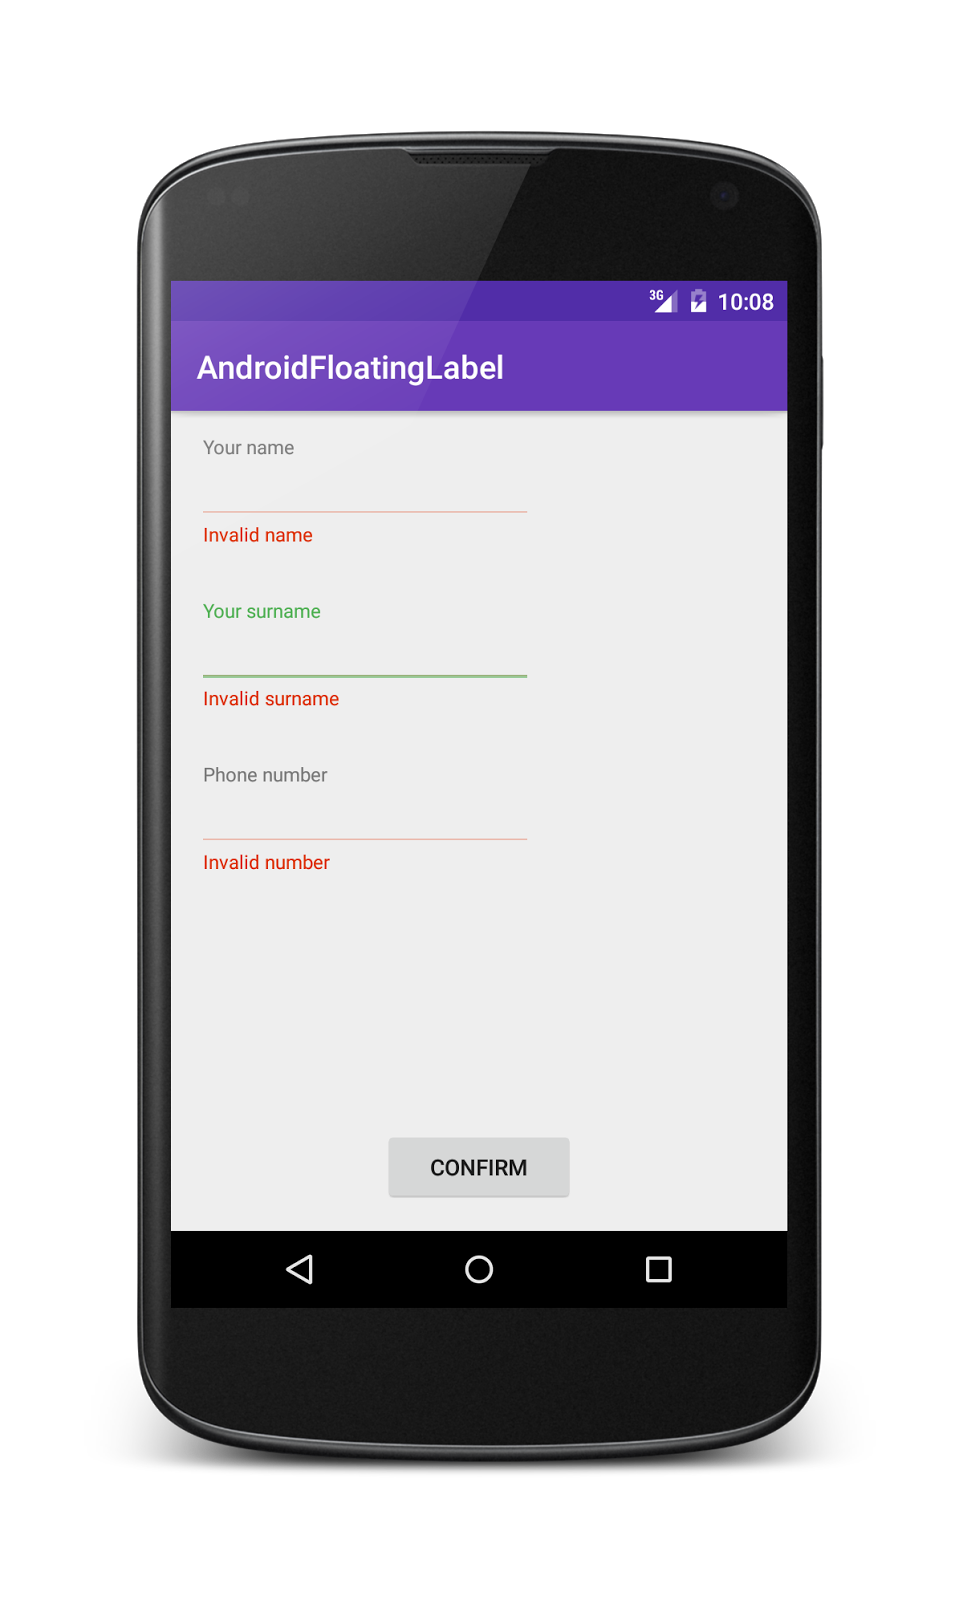
为处理错误,TextInputLayout提供了两种方法: setError接受一个包含消息的字符串, setErrorEnabled接受一个布尔值以启用或禁用错误功能。 第一种方法用于显示erorr消息,第二种方法用于删除消息。
处理UI的Activity包含验证方法,如下所示:
edtName = (EditText) findViewById(R.id.edtName);
     edtSurname = (EditText) findViewById(R.id.edtSurname);
     edtPhone = (EditText) findViewById(R.id.edtPhone);
     nameLayout = (TextInputLayout) findViewById(R.id.til1);
     surnameLayout = (TextInputLayout) findViewById(R.id.til2);
     phoneLayout = (TextInputLayout) findViewById(R.id.til3);

     Button btn = (Button) findViewById(R.id.btn);
     btn.setOnClickListener(new View.OnClickListener() {
         @Override
         public void onClick(View v) {
             if ( validateData() ) {
                   //
             }
          }
     });
在validate方法中:
private boolean validateData() {
        boolean result = true;

        String name = edtName.getText().toString();
        if (name == null || name.length() < 3) {
            // We set the error message
            nameLayout.setError(getString(R.string.invalidName));
            result = false;
        }
        else
            // We remove error messages
           nameLayout.setErrorEnabled(false);

        String surname = edtSurname.getText().toString();
        if (surname == null || surname.length() < 3) {
            // We set the error message
            surnameLayout.setError(getString(R.string.invalidSurname));
            result = false;
        }
        else
            // We remove error messages
            surnameLayout.setErrorEnabled(false);


        String phone = edtPhone.getText().toString();
        if (phone == null || phone.equals("")) {
            phoneLayout.setError(getString(R.string.invalidNumber));
            result = false;
        }
        else if (phone.equals("0")) {
            phoneLayout.setError(getString(R.string.invalidNumberZero));
            result = false;
        }

        return result;
    }
在本文中,您学习了如何使用TextInputLayout创建材质UI来为EditText设置动画,以及如何使用TextInputLayout和EditText的组合来处理错误。


 145
145

 被折叠的 条评论
为什么被折叠?
被折叠的 条评论
为什么被折叠?
 到【灌水乐园】发言


