


程序员的英文代号
本教程开始变得有趣.... 在本节中,我们将深入研究动画,特殊效果,搜索样式和提取联系人。 在前面的部分中,我们构建了应用程序的第一个表单,已登录,现在我们需要显示实际的登录表单。 更重要的是,我们需要以如下样式显示它: 
(请注意,您自然应该在上面看到动画gif,我们降低了画质以使其更小,但是加载仍然需要一点时间)。
我们在这里看到的是如何通过向右滑动按钮,然后将背景变形为以下表单的标题区域来动画化登录表单。 我们将尽快研究如何完成此操作...但是首先让我们获取联系方式!
新联系人API
首先,我们需要通过添加'gc.setScope(“个人资料电子邮件https://www.googleapis.com/auth/plus.login https://www.googleapis.com/auth /plus.me”);' 这样进入初始登录:
loginWithGoogle.addActionListener((e) -> {
    tokenPrefix = "google";
    Login gc = GoogleConnect.getInstance();
    gc.setScope("profile email https://www.googleapis.com/auth/plus.login https://www.googleapis.com/auth/plus.me");
    gc.setClientId("1013232201263-lf4aib14r7g6mln58v1e36ibhktd79db.apps.googleusercontent.com");
    gc.setRedirectURI("https://www.codenameone.com/oauth2callback");
    gc.setClientSecret("uvu03IXOhx9sO8iPcmDfuX3R");
    doLogin(gc, new GoogleData());
});
我们实际上是在寻求更多权限。 请注意,配置文件和电子邮件是Google接受的完整URI的简写语法,作用域中的值用空格分隔。
为了使联系人访问通用,我们在上一步中定义的接口中做了一些更改:
static class ContactData {
    public String uniqueId;
    public String name;
    public String imageUrl;
}
首先,我们添加了简单的联系人数据抽象类来表示特定联系人。 通常,我们将使用更简单的方法,但是由于Google和Facebook具有截然不同的图像源,因此我们必须创建此类的两种不同实现。
static interface UserData {
    public String getName();
    public String getId();
    public String getImage();
    public void fetchData(String token, Runnable callback);
    public ContactData[] getContacts();
} 我们仅向用户数据添加了一种方法,即getContacts方法。 为简单起见,我们获取所有联系人并同步进行。 在未来的迭代中,我们可能会通过创建一个“流式处理”联系人的实现来改善这一点,但是现在我们想要一个简单的东西,也可以很好地进行搜索。
在Google上获取联系人
我们连接到Google网络服务并获取所有可见的联系人。 在这里,我们不必局限于安装应用程序的人员,这为我们提供了更多信息:
private String token;

@Override
public ContactData[] getContacts() {
    ArrayList<ContactData> dat = new ArrayList<>();
    ConnectionRequest req = new ConnectionRequest() {
        @Override
        protected void readResponse(InputStream input) throws IOException {
            JSONParser parser = new JSONParser();
            Map<String, Object> parsed = parser.parseJSON(new InputStreamReader(input, "UTF-8"));
            java.util.List<Object> data = (java.util.List<Object>)parsed.get("items");
            for(Object current : data) {
                Map<String, Object> cMap = (Map<String, Object>)current;
                String name = (String)cMap.get("displayName");
                if(name == null) {
                    continue;
                }
                String type =(String)cMap.get("objectType");
                if(!type.equals("person")) {
                    continue;
                }
                String id = cMap.get("id").toString();
                ContactData cd = new ContactData();
                cd.name = name;
                cd.uniqueId = id;

                if(cMap.containsKey("image")) {
                    cd.imageUrl = (String)((Map<String, Object>)cMap.get("image")).get("url");;
                }

                dat.add(cd);
            }
        }
    };
    req.setPost(false);
    req.setUrl("https://www.googleapis.com/plus/v1/people/me/people/visible");
    if(token == null) {
        token = Preferences.get("googletoken", (String)null);
    }
    req.addArgumentNoEncoding("key", token);
    NetworkManager.getInstance().addToQueueAndWait(req);

    ContactData[] cd = new ContactData[dat.size()];
    dat.toArray(cd);
    return cd;
}
该代码有点大,但实际上确实很简单,我们获得了Google令牌,该令牌提供给Google API以请求联系人列表。 然后,我们使用addToQueueAndWait进行同步调用,这在这种情况下非常方便,并将所有条目添加到数组列表中。
请注意,我们会跳过不是“ person”对象的类型,在Google+ API中,您返回的页面也会返回,因此有必要去除一些多余的噪音。
返回的JSON将所有已连接的联系人保留在data属性下,因此我们解析JSON并从items属性获取朋友数组。 然后,只需遍历联系人并构造一个新的联系人对象即可。
从Facebook获取联系人
Facebook非常相似,我们需要为用户查询Graph API并对其进行迭代。 当前代码仅获得用户的第一页,因此它有一些缺陷,但它应该很容易适应于通过整个结果列表进行分页。 请注意,Facebook仅会返回登录该应用程序的用户,因此,当结果可能列出您的数百个朋友时,如果他们中的任何一个都没有登录,您可能仍会获得空白列表。
@Override
public ContactData[] getContacts() {
    ArrayList<ContactData> dat = new ArrayList<>();
    ConnectionRequest req = new ConnectionRequest() {
        @Override
        protected void readResponse(InputStream input) throws IOException {
            JSONParser parser = new JSONParser();
            Map<String, Object> parsed = parser.parseJSON(new InputStreamReader(input, "UTF-8"));
            //name = (String) parsed.get("name");
            java.util.List<Object> data = (java.util.List<Object>)parsed.get("data");
            for(Object current : data) {
                Map<String, Object> cMap = (Map<String, Object>)current;
                String name = (String)cMap.get("name");
                if(name == null) {
                    continue;
                }
                String id = cMap.get("id").toString();
                ContactData cd = new ContactData();
                cd.name = name;
                cd.uniqueId = id;
                cd.imageUrl = "http://graph.facebook.com/v2.4/" + id + "/picture";
                dat.add(cd);
            }
        }
    };
    req.setPost(false);
    req.setUrl("https://graph.facebook.com/v2.4/me/friends");
    if(token == null) {
        token = Preferences.get("facebooktoken", (String)null);
    }
    req.addArgumentNoEncoding("access_token", token);
    NetworkManager.getInstance().addToQueueAndWait(req);

    ContactData[] cd = new ContactData[dat.size()];
    dat.toArray(cd);
    return cd;
}
这几乎与Google版本相同,唯一的区别在于返回的JSON和URL的结构。
在主题中添加我们需要的东西
为了使下一部分工作,我们需要使用设计器中图像菜单中的“ Quick Add Multi Image多幅图像”将多个多幅图像添加到主题,然后选择“非常高”作为源图像分辨率。 这将使图像自动适应所有DPI。
首先,我们需要rounded-mask.png :
此图像将用于将方形图片转换为圆形图片,如我在上方标题区域中的图片所示。 有效地遮罩使用黑色像素删除图像中的相应像素,而保留白色像素,灰色像素将保持半透明。
然后我们需要rounded-border.png :

我们将此图像放置在蒙版图像下方,从而产生边框/阴影效果。 这对于外观很重要,因为源图像是从Facebook / Google等下载的,并且可能与工具栏发生颜色冲突。 这样,我们保证边框将适合工具栏。
最后,我们添加将放置在工具栏区域中的图像social-chat-tutorial-image-top.jpg :

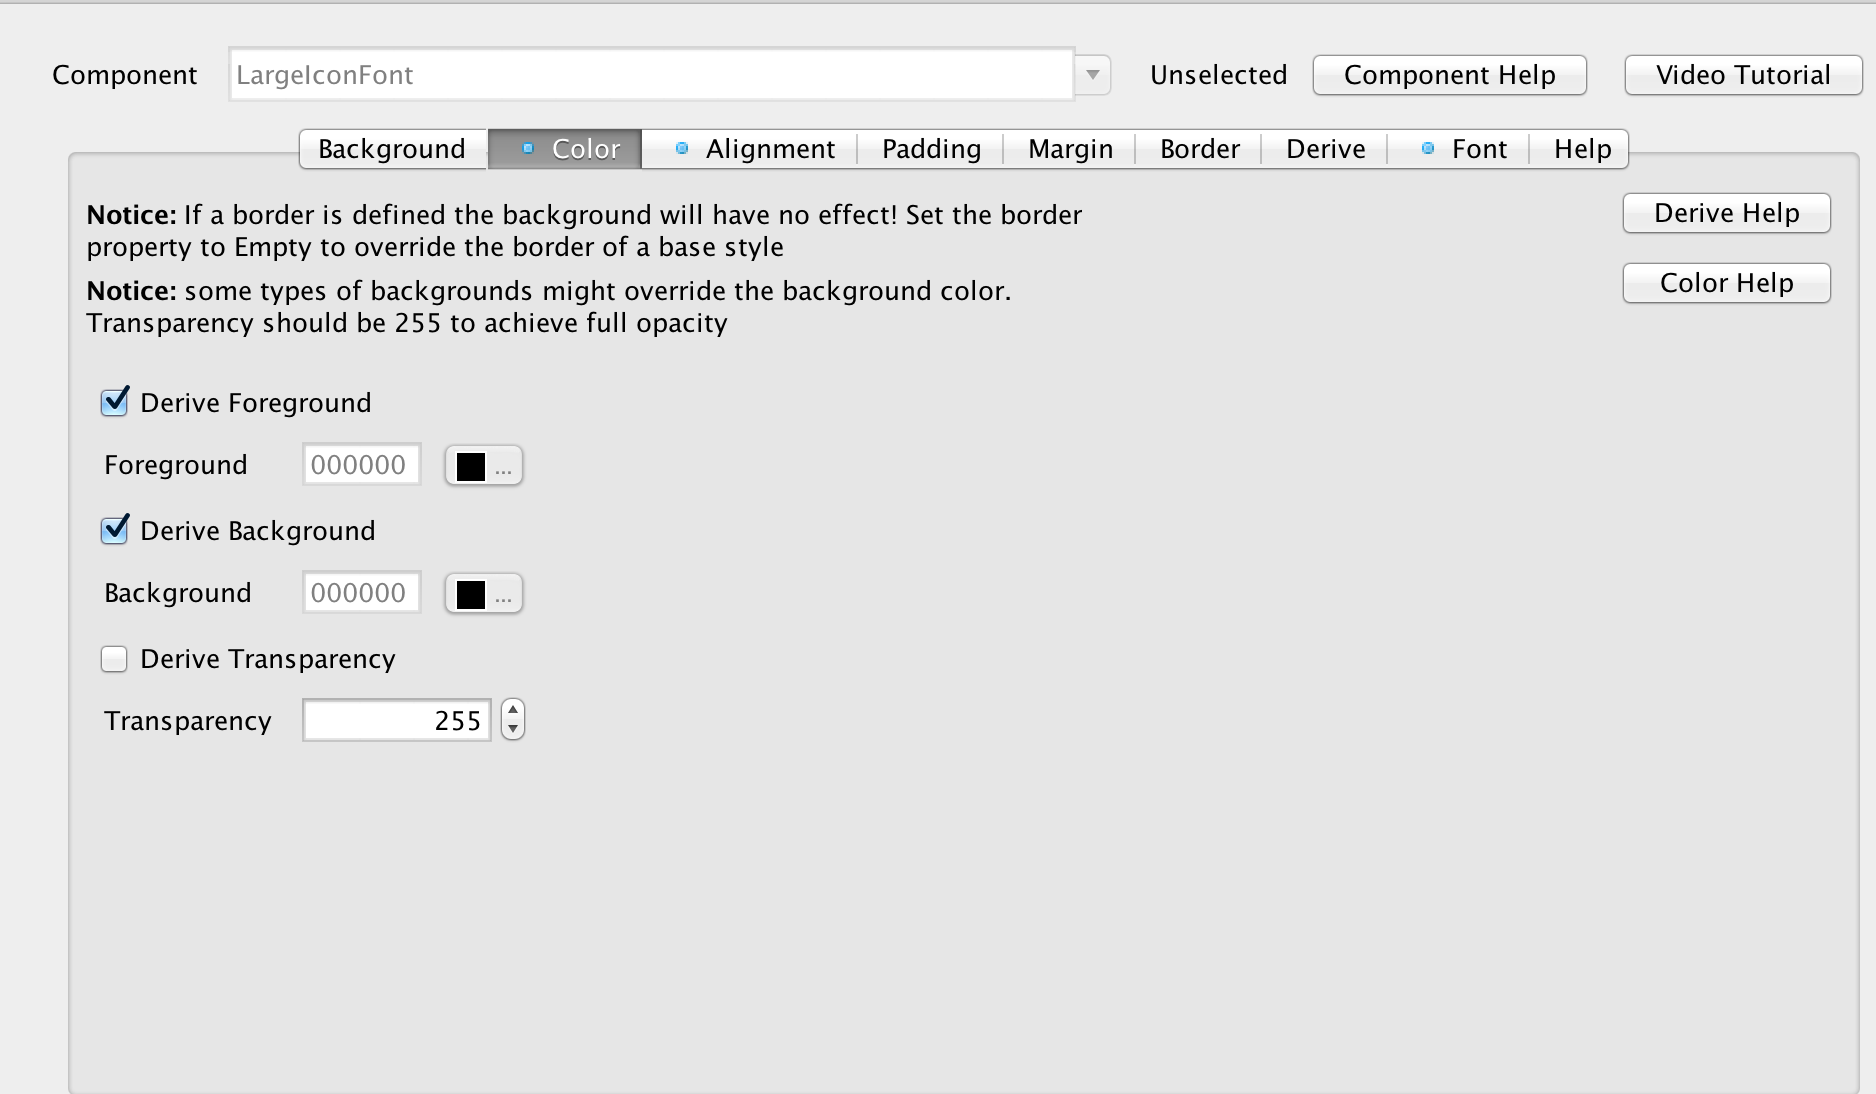
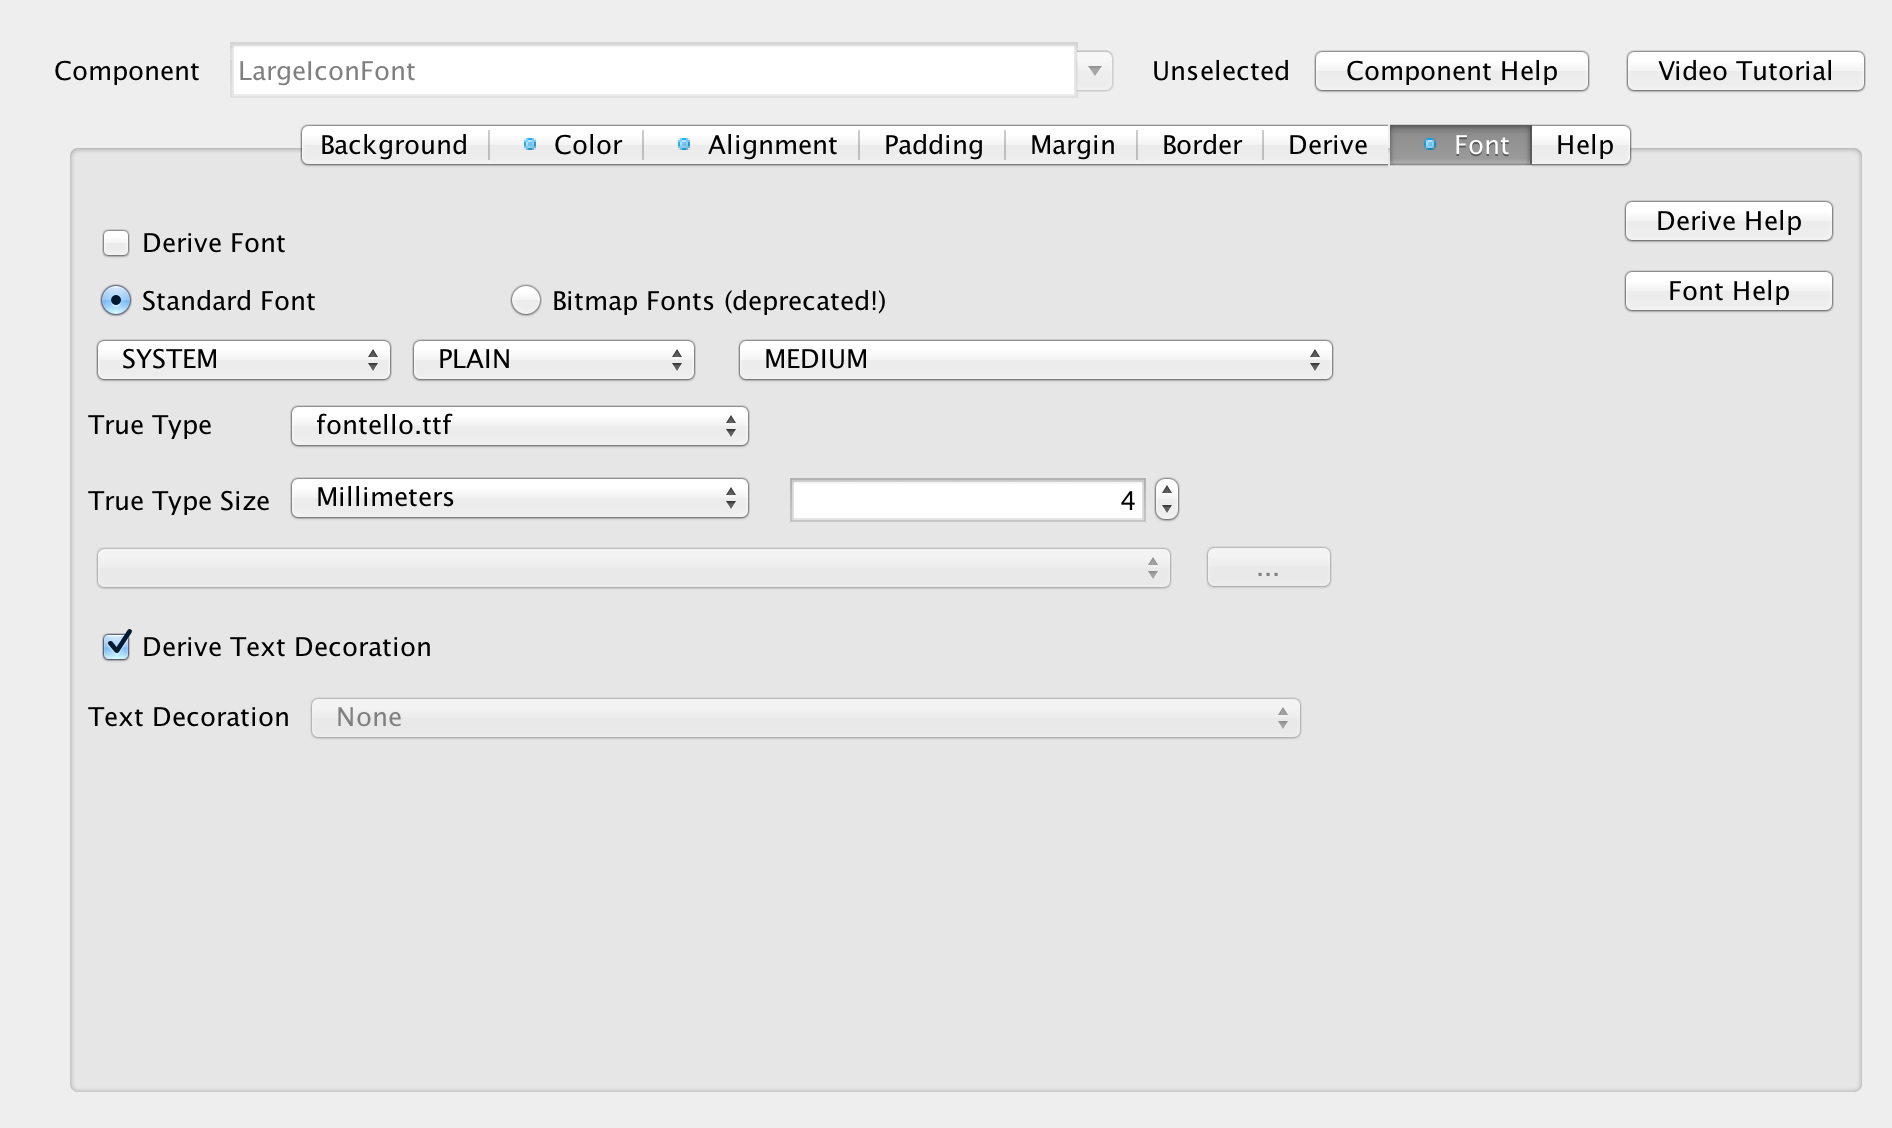
既然所有图像都就位了,我们需要在主题中添加一些UIID以支持我们将使用的其他组件,首先我们从LargeIconFont UIID开始,该LargeIconFont与上次介绍的IconFont UIID非常相似,但是它不会覆盖前景色,尺寸为4mm。 该图标字体用于应用程序的主体中,因此我们希望它使用默认颜色,以便可以正确集成,否则标准图标字体的白色前景可能会消失。
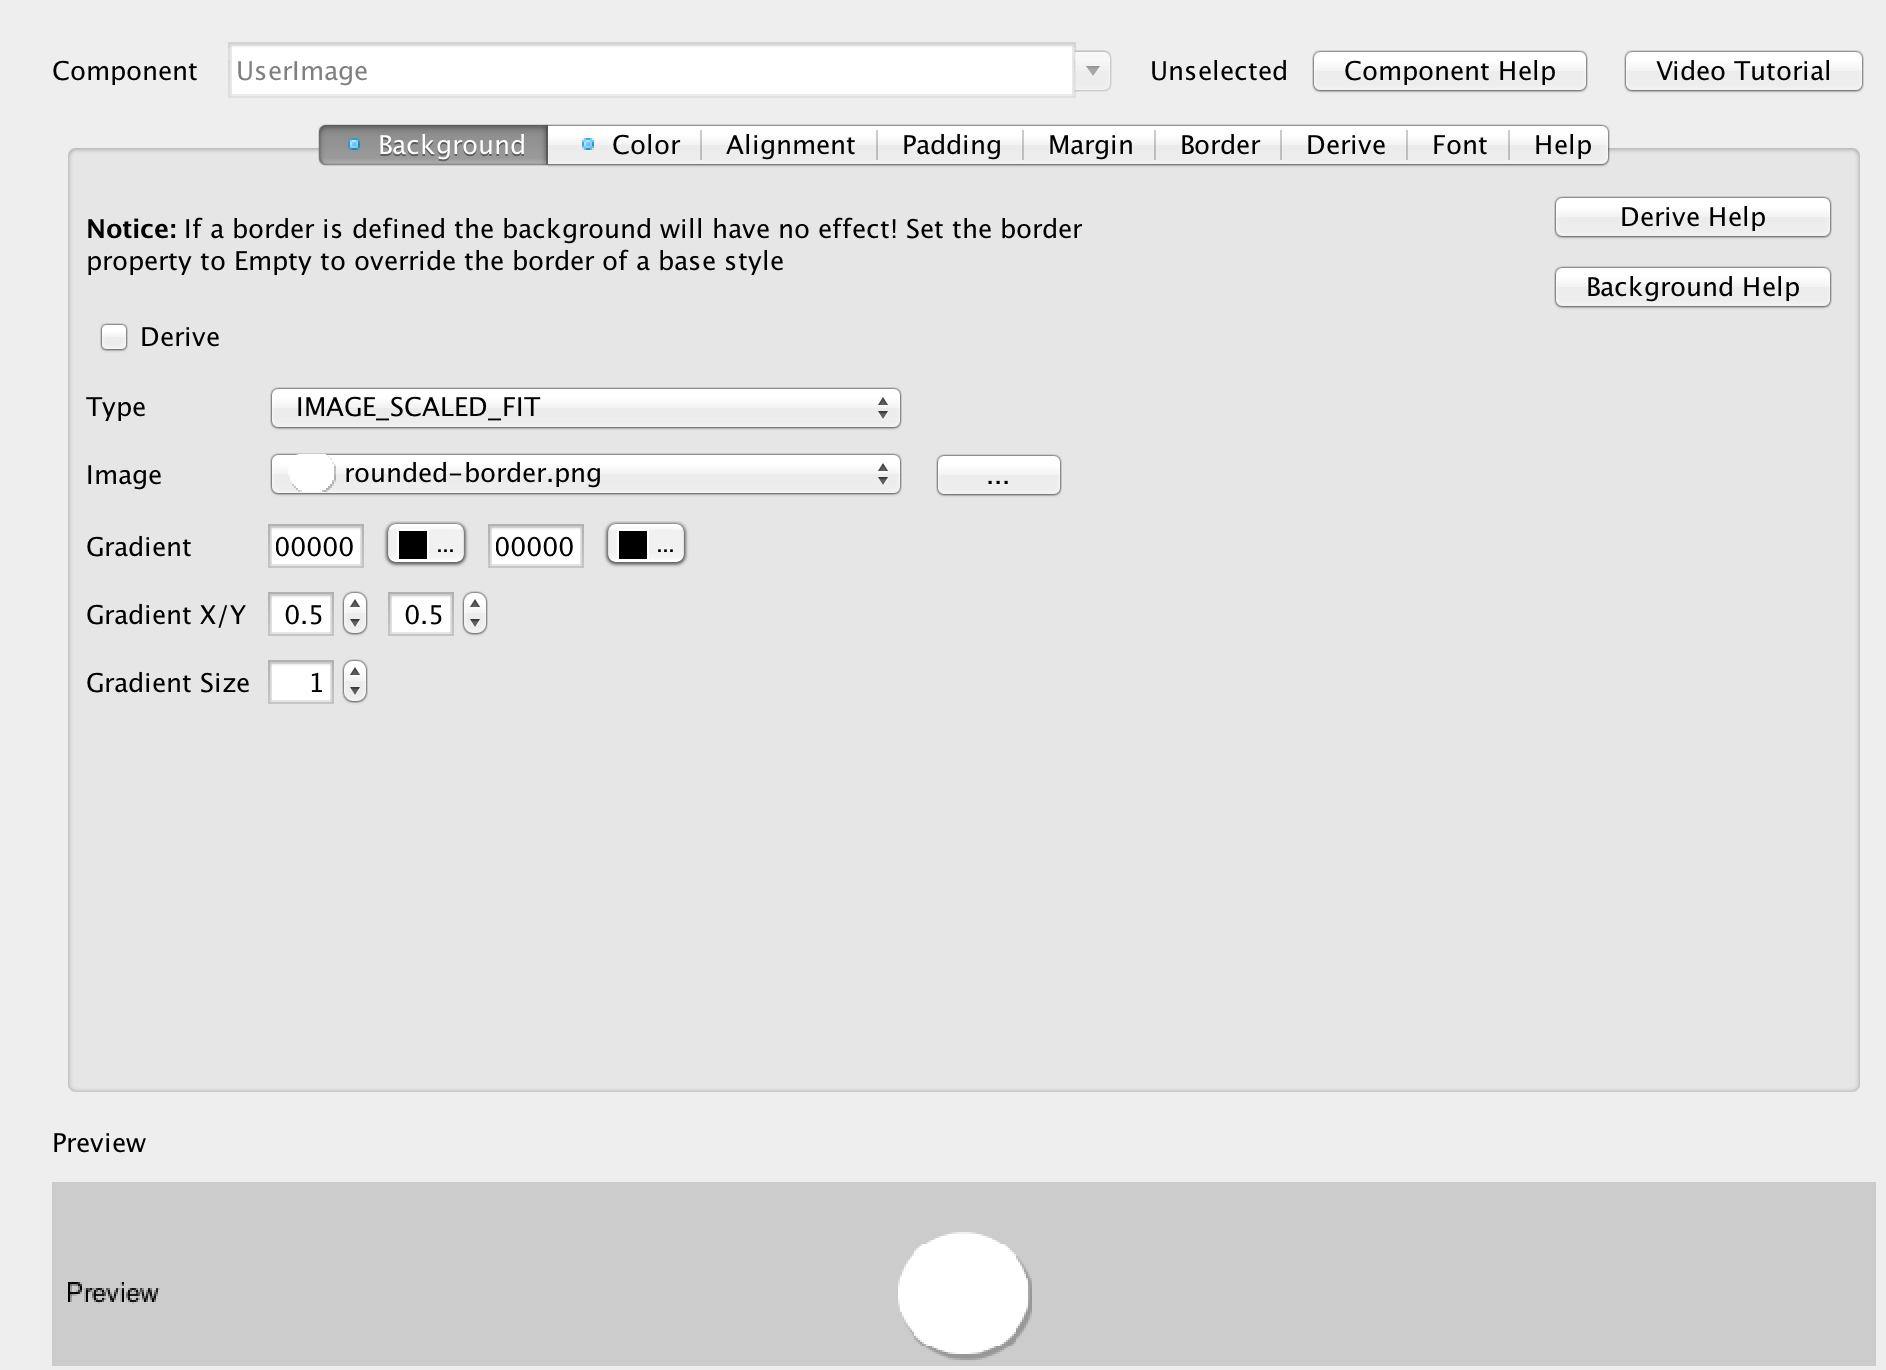
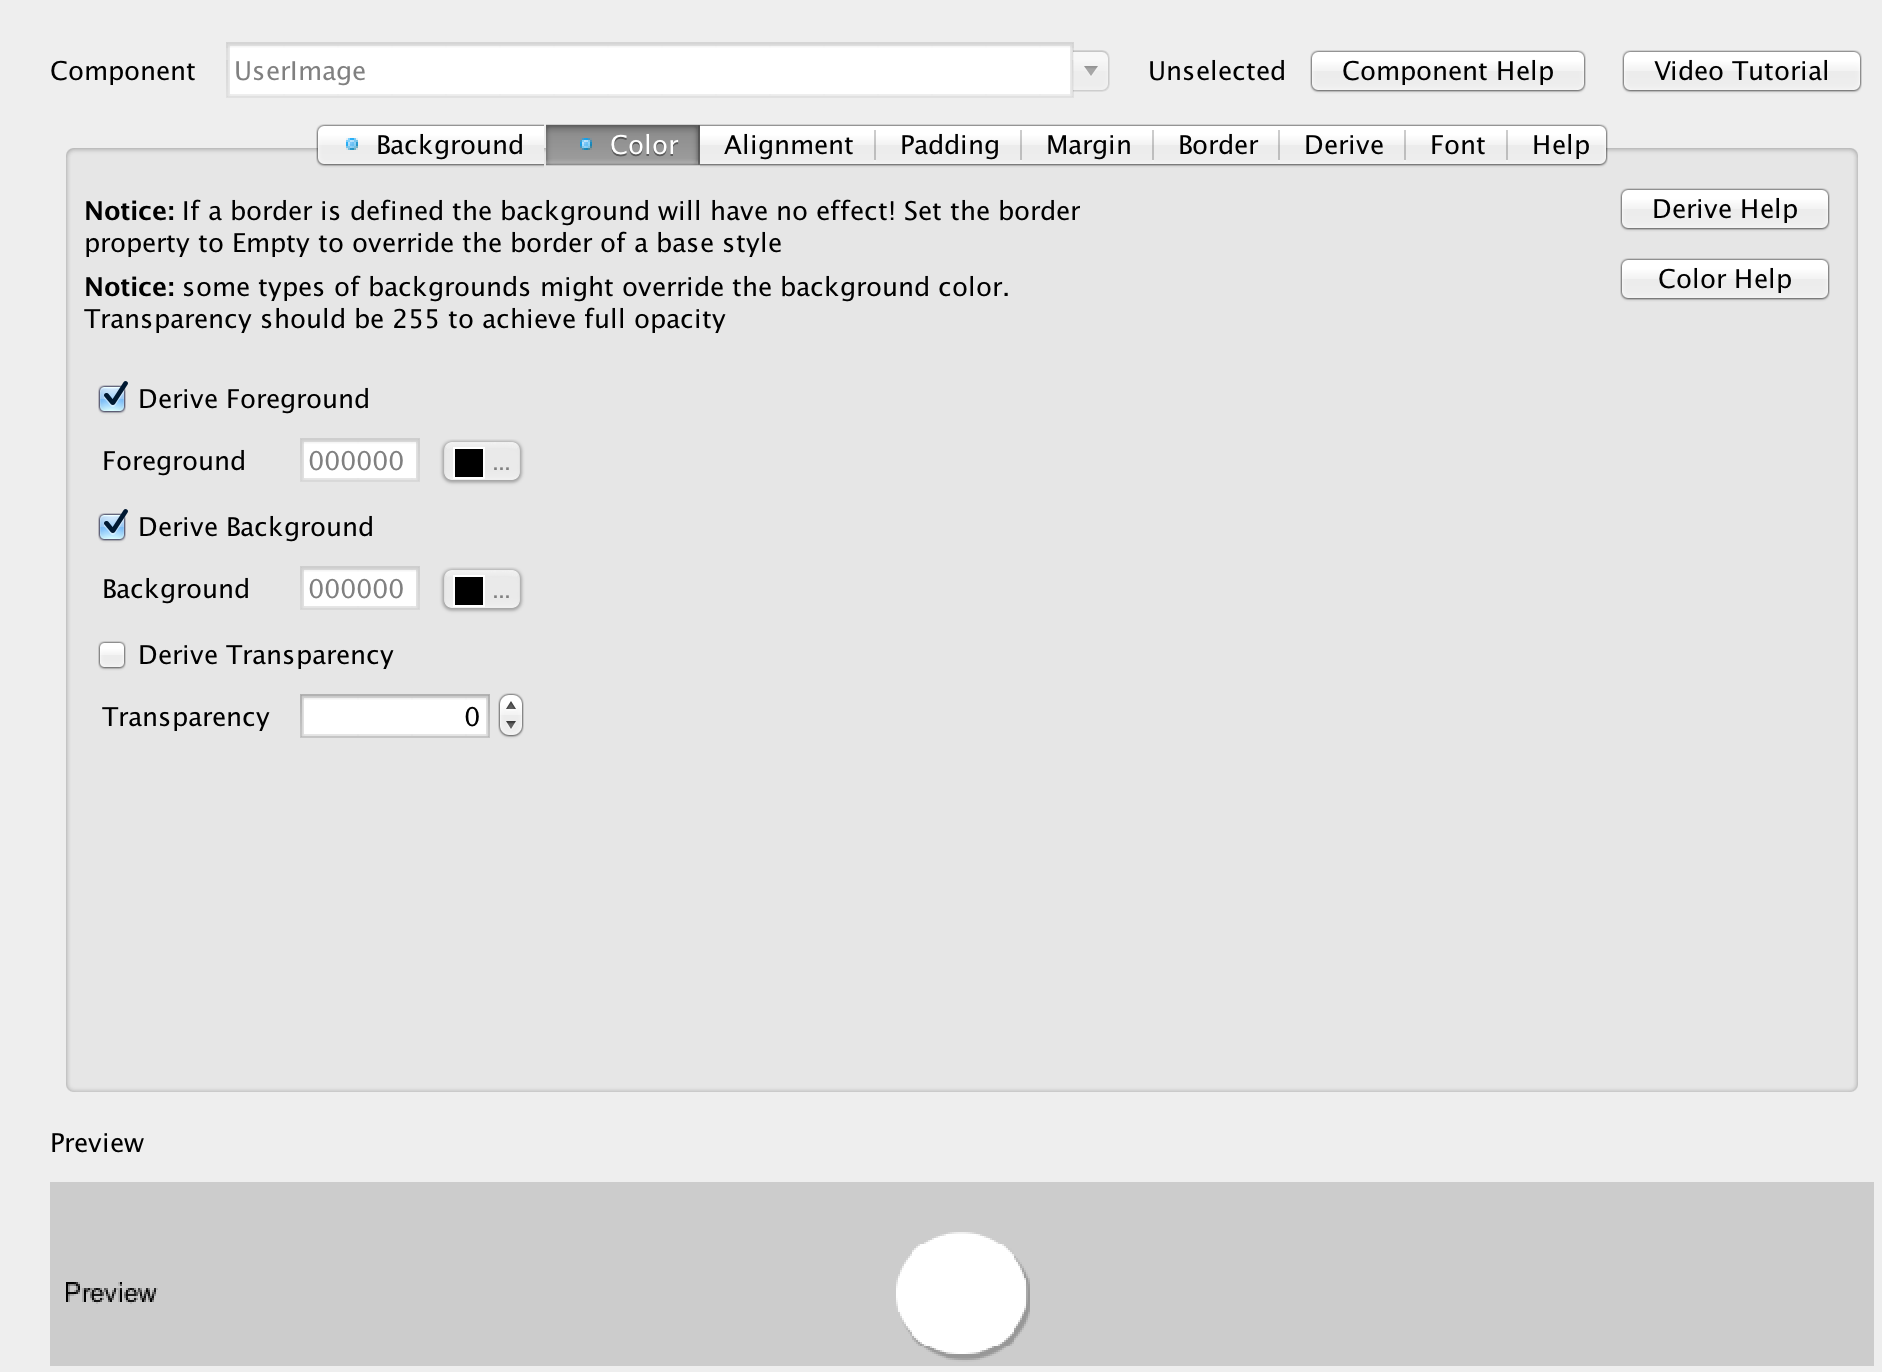
我们还将添加四舍五入的图像作为UIID,稍后可以通过添加UserImage UIID并将背景图像设置为rounded-border.png并将背景行为缩放到合适的大小,将其应用于实际图像。 我们还需要将透明度设置为0,以确保样式是透明的。
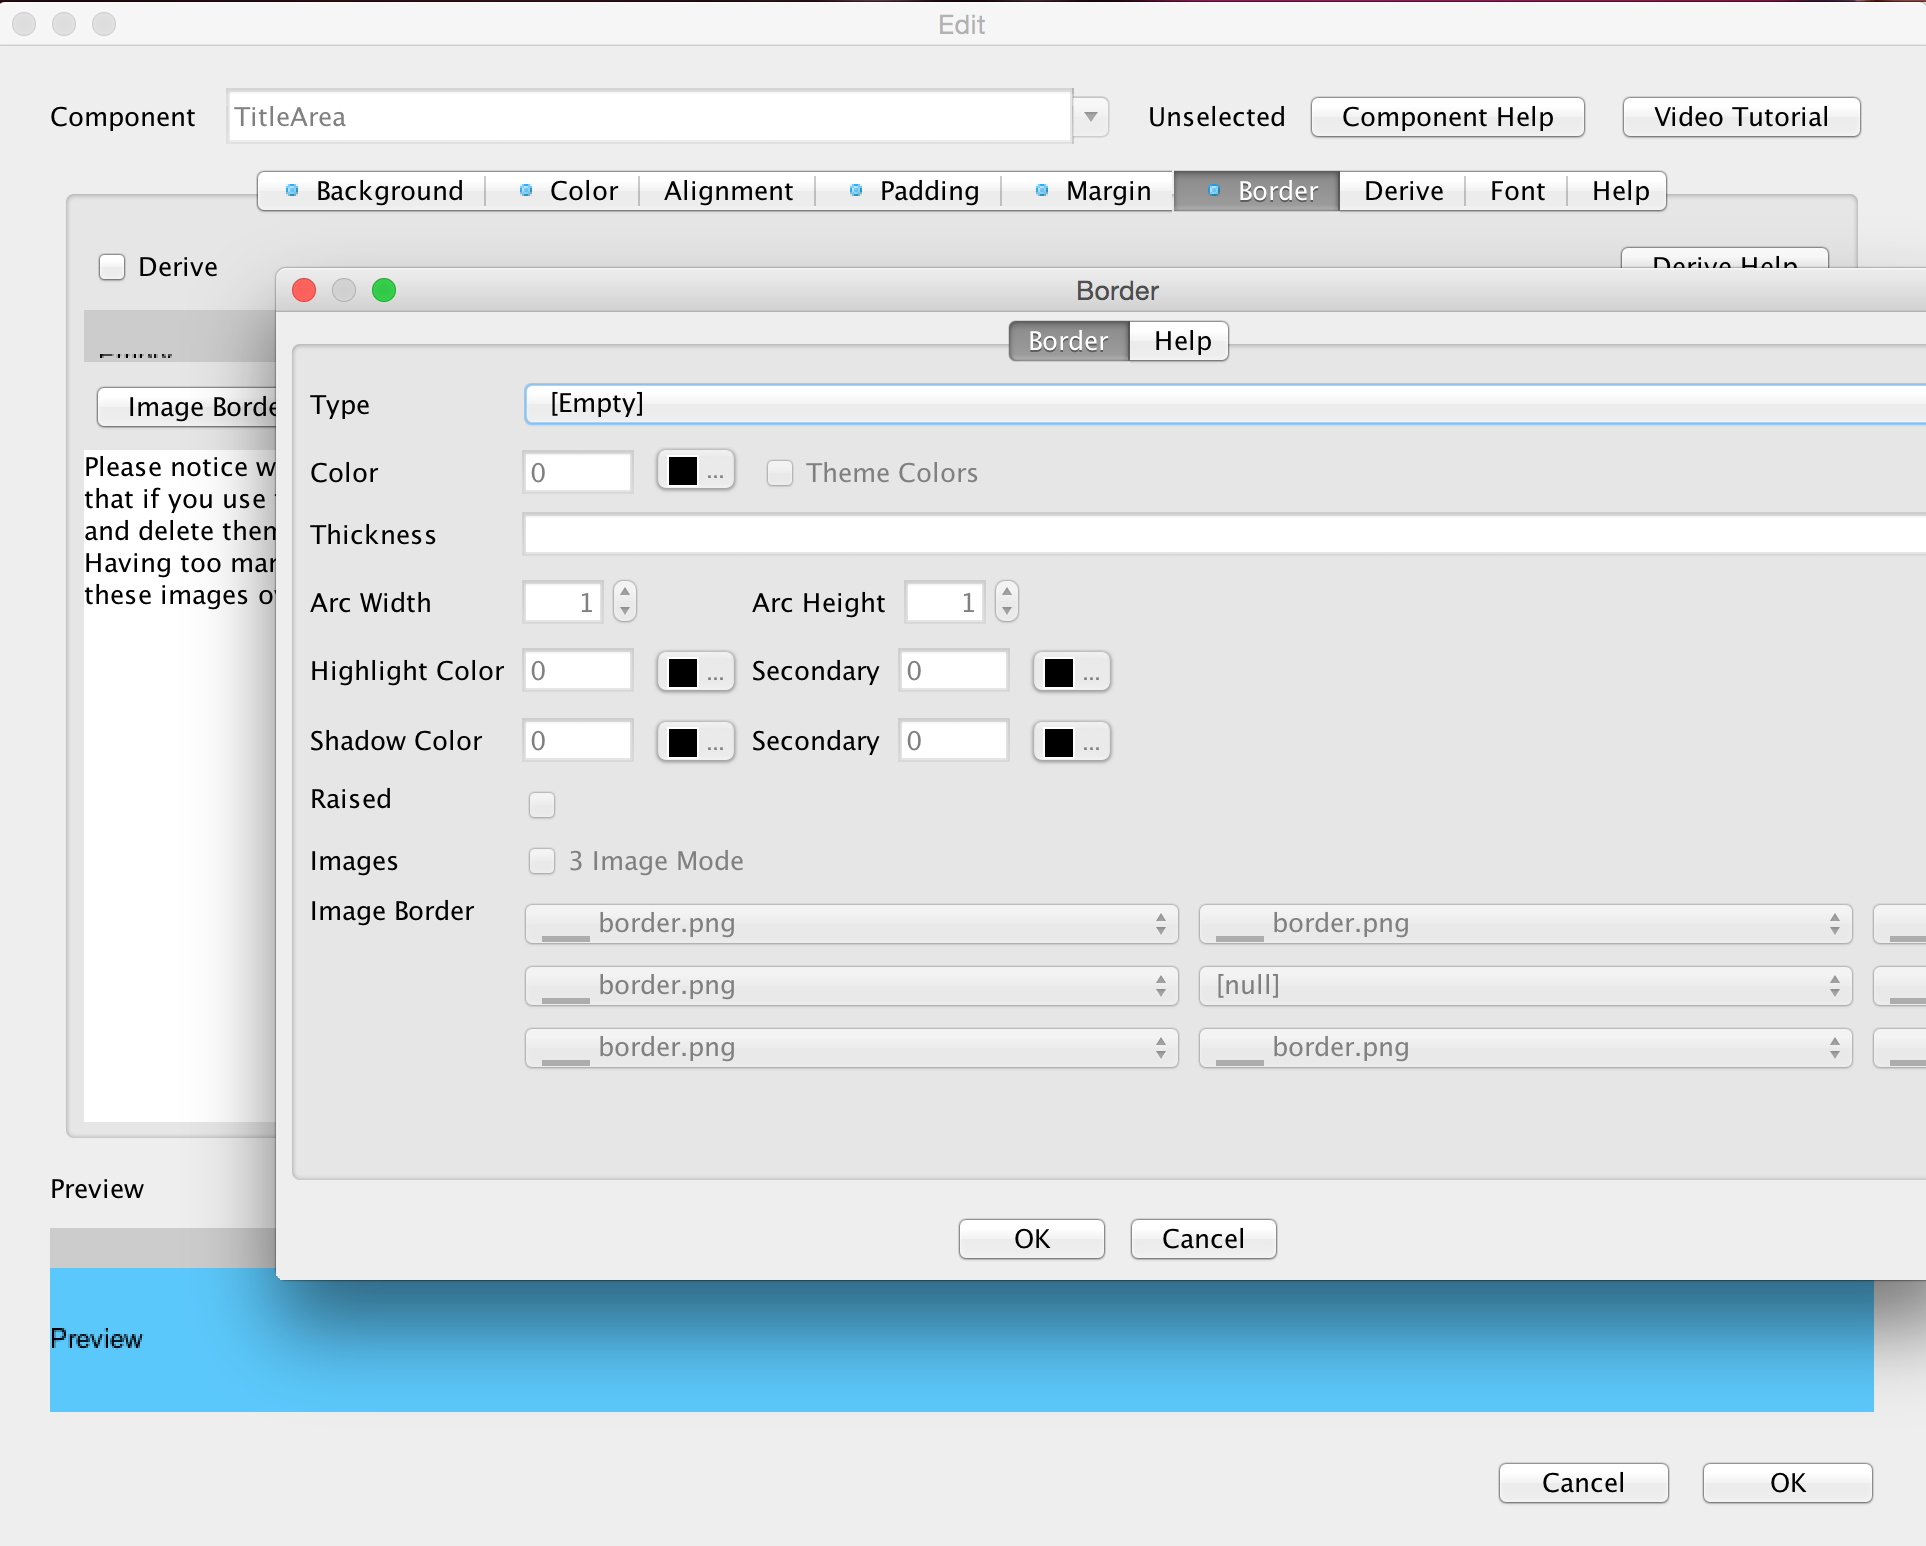
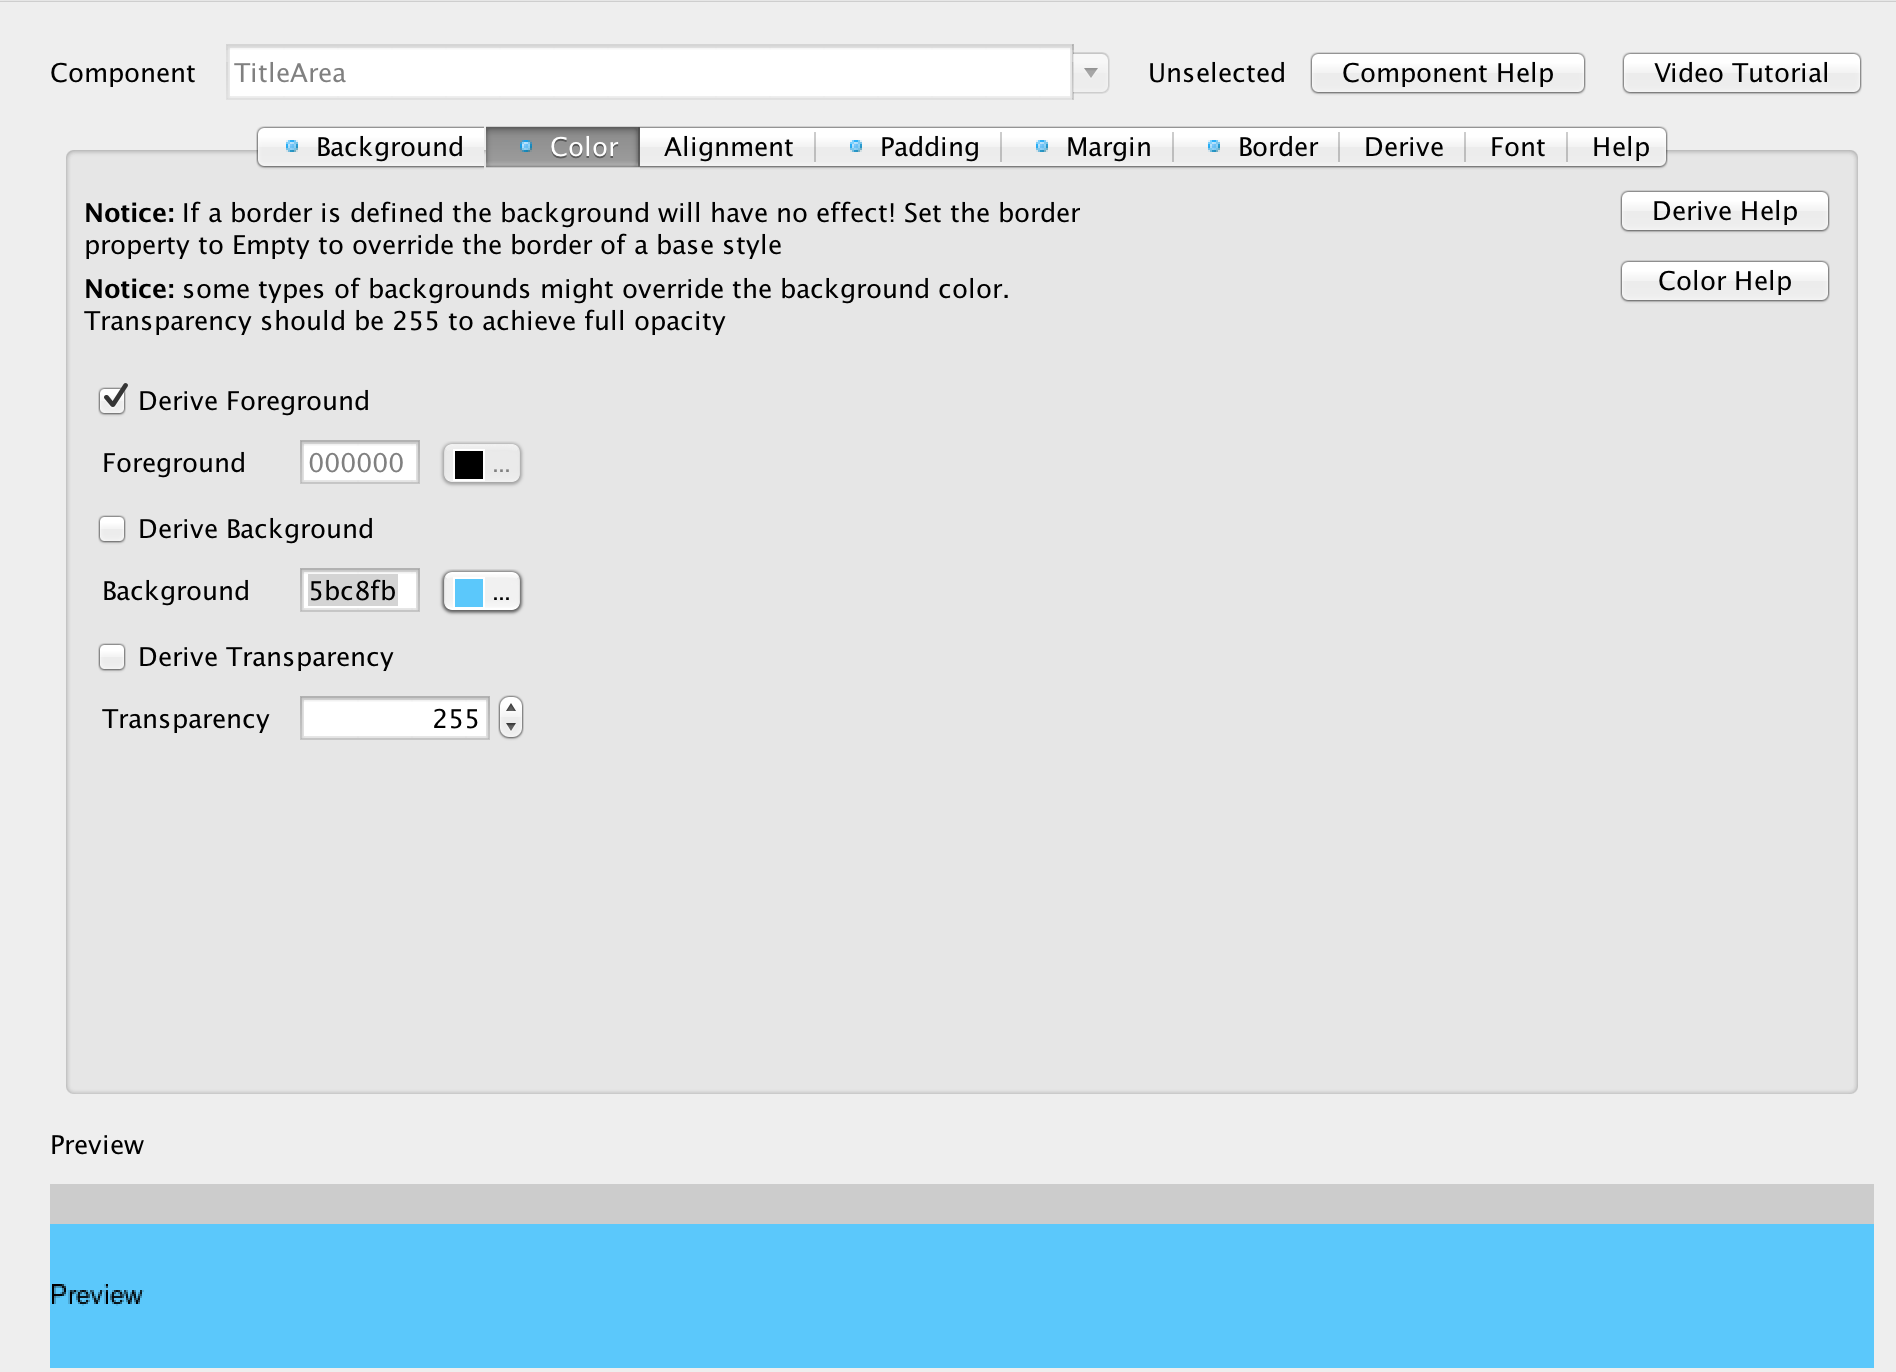
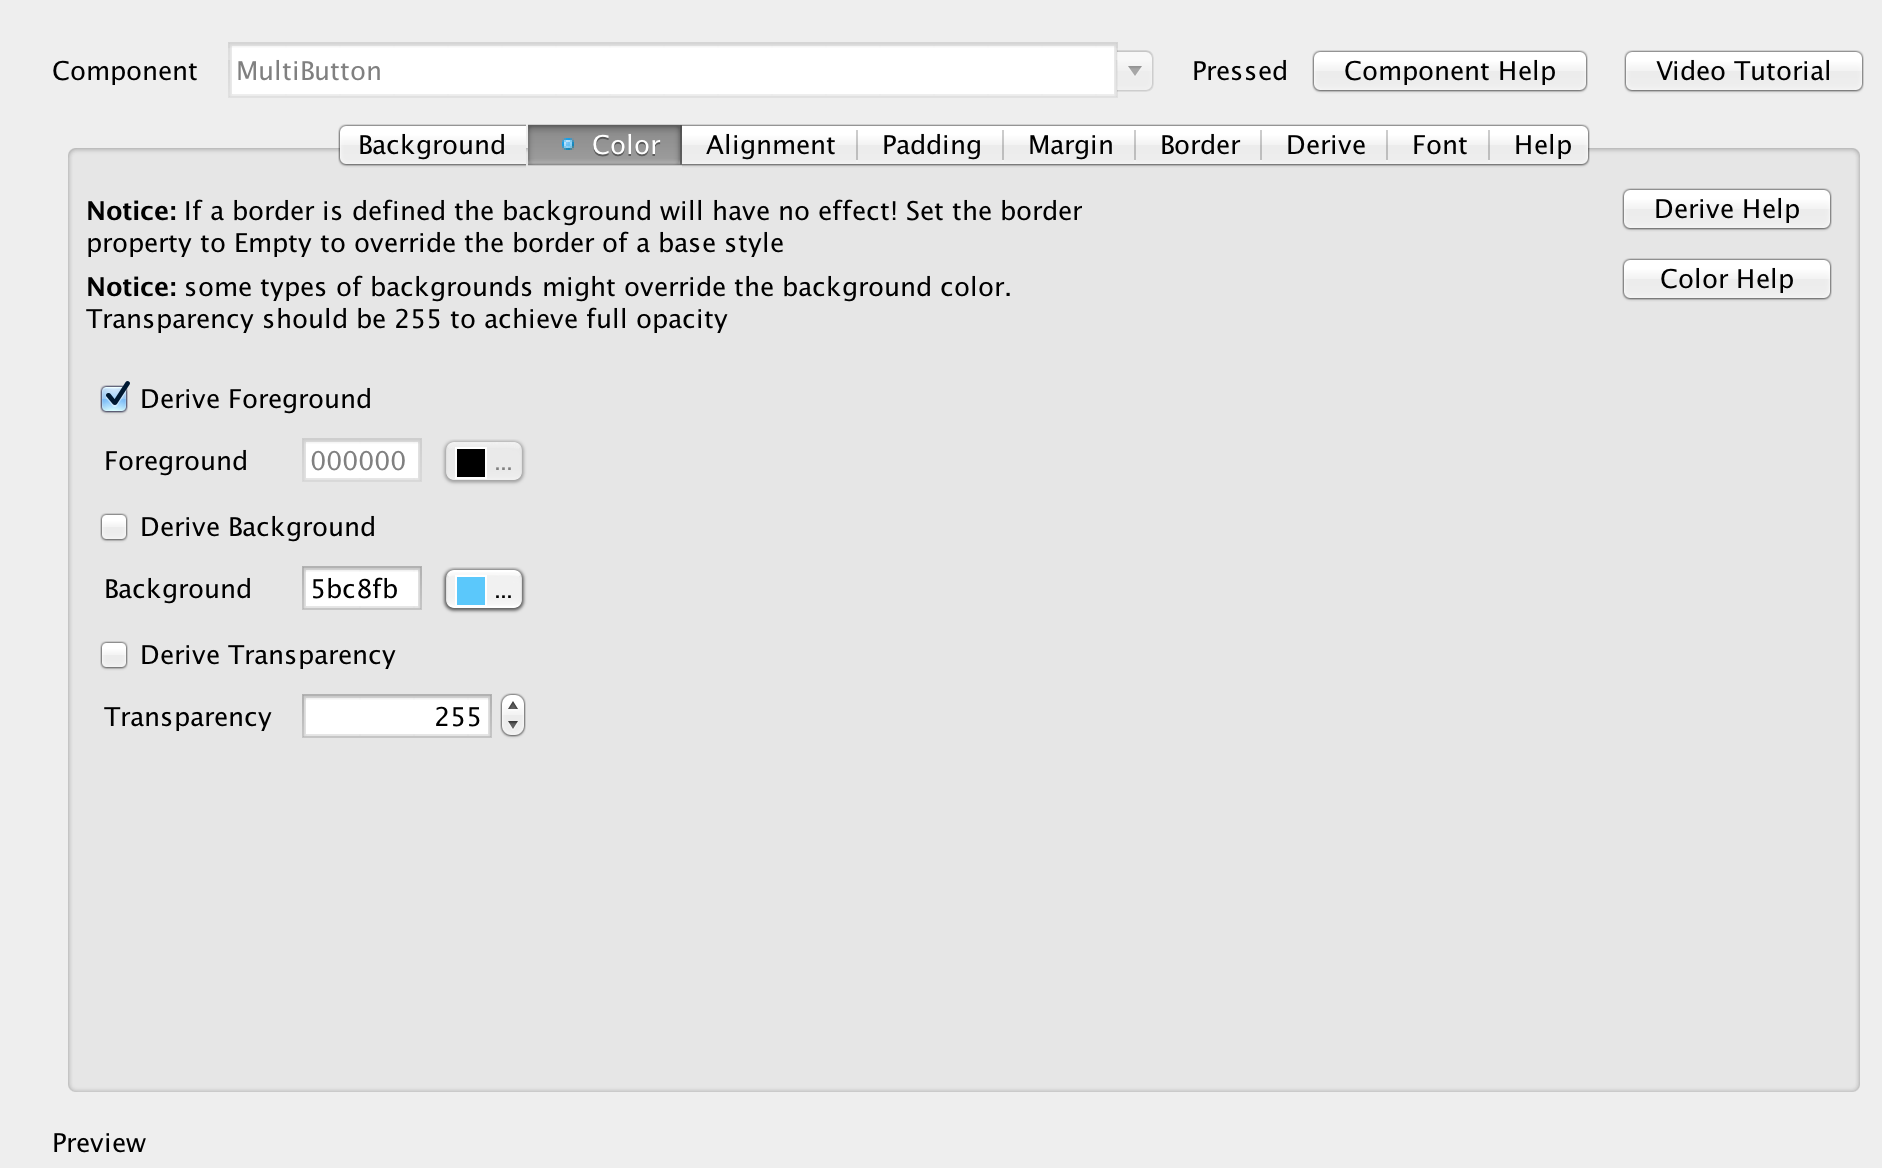
我们还希望通过不透明性来使TitleArea更加可控。 当前将其定义为有问题的图像边框,因此我们将边框更改为“ Empty”,将背景色定义为5bc8fb并将透明度设置为255,这将产生相同的效果,但允许我们对代码进行更多控制。
最后, MultiButton's don't have a clickable state in the default theme so we need to update their selected state to have 255 transparency (opaque) and have the background color `5bc8fb ,这将为我们提供点击效果。
显示联系人
为了显示联系人,我们将需要几个新的UI元素和几个新的类变量,因此首先让我们定义为此所需的新类成员:
private String fullName;
private String uniqueId;
private String imageURL;
private static EncodedImage userPlaceholder;
private EncodedImage roundPlaceholder;
private Image mask;
private ContactData[] contacts;
这些成员是在主类中定义的,其中包括图像,我们将使用它们来显示各个条目并创建一个“四舍五入”蒙版,以在标题栏区域上产生四舍五入的图片效果。 我们还添加了一个包含contacts数组的变量,我们可以在以后的代码中使用它。
为了初始化这些变量,我们将在主题初始化之后立即使用主类的init(Object context)方法。 此代码每个应用程序执行仅发生一次,是加载/初始化事物的好地方。 请注意,它仍然应该是一种相对较快的方法,因此不要在那里进行繁重的处理,否则应用程序的启动可能会变慢,并且操作系统可能会杀死您无响应的应用程序。
Style iconFontStyle = UIManager.getInstance().getComponentStyle("LargeIconFont");
iconFontStyle.setBgTransparency(255);
FontImage fnt = FontImage.create(" \ue80f ", iconFontStyle);
userPlaceholder = fnt.toEncodedImage();
mask = theme.getImage("rounded-mask.png");
roundPlaceholder = EncodedImage.createFromImage(userPlaceholder.scaled(mask.getWidth(), mask.getHeight()).applyMask(mask.createMask()), false);
fullName = Preferences.get("fullName", null);
uniqueId = Preferences.get("uniqueId", null);
imageURL = Preferences.get("imageURL", null); 我们在这里做一些有趣的事情,我们定义图标样式以使用LargeIconFont UIID,它允许我们创建可伸缩的占位符图像。 然后在代码中将其用于两个目的:占位符,用于我们联系人的图片(在URLImage下载图像之前)和标题区域中的“我的图片”(当前登录的用户)。 在“我的图片”情况下,将使用上述的圆角蒙版图像将其四舍五入。
这行很复杂,所以让我们分解一下:
roundPlaceholder = EncodedImage.createFromImage(userPlaceholder.scaled(mask.getWidth(), mask.getHeight()).applyMask(mask.createMask()), false); 我们在这里做的是几件事, userPlaceholder.scaled(mask.getWidth(), mask.getHeight())接受userPlaceholder并确保它与遮罩的大小完美匹配。 如果没有,我们将得到一个例外。 然后,我们将蒙版图像mask.createMask()转换为内部表示形式。 您可能从上面回想起蒙版图像是这样的:
因此, createMask方法提取这些像素并将其转换为内部表示形式,我们以后可以将其应用于任意图像。 这是一个稍微昂贵的操作,所以我们不建议您经常这样做。 然后,我们获取缩放后的图像,并将新创建的蒙版应用到缩放后的图像上,从而通过调用applyMask生成圆形图像。
但是,我们需要一个EncodedImage实例,而不仅仅是一个普通图像,因此我们将EncodedImage.createFromImage与false参数一起使用(指示该图像不是不透明的)将生成的占位符转换为编码图像。 请注意,如果图像已经是编码图像,则此方法不执行任何操作...
我们需要一个编码图像,因为后面的代码中,我们将使用URLImage其预计EncodedImage ,该EncodedImage一般是在RAM方面存储图像的一种更有效的方式,它使我们能够更有效地获取图像数据。 这意味着图像PNG / JPEG数据仍然可用...从资源文件返回的所有标准/多图像都是`EncodedImage's,有助于内存利用率。
现在一切就绪,我们可以从显示UI的main方法开始:
void showContactsForm(UserData data) {
    Form contactsForm = new Form("Contacts");
    contactsForm.setLayout(new BoxLayout(BoxLayout.Y_AXIS));

    // the toolbar is created into a layer on the content pane. This allows us to render behind it and leave it semi transparent
    Toolbar tb = new Toolbar(true);

    // we want the title area to be transparent so it won't get in the way
    contactsForm.getTitleArea().setUIID("Container");

    // folds the toolbar automatically as we scroll down, shows it if we scroll back up
    tb.setScrollOffUponContentPane(true);
    contactsForm.setToolBar(tb);

    // we want the image behind the toolbar to stretch and fit the entire screen and leave no margin
    Label titleLabel = new Label(" ");
    Style titleLabelStyle = titleLabel.getUnselectedStyle();
    titleLabelStyle.setBgImage(theme.getImage("social-chat-tutorial-image-top.jpg"));
    titleLabelStyle.setBackgroundType(Style.BACKGROUND_IMAGE_SCALED_FILL);
    titleLabelStyle.setPadding(tb.getPreferredH(), tb.getPreferredH(), tb.getPreferredH(), tb.getPreferredH());
    titleLabelStyle.setPaddingUnit(Style.UNIT_TYPE_PIXELS, Style.UNIT_TYPE_PIXELS, Style.UNIT_TYPE_PIXELS, Style.UNIT_TYPE_PIXELS);
    titleLabelStyle.setMargin(0, 0, 0, 0);

    contactsForm.addComponent(titleLabel);

    // the behavior of the title is rather complex so we extract it to a separate method
    tb.setTitleComponent(createTitleComponent(contactsForm));

    InfiniteProgress ip = new InfiniteProgress();
    contactsForm.addComponent(ip);

    loadContacts(data, ip, contactsForm.getContentPane());

    // creates the morph and other animations from the main form to the second form of the app
    createMorphEffect(titleLabel);

    contactsForm.show();
}
这是一个相对较大的方法,但是它将大部分的辛苦工作委托给其他方法,因此此处完成的大多数工作不是很复杂,甚至不会很有趣。 这里:
contacts.getTitleArea().setUIID("Container"); 我们只是使标题区域透明(因为Container UIID始终是透明的),这使我们可以在createTitleComponent方法中以相当复杂的方式设置工具栏的样式。
这段代码:
Label titleLabel = new Label(" ");
Style titleLabelStyle = titleLabel.getUnselectedStyle();
titleLabelStyle.setBgImage(theme.getImage("social-chat-tutorial-image-top.jpg"));
titleLabelStyle.setBackgroundType(Style.BACKGROUND_IMAGE_SCALED_FILL);
titleLabelStyle.setPadding(tb.getPreferredH(), tb.getPreferredH(), tb.getPreferredH(), tb.getPreferredH());
titleLabelStyle.setPaddingUnit(Style.UNIT_TYPE_PIXELS, Style.UNIT_TYPE_PIXELS, Style.UNIT_TYPE_PIXELS, Style.UNIT_TYPE_PIXELS);
titleLabelStyle.setMargin(0, 0, 0, 0);
初始化标题后面的图像:
请注意,我们希望在代码中设置样式,因为我们希望它以非常特定的方式定位并获得工具栏的大小。 因此,我们使用工具栏中的填充来正确设置尺寸。 请注意,我们明确声明了填充单元,否则某些默认设置为毫米填充的平台可能最终无法使用。
我们可以通过几种不同的方式来实现这种效果,但是这种带有“按比例缩放”选项的特定方法可以使图像很好地适应设备的方向,而不会失去比例性。
在此块中使用了几种方法,我们将从最简单到最困难的方法进行介绍:
private MultiButton createContactComponent(ContactData d) {
    MultiButton mb = new MultiButton();
    mb.putClientProperty("uid", d.uniqueId);
    mb.setTextLine1(d.name);
    if(d.imageUrl != null) {
        mb.setIcon(URLImage.createToStorage(userPlaceholder, "userPic" + d.uniqueId, d.imageUrl, URLImage.RESIZE_SCALE_TO_FILL));
    } else {
        mb.setIcon(userPlaceholder);
    }
    mb.addActionListener((e) -> {
        showChatForm(d, mb);
    });
    return mb;
} 联系人列表中的条目只是一个多按钮,没有太多的乐趣,我们使用putClientProperty调用将uid放置为客户端属性。 这有效地使我们能够将对象放入存在于Component中的Map ,稍后在代码中处理按钮单击时,我们可以调用mb.getClientProperty("uid"); 并获取按钮代表的唯一标识符。 这对于将应用程序逻辑与UI分离非常有用。
private void createMorphEffect(Label titleLabel) {
    // animate the components out of the previous form if we are coming in from the login form
    Form parent = Display.getInstance().getCurrent();
    if(parent.getUIID().equals("MainForm")) {
        for(Component cmp : parent.getContentPane()) {
            cmp.setX(parent.getWidth());
        }

        // moves all the components outside of the content pane to the right while fading them out over 400ms
        parent.getContentPane().animateUnlayoutAndWait(400, 0);
        parent.getContentPane().removeAll();

        // we can't mutate a form into a component in another form so we need to convert the background to an image and then morph that
        // this is especially easy since we already removed all the components
        Label dummy = new Label();
        dummy.setShowEvenIfBlank(true);
        dummy.setUIID("Container");
        dummy.setUnselectedStyle(new Style(parent.getUnselectedStyle()));
        parent.setUIID("Form");

        // special case to remove status bar on iOS 7
        parent.getTitleArea().removeAll();
        parent.setLayout(new BorderLayout());
        parent.addComponent(BorderLayout.CENTER, dummy);
        parent.revalidate();

        // animate the main panel to the new location at the top title area of the screen
        dummy.setName("fullScreen");
        titleLabel.setName("titleImage");
        parent.setTransitionOutAnimator(MorphTransition.create(1100).morph("fullScreen", "titleImage"));
    }
}
离开主要形式时,变形效果显示出几种效果。 请注意,它仅在主UI是过渡的源时才适用,这在大多数情况下是有意义的。 例如,从聊天返回到联系人表单时,我们会有不同的效果……
我们在这里展示了两种不同的效果,首先是对屏幕外的按钮进行动画处理,方法是将它们放置在它们的最终位置(在屏幕右侧),然后调用animateUnlayoutAndWait ,这与animateLayoutAndWait相反。 它旨在显示这样的退出动画,并有效地将组件返回到其正确的布局位置,然后对它们进行动画处理,同时可以选择使其褪色。
组件消失后,我们将其删除,然后将图像移到一个大标签中,并将表单的UIID转换为标准表单。 这对于只能使元素变形而不能使表单本身变形的变形过渡是必需的。 通常,此“技巧”可以无缝运行,但在iOS上,我们在表单顶部具有StatusBar UIID,以向下推动应用程序并允许我们查看状态栏的内容(电池等)。 一个小的hack使我们可以临时删除该组件(如果存在),并防止过渡期间出现“反弹”。
接下来,我们为变形过渡命名源/目标组件,并将其设置为父表单。 就是这样,变形过渡完成了将组件彼此动画化的其余工作。
表单的标题区域是标准的Toolbar ,尽管我们没有使用标准标题,而是使用了由图层组成的自定义组件来创建特殊效果。 当我们滚动并提供所有标准效果时, Toolbar仍会自动折叠。 它还具有很酷的搜索功能,我们将在下一节中讨论。
private Component createTitleComponent(Form parent) {
    // we want the toolbar to be completely transparent, since we created it on the layered pane (using the true
    // argument in the constructor) it will flow in the UI
    parent.getToolbar().setUIID("Container");

    // we create 3 layers within the title, the region contains all the layers, the encspsulate includes the "me image"
    // which we want to protrude under the title area layer
    Container titleRegion = new Container(new LayeredLayout());
    Container titleEncapsulate = new Container(new BorderLayout());
    Container titleArea = new Container(new BorderLayout());

    // since the Toolbar is now transparent we assign the title area UIID to one of the layers within and the look
    // is preserved, we make it translucent though so we can see what's underneath
    titleArea.setUIID("TitleArea");
    titleArea.getUnselectedStyle().setBgTransparency(128);

    // We customize the title completely using a component, the "title" is just a label with the Title UIID
    Label title = new Label(parent.getTitle());
    title.setUIID("Title");
    titleArea.addComponent(BorderLayout.CENTER, title);

    // the search button allows us to search a large list of contacts rather easily
    Button search = createSearchButton(parent, title, titleArea, titleRegion);

    // we package everything in a container so we can replace the title area with a search button as needed
    Container cnt = new Container(new BoxLayout(BoxLayout.X_AXIS));
    titleArea.addComponent(BorderLayout.EAST, cnt);
    cnt.addComponent(search);

    // this is the Me picture that protrudes downwards. We use a placeholder which is then replace by the URLImage
    // with the actual image. Notice that createMaskAdapter allows us to not just scale the image but also apply
    // a mask to it...
    Label me = new Label(URLImage.createToStorage(roundPlaceholder, "userImage", imageURL, URLImage.createMaskAdapter(mask)));
    me.setUIID("UserImage");

    // the search icon and the "me" image are on two separate layers so we use a "dummy" component that we
    // place in the search container to space it to the side and leave room for the "me" image
    Label spacer = new Label(" ");
    Container.setSameWidth(spacer, me);
    cnt.addComponent(spacer);

    Container iconLayer = new Container(new BorderLayout());
    titleEncapsulate.addComponent(BorderLayout.NORTH, titleArea);

    titleRegion.addComponent(titleEncapsulate);
    titleRegion.addComponent(iconLayer);
    iconLayer.addComponent(BorderLayout.EAST, me);

    return titleRegion;
} 搜索按钮封装了许多功能,有效地将其替换为允许我们键入联系人姓名的TextField 。 最酷的部分是我们筛选联系人以找到正确条目的方式,这是使用数据更改侦听器并动态隐藏不相关的条目来完成的。
您可以在以下短片中看到该动画的运行情况:
所有这些功能都直接嵌入到创建搜索按钮的代码中:
private Button createSearchButton(Form parent, Label title, Container titleArea, Container titleRegion) {
    // we want the search feature to be based on the title style so it will "fit" but we need it to use the font defined
    // by the icon font UIID so we merge both
    Style s = new Style(title.getUnselectedStyle());
    Style iconFontStyle = UIManager.getInstance().getComponentStyle("IconFont");
    s.setFont(iconFontStyle.getFont().derive(s.getFont().getHeight(), Font.STYLE_PLAIN));
    FontImage searchIcon = FontImage.create(" \ue806 ", s);
    FontImage cancelIcon = FontImage.create(" \ue81e ", s);

    // this is the actual search button, but we don't want it to have a border...
    Button search = new Button(searchIcon);
    search.setUIID("Label");

    // the search box will be placed in the title area so we can type right into it. We make it look like a title but
    // explicitly align it to the left for cases such as iOS where the title is centered by default
    TextField searchBox = new TextField();
    searchBox.setUIID("Title");
    searchBox.getUnselectedStyle().setAlignment(Component.LEFT);
    searchBox.getSelectedStyle().setAlignment(Component.LEFT);

    // the data change listener allows us to animate the data on every key press into the field
    searchBox.addDataChangeListener((type, index) -> {
        String text = searchBox.getText().toLowerCase();
        if(text.length() > 0) {
            Dimension hidden = new Dimension(0, 0);
            // iterates over the components, if a component matches its set to visible and its size is kept as default
            // otherwise the component is hidden and set to occupy no space.
            for(Component cmp : parent.getContentPane()) {
                if(cmp instanceof MultiButton) {
                    String l1 = ((MultiButton)cmp).getTextLine1();
                    if(l1.toLowerCase().indexOf(text) > -1) {
                        cmp.setPreferredSize(null);
                        cmp.setVisible(true);
                    } else {
                        cmp.setPreferredSize(hidden);
                        cmp.setVisible(false);
                    }
                }
            }
        } else {
            // no search string, show all the components by resetting the preferred size to default (thru null) and making them visible
            for(Component cmp : parent.getContentPane()) {
                cmp.setPreferredSize(null);
                cmp.setVisible(true);
            }
        }

        // update the UI with an animation effect
        parent.getContentPane().animateLayout(200);
    });

    // the action event is invoked when the button is pressed, this can have 2 separate states: during search/before search
    search.addActionListener((e) -> {
        if(search.getIcon() == searchIcon) {
            // Starts the search operation by replacing the title with a text field and launching the native editing
            search.setIcon(cancelIcon);
            titleArea.replaceAndWait(title, searchBox, CommonTransitions.createCover(CommonTransitions.SLIDE_VERTICAL, true, 400));
            titleRegion.revalidate();
            Display.getInstance().editString(searchBox, searchBox.getMaxSize(), searchBox.getConstraint(), "");
        } else {
            // if we are currently searching then cancel the search, return all items to visible and restore everything
            search.setIcon(searchIcon);
            for(Component cmp : parent.getContentPane()) {
                cmp.setPreferredSize(null);
                cmp.setVisible(true);
            }
            parent.getContentPane().animateLayoutAndWait(200);
            search.setEnabled(true);
            search.setVisible(true);
            titleArea.replaceAndWait(searchBox, title, CommonTransitions.createCover(CommonTransitions.SLIDE_VERTICAL, true, 400));
        }
    });
    return search;
}
那是一个很大的方法,但是它的功能相对简单。 下次我们将讨论聊天界面。
本系列其他文章
这是一系列持续不断的帖子,包括以下部分:
- 第1部分–初始用户界面
- 第2部分–使用Google登录
- 第3部分–使用Facebook登录
- 第4部分–联系人表格
- 第5部分–聊天表单(即将推出)
翻译自: https://www.javacodegeeks.com/2015/08/building-a-chat-app-with-codename-one-part-4.html
程序员的英文代号


 339
339

 被折叠的 条评论
为什么被折叠?
被折叠的 条评论
为什么被折叠?
 到【灌水乐园】发言


