


现在基本大公司都要求单元测试了,保证我们代码得质量,而我司更是要求覆盖率要达到60%以上,所以搞一下。
1.maven集成
<!-- 单元测试覆盖率 -->
<dependency>
     <groupId>org.springframework.boot</groupId>
     <artifactId>spring-boot-starter-test</artifactId>
 	 <version>2.7.2</version>
 </dependency>
<!-- junit5 -->
<dependency>
    <groupId>org.junit.jupiter</groupId>
    <artifactId>junit-jupiter-engine</artifactId>
    <version>5.8.2</version>
    <scope>test</scope>
</dependency>
<dependency>
    <groupId>org.junit.platform</groupId>
    <artifactId>junit-platform-runner</artifactId>
    <version>1.7.0</version>
    <scope>test</scope>
</dependency>
2.maven单元测试覆盖率集成组件
<!-- 跳过测试test -->
<build>
<plugins>
<plugin>
   <groupId>org.apache.maven.plugins</groupId>
   <artifactId>maven-surefire-plugin</artifactId>
   <version>2.22.2</version>
   <configuration>
       <!-- skipTests设置为false才可以走单元测试哦。如果设置为true的话,要么不会生成覆盖率,要么覆盖率为  -->
       <skipTests>false</skipTests>
       <includes>
           <include>**/Test*.java</include>
           <include>**/*Test.java</include>
           <include>**/*Tests.java</include>
           <include>**/*TestCase.java</include>
           <include>**/*Spec.class</include>
       </includes>
   </configuration>
</plugin>
 <plugin>
      <groupId>org.jacoco</groupId>
           <artifactId>jacoco-maven-plugin</artifactId>
           <version>0.8.7</version>
           <executions>
               <execution>
                   <id>prepare-agent</id>
                   <goals>
                       <goal>prepare-agent</goal>
                   </goals>
               </execution>
               <execution>
                   <id>report</id>
                   <phase>test</phase>
                   <goals>
                       <goal>report</goal>
                   </goals>
               </execution>
           </executions>
</plugin>

</plugins>
</build>
3.编写单元测试
创建单测启动基类
import org.springframework.boot.test.context.SpringBootTest;

/**
 * @author cf
 * @date 2022/12/26下午 2:52
 */
@SpringBootTest(classes = BasicPatternApplication.class)
public class BaseTest {
}
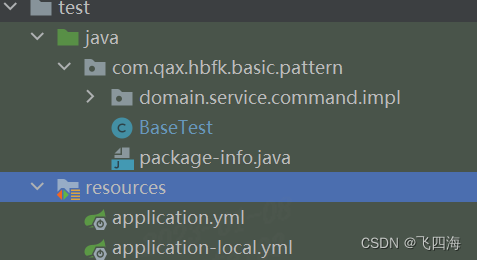
resources里面得配置文件要迁移到test文件夹下,如下图:
编写单测类:
import com.qax.needle.framework.boot.model.PageResult;
import org.junit.jupiter.api.Test;
import org.junit.Assert;

import org.springframework.beans.factory.annotation.Autowired;
import org.springframework.mock.web.MockHttpServletResponse;

/**
 * @author cf
 * @date 2022/12/26下午 2:51
 */
public class AreasAccessInfoServiceImplTest extends BaseTest {

    @Autowired
    IAreasAccessInfoService iAreasAccessInfoService;
    private MockHttpServletResponse response;

    @Test
    public void page() {
        AreasAccessInfoPageReq areasAccessInfo = new AreasAccessInfoPageReq();
        Integer offset = 0;
        Integer limit = 10;
        areasAccessInfo.setCheckpointArea("110101");
        areasAccessInfo.setCheckpointName("检");
        areasAccessInfo.setLineType("1");
        areasAccessInfo.setCheckTimeEnd(1671465600000L);
        areasAccessInfo.setCheckTimeStart(1669824000000L);
        PageResult<AreasAccessInfoPageResp> page = iAreasAccessInfoService.page(areasAccessInfo, offset, limit);
        Assert.assertNotNull(page);
    }

    @Test
    public void statistics() {
        AreasAccessInfoPageReq areasAccessInfo = new AreasAccessInfoPageReq();
        areasAccessInfo.setCheckpointArea("110101");
        areasAccessInfo.setCheckpointName("");
        areasAccessInfo.setLineType("1");
        areasAccessInfo.setCheckTimeEnd(1671465600000L);
        areasAccessInfo.setCheckTimeStart(1669824000000L);
        AreasAccessInfoStatisticsResp statistics = iAreasAccessInfoService.statistics(areasAccessInfo);
        Assert.assertNotNull(statistics);
    }

    @Test
    public void export() {
        AreasAccessInfoPageReq areasAccessInfo = new AreasAccessInfoPageReq();
        areasAccessInfo.setCheckpointArea("110101");
        areasAccessInfo.setCheckpointName("检");
        areasAccessInfo.setLineType("1");
        areasAccessInfo.setCheckTimeEnd(1671465600000L);
        areasAccessInfo.setCheckTimeStart(1669824000000L);
        response = new MockHttpServletResponse();
        iAreasAccessInfoService.export(areasAccessInfo, response);
        Assert.assertNotNull("1");
    }
}
4.执行单元测试覆盖率
这里有两个方法:
1.使用maven自带得test,idea右侧maven模块执行项目下得test
2.使用cmd命令,在你的项目pom文件所在目录 ,打开cmd,执行如下:
mvn clean test org.jacoco:jacoco-maven-plugin:0.8.7:prepare-agent install -Dmaven.test.failure.ignore=true
结果如下:打开site文件夹下得 index.html
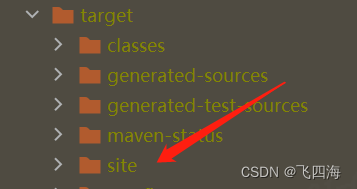
出来了:

5.有个坑
在编写单测得时候注意不要引入@Test得包为org.junit.Test,因为
- spring boot 2.2之前使用的是 Junit4
- spring boot 2.2之后使用的是 Junit5


 3852
3852


 被折叠的 条评论
为什么被折叠?
被折叠的 条评论
为什么被折叠?
 到【灌水乐园】发言


