


文章目录
(一)Python 3.10 的生命周期
呃,写这些文字的时候,Python目前最新的版本是3.12。
手上不少项目正在用的3.10不再提供新的安装包了。
- 根据 PEP 619 中指定的发布日历,Python 3.10 现在处于其生命周期的“仅安全修复”阶段:3.10 分支仅接受安全修复,并且这些安全修复程序的发布以仅源代码形式不定期发布。
- 直到 2026 年 10 月,Python 3.10 不再收到常规的错误修复,并且不再为其提供二进制安装程序。
- Python 3.10.11 是带有二进制安装程序的 Python 3.10 的最后一个完整错误修复版本。
本来可以就这样放着不管的……
但最近Golang和Java的项目依赖都在更新,解决了“暂时不敢告诉大家具体问题”的安全漏洞。
所以还是把Python也更新一下吧。
既然没有安装包,就只能自己从源码编译。
记得以前在Linux下编译过,不清楚Windows下怎么弄,正好学习学习。
💡为啥不升级
3.11,3.12?
因为Python不同小版本之间的包并不兼容(包带版本号就不兼容,除非是py3-none-any这种不分版本的)。
所以升级到3.11或12需要虚拟环境全部更新,好麻烦。并且还有可能某些包尚未提供3.12的对应版本。
(一)下载源码
🔗Python官网的3.10.13页面。
🔗Python仓库的3.10.13标签。
(二)准备环境
查了一下,不知道是不是这样的,大概需要:
- Visual Studio 2022 桌面应用开发
- Windows自带的.net3.5。
- 微软.net6.0以上的SDK
- git
正好都有,所以我什么都没额外安装。
(三)编译
(3.1)解压源码到目录
我下载的是Python-3.10.13.tgz,解压到任意目录,比如:x:\Python-3.10.13\目录中。
下面用%YourPath%代替。
(3.2)下载依赖(PCBuild)
执行:%YourPath%\PCbuild\get_externals.bat
PS x:\%YourPath\PCbuild> .\get_externals.bat
Installing Python via nuget...
Feeds used:
  https://api.nuget.org/v3/index.json

Installing package 'pythonx86' to 'x:\%YourPath\externals'.
  CACHE https://api.nuget.org/v3/registration5-gz-semver2/pythonx86/index.json
  CACHE https://api.nuget.org/v3/registration5-gz-semver2/pythonx86/page/3.5.2/3.8.1-c1.json
  CACHE https://api.nuget.org/v3/registration5-gz-semver2/pythonx86/page/3.8.1/3.10.4.json
  CACHE https://api.nuget.org/v3/registration5-gz-semver2/pythonx86/page/3.10.5/3.12.0.json

Attempting to gather dependency information for package 'pythonx86.3.12.0' with respect to project 'x:\%YourPath\externals', targeting 'Any,Version=v0.0'
Gathering dependency information took 22 ms
Attempting to resolve dependencies for package 'pythonx86.3.12.0' with DependencyBehavior 'Lowest'
Resolving dependency information took 0 ms
Resolving actions to install package 'pythonx86.3.12.0'
Resolved actions to install package 'pythonx86.3.12.0'
Retrieving package 'pythonx86 3.12.0' from 'nuget.org'.
Adding package 'pythonx86.3.12.0' to folder 'x:\%YourPath\externals'
Added package 'pythonx86.3.12.0' to folder 'x:\%YourPath\externals'
Successfully installed 'pythonx86 3.12.0' to x:\%YourPath\externals
Executing nuget actions took 1.58 sec
Using "x:\%YourPath\PCbuild\\..\externals\pythonx86\tools\python.exe" (found on nuget.org)
Fetching external libraries...
Fetching bzip2-1.0.8...
Fetching sqlite-3.40.1.0...
Fetching xz-5.2.5...
Fetching zlib-1.2.13...
Fetching external binaries...
Fetching libffi-3.3.0...
Fetching openssl-bin-1.1.1u...
Fetching tcltk-8.6.12.0...
Finished.
PS x:\%YourPath\PCbuild>
如果你会魔法或者网络条件很好,则直接执行命令没有问题。
如果和我一样只是普通的麻瓜,也许需要先这样:
- 手动下载nuget.exe,并放入
%YourPath%\externals\(可手动新建)中。 - 修改
PCbuild目录中的get_externals.bat和get_external.py,
把https://github.com/改成https://ghproxy.com/https://github.com/。
或者任意其它办法能访问到git仓库就行。
总之日志中不要有报错就OK。
(3.3)下载依赖(MSI)
执行:%YourPath%\\Tools\msi\get_externals.bat
PS x:\%YourPath\Tools\msi> .\get_externals.bat
Installing Python via nuget...
Feeds used:
  https://api.nuget.org/v3/index.json

Installing package 'pythonx86' to 'x:\%YourPath\externals\windows-installer'.
  CACHE https://api.nuget.org/v3/registration5-gz-semver2/pythonx86/index.json
  CACHE https://api.nuget.org/v3/registration5-gz-semver2/pythonx86/page/3.5.2/3.8.1-c1.json
  CACHE https://api.nuget.org/v3/registration5-gz-semver2/pythonx86/page/3.8.1/3.10.4.json
  CACHE https://api.nuget.org/v3/registration5-gz-semver2/pythonx86/page/3.10.5/3.12.0.json

Attempting to gather dependency information for package 'pythonx86.3.12.0' with respect to project 'x:\%YourPath\externals\windows-installer', targeting 'Any,Version=v0.0'
Gathering dependency information took 22 ms
Attempting to resolve dependencies for package 'pythonx86.3.12.0' with DependencyBehavior 'Lowest'
Resolving dependency information took 0 ms
Resolving actions to install package 'pythonx86.3.12.0'
Resolved actions to install package 'pythonx86.3.12.0'
Retrieving package 'pythonx86 3.12.0' from 'nuget.org'.
Adding package 'pythonx86.3.12.0' to folder 'x:\%YourPath\externals\windows-installer'Added package 'pythonx86.3.12.0' to folder 'x:\%YourPath\externals\windows-installer'
Successfully installed 'pythonx86 3.12.0' to x:\%YourPath\externals\windows-installer
Executing nuget actions took 1.66 sec
Using "x:\%YourPath\Tools\msi\..\..\externals\windows-installer\pythonx86\tools\python.exe" (found on nuget.org)
Fetching external libraries...
Fetching external tools...
Fetching binutils...
Fetching gpg...
Fetching htmlhelp...
Fetching nuget...
Fetching redist-1...
Fetching wix...
Finished.
PS x:\%YourPath\Tools\msi>
(3.4)漫长的编译
我们要的结果是python的Windows x64安装程序。
执行:%YourPath%\Tools\msi\buildrelease.bat -x64 -o %YourPath%\PCbuild
这个命令也会先检查和准备依赖。
不过由于网络情况,我们前面单独下载了依赖,这时能安心一些。
编译时间较长,会输出大量的信息。
我这里有一堆警告,倒是没有报错。
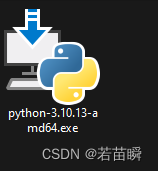
最后得到了python-3.10.13-amd64.exe:
(四)完成和测试
安装后一切正常。

查看版本号和命令行也没问题。
PS C:\> python -V
Python 3.10.13

PS C:\> python
Python 3.10.13 (main, Oct 11 2023, 17:48:00) [MSC v.1937 64 bit (AMD64)] on win32
Type "help", "copyright", "credits" or "license" for more information.
>>> ^Z

PS C:\>
跑个程序试试,功能正常,版本显示正常。


 828
828

 被折叠的 条评论
为什么被折叠?
被折叠的 条评论
为什么被折叠?
 到【灌水乐园】发言


