


Springboot利用Security做OAuth2授权验证_LO嘉嘉VE的博客-CSDN博客_springbootsecurity oauth2 密码认证
验证服务器在上一篇文章中.
验证服务器是做权限验证,有没有登录,有没有权限访问某些内容等。资源服务器指提供业务功能的服务器,他们会向验证服务器进行验证是否有权限访问,有则处理请求,无则直接返回401无授权。
一、验证服务器本身就是资源服务器
这样就简单了,在上一篇文章的基础上,直接添加一个ResourceServerConfig的配置就行了
代码如下
@Configuration
@EnableResourceServer
public class ResourceServerConfig extends ResourceServerConfigurerAdapter {
@Override
public void configure(HttpSecurity http) throws Exception {
http.authorizeRequests().anyRequest().authenticated()
.and()
.httpBasic();
}
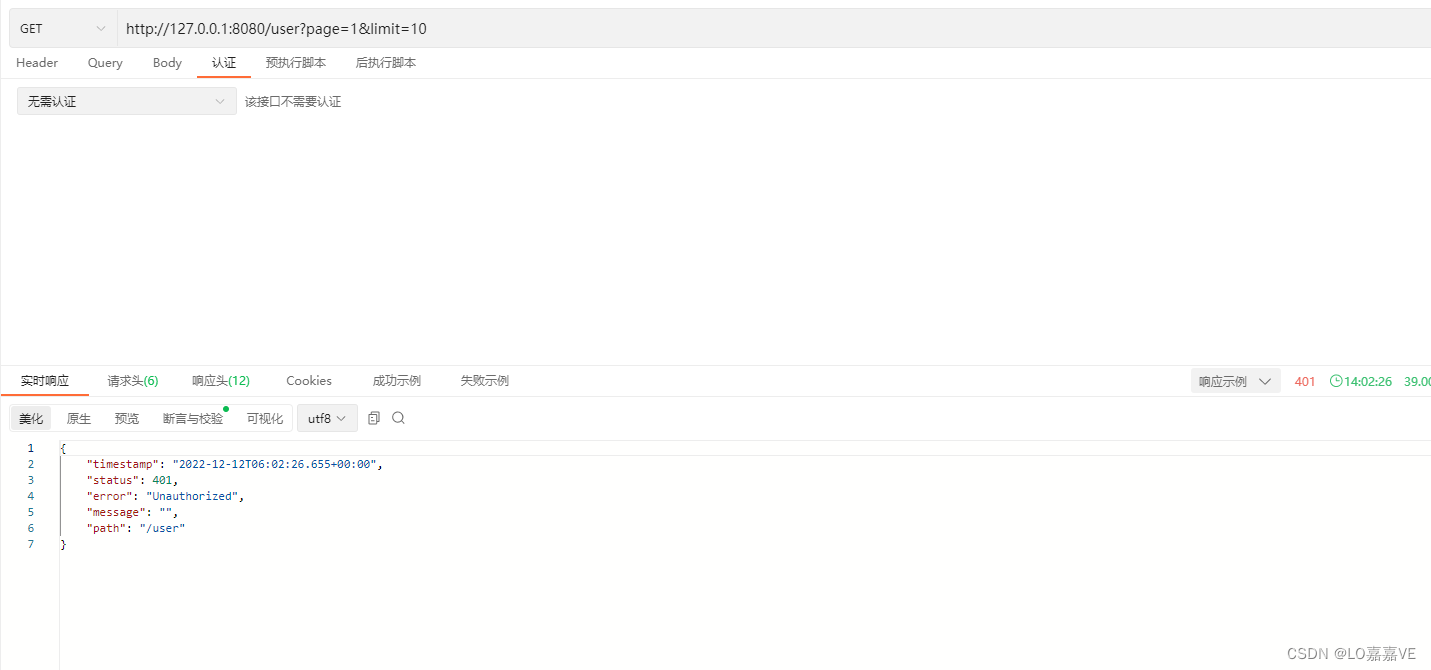
}这时,验证服务器内提供的接口,需要授权才能访问。
我们用api访问软件进行测试,截图分别如下:

二、微服务配置的资源服务器
单独构建的资源服务器会向授权服务器进行验证,验证的接口为/oauth/check_token。
我们第一步是给授权服务器的配置文件Oauth2ServerConfig添加允许访问验证接口的代码:
    @Override
    public void configure(AuthorizationServerSecurityConfigurer security) {
        security.allowFormAuthenticationForClients();
        //允许访问/oauth/check_token
        security.checkTokenAccess("permitAll()");
    }
第二步配置资源服务器
1、pom添加依赖
        <dependency>
            <groupId>org.springframework.cloud</groupId>
            <artifactId>spring-cloud-starter-security</artifactId>
        </dependency>
        <dependency>
            <groupId>org.springframework.cloud</groupId>
            <artifactId>spring-cloud-starter-oauth2</artifactId>
        </dependency>
2、创建资源服务器的配置
@Configuration
@EnableResourceServer
public class OAuth2ResourceConfig extends ResourceServerConfigurerAdapter {

    @Override
    public void configure(HttpSecurity http) throws Exception {
        http.authorizeRequests()
                .antMatchers("/noAuth/**").permitAll() //设置/oauth/**的接口不需要授权就可以访问
                .anyRequest().authenticated();
    }

}
3、application中配置权限验证服务器的地址
security:
  oauth2:
    resource:
      id: test
      token-info-uri: http://127.0.0.1:8080/oauth/check_token
      prefer-token-info: true
    client:
      access-token-uri: http://127.0.0.1:8080/oauth/token
      user-authorization-uri: http://127.0.0.1:8080/oauth/authorize
      client-id: test
      client-secret: test
配置好以上三步,资源服务器的配置就算完成了,配合验证服务器,我们可以启动进行测试。
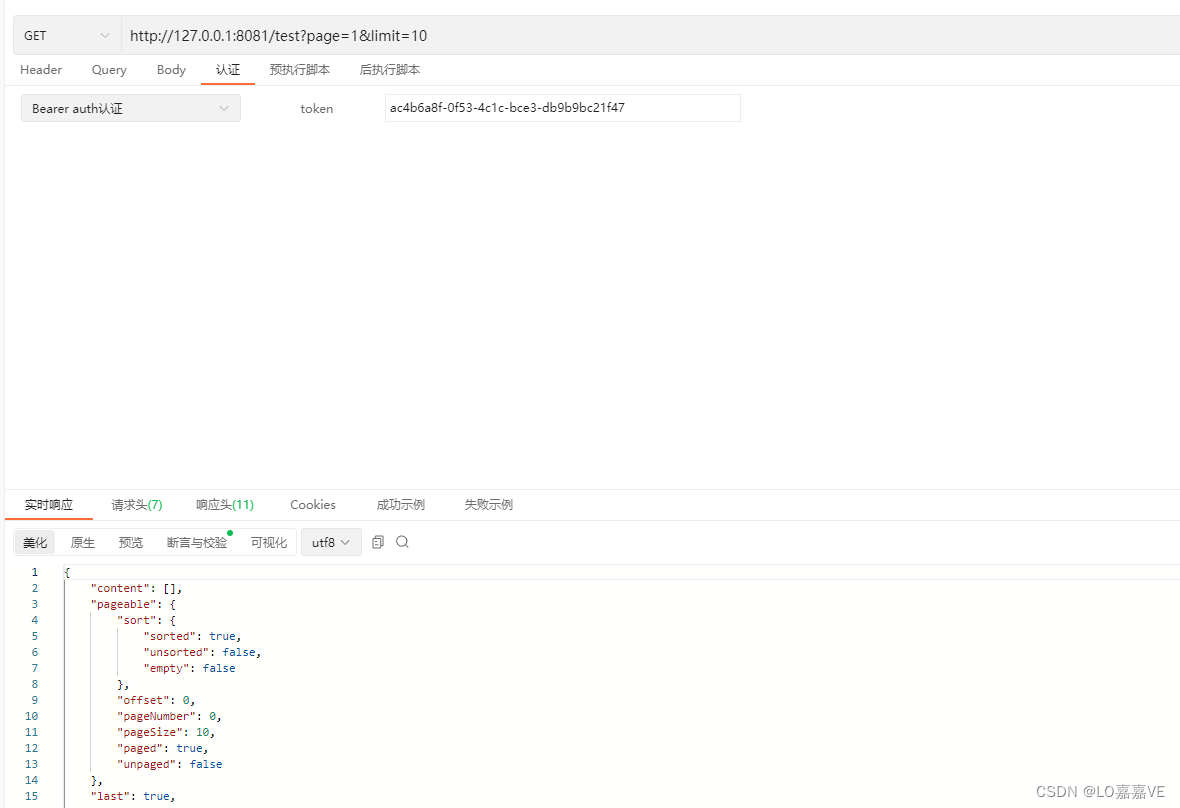
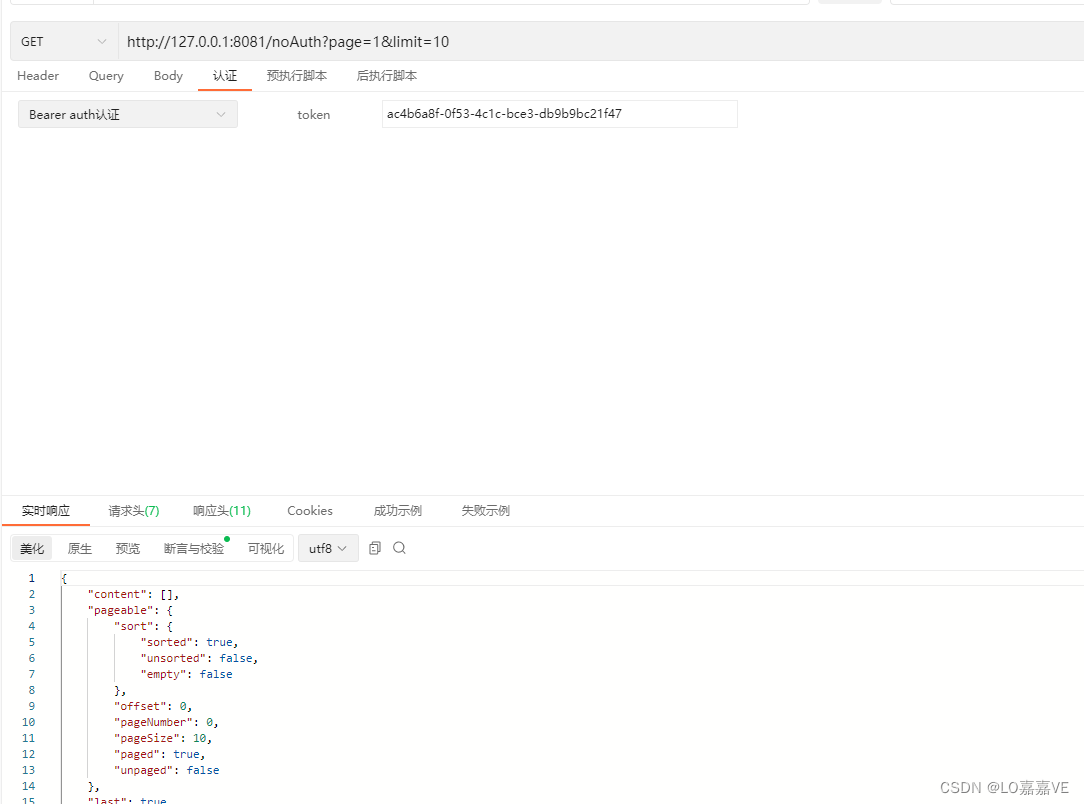
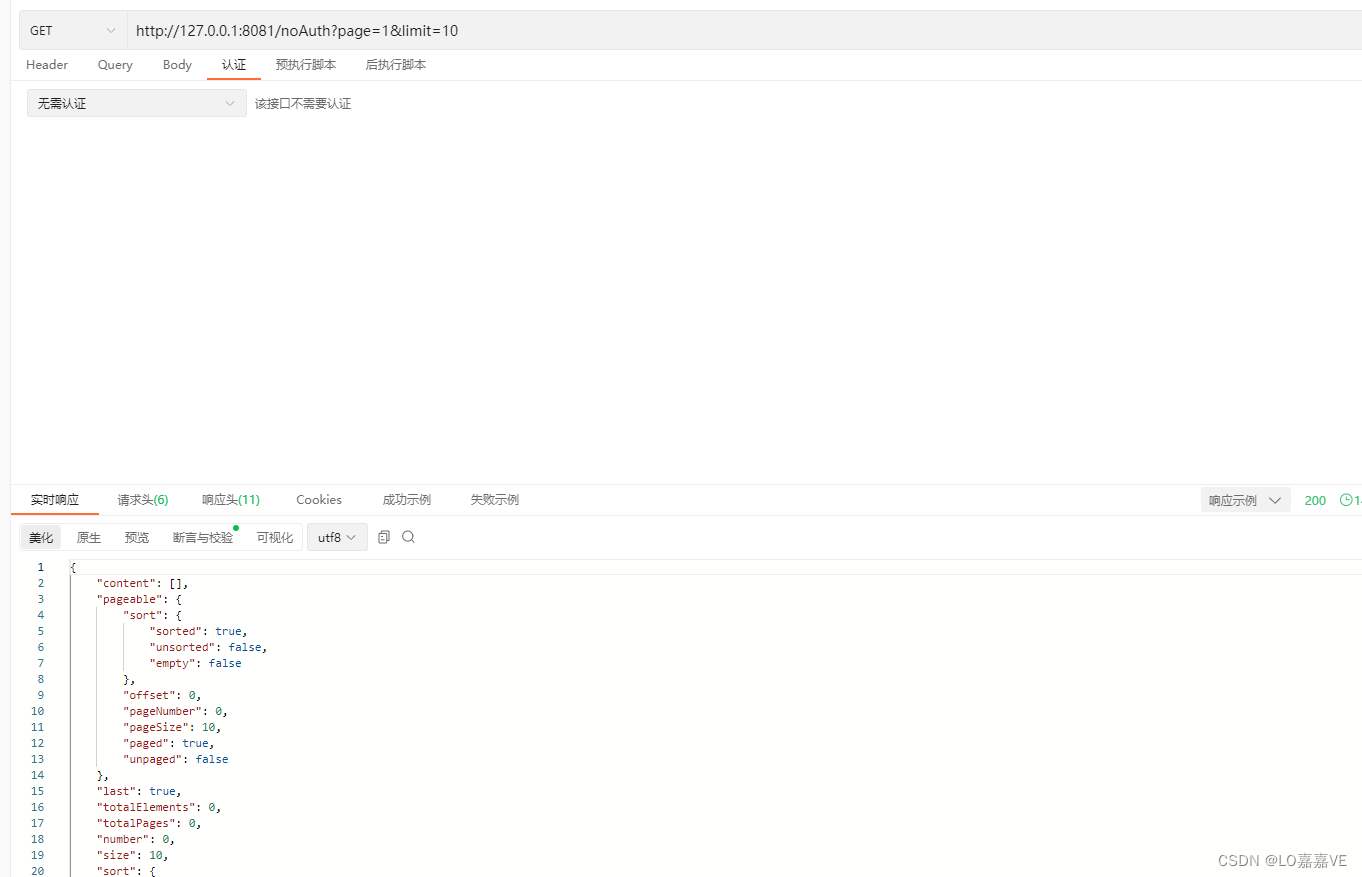
访问/noAuth 接口,是否有token都可以访问
访问/test 接口,必须有权限才可以
测试访问截图如下:

源码测试地址:


 1808
1808


 被折叠的 条评论
为什么被折叠?
被折叠的 条评论
为什么被折叠?
 到【灌水乐园】发言


