


目录:
(1)springboot简单功能:
(2)@SpringBootApplication的作用
(3)springboot项目的配置文件:
* 3.1使用properties配置文件
* 3.2使用yml配置文件:
(4)多配制文件的使用
(5)SpringBoot的自定义配置
* 5.1 @Value读取数据
* 5.2@ConfigurationProperties将配置文件数据有影射为Java对象
(1)springboot简单功能:
SpringBoot项目内置了tomcat就不用手动配置了,现在写的Controller,不用在写中央调度器了,是因为SpringBoot框架已经把Spring的有关东西都已经配置好了,项目中已经有了,所有就不用写那些复杂的东西了,直接写业务逻辑就可以了:

编写控制器HelloSpringBoot :
package com.bjpowernod.controller;

import org.springframework.stereotype.Controller;
import org.springframework.web.bind.annotation.RequestMapping;
import org.springframework.web.bind.annotation.ResponseBody;

@Controller
public class HelloSpringBoot {

    @RequestMapping("/hello")
    @ResponseBody //把String返回值当做数据来用返回给浏览器,
    public String helloSplringBoot(){
        return "欢迎使用SpringBoot框架";
    }
}
运行项目点击Application中的main方法:
从中可以看到内嵌的tomcat服务器已经启动了 ,通过端口号8080,可以访问刚才写的Controller

在浏览器输入地址:http://localhost:8080/hello

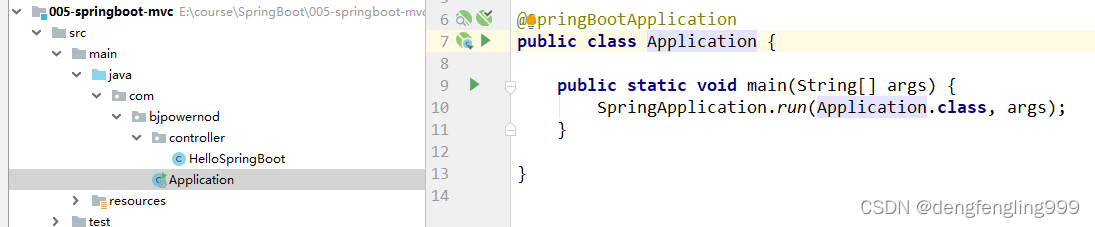
(2)@SpringBootApplication的作用
SpringBoot项目里面都有一个类Application类(名字自定义的),里面包含一个主方法,不管你做的是web项目还是非web项目都是通过主方法来启动的
这个类上面有一个注解:@SpringBootApplication:是一个复合注解

Student:
package com.bjpowernod.vo;

public class Student {
}
Application:主启动类:
@SpringBootConfiguration注解可以当做配置文件来用,可以创建对象
package com.bjpowernod;

import com.bjpowernod.vo.Student;
import org.springframework.boot.SpringApplication;
import org.springframework.boot.autoconfigure.SpringBootApplication;
import org.springframework.context.annotation.Bean;

@SpringBootApplication
public class Application {

    public static void main(String[] args) {
        SpringApplication.run(Application.class, args);
    }

    //这个类具有注解Configuration注解的功能,可以声明对象注入到容器中
    @Bean
    public Student myStudent(){
        return new Student();
    }

}
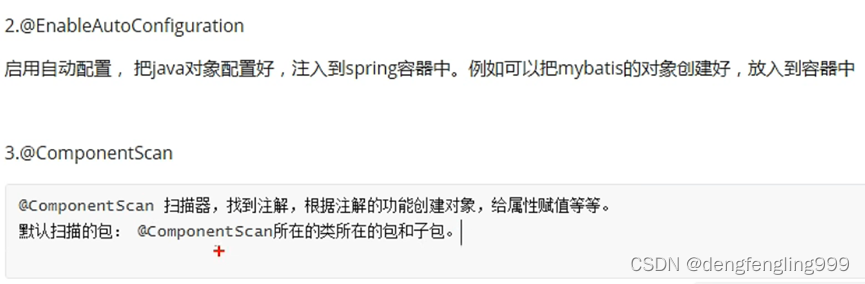
@CompopnentScan注解会扫描@CompopnentScan所在类的包和子包,所以把主类放在主包之下,其他类放在主包的子包中的,这个规则是默认的可以打破,但是不建议,所以说不用做特殊的声明就可以找到程序中各种各样的注解
在写Controller控制类的时候里面有注解@Controller、@RequestMapping、但是在程序中并没有声明主键扫描器,正是因为主类的@SpringBootApplication注解:@ComponentScan的作用
(3)springboot项目的配置文件:

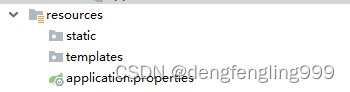
application.properties :是配置文件:我们要用到的各种配置和项目的各种配置都是在这个项目中来实现的
有两种格式:
一种以proplerties结尾
一种以yml结尾
这两种格式表达的内容是一样的只是格式上有所区别而已,推荐用yml的
3.1使用properties配置文件


控制器BootController:
package com.bjpowernode.controller;

import org.springframework.stereotype.Controller;
import org.springframework.web.bind.annotation.RequestMapping;
import org.springframework.web.bind.annotation.ResponseBody;

@Controller
public class BootController {
    @RequestMapping("/hello")
    @ResponseBody //不使用视图,希望返回值String作为数据给浏览器
    public String doSome(){
        return "hello SpringBoor应用,设置端口,上下文路径";
    }
}
MyApplication:主启动类:
package com.bjpowernode;

import org.springframework.boot.SpringApplication;
import org.springframework.boot.autoconfigure.SpringBootApplication;

@SpringBootApplication
public class MyApplication {
    public static void main(String[] args) {
        SpringApplication.run(MyApplication.class,args);
    }
}
配置文件application.properties:通过配置文件设置端口号,和上下文访问路径
#设置端口号
server.port=8082
#设置访问应用的上下文路径,contextpath
server.servlet.context-path=/myboot
可以观察到tomcat服务器的端口号,上下文访问路径发生改变:

在浏览器通过地址:http://localhost:8082/myboot/hello

3.2使用yml配置文件:
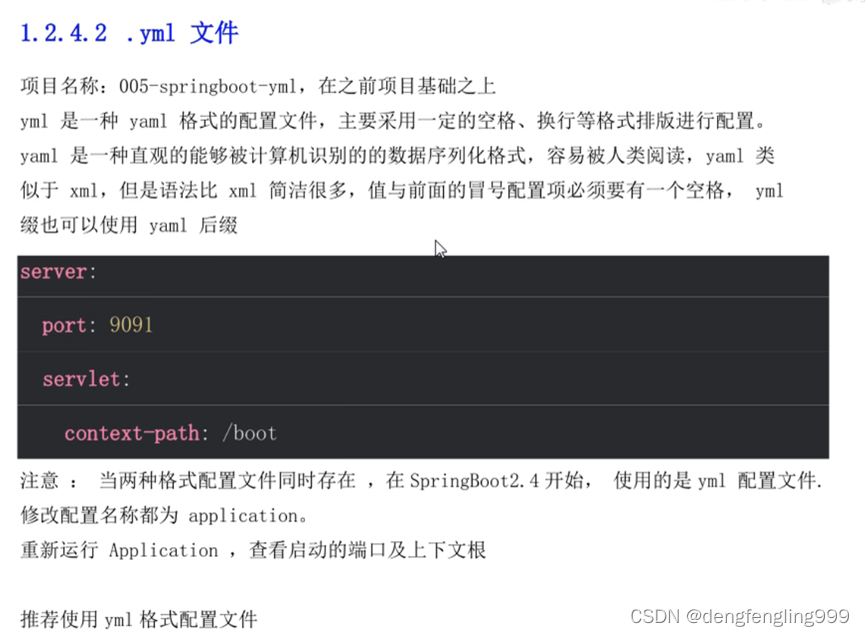
yml:不是通过键=值得方式,而是键: 值 ,中间有空格 yml有层级关系:
创建application.yml:
server:
  port: 8083
  servlet:
    context-path: /myboot2
删除application.properties:
配置文件的优先级:application.properties>application.yml>appllication.yaml
运行主启动类:发现使用了yml的配置问价

在浏览器访问:

如果项目中有两个配置文件,默认使用application.properties的:
配置文件的优先级:application.properties>application.yml>appllication.yaml


(4)多配制文件的使用


控制类:BootController:
package com.bjpowernode.controller;

import org.springframework.stereotype.Controller;
import org.springframework.web.bind.annotation.RequestMapping;
import org.springframework.web.bind.annotation.ResponseBody;

@Controller
public class BootController {
    @RequestMapping("/hello")
    @ResponseBody //不使用视图,希望返回值String作为数据给浏览器
    public String doSome(){
        return "hello SpringBoot多环境配置";
    }
}
主启动类:Application:
package com.bjpowernode;

import org.springframework.boot.SpringApplication;
import org.springframework.boot.autoconfigure.SpringBootApplication;

@SpringBootApplication
public class Application {

    public static void main(String[] args) {
        SpringApplication.run(Application.class, args);
    }

}
生产环境配置文件:application-dev.yml:
#开发环境的配置文件
server:
  port: 8081
  servlet:
    context-path: /mydev
测试环境配置文件:application-test.yml:
#测试环境使用的配置文件
server:
  port: 9001
  servlet:
    context-path: /mytest
上线环境配置文件:application-test.yml:
#项目上线使用的配置文件
server:
  port: 9002
  servlet:
    context-path: /myonline
文件创建完成了告诉应用007-springboot-multi-environment项目,使用哪一个配置文件,默认先读取的是application.properties:在里面设置
#激活使用按那个配置文件
spring.profiles.active=dev
点击主启动类:运行的是application-dev.yml

在浏览器输网址:

更换环境appllication.properties:
#激活使用按那个配置文件
#使用dev
#spring.profiles.active=dev

#使用test环境
spring.profiles.active=test
服务器更换了测试环境


这里面application.properties可以使用application.yml:
(5)SpringBoot的自定义配置

我们从配置文件中来获取数据,
5.1 @Value读取数据

配置文件:application.pro[erties:
#配置端口号
server.port=8082
#设置上下文路径 context-path
server.servlet.context-path=/myboot

#自定义key=value
school.name=动力节点
school.website=www.bjpowernode.com
school.address=北京的大兴区

site=www.baidu.com
控制器:HelloController:
package com.bjpowernode.controller;

import org.springframework.beans.factory.annotation.Value;
import org.springframework.stereotype.Controller;
import org.springframework.web.bind.annotation.RequestMapping;
import org.springframework.web.bind.annotation.ResponseBody;

@Controller
public class HelloController {
    //声明属性,使用注解读取数据
    @Value("${server.port}")
    private Integer port;

    @Value("${server.servlet.context-path}")
    private String contextPath;

    @Value("${school.name}")
    private String name;

    @Value("${site}")
    private String site;

    //读取配置文件中的数据
    @RequestMapping("/data")
    @ResponseBody
    public String queryData(){
        return name+",site="+site+",项目的访问地址="+contextPath+",使用的端口="+port;
    }
}
主启动类Application:
package com.bjpowernode;

import org.springframework.boot.SpringApplication;
import org.springframework.boot.autoconfigure.SpringBootApplication;

@SpringBootApplication
public class Application {

    public static void main(String[] args) {
        SpringApplication.run(Application.class, args);
    }

}
启动项目:

浏览器运行:

5.2@ConfigurationProperties将配置文件数据有影射为Java对象
SchoolInfo:用这个对象来接收配置文件中特定的属性,需要使用一个注解@ConfigurationProperties
package com.bjpowernode.vo;

import org.springframework.boot.context.properties.ConfigurationProperties;
import org.springframework.stereotype.Component;

@Component //注解创建此类的对象
@ConfigurationProperties(prefix = "school")  //告诉框架去配置文件找school开头的,把相同的名字赋值给相同的属性 profix代表前缀,配置文件中所有school开头的
public class SchoolInfo {
    private String name;

    private String website;

    private String address;

    public String getName() {
        return name;
    }

    public void setName(String name) {
        this.name = name;
    }

    public String getWebsite() {
        return website;
    }

    public void setWebsite(String website) {
        this.website = website;
    }

    public String getAddress() {
        return address;
    }

    public void setAddress(String address) {
        this.address = address;
    }

    @Override
    public String toString() {
        return "SchoolInfo{" +
                "name='" + name + '\'' +
                ", website='" + website + '\'' +
                ", address='" + address + '\'' +
                '}';
    }
}
加上了注解@ConfigurationProperties后,可以在pom.xml中加上依赖,来处理这个类提示的信息数据,不加也能正常使用
<!--处理ConfigurationProperties有关的元数据-->
<dependency>
    <groupId>org.springframework.boot</groupId>
    <artifactId>spring-boot-configuration-processor</artifactId>
    <optional>true</optional>
</dependency>
HelloController:加上一个对象的属性,和一个方法
package com.bjpowernode.controller;

import com.bjpowernode.vo.SchoolInfo;
import org.springframework.beans.factory.annotation.Value;
import org.springframework.stereotype.Controller;
import org.springframework.web.bind.annotation.RequestMapping;
import org.springframework.web.bind.annotation.ResponseBody;

import javax.annotation.Resource;

@Controller
public class HelloController {
    //声明属性,使用注解读取数据
    @Value("${server.port}")
    private Integer port;

    @Value("${server.servlet.context-path}")
    private String contextPath;

    @Value("${school.name}")
    private String name;

    @Value("${site}")
    private String site;

    @Resource //注解自动注入
    private SchoolInfo info;

    //读取配置文件中的数据
    @RequestMapping("/data")
    @ResponseBody
    public String queryData(){
        return name+",site="+site+",项目的访问地址="+contextPath+",使用的端口="+port;
    }

    @RequestMapping("/info")
    @ResponseBody
    public String queryInfo(){
        return "SchoolInfo这个对象="+info.toString();
    }
}

在浏览器输入地址:


 3万+
3万+


 被折叠的 条评论
为什么被折叠?
被折叠的 条评论
为什么被折叠?
 到【灌水乐园】发言


