


 本文介绍了如何为Nexus S刷入Android 4.4系统。首先从http://downloadandroidrom.com/下载ROM,并通过115网盘获取相关文件。在解锁Bootloader后,使用Recovery.bat进行恢复操作,然后通过adb sideload刷入cm-11-20131117-UNOFFICIAL-crespo.zip和gapps。在系统中激活Developer Options以启用USB调试。
使用http://downloadandroidrom.com/上的Rom
http://downloadandroidrom.com/file/NexusS/roms/CM11/cm-11-20131117-UNOFFICIAL-crespo.zip
Nexus S 4.4
115网盘礼包码:5lbaocw721rf
http://115.com/lb/5lbaocw721rf
我把4个文件都放在礼包里面
2013/08/02 19:13 819,200 adb.exe
2013/08/02 19:13 96,256 AdbWinApi.dll
2013/08/02 19:13 60,928 AdbWinUsbApi.dll
2013/08/02 19:13 160,768 fastboot.exe
2011/12/19 14:22 159 Recovery.bat
2013/10/07 10:51 5,517,312 recovery.img
2011/12/19 14:23 138 加锁.bat
2011/12/19 14:22 140 解锁.bat
8 File(s) 6,654,901 bytes
2 Dir(s) 59,357,368,320 bytes free
C:\Users\dengsl\Downloads\111320zepze23uvexvu1k6\CWM touch>Recovery.bat
sending 'recovery' (5388 KB)...
OKAY [ 0.677s]
writing 'recovery'...
FAILED (remote: Bootloader Locked - Use "fastboot oem unlock" to Unlock)
finished. total time: 0.682s
按任意键退出。
C:\Users\dengsl\Downloads\111320zepze23uvexvu1k6\CWM touch>fastboot oem unlock
...
OKAY [ 15.348s]
finished. total time: 15.349s
C:\Users\dengsl\Downloads\111320zepze23uvexvu1k6\CWM touch>Recovery.bat
sending 'recovery' (5388 KB)...
OKAY [ 0.678s]
writing 'recovery'...
OKAY [ 0.676s]
finished. total time: 1.356s
按任意键退出。
C:\Users\dengsl\Downloads\111320zepze23uvexvu1k6\CWM touch>
没有解锁 按照提示解锁
C:\Users\dengsl\Downloads>adb sideload cm-11-20131117-UNOFFICIAL-crespo.zip
sending: 'cm-11-20131117-UNOFFICIAL-crespo.zip' 100%
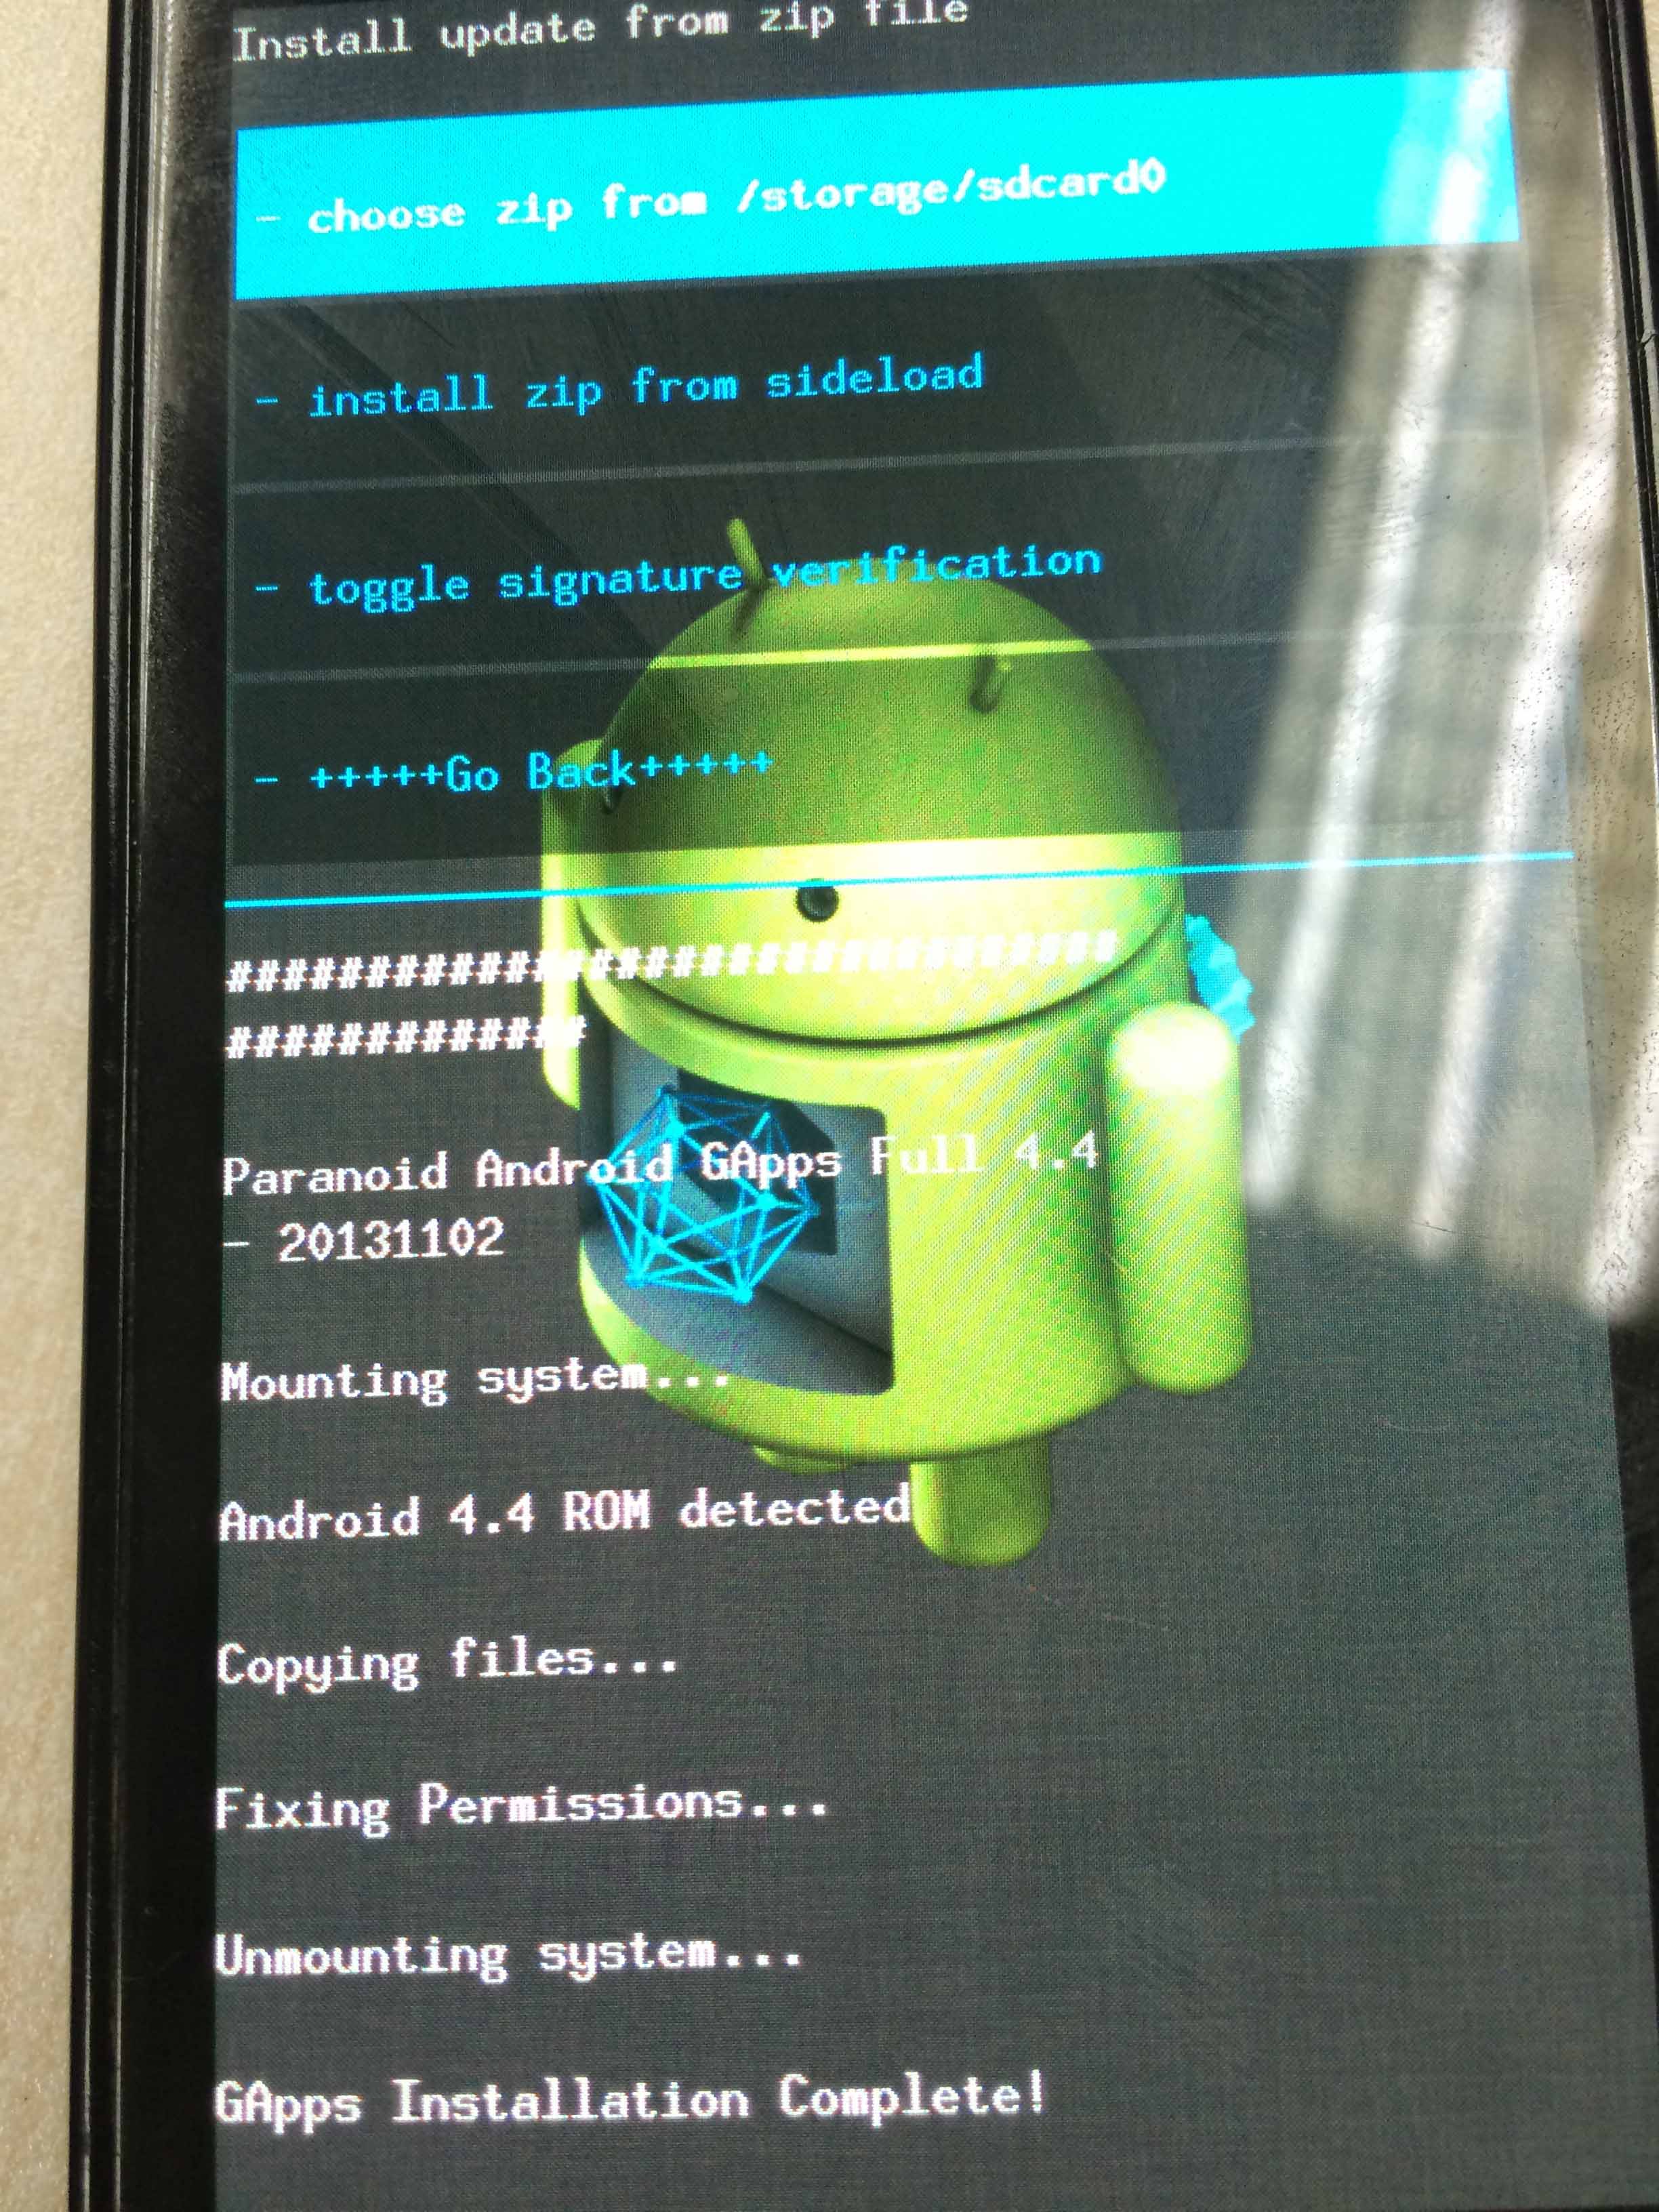
C:\Users\dengsl\Downloads>adb sideload pa_gapps-full-4.4-20131102-signed.zip
sending: 'pa_gapps-full-4.4-20131102-signed.zip' 100%


进入4.4 没有developer option ,进入settings->about phone 猛点Build number
就出来了 然后再进去Settings 就有 Devloper options 进入选择Android debugging 就行了


 9995
9995

 被折叠的 条评论
为什么被折叠?
被折叠的 条评论
为什么被折叠?
 到【灌水乐园】发言


