maven (profiles)装载不同环境所需的配置文件

引子:

  maven与java的联系在今天的项目已经是不可分割的 ,但是不同的项目有各具特色的项目结构,不同的项目结构使用了不同的maven插件,想要了解一个项目的项目结构,或者自己构建一个具有成熟结构体系的项目,那么,了解到熟悉的使用maven插件那么就是势在必行的了。

maven装载不同环境所需的配置文件

  场景:

  企业及应用,摆脱不了三个环境,研发环境,测试环境,生产环境,或者灰度环境,甚至更多。不同的环境 有不同的配置,那么如何在项目发布打包时将所需的配置正确的装载呢。

正常情况下,这些不同环境的配置放在了相似的配置文件,或者类似的包结构下。

  我们会使用以下命令,来装载不同的配置文件:

mvn clean package -P uat

  以上的配置代表了我们将选择prod下包括的相关配置文件,这依赖于pom的相关profile配置 ,实际上profile文件是由maven conf/setting.xml而来的,但这里配置的是全局变量,对于一个开发者我们往往在具体的项目里配置相关的profile,以方便在打包时选择。

示例配置如下:


    <profiles>
        <profile>
            <id>dev</id>    <!-- a. _P后的参数-->
            <activation>
                <activeByDefault>true</activeByDefault>   <!-- b.    表示是否默认激活  mvn clean package 加载的就是此配置下的文件-->
            </activation>
            <properties>
                <finalName.suffix>dev</finalName.suffix><!-- c.  最终项目包后缀-->
                <sysconfig.properties.file>sysconfig-dev.properties</sysconfig.properties.file> <!-- d. 选择加载的配置,注意这并不代表打包时就使用这个配置文件了,而是声明sysconfig.properties.file这个变量留待其他地方调用-->
                <ucmp.log.home>d:/app/applogs/ucmp</ucmp.log.home>  <!-- 同样是声明变量,而不是指定文件-->
            </properties>
        </profile>
        <profile>
            <id>uat</id>
            <properties>
                <finalName.suffix>uat</finalName.suffix>
                <sysconfig.properties.file>sysconfig-uat.properties</sysconfig.properties.file>
                <ucmp.log.home>/app/applogs/ucmp</ucmp.log.home>
            </properties>
        </profile>

  需要留意的是,properties 下的文件都是变量的声明,而不是变量的使用都是需要其他地方调用的 ,正如 properties 代表的是属性。

  关于我们声明的这三个属性我们分别在这三个地方指定加载,


<build>
        <finalName>${project.artifactId}-${finalName.suffix}-${project.version}</finalName>


<!-- 环境配置和war包分离 以外部配置为准 -->
<context:property-placeholder order="1"
   ignore-resource-not-found="true" ignore-unresolvable="true"
   location="file:${CONF_PATH}/${sysconfig.properties.file}" />
   
<context:property-placeholder 
   order="2" 
   ignore-resource-not-found="true" 
   ignore-unresolvable="false"
   location="classpath*:/${sysconfig.properties.file}" />  
    <property name="instance_name" value="${jboss.server.name:-default}" />
    <property name="log_home" value="${ucmp.log.home}/${instance_name}" />
    <property name="logfile_maxsize" value="100MB" />
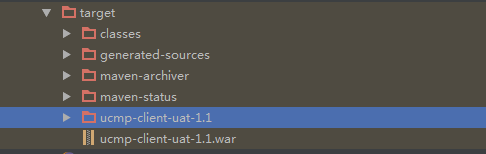
 最终打包后的结果如下

uat替换${finalName.suffix}  ,sysconfig-uat.properties替换${sysconfig.properties.file}

 那是否这样就代表万事大吉了,答案是否定的 ,这样的我们会发现在打包时上述声明的几个配置文件都有打入jar包只是在spring配置阶段加载了我们声明的 ,这样的包是不够简洁的。

同时在复杂的环境中我们将所有的配置变量都放入一个配置文件也是行不通的,这样会大大降低代码的可读性。

关于如何与assembly结合,构建更好的包结构信息,请参考我的下篇博客:http://www.cnblogs.com/lianshan/p/7348093.html


转载于:https://www.cnblogs.com/lianshan/p/7347890.html

  • 0
    点赞
  • 0
    收藏
    觉得还不错? 一键收藏
  • 0
    评论
使用Spring Boot Maven插件可以很方便地根据不同环境使用不同配置文件来打包WAR文件。 首先,在项目的资源目录下创建多个不同环境配置文件,如application-dev.properties、application-prod.properties、application-test.properties等。 然后,在pom.xml文件中,为每个环境配置一个profile,指定相应的配置文件。 ``` <profiles> <profile> <id>dev</id> <activation> <activeByDefault>true</activeByDefault> </activation> <build> <resources> <resource> <directory>src/main/resources</directory> <includes> <include>application-dev.properties</include> </includes> </resource> </resources> </build> </profile> <profile> <id>prod</id> <build> <resources> <resource> <directory>src/main/resources</directory> <includes> <include>application-prod.properties</include> </includes> </resource> </resources> </build> </profile> <profile> <id>test</id> <build> <resources> <resource> <directory>src/main/resources</directory> <includes> <include>application-test.properties</include> </includes> </resource> </resources> </build> </profile> </profiles> ``` 接下来,在插件配置中,使用resource元素来指定每个环境配置文件。 ``` <build> <plugins> <plugin> <groupId>org.springframework.boot</groupId> <artifactId>spring-boot-maven-plugin</artifactId> <configuration> <executable>true</executable> </configuration> </plugin> <plugin> <groupId>org.apache.maven.plugins</groupId> <artifactId>maven-assembly-plugin</artifactId> <executions> <execution> <id>make-assembly</id> <phase>package</phase> <goals> <goal>single</goal> </goals> <configuration> <finalName>my-project-${env}</finalName> <appendAssemblyId>false</appendAssemblyId> <descriptors> <descriptor>src/main/assembly/assembly.xml</descriptor> </descriptors> </configuration> </execution> </executions> </plugin> </plugins> </build> ``` 在上面的配置中,使用了一个单独的assembly.xml文件来定义如何打包WAR文件。在assembly.xml中,可以根据不同环境配置不同配置文件。 ``` <assembly xmlns:xsi="http://www.w3.org/2001/XMLSchema-instance" xmlns="http://maven.apache.org/ASSEMBLY/2.0.0" xsi:schemaLocation="http://maven.apache.org/ASSEMBLY/2.0.0 http://maven.apache.org/xsd/assembly-2.0.0.xsd"> <id>war</id> <formats> <format>war</format> </formats> <fileSets> <fileSet> <directory>${project.basedir}/src/main/resources</directory> <outputDirectory>/</outputDirectory> <includes> <include>application*.properties</include> </includes> </fileSet> </fileSets> </assembly> ``` 最后,使用命令mvn -P dev package可以选择不同的profile进行打包,生成的WAR文件会根据不同环境使用相应的配置文件。例如,使用mvn -P dev package会使用application-dev.properties配置文件进行打包,生成的WAR文件名为my-project-dev.war。

“相关推荐”对你有帮助么?

  • 非常没帮助
  • 没帮助
  • 一般
  • 有帮助
  • 非常有帮助
提交
评论
添加红包

请填写红包祝福语或标题

红包个数最小为10个

红包金额最低5元

当前余额3.43前往充值 >
需支付:10.00
成就一亿技术人!
领取后你会自动成为博主和红包主的粉丝 规则
hope_wisdom
发出的红包
实付
使用余额支付
点击重新获取
扫码支付
钱包余额 0

抵扣说明:

1.余额是钱包充值的虚拟货币,按照1:1的比例进行支付金额的抵扣。
2.余额无法直接购买下载,可以购买VIP、付费专栏及课程。

余额充值