


CSS3 介绍
新特征简介
- 强大的CSS选择器
- 抛弃图片的视觉效果
- 盒模型变化(多列布局和弹性盒模型)
- 阴影效果
- Web字体和web Font 图标
- CSS33过渡与动画交互效果
- 媒体查询
查看浏览器份额
伪类(Pesudo Classes)
(1)动态伪类选择器
:link 设置a对象在未被访问前的样式表属性
:visited 设置a对象在其链接地址已被访问过时的样式表属性
:hover 设置对象在其鼠标悬停时的样式表属性
:active 设置对象在被用户激活(在鼠标点击与释放之间发生的事件)时的样式表属性
定义CSS时候的顺序不同,也会直接导致链接显示的效果不同。原因可能在于浏览器解释CSS时遵循的“就近原则”。正确的顺序:a:link、a:visited、a:hover、a:active
解释:
- link:连接平常的状态
- visited:连接被访问过之后
- hover:鼠标放到连接上的时候
- active:连接被按下的时候
(2)结构伪类选择器
:first-child 选择某个元素第一个子元素
:last-child 选择某个元素最后一个子元素
:nth-child() 选择某个元素的一个或者多个特定的子元素
:nth-last-child 选择某个元素的一个或者多个特定的子元素,从这个元素的最后一个子元素开始算
:nth-of--type() 选择指定的元素
:nth-last-of--type() 选择指定的元素,从元素的最后一个开始计算
:first-of-type 选择一个上级元素下的第一个同类子元素
:last-of-type 选择一个上级元素下的最后一个同类子元素
:only-of-type 选择的是它父元素唯一一个子元素
:empty 选择的元素里面没有内容
伪元素
CSS 伪元素用于向某些选择设置特殊效果
| 伪元素 | 作用 |
|---|---|
| :first-letter | 将特殊的样式添加到文本的首字母 |
| :first-line | 将特殊的样式添加到文本的首行 |
| :before | 在某些元素之前插入某些内容 |
| :after | 在某些元素之后插入某些内容 |
CSS3 变形
(1)border-radius
半圆+标准写法
左上角开始,顺时针
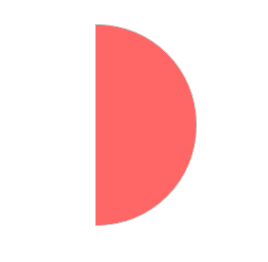
.demo5{
    width: 100px;
    height: 200px;
    border: 1px solid #ccc;
    background: #f66;
    margin: 50px auto;
    border-radius: 0px 100px 100px 0px;
}
(2)border
三角形+对话框
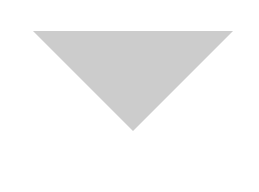
.triangle{
    border-top:100px solid #ccc;
    border-bottom:100px solid transparent;
    border-right:100px solid transparent;
    border-left:100px solid transparent;
    width: 0;
    height: 0;
    margin: 50px auto;
}
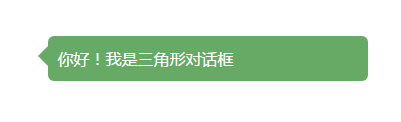
<style>
.triangle-dialog{
    background: #6a6;
    margin: 50px auto;
    width: 300px;
    height: 25px;
    line-height: 25px;
    padding: 10px;
    border-radius: 6px;
    color:#fff;
    position: relative;
}
.triangle-dialog::before{
    content:'';
    border-left: 0px solid #6a6;
    border-top: 10px solid transparent;
    border-right: 10px solid #6a6;
    border-bottom: 10px solid transparent;
    position: absolute;
    left: -10px;
    top: 10px;
}
</style>

html
<div class="triangle-dialog">
    你好!我是三角形对话框
</div>
(3)菱形和平行四边形

.diamond {
    width: 200px;
    height: 200px;
    background: #6a6;
    margin: 100px auto;
    -webkit-transform: rotate(-45deg);
    -ms-transform: rotate(-45deg);
    -o-transform: rotate(-45deg);
    transform: rotate(-45deg);
}
.parallel{
    width: 200px;
    height: 200px;
    background: #6a6;
    margin: 100px auto;
    /*skew 倾斜(x, y)*/
    -webkit-transform: skew(20deg);
    -ms-transform: skew(20deg);
    -o-transform: skew(20deg);
    transform: skew(20deg);
}
(4)五角星和六角星

<style>
    #star{
        position: relative;
        width: 0;
        height: 0;
        border-bottom: 70px solid #f66;
        border-left: 100px solid transparent;
        border-right: 100px solid transparent;
        margin: 150px auto;
        -webkit-transform: rotate(35deg);
        -ms-transform: rotate(35deg);
        -o-transform: rotate(35deg);
        transform: rotate(35deg);
    }
    #star::before{
        position: absolute;
        top: -50px;
        left: -69px;
        content: '';
        width: 0;
        height: 0;
        border-bottom: 80px solid #f66;
        border-left: 30px solid transparent;
        border-right: 30px solid transparent;
        -webkit-transform: rotate(-35deg);
        -ms-transform: rotate(-35deg);
        -o-transform: rotate(-35deg);
        transform: rotate(-35deg);
    }
    #star::after{
        position: absolute;
        content: '';
        top: 4px;
        left: -105px;
        width: 0;
        height: 0;
        border-bottom: 70px solid #f66;
        border-left: 100px solid transparent;
        border-right: 100px solid transparent;
        -webkit-transform: rotate(-70deg);
        -ms-transform: rotate(-70deg);
        -o-transform: rotate(-70deg);
        transform: rotate(-70deg);
    }
</style>


<div id="star"></div>

        #mogen-david{
            position: relative;
            width: 0;
            height: 0;
            border-bottom: 100px solid #f66;
            border-left: 50px solid transparent;
            border-right: 50px solid transparent;
            margin: 100px auto;
        }
        #mogen-david::before{
            position: absolute;
            content: '';
            top: 30px;
            left: -50px;
            width: 0;
            height: 0;
            border-top: 100px solid #f66;
            border-left: 50px solid transparent;
            border-right: 50px solid transparent;
        }
(5)五边形和六边形
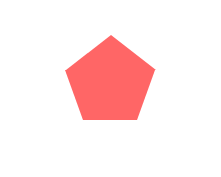
.pentagon{
    position: relative;
    margin: 100px auto;
    width: 54px;
    height: 0;
    border-top: 50px solid #f66;
    border-left: 18px solid transparent;
    border-right: 18px solid transparent;
}
.pentagon::after{
    content: '';
    position: absolute;
    top: -85px;
    left: -17px;
    width: 0;
    height: 0;
    border-bottom: 35px solid #f66;
    border-left: 45px solid transparent;
    border-right: 45px solid transparent;
}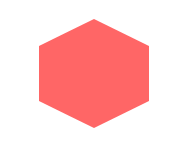
.hexagon{
    position: relative;
    margin: 100px auto;
    width: 100px;
    height: 50px;
    background: #f66;
}
.hexagon::before{
    content: '';
    top: -25px;
    position: absolute;
    width: 0;
    height: 0;
    border-bottom: 25px solid #f66;
    border-left: 50px solid transparent;
    border-right: 50px solid transparent;
}
.hexagon::after{
    content: '';
    top: 50px;
    position: absolute;
    width: 0;
    height: 0;
    border-top: 25px solid #f66;
    border-left: 50px solid transparent;
    border-right: 50px solid transparent;
}
(6)心形和蛋边形
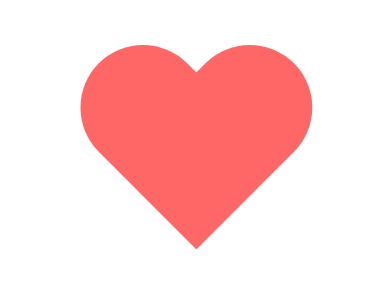
// 无圆心
.hearts{
    position: relative;
    margin: 50px auto;
    width: 50px;
    height: 80px;
    background: #f66;
    border-top-right-radius: 25px;
    border-top-left-radius: 25px;
    -webkit-transform: rotate(-45deg);
    -ms-transform: rotate(-45deg);
    -o-transform: rotate(-45deg);
    transform: rotate(-45deg);
}
.hearts:before{
    position: absolute;
    content: '';
    top: 15px;
    left: 15px;
    width: 50px;
    height: 80px;
    background: #f66;
    border-top-right-radius: 25px;
    border-top-left-radius: 25px;
    -webkit-transform: rotate(90deg);
    -ms-transform: rotate(90deg);
    -o-transform: rotate(90deg);
    transform: rotate(90deg);
}

// 有圆心
.hearts1::before{
    position: absolute;
    left: 50px;
    content: '';
    margin: 50px auto;
    width: 50px;
    height: 80px;
    background: #f66;
    border-radius: 50px 40px 0 0;
    -webkit-transform-origin:0 100% ;
    -ms-transform-origin:0 100% ;
    -o-transform-origin:0 100% ;
    transform-origin:0 100% ;
    -webkit-transform: rotate(-45deg);
    -ms-transform: rotate(-45deg);
    -o-transform: rotate(-45deg);
    transform: rotate(-45deg);
}
.hearts1::after{
    position: absolute;
    content: '';
    margin: 50px auto;
    width: 50px;
    height: 80px;
    background: #f66;
    border-radius: 50px 40px 0 0;
    -webkit-transform-origin:100% 100% ;
    -ms-transform-origin:100% 100% ;
    -o-transform-origin:100% 100% ;
    transform-origin:100% 100% ;
    -webkit-transform: rotate(45deg);
    -ms-transform: rotate(45deg);
    -o-transform: rotate(45deg);
    transform: rotate(45deg);
}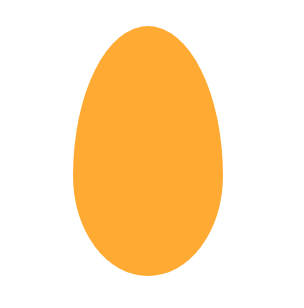
.ogival{
    margin: 100px auto;
    width: 60px;
    height: 100px;
    background: #fa3;
    /*(x / y)*/
    border-radius: 50% 50% 50% 50% / 60% 60% 40% 40%;
}
(7)太极阴阳图
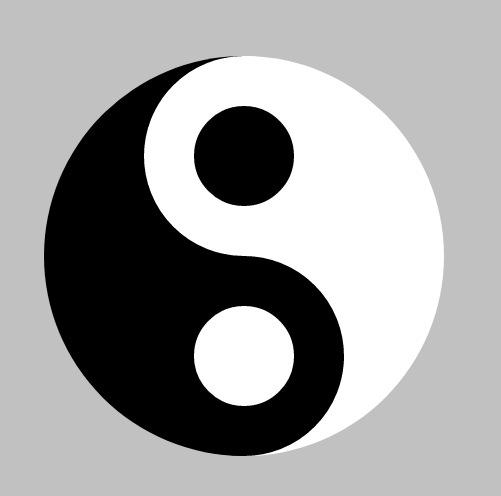
body{
    background: rgb(193, 193, 193);
}
.taiji{
    position: relative;
    margin: 200px auto;
    width: 200px;
    height: 400px;
    background: #fff;
    border-radius: 200px;
    border-left: 200px solid #000;
}
.taiji:before{
    position: absolute;
    left: -100px;
    content: '';
    width: 100px;
    height: 100px;
    border:50px solid #fff;
    background: #000;
    border-radius: 200px;
}
.taiji:after{
    position: absolute;
    left: -100px;
    top: 200px;
    content: '';
    width: 100px;
    height: 100px;
    border:50px solid #000;
    background: #fff;
    border-radius: 200px;
}
CSS3 色彩
透明背景图层
opacity : value
.show{
    margin: 50px auto;
    width: 200px;
    height: 200px;
    padding: 10px;
    text-align: center;
    opacity: 0.5;
    background: #fff;
    border-radius: 40px;
    -webkit-box-shadow: 3px 3px 5px #888;
    box-shadow: 3px 3px 5px #888;
}
颜色模式1
(1)rgba(R, G, B, A)
| 字母 | 描述 |
|---|---|
| R | 正整数 | 百分数 |
| G | 正整数 | 百分数 |
| B | 正整数 | 百分数 |
| A | Alpha 透明度 ( 0~1 ) |
(2)hsla(H, S, L, A)
| 字母 | 描述 |
|---|---|
| H | Hue(色调) ,红色:0 | 360,绿色:120,蓝色:240。 取值范围:0 ~ 360 |
| S | Saturation(饱和度)。取值范围:0.0% ~ 100.0% |
| L | Lightness(亮度)。取值范围:0.0% ~ 100.0% |
| A | Alpha 透明度 ( 0~1 ) |
颜色模式2
#main{
    margin: 100px auto;
    width: 800px;
    clear:both;
}
#main li{
    list-style: none;
    width: 240px;
    padding: 1px;
    border:1px solid rgba(255,0,0,0);
    cursor: pointer;
}
#main li:hover{
    border:1px solid rgba(255,0,0,0.8);
}
#main li:hover .img img{

    opacity: 0.7;
}
.img img {
    width: 240px;
    -webkit-transition: all .5s;
    -o-transition: all .5s;
    transition: all .5s;
}
.goods_title{
    margin: 10px;
    height: 50px;
    color:#666;
    overflow: hidden;
}
.price{
    margin: 10px;
    color:#f00;
}
线性渐变
语法:linear-gradient( [ <point> || <angle> ,] ? <stop> , <stop> [,<stop>] * )
| 元素 | 描述 |
|---|---|
| <angle> | 用角度值指定渐变的方向(或角度)。to left (270deg) | to right (90deg) | to top(0deg) | to bottom(180deg) 分别代表渐变方向:右 -> 左,左 -> 右,下 -> 上,上 -> 下 |
| <color-stop> | 用于指定渐变的起止颜色 |
| <length> | 用长度值指定起止色位置。不允许负值 |
| <percentage> | 用百分比指定起止色位置 |
| <color> | 指定颜色 |
.demo{
    margin: 50px auto;
    width: 260px;
    height: 200px;
    border:1px solid black;
    background-image: linear-gradient(to left,orange 100px, green 160px,red 260px);
    /*或者*/
    background-image: linear-gradient(270deg,orange 100px, green 160px,red 260px);
    background-image: linear-gradient(to left,orange 20%, green 40%x,red 100%);
    /*加前缀*/
    background-image: -webkit-linear-gradient(70deg,orange 100px, green 160px,red 260px);
    background-image:-o-linear-gradient(70deg,orange 100px, green 160px,red 260px);
    background-image:linear-gradient(70deg,orange 100px, green 160px,red 260px);

}
径向渐变
语法:radial-gradient( [<bg-position> || <angle>, ] ? [ <shape> || <size> ,] ? <color-stop> , <color-stop>[, <color-stop>]* )
/*circle 圆*/
.circle{
    background-image: radial-gradient(circle at right,orange,green);
}
/*ellipse 椭圆*/
.ellipse{
    background-image: radial-gradient(ellipse at right,orange,green);
}
.circle{
    background-image: radial-gradient(circle at right top,orange,green);
}
.ellipse{
    background-image: radial-gradient(ellipse at right top,orange,green);
}
/*x*/
.circle{
    background-image: radial-gradient(20px circle at center,orange,green);
}
/*x, y*/
.ellipse{
    background-image: radial-gradient(20px 30px ellipse at center,orange,green);
}
重复性渐变
.linear{
    width: 300px;
    height: 300px;
    margin: 20px auto;
    border:1px solid #ccc;
    background-image: repeating-linear-gradient(orange 0px, green 40px,red 80px);
}
.circle{
    width: 300px;
    height: 300px;
    margin: 20px auto;
    border-radius: 50%;
    border:1px solid #ccc;
    background-image: repeating-radial-gradient(orange 0px, green 30px,red 40px);
}
盒子阴影效果
语法:box-shadow : h-shadow v-shadow blur spread color inset;
| 元素 | 描述 | 必需 |
|---|---|---|
| h-shadow | 水平阴影的位置。允许负值 | 是 |
| v-shadow | 垂直阴影的位置。允许负值 | 是 |
| blur | 模糊距离 | 否 |
| spread | 阴影的尺寸 | 否 |
| color | 阴影的颜色。 | 否 |
| inset | 将外部阴影(outset)改为内部阴影 | 否 |
CSS3 过渡
制作缓慢变长的方形
简写语法:transition: property duration delay timing-function;
| Transition属性 | 描述 |
|---|---|
| transition-property | 过渡属性(默认值为all) |
| transition-duration | 过渡持续时间(默认值为0s) |
| transition-timing-function | 过渡函数(默认值为ease函数) |
| transition-delay | 过渡延迟时间(默认值为0s) |
.demo{
    width: 100px;
    height: 100px;
    background: pink;
    cursor: pointer;
    /*过渡时间*/
    -webkit-transition-duration: 2s;
    -o-transition-duration: 2s;
    transition-duration: 2s;
    /*过渡属性*/
    -webkit-transition-property: height width;
    -o-transition-property: height width;
    transition-property:  height width;
    /*延迟时间*/
    -webkit-transition-delay: 1s;
    -o-transition-delay: 1s;
    transition-delay: 1s;
    /*过渡函数*/
    -webkit-transition-timing-function: ease;
    -o-transition-timing-function: ease;
    transition-timing-function: ease;
    /*简写形式*/
    -webkit-transition: height width 2s 1s ease;
    -o-transition: height width 2s 1s ease;
    transition: height width 2s 1s ease;
}
.demo:hover{
    /*边框跟颜色也可以渐变*/
    width: 300px;
    height: 150px;
    background: #f66;
    border-radius: 40%;
}
过渡的timing-function属性详解
| timing-function值 | 描述 |
|---|---|
| ease | 慢 -> 快 -> 慢 |
| linear | 匀速 |
| ease-in | 开始慢 结束快 |
| ease-out | 开始快 结束慢 |
| ease-in-out | 慢 -> 快 -> 慢 |
| step-start | 无视过渡时间,延迟时间结束后直接变化 |
仿天猫类别过渡效果制作
.main{
    width: 200px;
    height: 200px;
    border: 1px solid #ccc;
    margin: 50px auto;
    font-family: 'Microsoft YaHei';
    cursor: pointer;
}
.main:hover img {
    right: 10px;
}
.m_title{
    text-align: left;
    font-size:20px;
    padding: 20px 10px 10px 10px;
}
.m_content{
    color:#11ccaa;
    padding: 0 10px 10px 10px;
}
.m_img{
    position: relative;
    text-align: right;
}
.m_img img{
    position: absolute;
    width: 100px;
    top: 0;
    right: 0;
    -webkit-transition: all 0.5s;
    -o-transition: all 0.5s;
    transition: all 0.5s;
}
仿天猫专题过渡效果实例
.main{
    margin: 10px auto;
    width: 230px;
    border:1px solid #ccc;
    text-align: center;
    font-family: 'Microsoft YaHei';
    cursor: pointer;
}
.m_title{
    font-weight: 700;
    margin: 5px;
    font-size: 20px;
}
.m_content{
    color:#666;
    margin-bottom: 15px;
}
.main:hover img{
    -webkit-transform: scale(1.1);
    -ms-transform: scale(1.1);
    -o-transform: scale(1.1);
    transform: scale(1.1);
}
.m_img{
    position: relative;
    padding: 30px;
}
.m_img::before{
    position: absolute;
    content: '';
    top: 10px;
    left: 35px;
    width: 160px;
    height: 160px;
    background: #eee;
    border-radius: 50%;
    z-index: -1;
}
img{
    width: 120px;
    -webkit-transform: scale(1);
    -ms-transform: scale(1);
    -o-transform: scale(1);
    transform: scale(1);
    -webkit-transition: all 0.5s;
    -o-transition: all 0.5s;
    transition: all 0.5s;
}
CSS3 动画
动画中的@keyframes关键帧讲解
.rect{
    width: 100px;
    height: 100px;
    background: red;
    position: fixed;
    animation: myMove 2s infinite;
}
@keyframes myMove{
    0%{ top:0; left:20%;background:red; }
    25%{ top:0; left:80%; background:blue;}
    50%{ top:80%; left:80%; background:green;}
    75%{ top:80%; left:20%;background:black; }
    100%{ top:0; left:20%; background:red;}
}
动画animation符合属性讲解
/*指定动画名字*/
-webkit-animation-name: myMove;
-o-animation-name: myMove;
animation-name: myMove;
/*动画延续时间*/
-webkit-animation-duration: 1s;
-o-animation-duration: 1s;
animation-duration: 1s;
/*动画运动函数*/
-webkit-animation-timing-function: ease;
-o-animation-timing-function: ease;
animation-timing-function: ease;
/*动画延迟时间*/
-webkit-animation-delay: 1s;
-o-animation-delay: 1s;
animation-delay: 1s;
/*动画循环次数(infinite 无限循环)*/
-webkit-animation-iteration-count: 3;
-o-animation-iteration-count: 3;
animation-iteration-count: 3;
/*动画顺序 normal|alternate*/
-webkit-animation-direction: alternate;
-o-animation-direction: alternate;
animation-direction: alternate;
动画综合实例制作-loading加载动画制作
.spinner{
    margin: 100px auto;
    width: 60px;
    height: 60px;
    text-align: center;
    font-size:10px;
}
.spinner > div{
    background: #67cf22;
    height: 100%;
    width: 6px;
    display: inline-block;
    animation:myMove 1.2s infinite ease-in-out;
}
.spinner > div:nth-child(2){
    -webkit-animation-delay: -1.1s;
    -o-animation-delay: -1.1s;
    animation-delay: -1.1s;
}
.spinner > div:nth-child(3){
    -webkit-animation-delay: -1s;
    -o-animation-delay: -1s;
    animation-delay: -1s;
}
.spinner > div:nth-child(4){
    -webkit-animation-delay: -0.9s;
    -o-animation-delay: -0.9s;
    animation-delay: -0.9;
}
.spinner > div:nth-child(5){
    -webkit-animation-delay: -0.8s;
    -o-animation-delay: -0.8s;
    animation-delay: -0.8;
}
@keyframes myMove{
    0%,40%,100%{-webkit-transform: scaleY(0.4);
    -ms-transform: scaleY(0.4);
    -o-transform: scaleY(0.4);
    transform: scaleY(0.4);}
    20%{-webkit-transform: scaleY(1);
    -ms-transform: scaleY(1);
    -o-transform: scaleY(1);
    transform: scaleY(1);}
}
Loading动画效果实例2
.spinner{
    width: 60px;
    height: 60px;
    position: relative;
    margin: 100px auto;
}
.spinner > div{
    position: absolute;
    top: 0;
    left: 0;
    width: 100%;
    height: 100%;
    border-radius: 50%;
    background: #67cf22;
    opacity: 0.6;
    animation: myLoading 2s infinite ease-in-out;
}
.spinner > div:nth-child(2){
    -webkit-animation-delay: -1s;
    -o-animation-delay: -1s;
    animation-delay: -1s;
}
@keyframes myLoading{
    0% ,100%{ transform: scale(0.0); }
    50% { transform: scale(1); }
}
CSS3 文字排版
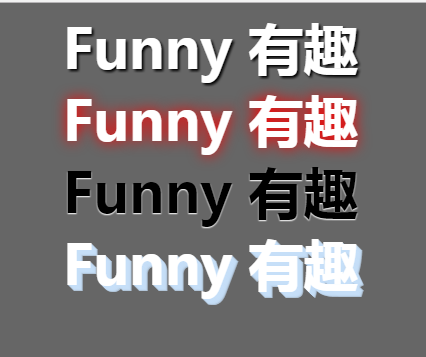
制作发光字,立体字,苹果字体
语法:text-shadow: h-shadow v-shadow blur color;
body{
    background: #666;
    text-align: center;
    font: 700 55px 'Microsoft YaHei'
}
.font1{
    color:#fff;
    text-shadow: 2px 2px 3px #000;
}
.font2{
    color:#fff;
    text-shadow: 0 0 20px red;
}
.font3{
    text-shadow: 0 1px 1px #fff;
}
.font4{
    color:#fff;
    text-shadow: 1px 1px 0px rgba(197,223,248,0.8),
                 2px 2px 0px rgba(197,223,248,0.8),
                 3px 3px 0px rgba(197,223,248,0.8),
                 4px 4px 0px rgba(197,223,248,0.8),
                 5px 5px 0px rgba(197,223,248,0.8),
                 6px 6px 0px rgba(197,223,248,0.8);

}
用text-overflow解决文字排版问题
语法:text-overflow:clip|ellipsis|string;
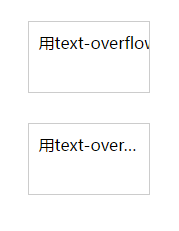
.demo{
    margin: 30px auto;
    width: 100px;
    padding: 10px;
    border:1px solid #ccc;
    height: 50px;
    /*clip 需要overflow:hidden支持,但是不加clip只要overflow:hidden却也可以实现效果*/
    text-overflow:clip;
    overflow: hidden;

}
.demo1{
    margin: 30px auto;
    width: 100px;
    padding: 10px;
    border:1px solid #ccc;
    height: 50px;

    -webkit-text-overflow:ellipsis;
    text-overflow:ellipsis;
    overflow: hidden;
    /*关键 出现省略号 不换行*/
    white-space: nowrap;
}
新的字体单位rem
| 元素 | 特点 | 描述 |
|---|---|---|
| px | 它是一个绝对尺寸单位,是不能变动的 | 像素单位 。 是显示屏上显示的每一个小点,为显示的最小单位。 |
| em | 1.em的值并不是固定不变的。2.em会继承父级元素字体的大小rem | 描述相对于应用在当前元素的字体尺寸,所以它也是相对长度单位,可以变动。一般浏览器字体大小默认为16px,则2em == 32px |
| rem | 相对于应用<html>根元素的字体尺寸 。 | 1. 它是描述相对于当前根元素字体尺寸,除了描述对象与em不同其余都和em一样 。 2.如果要对网页根元素字体大小进行修改,需要在<html>标签中加上style="font-size:value"属性 |


 1569
1569


 被折叠的 条评论
为什么被折叠?
被折叠的 条评论
为什么被折叠?
 到【灌水乐园】发言


