


目录
1.查询三级分类
1.controller
直接调用service层的接口
 @RequestMapping("/list/tree")
    public R list(){
        List<CategoryEntity> entityList=categoryService.listWithTree();

        return R.ok().put("data",entityList);
    }
2.service
- 1.查询所有分类
- 2.找到所有的一级分类
- 3.在一级分类下递归子菜单
 //查出所有分类
    @Override
    public List<CategoryEntity> listWithTree() {
        //1.查出所有分类
        List<CategoryEntity> entities = baseMapper.selectList(null);
        //2.组装成父子结构
        //2.1---找到所有的一级分类
        List<CategoryEntity> level1Menus = entities.stream().filter((categoryEntity) -> {
            return categoryEntity.getParentCid() == 0;
        }).map((menu) -> {
            menu.setChildren(getChildren(menu, entities));
            return menu;
        }).sorted((menu1, menu2) -> {
            return menu1.getSort() - menu2.getSort();
        }).collect(Collectors.toList());

        return level1Menus;
    }

    //递归查找所有菜单的子菜单
    private List<CategoryEntity> getChildren(CategoryEntity root, List<CategoryEntity> all) {
        List<CategoryEntity> children = all.stream().filter(categoryEntity -> {
            return categoryEntity.getParentCid() == root.getCatId();
        }).map((categoryEntity -> {
            //递归找到子菜单
            categoryEntity.setChildren(getChildren(categoryEntity, all));
            return categoryEntity;
        })).sorted((menu1,menu2)->{
            //2.排序
            return (menu1.getSort()==null?0:menu1.getSort())-(menu2.getSort()==null?0:menu2.getSort());
        }).collect(Collectors.toList());
        return children;
    }
2.前端页面搭建
- 1.启动renren-fast的前后端,并新建目录
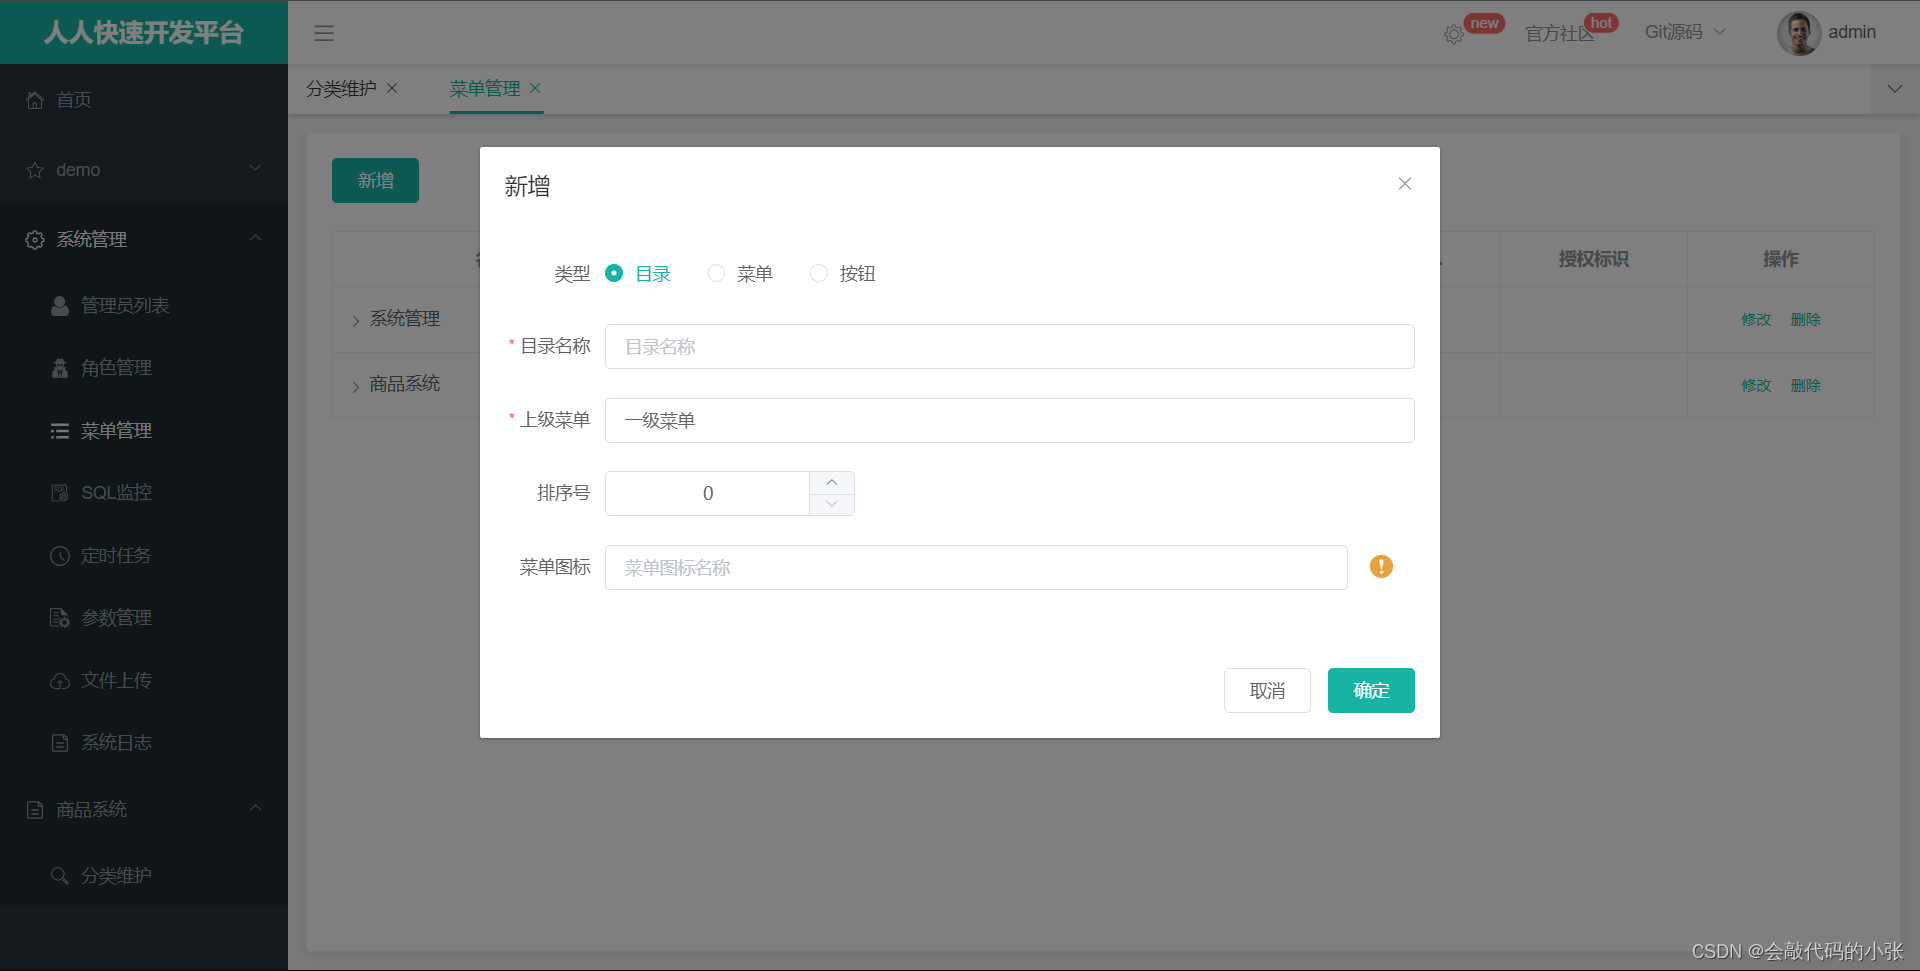
- 2.在renren-fast-vue.src.modules下新建目录product,并在目录下创建category.vue
根据在目录下新增菜单的URI进行创建
编写建category.vue
<template>
  <el-tree
    :data="data"
    :props="defaultProps"
    @node-click="handleNodeClick"
  ></el-tree>
</template>
<script>
export default {
  data () {
    return {
      data: [],
      defaultProps: {
        children: 'children',
        label: 'label'
      }
    }
  },
  methods: {
    handleNodeClick (data) {
      console.log(data)
    },
    getMenus () {
      this.$http({
        url: this.$http.adornUrl('/product/category/list/tree'),
        method: 'get'
      }).then((data) => {
        console.log('获取成功菜单数据', data)
      })
    }
  },
  created () {
    this.getMenus()
  }
}
</script>
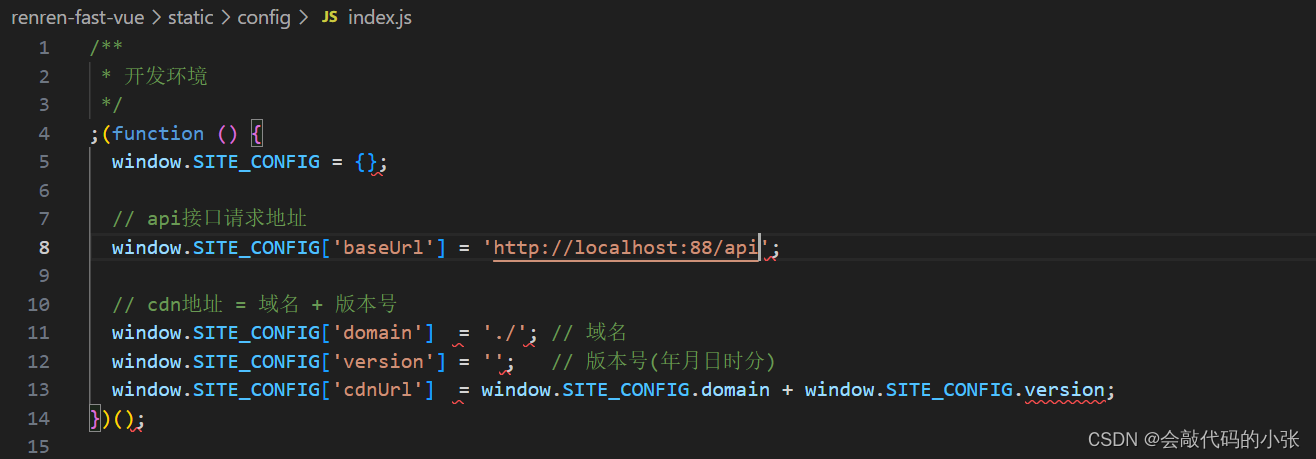
- 3.更改访问地址
访问地址路由到网关
3.添加网关
- 1.将renren-fast项目添加到注册中心
- 注意:
- 1.springboot的版本号以及cloud的版本号
- 2.服务名称
- 3.nacos注册地址
- 2.添加网关配置
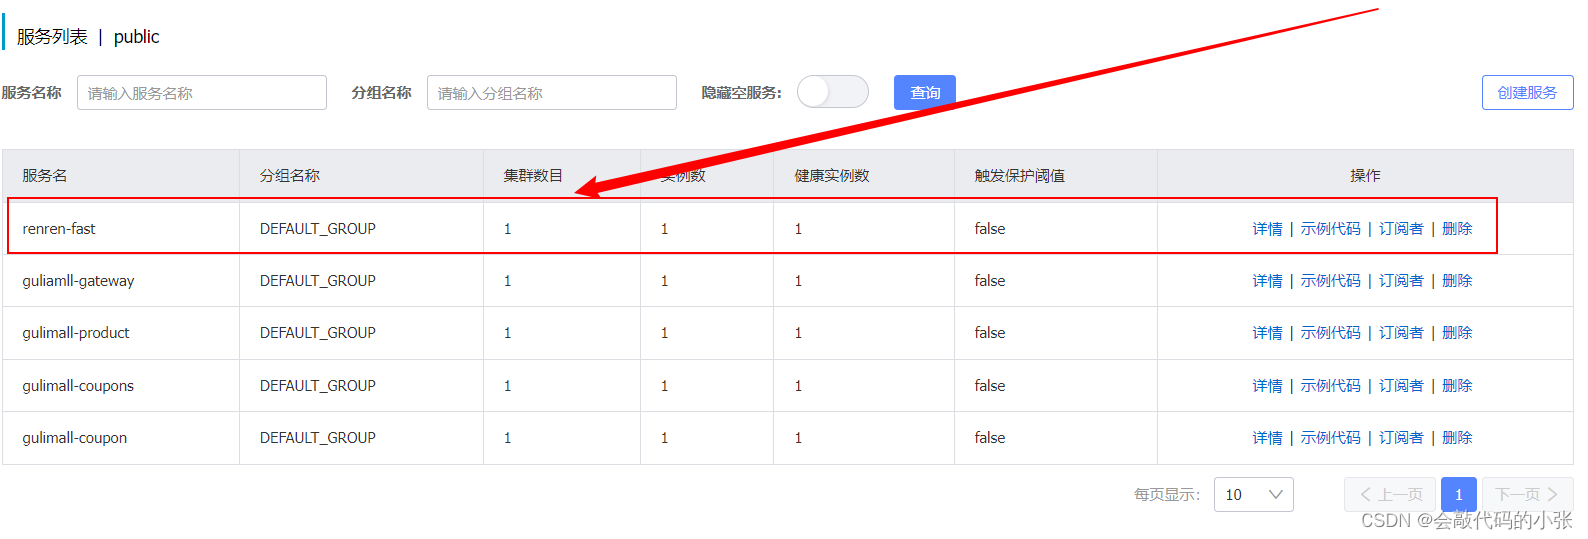
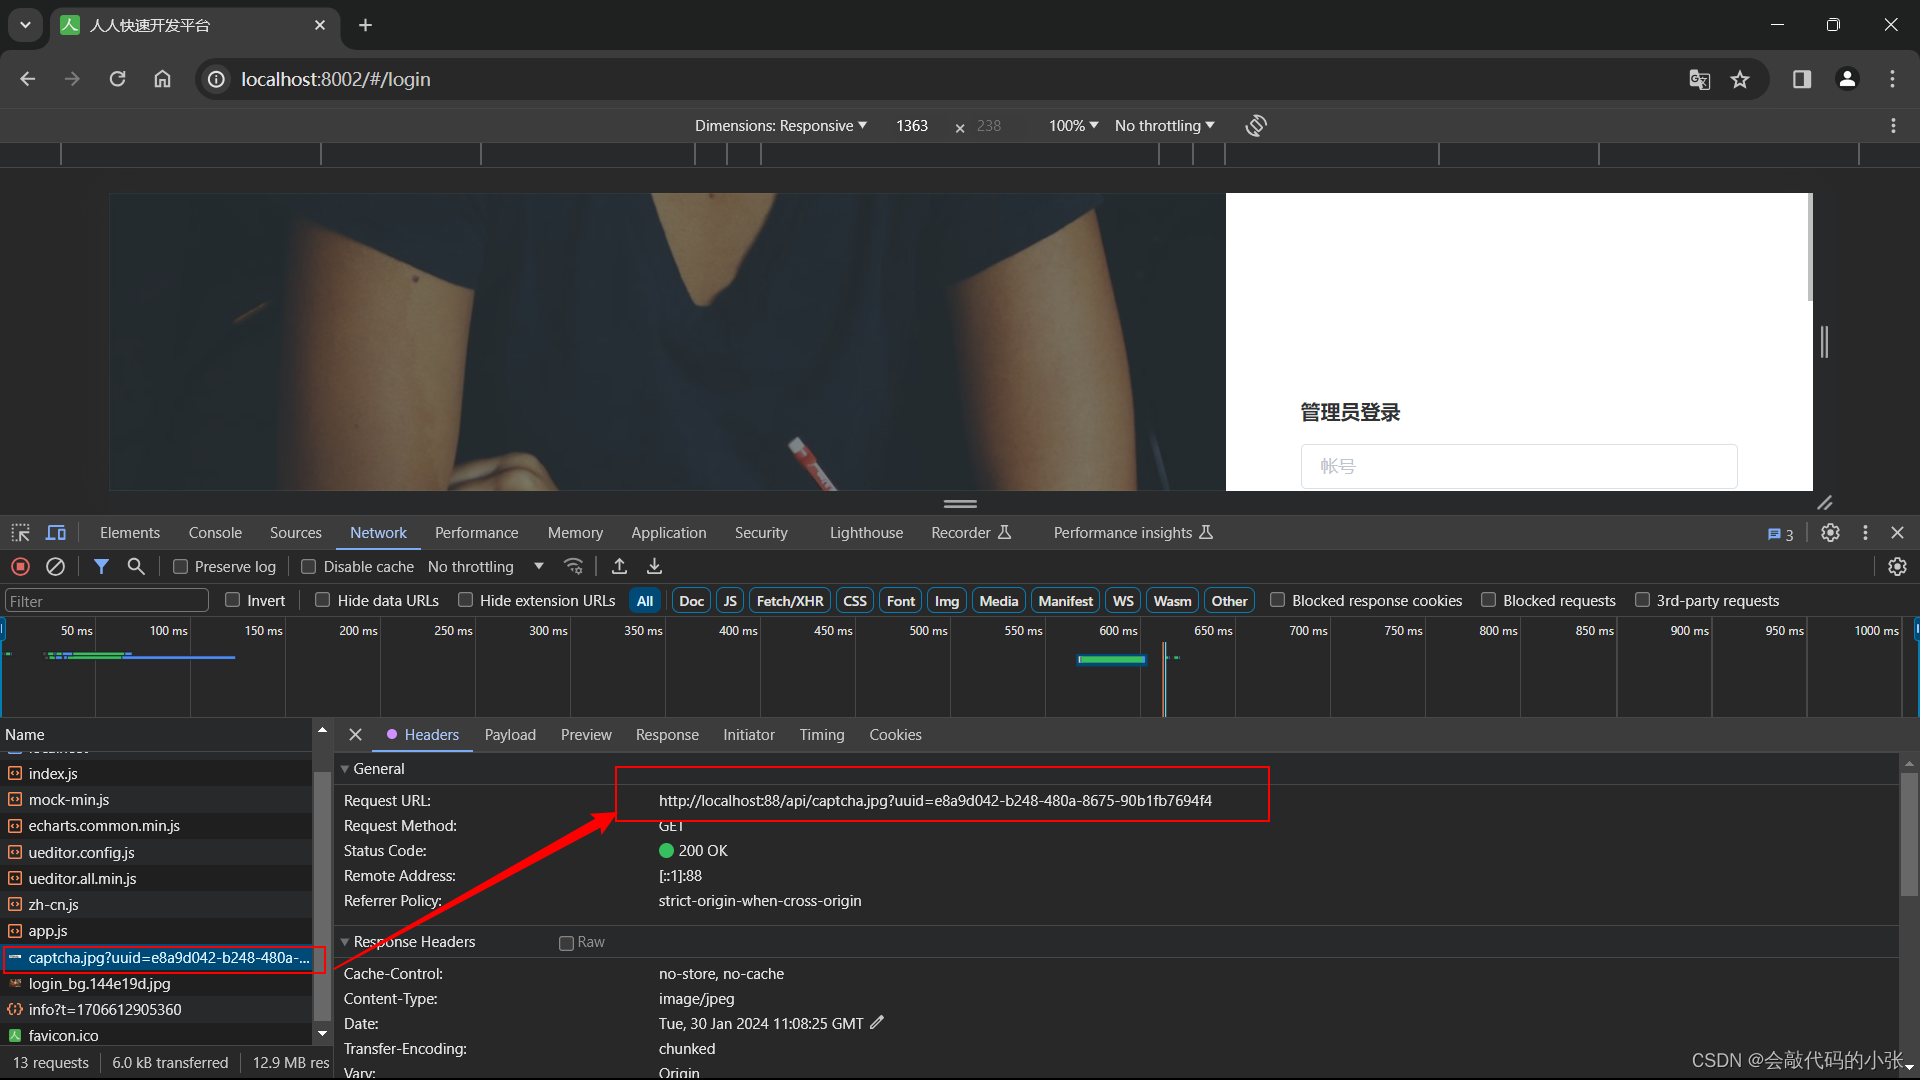
- 3.实测
发现访问地址已经路由到网关
4.解决跨域
- 1.添加跨域配置
在网关层添加跨域配置
小张发现直接运行不添加网关也能进入~不知阁下可否~~~
@Configuration
public class GulimallCorsConfiguration {
    @Bean
    public CorsWebFilter corsWebFilter() {
        UrlBasedCorsConfigurationSource urlBasedCorsConfigurationSource = new UrlBasedCorsConfigurationSource();
        CorsConfiguration corsConfiguration = new CorsConfiguration();
        //1.配置跨域
        corsConfiguration.addAllowedHeader("*");
        corsConfiguration.addAllowedMethod("*");
        corsConfiguration.addAllowedOrigin("*");
        corsConfiguration.setAllowCredentials(true);//是否允许cookie
        urlBasedCorsConfigurationSource.registerCorsConfiguration("/**",corsConfiguration);
        return new CorsWebFilter(urlBasedCorsConfigurationSource);
    }
}- 2.去除renren-fast的跨域配置
前面配置了自己的网关,将renren-fast自带的网关删除调,否则报错
5.显示分类
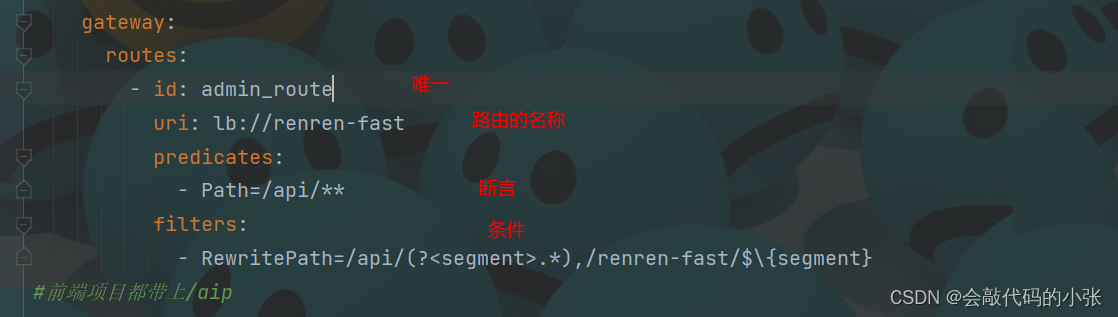
- 1.在将product添加到网关
注意路由的格式
spring:
   cloud:
    gateway:
      routes:
        #product三级分类
        - id: product_route
          uri: lb://gulimall-product
          predicates:
            - Path=/api/product/**
          filters:
            - RewritePath=/api/(?<segment>.*),/$\{segment}
        #全部
        - id: admin_route
          uri: lb://renren-fast
          predicates:
            - Path=/api/**
          filters:
            - RewritePath=/api/(?<segment>.*),/renren-fast/$\{segment}
注意:先后让精确的路由放到最上面
- 2.配置前端vue
<template>
  <el-tree
    :data="menus"
    :props="defaultProps"
    @node-click="handleNodeClick"
  ></el-tree>
</template>
<script>
export default {
  data () {
    return {
      menus: [],
      defaultProps: {
        children: 'children',
        label: 'name'
      }
    }
  },
  methods: {
    handleNodeClick (data) {
      console.log(data)
    },
    getMenus () {
      this.$http({
        url: this.$http.adornUrl('/product/category/list/tree'),
        method: 'get'
      }).then(({data}) => {
        console.log('获取成功菜单数据', data.data)
        this.menus = data.data
      })
    }
  },
  created () {
    this.getMenus()
  }
}
</script>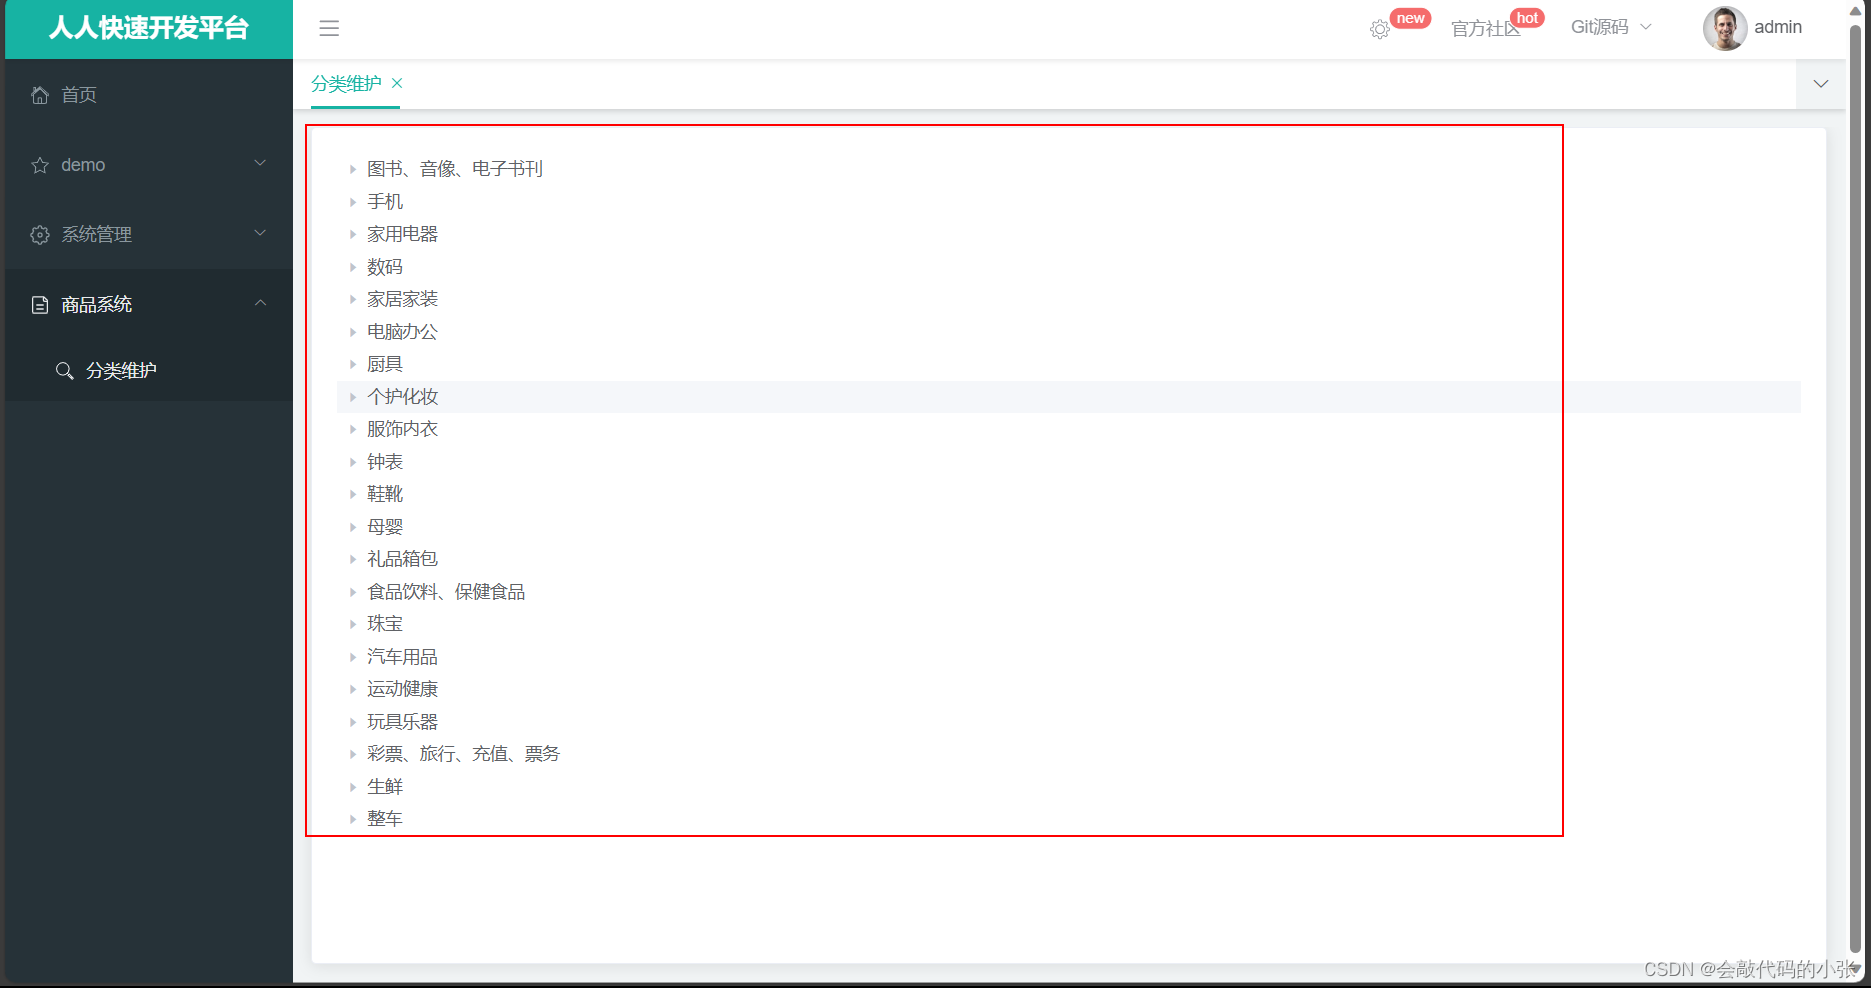
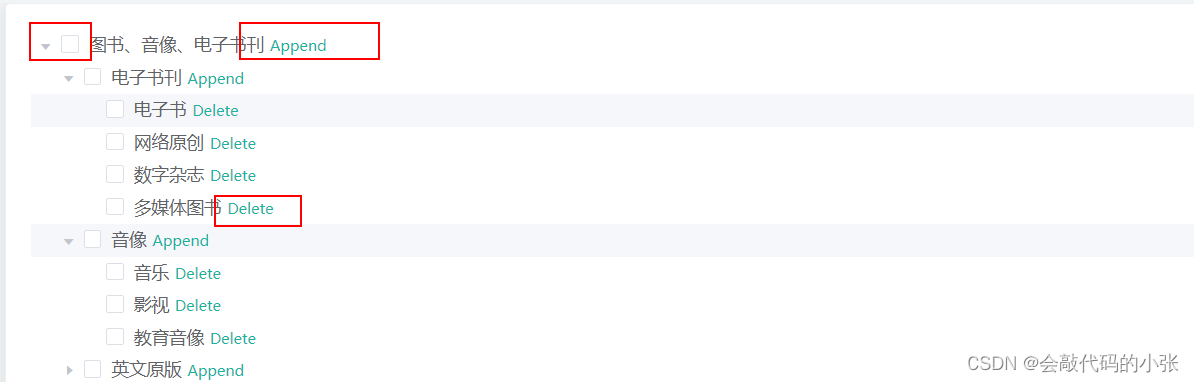
6.显示复选框
显示复选框以及,删除和显示按钮
让后端看前端,我看到的他们的神奇
<template>
  <el-tree :data="menus" :props="defaultProps"  :expand-on-click-node="false" show-checkbox node-key="catId">
    <span class="custom-tree-node" slot-scope="{ node, data }">
      <span>{{ node.label }}</span>
      <span>
        <el-button v-if="node.level <=2" type="text" size="mini" @click="() => append(data)">
          Append
        </el-button>
        <el-button v-if="node.childNodes.length==0" type="text" size="mini" @click="() => remove(node, data)">
          Delete
        </el-button>
      </span>
    </span>
  </el-tree>
</template>
<script>
export default {
  data () {
    return {
      menus: [],
      defaultProps: {
        children: 'children',
        label: 'name'
      }
    }
  },
  methods: {
    handleNodeClick (data) {
      console.log(data)
    },
    getMenus () {
      this.$http({
        url: this.$http.adornUrl('/product/category/list/tree'),
        method: 'get'
      }).then(({ data }) => {
        console.log('获取成功菜单数据', data.data)
        this.menus = data.data
      })
    },
    append (data) {
      console.log('append', data)
    },

    remove (node, data) {
      console.log('remove', node, data)
    }
  },
  created () {
    this.getMenus()
  }
}
</script>


 被折叠的 条评论
为什么被折叠?
被折叠的 条评论
为什么被折叠?
 到【灌水乐园】发言


