


 本文详细介绍了如何一步步整合Springboot、Mybatis、Resteasy和Swagger,从单独的Springboot应用到逐步添加Mybatis、Swagger,再到Resteasy的整合,最后解决跨域问题,实现通过Swagger对API的测试。文中提供了每个阶段的配置文件、代码示例以及遇到的问题和解决方案,适合学习者参考。
http://blog.csdn.net/dfsdffe/article/details/52101691
前言
由于在公司实习,自学了Springboot,mybatis,resteasy,swagger等内容,并做了相关整合,网上相关内容较少,故在此记录并分享一下。由于本人学习程度有限,如有错误,请多包涵并指正,谢谢。
逐步整合
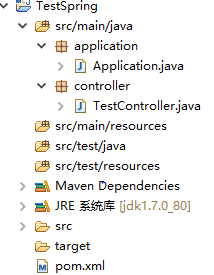
1.springboot
Spring Boot提供了一个强大的一键式Spring的集成开发环境,能够单独进行一个Spring应用的开发。
springboot将tomcat等内容集成,故只需建立一个java项目,导入springboot依赖,就可以发布使用了。
项目结构如图:
pom.xml:
<project xmlns="http://maven.apache.org/POM/4.0.0" xmlns:xsi="http://www.w3.org/2001/XMLSchema-instance"
    xsi:schemaLocation="http://maven.apache.org/POM/4.0.0 http://maven.apache.org/xsd/maven-4.0.0.xsd">
    <modelVersion>4.0.0</modelVersion>
    <groupId>TestSpring</groupId>
    <artifactId>TestSpring</artifactId>
    <version>0.0.1-SNAPSHOT</version>

    <parent>
        <groupId>org.springframework.boot</groupId>
        <artifactId>spring-boot-starter-parent</artifactId>
        <version>1.3.6.RELEASE</version>
        <relativePath />
    </parent>
    <dependencies>

        <!-- springboot -->
        <dependency>
            <groupId>org.springframework.boot</groupId>
            <artifactId>spring-boot-starter-web</artifactId>
        </dependency>
    </dependencies>

</project>
启动类application:
@SpringBootApplication

@ComponentScan("controller")
public class Application {

    public static void main(String[] args) {
        SpringApplication.run(Application.class, args);
    }
}
其中@ComponentScan标识Controller所在的文件夹。
Controller:
@RestController
@RequestMapping("echo")
public class TestController {


    @RequestMapping("/{text}")
    public String echo(@PathVariable("text") String text){
        return "hello world," + text;
    }
}运行application启动类,打开浏览器输入:http://localhost:8080/echo/test
显示: hello world,test 结果即为成功
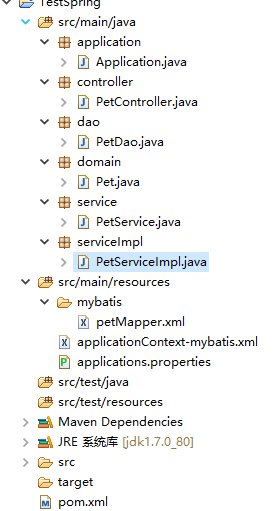
2.springboot+ mybatis
MyBatis 是支持普通 SQL查询,存储过程和高级映射的优秀持久层框架。使用简单的 XML或注解用于配置和原始映射,将接口和 Java 的POJO映射成数据库中的记录。
项目结构如图:
在pom.xml中加入依赖:
<!-- mybatis -->
<dependency>
    <groupId>org.mybatis.spring.boot</groupId>
    <artifactId>mybatis-spring-boot-starter</artifactId>
    <version>1.1.1</version>
</dependency>

<dependency>
    <groupId>org.mybatis</groupId>
    <artifactId>mybatis</artifactId>
    <version>3.4.1</version>
</dependency>

<dependency>
    <groupId>mysql</groupId>
    <artifactId>mysql-connector-java</artifactId>
</dependency>
分别是mybatis整合springboot的依赖,mybatis相关,以及mysql依赖(使用其他数据库的自行更换)
applicationContext-mybatis.xml:
<beans xmlns="http://www.springframework.org/schema/beans"
 最低0.47元/天 解锁文章


 3863
3863

 被折叠的 条评论
为什么被折叠?
被折叠的 条评论
为什么被折叠?
 到【灌水乐园】发言


