


本文介绍了在带有Firebase的Flutter中构建框架应用程序所需的所有步骤。
Google的Flutter SDK可用于开发可为Android和iOS平台提供本地UI体验的应用程序。 要使用Flutter编写应用,您必须使用Dart编程语言。
Firebase Realtime Database是一个云托管数据库,数据存储为JSON。 它为后端数据库提供安全访问权限,以直接从客户端构建丰富的协作应用程序。 数据在本地保留在设备上,而脱机和实时事件继续触发,从而为最终用户提供响应式体验。 当设备重新连接到Internet时,实时后端数据库将自动与客户端脱机时发生的本地数据更改同步,同时自动合并任何冲突。
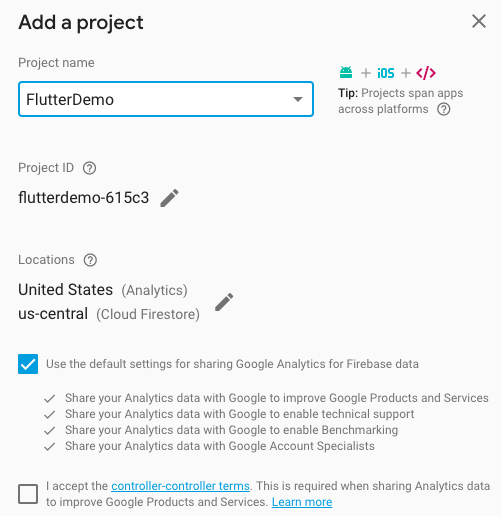
创建Firebase项目
- 在Firebase控制台中创建一个Firebase项目。
https://console.firebase.google.com
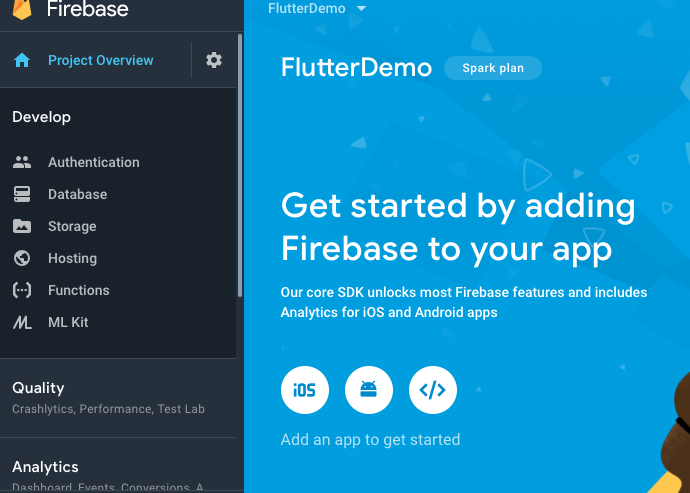
2.完整的平台特定配置
的iOS
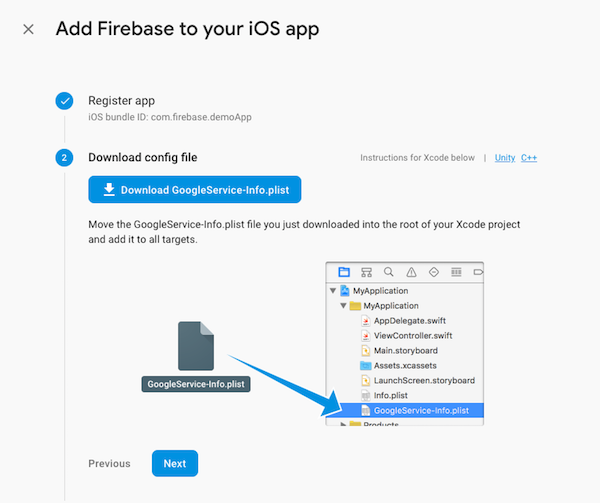
- 将IOS应用注册到Firebase,iOS捆绑ID在Xcode项目和Firebase控制台上必须相同。
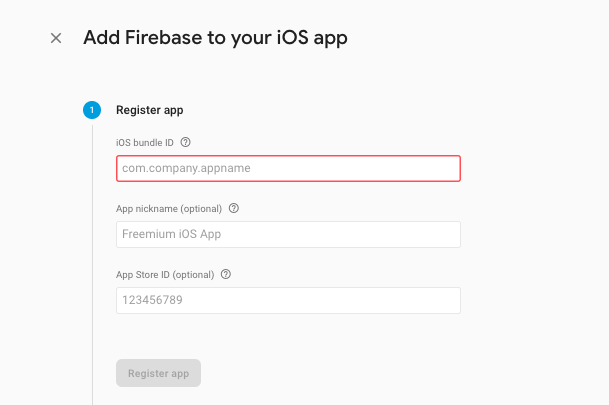
- 下载应用程序的配置文件,并将其添加到您的项目文件夹中。
- 将Firebase依赖项添加到您的项目

安卓系统
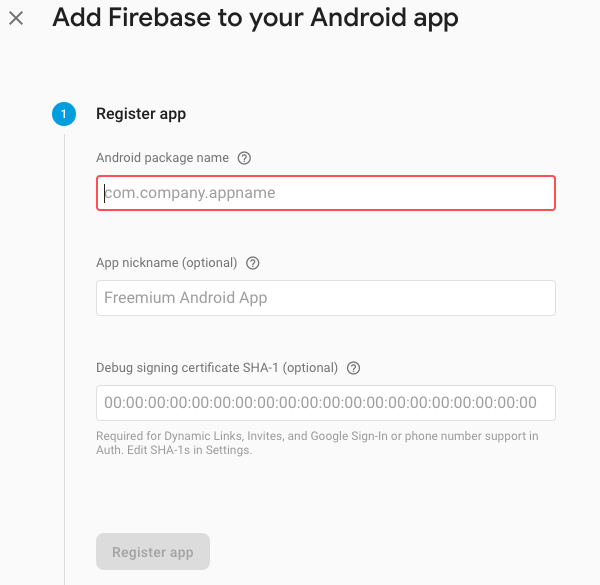
- 注册您的android应用。 在Firebase控制台上的项目中使用包名称。
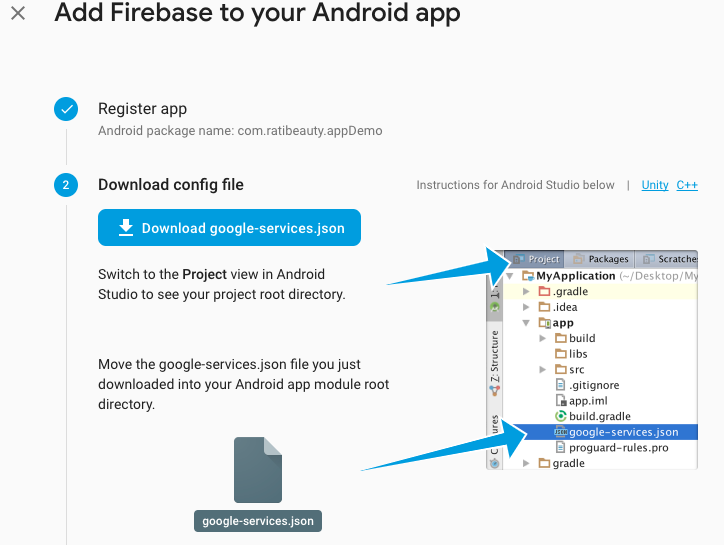
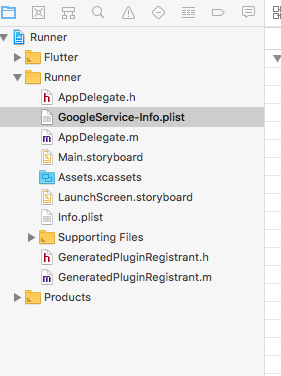
- 下载配置文件GoogleService-Info.plist并将其放在应用程序模块的根目录中。
创建Flutter项目
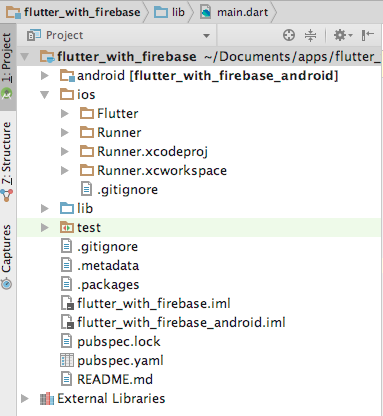
- 使用flutter create命令创建一个新项目。
$ flutter create flutter_with_firebase
2.打开ios / Runner.xcworkspace。 在Firebase控制台上定义的xcode项目中保留相同的Bundle Identifier,并将GoogleService-info.plist保存在Runner文件夹中
3.在您的IDE或编辑器中,打开文件pubspec.yaml。 为firebase_database添加依赖项并 保存文件。
dependencies: flutter: sdk: flutter firebase_database: 1.0.3
4.在将当前目录设置为Flutter应用程序目录的IDE或命令行中,运行以下命令。
颤振包得到
设定
- 导入Firebase的依赖项。
import 'package:firebase_database/firebase_database.dart' ;
2.创建databaseReference对象以使用数据库。
final databaseReference = FirebaseDatabase. instance .reference();
3.创建一个带有4个按钮的屏幕。
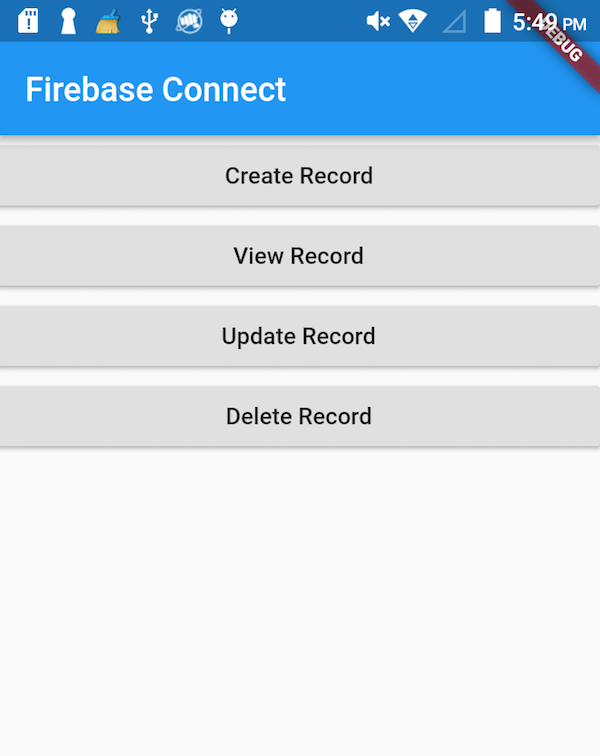
创建记录
1.单击“创建记录”按钮时,将调用createRecord()方法。
RaisedButton( child: Text( 'Create Record' ), onPressed: () { createRecord(); }, ),
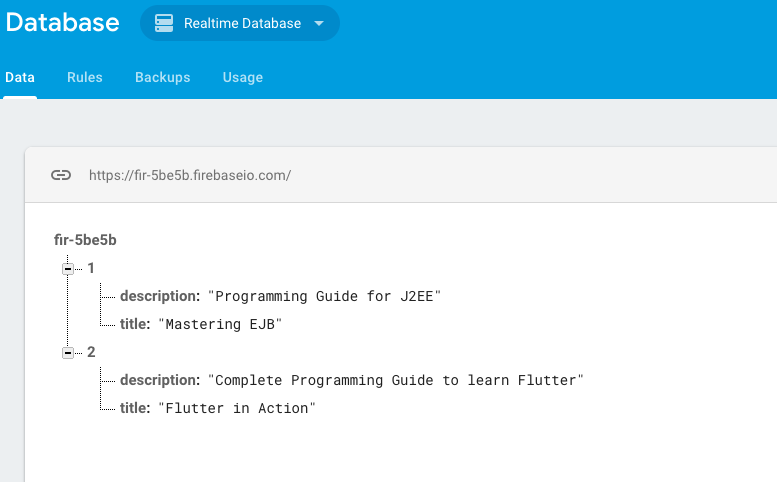
2.在createRecord()中,我们在数据库中创建两个演示记录。
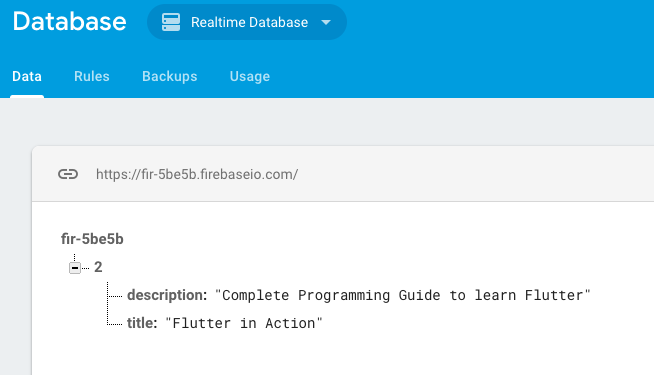
void createRecord(){ databaseReference .child( "1" ).set({ 'title' : 'Mastering EJB' , 'description' : 'Programming Guide for J2EE' }); databaseReference .child( "2" ).set({ 'title' : 'Flutter in Action' , 'description' : 'Complete Programming Guide to learn Flutter' }); }
查看记录
- 单击“查看记录”按钮时,将调用getData()方法。
RaisedButton( child: Text( 'View Record' ), onPressed: () { getData(); }, )
2.在getData()中,我们从数据库中检索所有记录。
void getData(){ databaseReference .once().then((DataSnapshot snapshot) { print( 'Data : ${snapshot. value } ' ); }); }
3.它们被打印在控制台上
Data : [{title: Mastering EJB, description: Programming Guide for J2EE}, {title: Flutter in Action, description: Complete Programming Guide to learn Flutter}]
更新记录
- 单击“更新记录”按钮时,将调用updateData()方法。
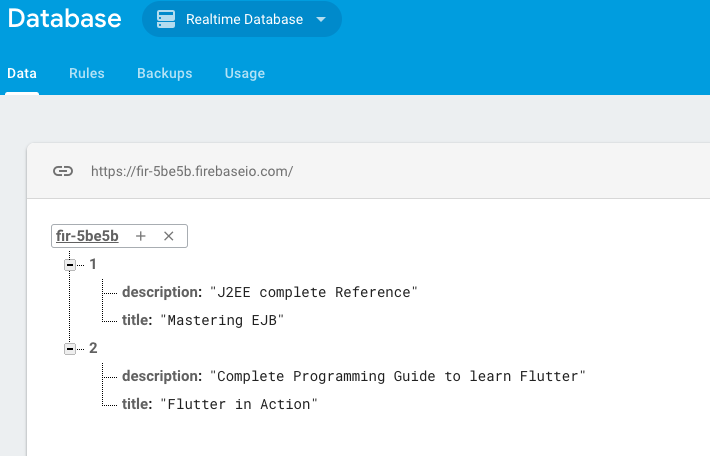
void updateData(){ databaseReference .child( '1' ).update({ 'description' : 'J2EE complete Reference' }); }
2.它将标题“ Mastering EJB”的描述从“ J2EE编程指南 ”更新为“ J2EE complete参考 ”
删除记录
- 单击“删除记录”按钮时,将调用deleteData()方法。
void deleteData(){ databaseReference .child( '1' ).remove(); }
2.从数据库中删除记录。
完整的代码
import 'package:flutter/material.dart' ; import 'package:firebase_database/firebase_database.dart' ;
class FirebaseDemoScreen extends StatelessWidget { final databaseReference = FirebaseDatabase. instance .reference();
final databaseReference = FirebaseDatabase. instance .reference();
@override Widget build(BuildContext context) { getData(); return Scaffold( appBar: AppBar( title: Text( 'Firebase Connect' ), ), body: Center( child: Column( crossAxisAlignment: CrossAxisAlignment. stretch , children: <Widget>[
@override Widget build(BuildContext context) { getData(); return Scaffold( appBar: AppBar( title: Text( 'Firebase Connect' ), ), body: Center( child: Column( crossAxisAlignment: CrossAxisAlignment. stretch , children: <Widget>[ RaisedButton( child: Text( 'Create Record' ), onPressed: () { createRecord(); }, ), RaisedButton( child: Text( 'View Record' ), onPressed: () { getData(); }, ), RaisedButton( child: Text( 'Udate Record' ), onPressed: () { updateData(); }, ), RaisedButton( child: Text( 'Delete Record' ), onPressed: () { deleteData(); }, ), ], ) ), //center ); }
RaisedButton( child: Text( 'View Record' ), onPressed: () { getData(); }, ), RaisedButton( child: Text( 'Udate Record' ), onPressed: () { updateData(); }, ), RaisedButton( child: Text( 'Delete Record' ), onPressed: () { deleteData(); }, ), ], ) ), //center ); } void createRecord(){ databaseReference .child( "1" ).set({ 'title' : 'Mastering EJB' , 'description' : 'Programming Guide for J2EE' }); databaseReference .child( "2" ).set({ 'title' : 'Flutter in Action' , 'description' : 'Complete Programming Guide to learn Flutter' }); } void getData(){ databaseReference .once().then((DataSnapshot snapshot) { print( 'Data : ${snapshot. value } ' ); }); }
void createRecord(){ databaseReference .child( "1" ).set({ 'title' : 'Mastering EJB' , 'description' : 'Programming Guide for J2EE' }); databaseReference .child( "2" ).set({ 'title' : 'Flutter in Action' , 'description' : 'Complete Programming Guide to learn Flutter' }); } void getData(){ databaseReference .once().then((DataSnapshot snapshot) { print( 'Data : ${snapshot. value } ' ); }); }
void createRecord(){ databaseReference .child( "1" ).set({ 'title' : 'Mastering EJB' , 'description' : 'Programming Guide for J2EE' }); databaseReference .child( "2" ).set({ 'title' : 'Flutter in Action' , 'description' : 'Complete Programming Guide to learn Flutter' }); } void getData(){ databaseReference .once().then((DataSnapshot snapshot) { print( 'Data : ${snapshot. value } ' ); }); } void updateData(){ databaseReference .child( '1' ).update({ 'description' : 'J2EE complete Reference' }); }
void updateData(){ databaseReference .child( '1' ).update({ 'description' : 'J2EE complete Reference' }); } void deleteData(){ databaseReference .child( '1' ).remove(); } }
void deleteData(){ databaseReference .child( '1' ).remove(); } }
谢谢阅读。 如果您喜欢这篇文章,请随时单击该鼓掌按钮👏,以帮助其他人找到它。
本文是与移动技术相关的系列文章的一部分。 如果您正在寻找移动应用程序开发团队来构建您的解决方案,请通过 info@47billion.com 与我们联系 。

From: https://hackernoon.com/how-to-use-firebase-with-flutter-2c9838d5f0d6


 3859
3859


 被折叠的 条评论
为什么被折叠?
被折叠的 条评论
为什么被折叠?
 到【灌水乐园】发言


