


一、前言
用Java开发企业应用软件, 经常会采用spring+MyBatis+MySQL搭建数据库框架。如果数据量很大,一个mysql库存储数据访问效率很低,往往会采用分库存储管理的方式。本文讲述如何通过Spring+Mybatis构建多数据库访问的架构,并采用多线程提升数据库的访问效率。
二、整体方案

三、开发环境准备
3.1 下载Spring、Mybatis、Mysql组件。
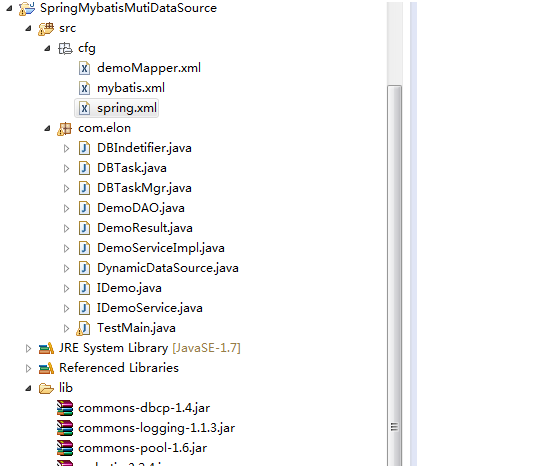
3.2 Eclipse:Java开发IDE。引入如下jar包:

代码结构如下:
四、构建数据库集群
在MYSQL中创建11个数据库(test1/2/3/4/5/6/7/8/9/10/11)创建一个简单的表:

在test1的tbl_Demo表中插入5千万条数据,其它10个数据库的tbl_Demo表中分别插入5百万条数据(用函数)。
在test1的tbl_Demo表中插入5千万条数据,其它10个数据库的tbl_Demo表中分别插入5百万条数据(用函数)。
五、创建Mybatis数据库映射接口
/**
 * Mybatis 映射接口
 *
 *
 * @author elon
 * @version 1.0, 2015年10月23日
 */
public interface IDemo { public void insertDemo(DemoDAO demo); public List<Integer> selectGroup(); } /** * * Mybatis 映射服务接口 * * @author elon * @version 1.0, 2015年10月23日 */ public interface IDemoService { public void insertDemo(DemoDAO demo); public List<Integer> selectGroup(); } /** * * Mybatis 映射服务实现 * * @author elon * @version 1.0, 2015年10月23日 */ public class DemoServiceImpl implements IDemoService { private IDemo idemo = null; public void setIdemo(IDemo idemo) { this.idemo = idemo; } @Override public void insertDemo(DemoDAO demo) { idemo.insertDemo(demo); } @Override public List<Integer> selectGroup() { return idemo.selectGroup(); } } - 1
六、创建数据库标识管理和动态数据源
/**
 *
 * 保存数据库标识。每个线程由独立的对象存储
 *
 * @author elon
 * @version 1.0, 2015年10月23日
 */
public class DBIndetifier { private static ThreadLocal<String> dbKey = new ThreadLocal<String>(); public static void setDBKey(final String dbKeyPara) { dbKey.set(dbKeyPara); } public static String getDBKey() { return dbKey.get(); } } /** * * 动态数据源。可根据不同的数据索引连接不同的数据库 * * @author elon * @version 1.0, 2015年10月23日 */ public class DynamicDataSource extends AbstractRoutingDataSource { @Override public Object determineCurrentLookupKey() { return DBIndetifier.getDBKey(); } } - 1
七、创建数据库访问对象
/**
 *
 * 数据库访问对象。用于插入数据。
 *
 * @author elon
 * @version 1.0, 2015年10月23日
 */
public class DemoDAO { private int a; private String b; private int c; public int getA() { return a; } public void setA(int a) { this.a = a; } public String getB() { return b; } public void setB(String b) { this.b = b; } public int getC() { return c; } public void setC(int c) { this.c = c; } } /** * * 映射结果定义 * * @author elon * @version 1.0, 2015年10月23日 */ public class DemoResult implements Serializable { /** * Comment for <code>serialVersionUID</code><br> * */ private static final long serialVersionUID = -413001138792531448L; private long sum; public long getSum() { return sum; } public void setSum(long sum) { this.sum = sum; } @Override public String toString() { return String.valueOf(sum); } } - 1
八、创建数据库访问任务
/**
 * 数据库访问任务定义。将每一个对数据库访问的请求包装为一个任务对象,放到任务管理中,
 * 然后等待任务执行完成,取出执行结果。
 *
 * @author elon
 * @version 1.0, 2015年10月23日
 */
public class DBTask implements Runnable { // 操作数据库标识,用于指定访问的数据库。与spring配置文件中的数据动态数据源定义一致。 private final String dbKey; // mybatis数据库访问对象 private final Object dbAccessObject; // mysbatis数据库访问方法名称,用于反射调用 private final String methodName; // 存储可变参数的值 private final Object[] paraArray; // 存储可变参数类型 @SuppressWarnings("rawtypes") private final Class[] paraClassArray; // 数据库操作结果。查询操作返回查询结果; 插入、删除、修改操作返回null。 private Object operateResult; // 操作数据库抛出的异常信息 private Exception exception; // 标识任务是否已经执行 private boolean finish; /** * 构造函数 * @param dbKey 数据库标识 * @param dbAccessObject 数据库访问对象 * @param methodName 数据库访问方法名称 * @param paraArray 参数列表 */ public DBTask(final String dbKey, final Object dbAccessObject, final String methodName, final Object... paraArray) { this.dbKey = dbKey; this.dbAccessObject = dbAccessObject; this.methodName = methodName; this.paraArray = paraArray; finish = false; exception = null; paraClassArray = new Class[paraArray.length]; for (int index = 0; index < paraArray.length; ++index) { paraClassArray[index] = paraArray[index].getClass(); } operateResult = null; } /** * * 任务执行函数 * */ @Override public void run() { try { DBIndetifier.setDBKey(dbKey); Method method = dbAccessObject.getClass().getMethod(methodName, paraClassArray); // 查询操作返回查询结果; 插入、删除、修改操作返回null operateResult = method.invoke(dbAccessObject, paraArray); } catch (Exception e) { exception = e; e.printStackTrace(); } finish = true; } /** * * 返回操作结果。查询操作返回查询结果; 插入、删除、修改操作返回null * * @return 操作结果 */ public Object getRetValue() { return operateResult; } /** * 抛出数据库操作异常 * * @return 异常 */ public Exception getException() { return exception; } /** * * 返回任务是否已执行 * * @return 标记 */ public boolean isFinish() { return finish; } } - 1
九、创建数据库任务管理器
/**
 * 数据库访问任务管理。将数据库访问任务放到线程池中执行。
 *
 *
 * @author elon
 * @version 1.0, 2015年10月23日
 */
public class DBTaskMgr { private static class DBTaskMgrInstance { public static final DBTaskMgr instance = new DBTaskMgr(); } public static DBTaskMgr instance() { return DBTaskMgrInstance.instance; } private ThreadPoolExecutor pool; public DBTaskMgr() { pool = new ThreadPoolExecutor(10, 50, 60, TimeUnit.SECONDS, new ArrayBlockingQueue<Runnable>(10000), new ThreadPoolExecutor.CallerRunsPolicy()); } public void excute(Runnable task) { pool.execute(task); } }- 1
- 2
- 3
- 4
- 5
- 6
- 7
- 8
- 9
- 10
- 11
- 12
- 13
- 14
- 15
- 16
- 17
- 18
- 19
- 20
- 21
- 22
- 23
- 24
- 25
- 26
- 27
- 28
- 29
- 30
- 31
- 32
- 33
- 1
- 2
- 3
- 4
- 5
- 6
- 7
- 8
- 9
- 10
- 11
- 12
- 13
- 14
- 15
- 16
- 17
- 18
- 19
- 20
- 21
- 22
- 23
- 24
- 25
- 26
- 27
- 28
- 29
- 30
- 31
- 32
- 33
十、创建MyBatis配置文件
10.1 mybatis.xml
<?xml version="1.0" encoding="UTF-8" ?>
<!DOCTYPE configuration PUBLIC "-//mybatis.org//DTD Config 3.0//EN"
"http://mybatis.org/dtd/mybatis-3-config.dtd">
<configuration>
<mappers> <mapper resource="cfg/demoMapper.xml"/> </mappers> </configuration> - 1
10.2 demoMapper.xml
<?xml version="1.0" encoding="UTF-8" ?>
<!DOCTYPE mapper PUBLIC "-//mybatis.org//DTD Mapper 3.0//EN" "http://mybatis.org/dtd/mybatis-3-mapper.dtd">
<mapper namespace="com.elon.IDemo"> <insert id="insertDemo" parameterType="com.elon.DemoDAO"> insert into tbl_demo(a, b, c) values(#{a}, #{b}, #{c}); </insert> <resultMap id="demoResult" type="com.elon.DemoResult"> <id property="sum" column="sumColum"/> </resultMap> <select id="selectGroup" resultMap="demoResult"> select sum(a) as sumColum from tbl_demo group by c; </select> </mapper> - 1
十一、创建Spring配置文件
11.1 spring.xml
<?xml version="1.0" encoding="UTF-8"?>
<beans xmlns="http://www.springframework.org/schema/beans"
    xmlns:xsi="http://www.w3.org/2001/XMLSchema-instance" xsi:schemaLocation="http://www.springframework.org/schema/beans http://www.springframework.org/schema/beans/spring-beans-3.0.xsd"> <bean id="dataSource_1" class="org.apache.commons.dbcp.BasicDataSource"> <property name="driverClassName" value="com.mysql.jdbc.Driver"></property> <property name="url" value="jdbc:mysql://10.70.69.69:3306/test1"></property> <property name="username" value="user123"></property> <property name="password" value="user123"></property> <property name="maxActive" value="100"></property> <property name="maxIdle" value="30"></property> <property name="maxWait" value="500"></property> <property name="defaultAutoCommit" value="true"></property> </bean> <bean id="dataSource_2" class="org.apache.commons.dbcp.BasicDataSource"> <property name="driverClassName" value="com.mysql.jdbc.Driver"></property> <property name="url" value="jdbc:mysql://10.70.69.69:3306/test2"></property> <property name="username" value="user123"></property> <property name="password" value="user123"></property> <property name="maxActive" value="100"></property> <property name="maxIdle" value="30"></property> <property name="maxWait" value="500"></property> <property name="defaultAutoCommit" value="true"></property> </bean> <bean id="dataSource_3" class="org.apache.commons.dbcp.BasicDataSource"> <property name="driverClassName" value="com.mysql.jdbc.Driver"></property> <property name="url" value="jdbc:mysql://10.70.69.69:3306/test3"></property> <property name="username" value="user123"></property> <property name="password" value="user123"></property> <property name="maxActive" value="100"></property> <property name="maxIdle" value="30"></property> <property name="maxWait" value="500"></property> <property name="defaultAutoCommit" value="true"></property> </bean> <bean id="dataSource_4" class="org.apache.commons.dbcp.BasicDataSource"> <property name="driverClassName" value="com.mysql.jdbc.Driver"></property> <property name="url" value="jdbc:mysql://10.70.69.69:3306/test4"></property> <property name="username" value="user123"></property> <property name="password" value="user123"></property> <property name="maxActive" value="100"></property> <property name="maxIdle" value="30"></property> <property name="maxWait" value="500"></property> <property name="defaultAutoCommit" value="true"></property> </bean> <bean id="dataSource_5" class="org.apache.commons.dbcp.BasicDataSource"> <property name="driverClassName" value="com.mysql.jdbc.Driver"></property> <property name="url" value="jdbc:mysql://10.70.69.69:3306/test5"></property> <property name="username" value="user123"></property> <property name="password" value="user123"></property> <property name="maxActive" value="100"></property> <property name="maxIdle" value="30"></property> <property name="maxWait" value="500"></property> <property name="defaultAutoCommit" value="true"></property> </bean> <bean id="dataSource_6" class="org.apache.commons.dbcp.BasicDataSource"> <property name="driverClassName" value="com.mysql.jdbc.Driver"></property> <property name="url" value="jdbc:mysql://10.70.69.69:3306/test6"></property> <property name="username" value="user123"></


 7881
7881


 被折叠的 条评论
为什么被折叠?
被折叠的 条评论
为什么被折叠?
 到【灌水乐园】发言


