


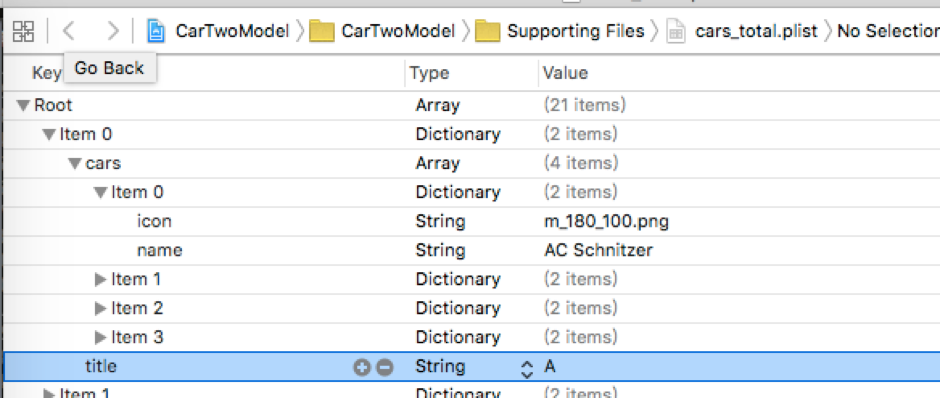
如果有以上结构的plist文件,那么应该怎么将其中的字典转换成模型?
显然一个模型已经无法搞定了,此时需要用到双数据模型(字典转模型)。
我写了两种方式来实现模型的转换:
方法一
第一个模型:CarModel
两个属性:
@property (nonatomic,copy)NSArray *cars;
@property (nonatomic,copy)NSString *title;
第二个模型:InnerCarModel
三个属性:
@property (nonatomic,copy)NSString *icon;
@property (nonatomic,copy)NSString *name;
@property (nonatomic,strong)CarModel *carModel;
首先看carDateModel.h
#import <UIKit/UIKit.h>

@interface CarModel : UIView

@property (nonatomic,copy) NSArray *cars;
@property (nonatomic,copy) NSString *title;

-(instancetype)initWithCarDict:(NSDictionary*)dict;
+(instancetype)carModel:(NSDictionary*)dict;
@end
这个carDateModel中有两个属性
为什么要提供类方法和对象方法?
在controller的数据加载中;
@property(nonatomic, stong)NsmutableArray*arrayDate;
在使用该数组时,我们是这样赋值的 eg: xxxx = self.arrayDate[i]
这种方式赋值会调用arrayDate 的getter方法,所以我们需要重写arrayDate的getter方法;
#import "ViewController.h"
#import "InnerCarModel.h"
#import "CarModel.h"
@interface ViewController () <UITableViewDataSource,UITableViewDelegate>

@property (weak, nonatomic) IBOutlet UITableView *tableView;
@property (nonatomic,strong) NSMutableArray *arrayDate;
@property (nonatomic,strong) NSMutableArray *indexDate;

@end

@implementation ViewController

-(NSMutableArray *)arrayDate{

    if (nil == _arrayDate) {
        _arrayDate = [NSMutableArray array];
       // _indexDate = [NSMutableArray array];
        NSString *path = [[NSBundle mainBundle] pathForResource:@"cars_total.plist" ofType:nil];
        NSArray *tempArray = [[NSArray alloc] initWithContentsOfFile:path];

        for (NSDictionary *dict in tempArray) {
            CarModel *model = [[CarModel alloc] initWithCarDict:dict];

            //here do something innercarmodel at carModel.m
            InnerCarModel *innerCarModel = [[InnerCarModel alloc] init];
            innerCarModel.carModel = model;

            [_arrayDate addObject:model];
        }
        // 使用的kvc 找到数组中对应的属性, 返回一个数组
        // 写到这个地方, 只加载一次
        _indexDate = [_arrayDate valueForKeyPath:@"title"];
    }
    return _arrayDate;
}
我们需要明白这三句的意义:
1. CarDateModel *carDateModel = [[CarDateModelalloc] initWithCarDict:dict]
此句使用了我们在carDateModel.h中为外界提供的方法将数据放到carDateModel中;
2.InnerCarModel *innerModel = [[InnerCarModel alloc] init];
此句我们实例化了一个innerModel,
InnerCarModel怎么定义的?
#import <UIKit/UIKit.h>
@class CarModel;
@interface InnerCarModel : UIView
@property (nonatomic,copy)NSString *icon;
@property (nonatomic,copy)NSString *name;
@property (nonatomic,strong)CarModel *carModel;
@end
是的,没错,在InnerCarModel Model中包含了一个carModel属性;
3. InnerModel.carDatemodel =carDateModel;
“=”右侧:carDateModel就是数据,数据中国包含了cars 和 title,在此我们需要的书cars。
“=”左侧InnerModel.carDatemodel,该句则是调用了carModel的setter方法。
所以我们需要重写carModel的setter方便我们对InnerCarModel的属性icon和name赋值
#import "InnerCarModel.h"
#import "CarModel.h"

@implementation InnerCarModel

-(void)setCarModel:(CarModel *)carModel {

    _carModel = carModel;

    NSMutableArray *mutbleArray = [NSMutableArray array];
    for (NSDictionary *dict in carModel.cars) {

        InnerCarModel *innerModel = [[InnerCarModel alloc] initWithInnerCarDict:dict];
        [mutbleArray addObject:innerModel];
    }
    _carModel.cars = mutbleArray;
}

-(instancetype)initWithInnerCarDict:(NSDictionary*)dict{

    if (self = [super init]) {
        [self setValuesForKeysWithDictionary:dict];
    }
    return self;
}

+(instancetype)innerCarModel:(NSDictionary*)dict{
    return [[self alloc]initWithInnerCarDict:dict];
}

@end
initWithInnerCarDict innerCarModel这两个方法是私有的,不必在.h中声明。以上,我们就完成了双模型的转换。方法二第一个模型 两个属性: @property (nonatomic,copy) NSArray *cars; @property (nonatomic,copy) NSString *title;第二个模型: 两个属性:@property(nonatomic,copy) NSString *icon; @property (nonatomic,copy) NSString *name;不同之处:加载数据的方式</pre><pre name="code" class="objc">-(NSMutableArray *)arrayDate{
if (nil == _arrayDate) {
_arrayDate = [NSMutableArray array];
// _indexDate = [NSMutableArray array];
NSString *path = [[NSBundle mainBundle] pathForResource:@"cars_total.plist" ofType:nil];
NSArray *tempArray = [[NSArray alloc] initWithContentsOfFile:path];
for (NSDictionary *dict in tempArray) {
CarModel *model = [[CarModel alloc] initWithCarDict:dict];
[_arrayDate addObject:model];
}
_indexDate = [_arrayDate valueForKeyPath:@"title"];
}
return _arrayDate;
}
关键句1 CarModel *model = [[CarModel alloc] initWithCarDict:dict];进入initWithCarDict:方法</pre><pre name="code" class="objc">-(instancetype)initWithCarDict:(NSDictionary*)dict{</span></span> if (self = [super init]) {
[self setValuesForKeysWithDictionary:dict];
NSMutableArray *mutbleArray = [NSMutableArray array];
for (NSDictionary *dict in self.cars) {
InnerCarModel *innerModel = [[InnerCarModel alloc] initWithInnerCarDict:dict];
[mutbleArray addObject:innerModel];
}
self.cars = mutbleArray;
}
return self;
}
此时,此中方式是,直接调用了initWithInnerCarDict方法,加载了self.cars 和title为 CarModel,
再将的self.cars数据转化为 InnerCarModel ,再返回数据到CarModel *model ,
_arrayDate最终装载的就是转化好的数据,供我们去调用。总之,字典转模型,重点要关注数据的存和取的过程,在这个过程中不能将: xxxx = self.arrayDate[i]这么一句话简单的理解为赋值语句,你要想到这句话中,包含的getter方法,在这个getter方法中,可能包含着setter 方法;我们费了这么劲儿去转模型,就是为了:1)降低代码的耦合度2)所有字典转模型部分的代码统一集中在一处处理,降低代码出错的几率3)在程序中直接使用模型的属性操作,提高编码效率 4)调用方不用关心模型内部的任何处理细节
需要根据外部的需求,提供相应的接口方法。
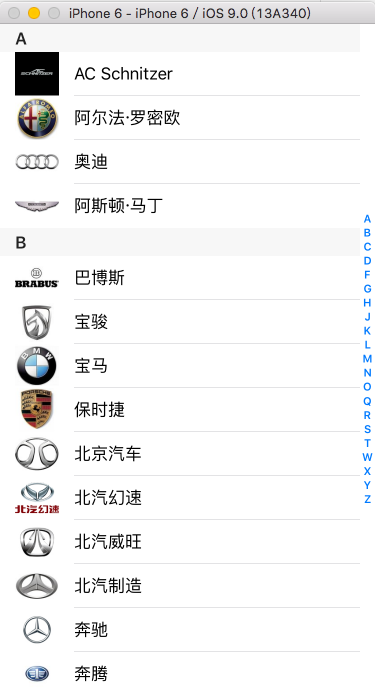
以上程序用UItableView实现了车品牌的展示,并建立相关的索引
程序源码在:
方法1:http://download.csdn.net/detail/yang198907/9222089
方法2: http://download.csdn.net/detail/yang198907/9222091


 4584
4584


 被折叠的 条评论
为什么被折叠?
被折叠的 条评论
为什么被折叠?
 到【灌水乐园】发言


