


入门案例(idea联网版)
1.创建SprngBoot模块
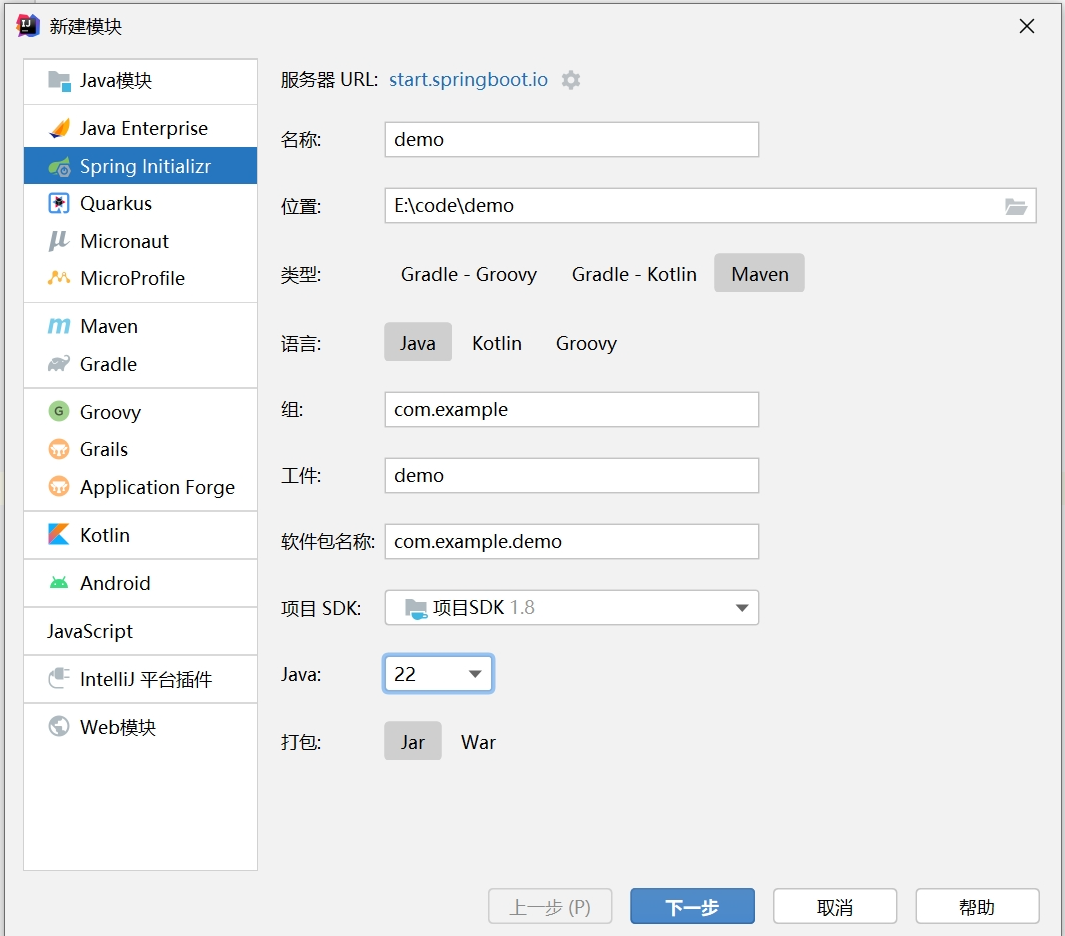
注:
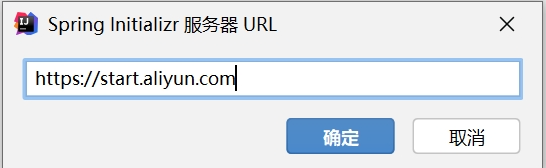
1.服务器URL需要改为start.springboot.io
2.这里Java选项应为8,但没有该选项,需要之后手动改
3.名称,组可以自己修改
2.选择依赖

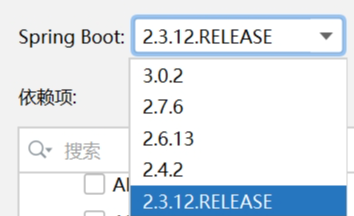
注:Java8可行的版本有2.5.4,但这里没有该选项,需要在之后改
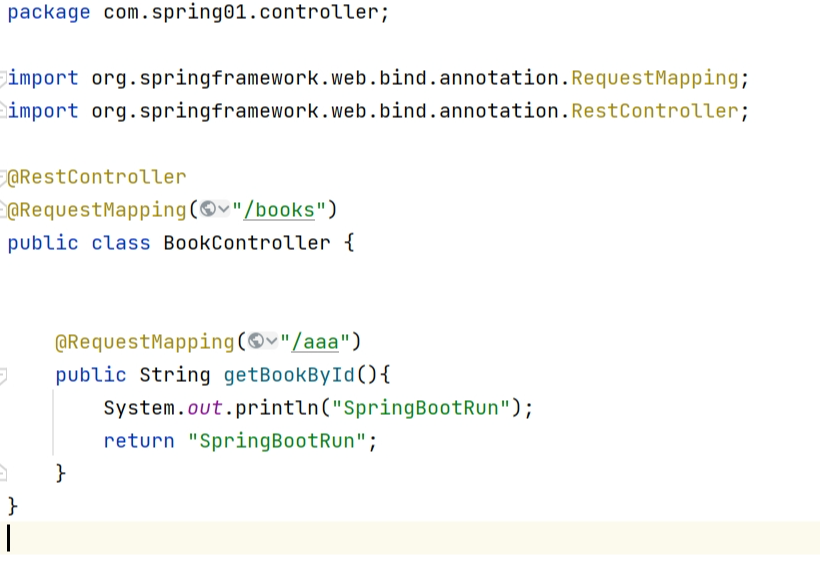
3.创建控制器类
4.修改pom.xml
<?xml version="1.0" encoding="UTF-8"?>
<project xmlns="http://maven.apache.org/POM/4.0.0" xmlns:xsi="http://www.w3.org/2001/XMLSchema-instance"
  xsi:schemaLocation="http://maven.apache.org/POM/4.0.0 https://maven.apache.org/xsd/maven-4.0.0.xsd">
  <modelVersion>4.0.0</modelVersion>
  <parent>
    <groupId>org.springframework.boot</groupId>
    <artifactId>spring-boot-starter-parent</artifactId>
    <version>2.5.4</version>
    <relativePath/> <!-- lookup parent from repository -->
  </parent>

  <!-- Generated by https://start.springboot.io -->
  <!-- 优质的 spring/boot/data/security/cloud 框架中文文档尽在 => https://springdoc.cn -->
  <groupId>com</groupId>
  <artifactId>spring01</artifactId>
  <version>0.0.1-SNAPSHOT</version>
  <name>spring01</name>
  <description>Demo project for Spring Boot</description>
  <properties>
    <java.version>1.8</java.version>
  </properties>
  <dependencies>
    <dependency>
      <groupId>org.springframework.boot</groupId>
      <artifactId>spring-boot-starter-web</artifactId>
    </dependency>

    <dependency>
      <groupId>org.springframework.boot</groupId>
      <artifactId>spring-boot-starter-test</artifactId>
      <scope>test</scope>
    </dependency>
  </dependencies>

  <build>
    <plugins>
      <plugin>
        <groupId>org.springframework.boot</groupId>
        <artifactId>spring-boot-maven-plugin</artifactId>
      </plugin>
    </plugins>
  </build>

</project>
5.运行
直接运行创建模块时自带的Application类即可启动服务器
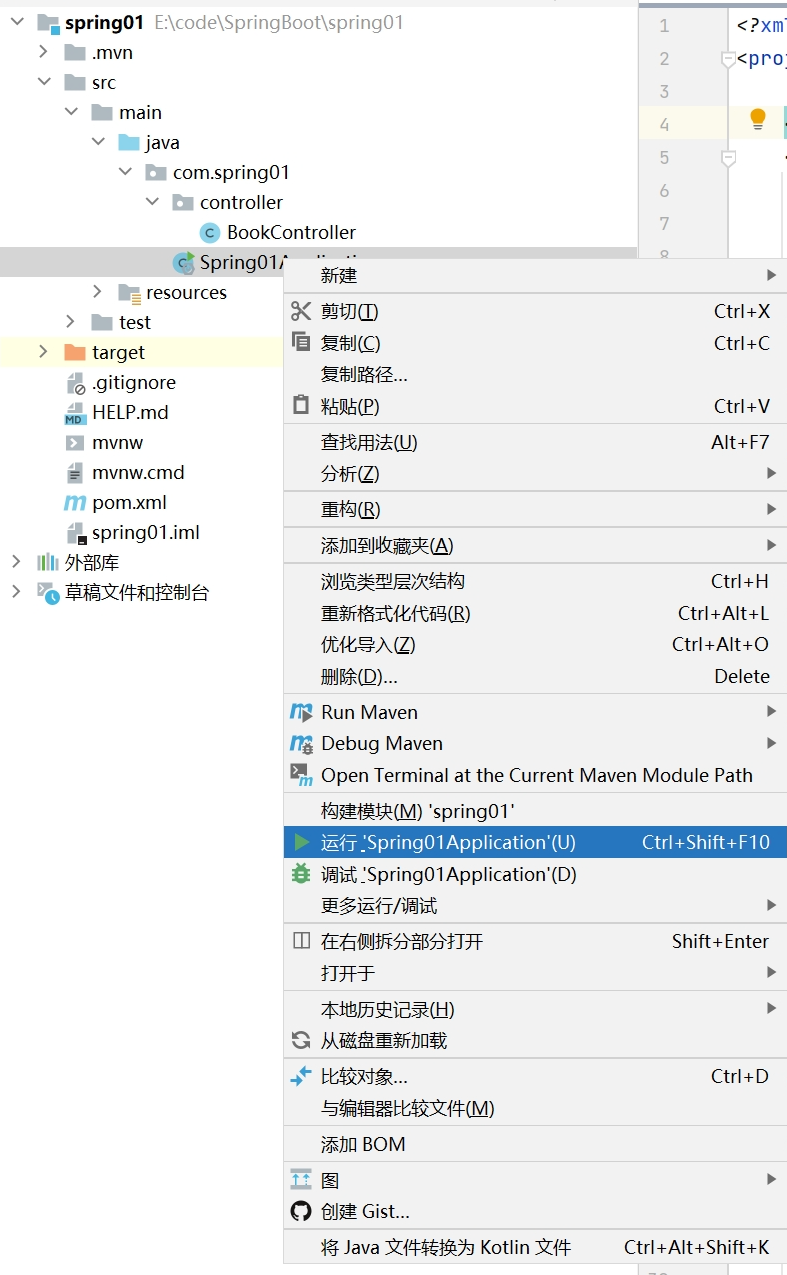
启动服务器后就可以在浏览器中搜索对应网址访问服务器
入门案例(官网创建版)
在Spring官网中找到SpringBoot技术的介绍页,并找到以下内容

点击Spring Initializr即可进入创建SpringBoot程序的界面
也可以通过访问地址start.springboot.io来进入官网中快捷创建工程
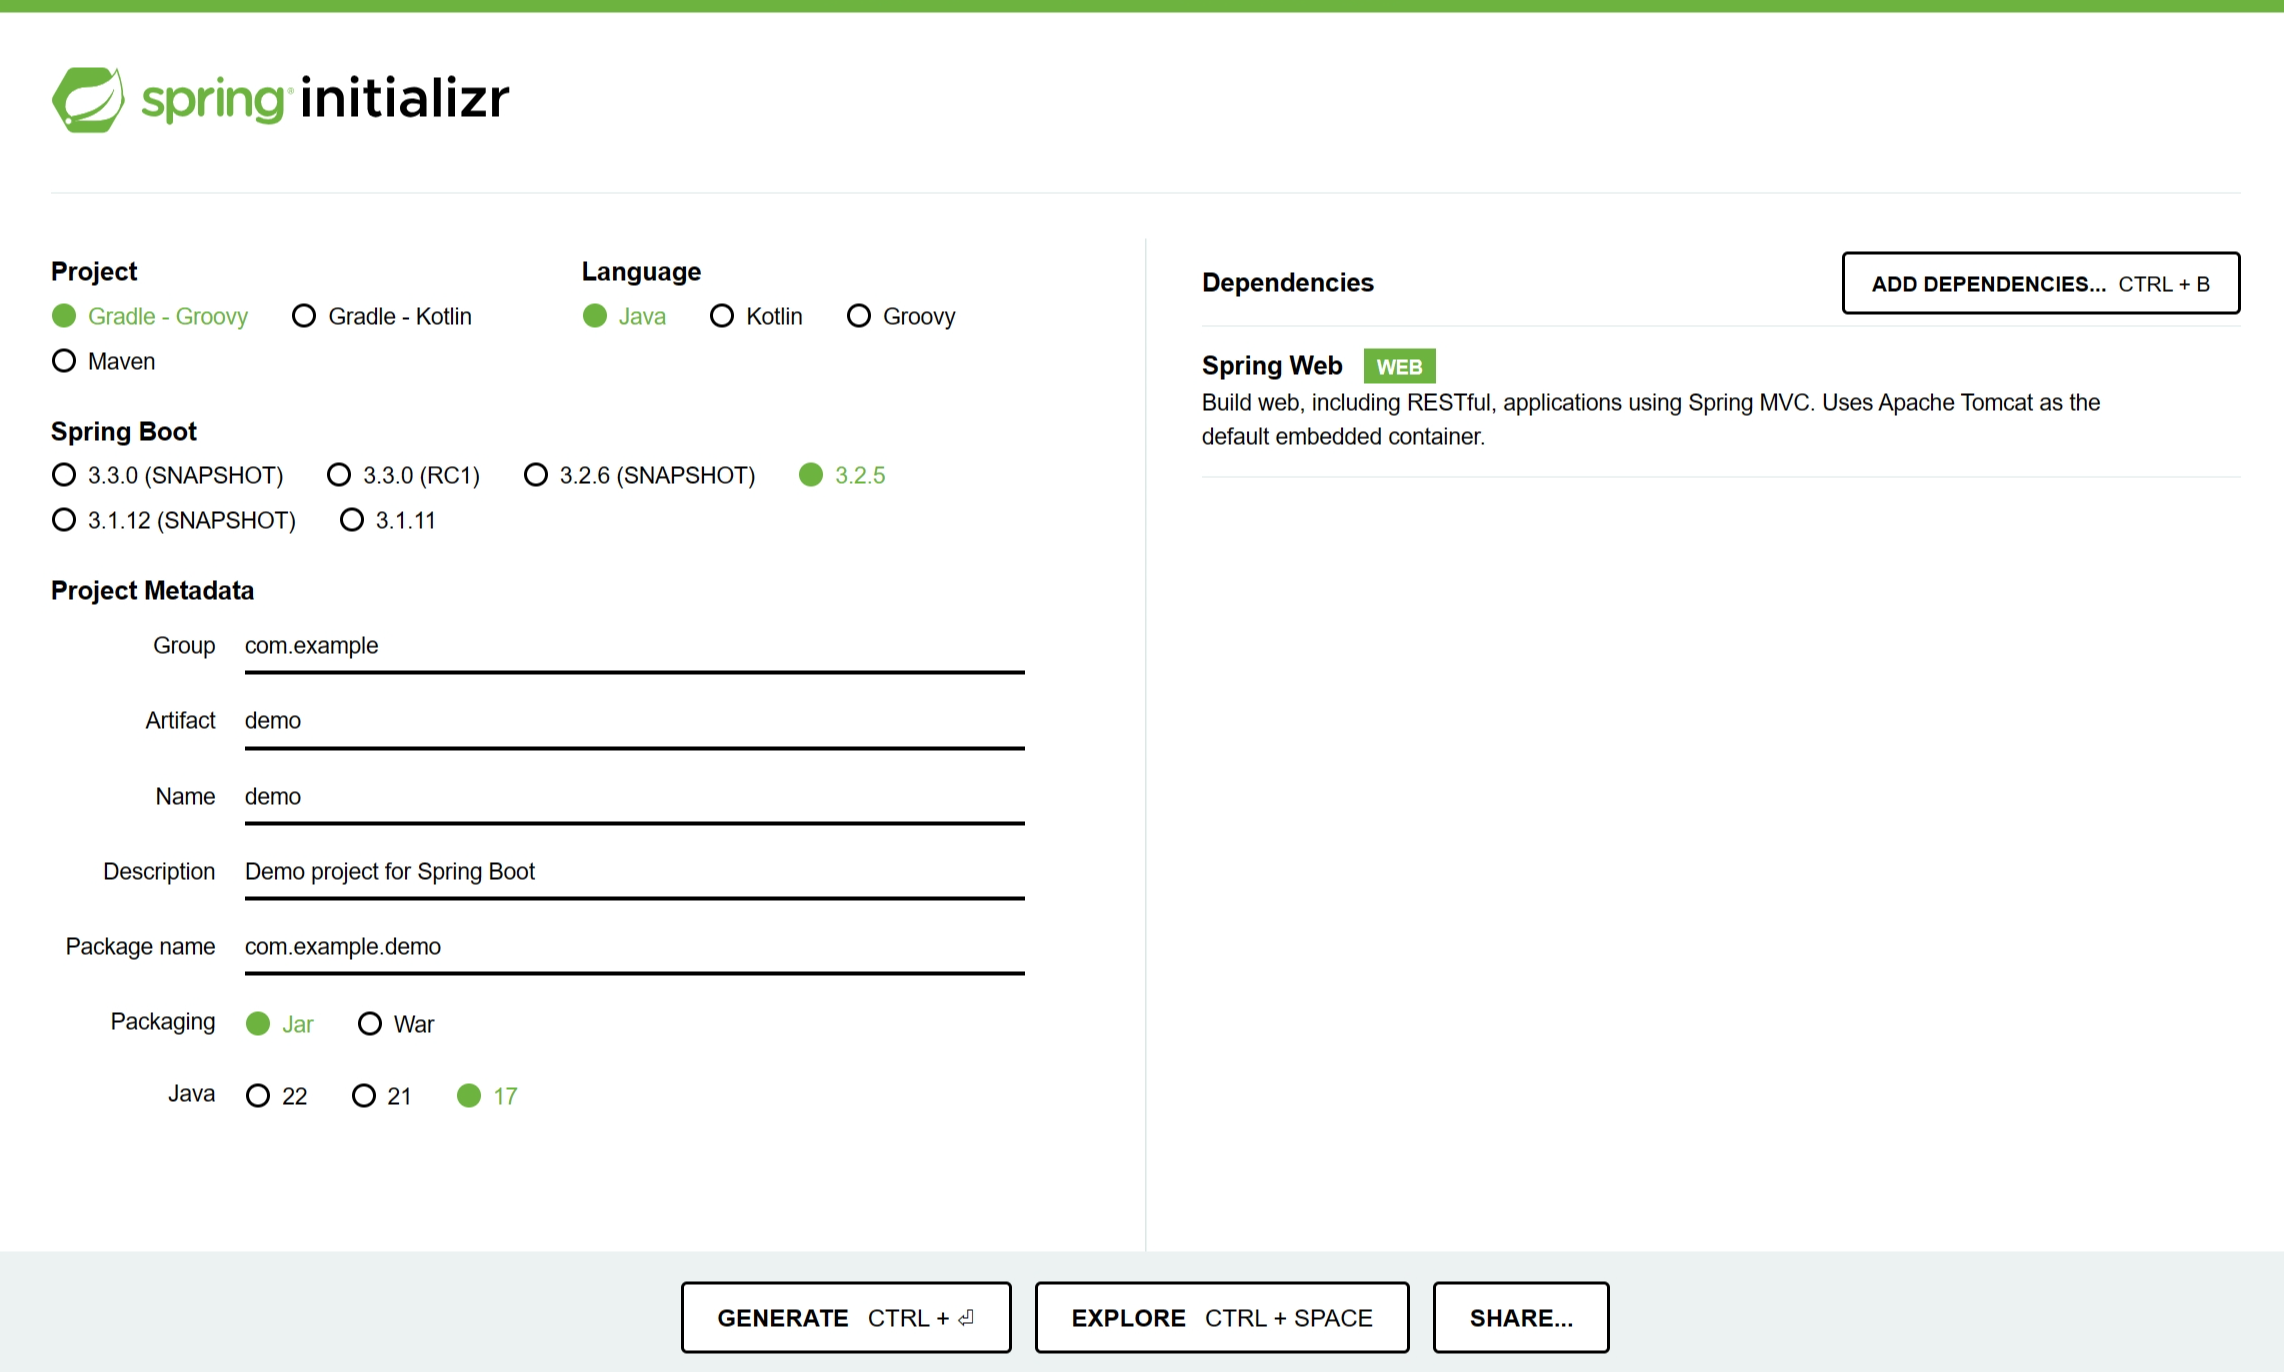
通过右侧的ADD DEPENDENCIES来选择使用何种技术
设置完信息后,点击下面最左侧的按钮,会下载一个压缩包,压缩包内就是创建的SpringBoot工程,将其导入到idea中即可使用
注:仍存在2、3、4问题
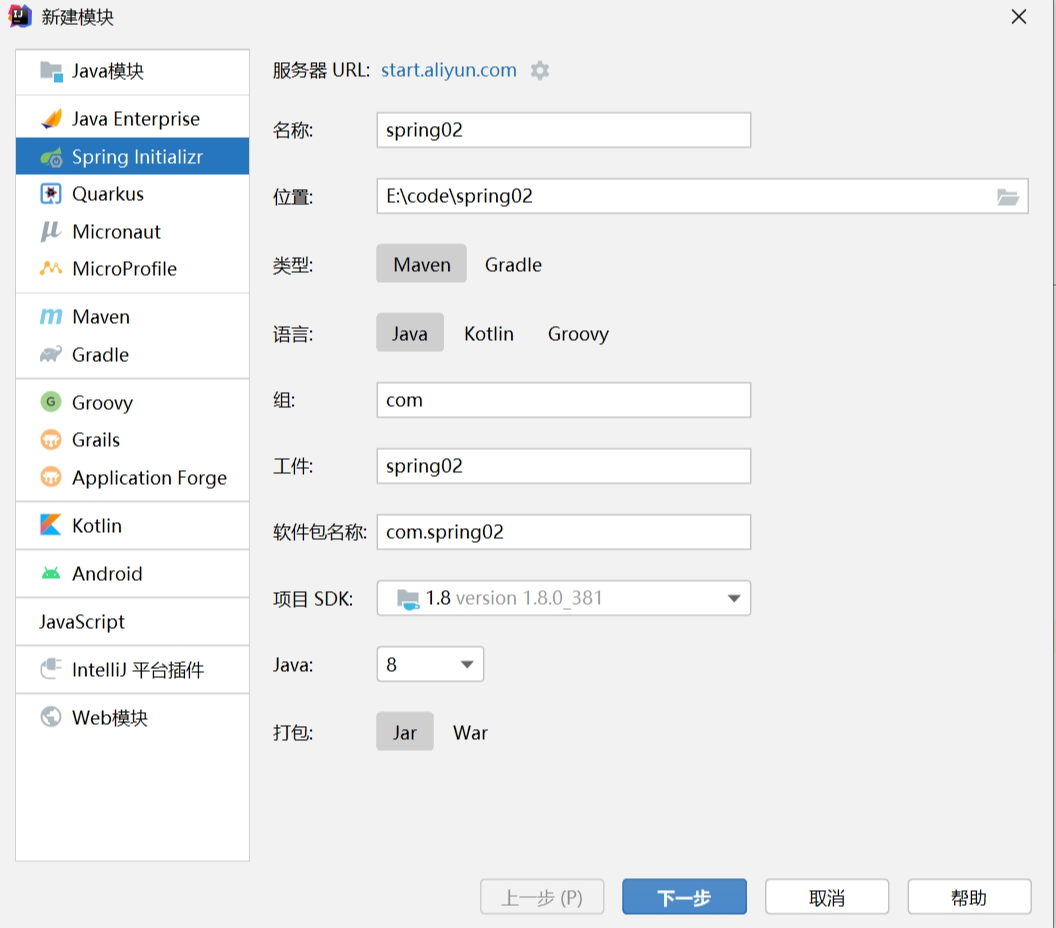
入门案例(阿里云版)(一般使用)
在选择服务器的URL时,可以选择阿里云提供的网站:start.aliyun.com
由于阿里云在国内,本身访问的速度也更快,且包含Java8的版本
默认的SpringBoot的版本是2.6.13,可以创建后在pom.xml中更改(但该版本可以正常使用,不报错)
入门案例(手工导入依赖)
SprigBoot最重要的是依赖,当导入对应依赖后,就可以使用相关的功能
步骤:
1.创建一个普通的Maven工程(不需要骨架)
2.导入依赖
<?xml version="1.0" encoding="UTF-8"?>
<project xmlns="http://maven.apache.org/POM/4.0.0"
  xmlns:xsi="http://www.w3.org/2001/XMLSchema-instance"
  xsi:schemaLocation="http://maven.apache.org/POM/4.0.0 http://maven.apache.org/xsd/maven-4.0.0.xsd">
  <modelVersion>4.0.0</modelVersion>

  <parent>
    <groupId>org.springframework.boot</groupId>
    <artifactId>spring-boot-starter-parent</artifactId>
    <version>2.5.4</version>
  </parent>

  <groupId>com.itheima</groupId>
  <artifactId>springboot_01_04_quickstart</artifactId>
  <version>1.0-SNAPSHOT</version>

  <properties>
    <maven.compiler.source>8</maven.compiler.source>
    <maven.compiler.target>8</maven.compiler.target>
  </properties>

  <dependencies>
    <dependency>
      <groupId>org.springframework.boot</groupId>
      <artifactId>spring-boot-starter-web</artifactId>
    </dependency>
  </dependencies>

</project>
3.创建一个Application类,用于运行
@SpringBootApplication
public class Application {
public static void main(String[] args) {
SpringApplication.run(Application.class);//不加args也可以
}
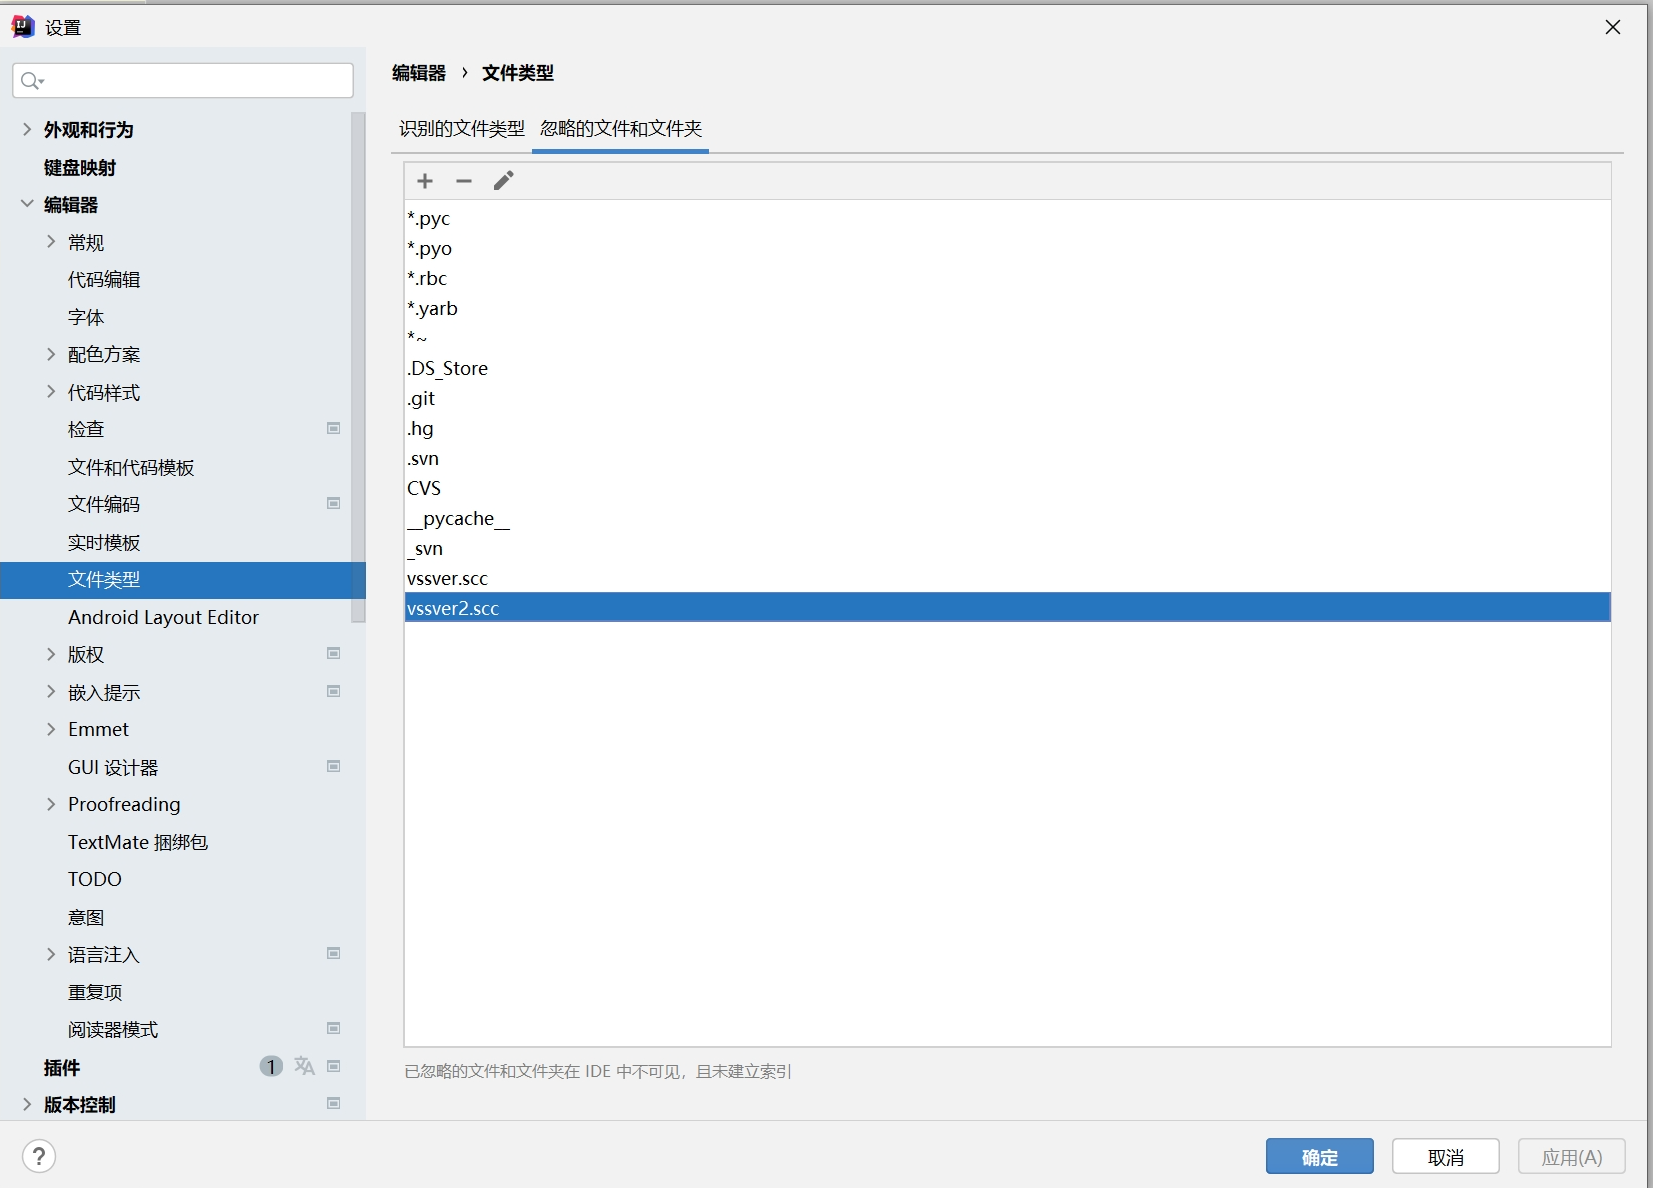
}在idea中隐藏文件和文件夹
在设置中可以隐藏文件和文件夹
报错解决方案
1.创建SpringBoot模块时
服务器的URL需要从
start.spring.io改为start.springboot.io
注:目前服务器URL前面自带一个https://
2.运行时报错:无效的源发行版:16
快捷键:ctrl + shift + Alt + s
将项目中的SDK和语言级别改为8版本
模块中源和依赖也改为8版本
3.运行时报错:无效的目标发行版
在设置,构建、执行、部署,编译器,Java编译器中
将对应模块的“目标字节码版本”改为8
4.将SpringBoot的版本改为2.5.4
由于创建SpringBoot模块时没有该选项,因此需要在创建模块后再pom.xml中改


 1897
1897


 被折叠的 条评论
为什么被折叠?
被折叠的 条评论
为什么被折叠?
 到【灌水乐园】发言


