


本文最初发布在Okta开发人员博客上 。 感谢您支持使SitePoint成为可能的合作伙伴。
就在短短的七年前,在网络上构建视频应用程序是一个巨大的痛苦。 还记得使用Flash和专有编解码器( 通常需要许可 )的时代吗? uck 在过去的几年中,视频聊天技术得到了极大的改进,不再需要Flash。
如今,借助WebRTC ,视频聊天的前景变得更加简单: WebRTC :这是一个由Google,Mozilla,Opera等人构建和维护的开源项目。 WebRTC使您可以轻松地在浏览器中构建实时通信软件,并且已在W3C和IETF级别进行了标准化。 使用WebRTC,您可以在实际运行良好的浏览器中构建实时视频聊天应用程序! 太神奇了
今天,我认为带您完成使用WebRTC和Okta构建简单视频聊天服务的过程很有趣,该服务使用户可以创建聊天室并将链接分享给他们想要的任何人,然后他们可以加入会议室并与他们实时聊天。
您今天将要构建的应用程序将使用Okta (免费的身份验证服务)来处理用户登录和访问控制,并使用WebRTC来支持所有视频功能。 您还将使用纯JavaScript创建Web应用程序。
在阅读本指南时,您将对纯JavaScript环境中的Web身份验证和实时视频聊天如何工作有更好的了解。
让我们开始吧。
注意 :是否想实时使用聊天应用程序? 您可以在这里进行 。 您还可以查看我们将在GitHub上构建的应用程序的源代码。
创建网页
您要做的第一件事是为应用程序创建一个简单的HTML网页。
在构建Web应用程序时,我希望首先创建标记和CSS,然后再进行第二遍操作并添加应用程序逻辑。
在您的计算机上的某个位置创建一个名为chatapp的新文件夹,然后创建一个具有以下内容的index.html文件:
<!DOCTYPE html>
<html>
  <head>
    <title>vchat - a simple video chat app</title>
    <link rel="stylesheet" href="https://maxcdn.bootstrapcdn.com/bootstrap/4.0.0/css/bootstrap.min.css" integrity="sha384-Gn5384xqQ1aoWXA+058RXPxPg6fy4IWvTNh0E263XmFcJlSAwiGgFAW/dAiS6JXm" crossorigin="anonymous">
    <link href="https://fonts.googleapis.com/css?family=Raleway" rel="stylesheet">
  </head>
  <body>
    <div class="container">
      <header>
        <h1><a href="/">vchat</a></h1>
        <h2><a href="/">a simple video chat app</a></h2>
      </header>

      <div id="okta-login-container"></div>

      <div class="row">
        <div class="col"></div>
        <div class="col-md-auto align-self-center">
          <p id="login"><b>NOTE</b>: You are not currently logged in. If you'd like to start your own
            chat room please <button type="button" class="btn btn-light">log in</button></p>
          <div id="url" class="alert alert-dark" role="alert">
            <span id="roomIntro">ROOM URL</span>: <span id="roomUrl"></span>
          </div>
        </div>
        <div class="col"></div>
      </div>

      <div id="remotes" class="row">
        <div class="col-md-6">
          <div class="videoContainer">
            <video id="selfVideo"></video>
            <meter id="localVolume" class="volume"></meter>
          </div>
        </div>
      </div>
    </div>

    <footer>
      <p>Hacked together by <a href="https://twitter.com/rdegges">@rdegges</a>
        and <a href="https://twitter.com/oktadev">@oktadev</a>.</p>
    </footer>
  </body>
</html>
这个简单的页面使用的是最新版本的Bootstrap以及Raleway字体( 我个人最喜欢的字体),但仅此而已。
此简约HTML页面中存在的关键元素是:
-
okta-login-containerdiv,它将最终保存我们的登录表单 - 登录通知和Room URL占位符,将通知用户是否需要登录以及他们当前所在的聊天室
- 一个div,最终将包含来自各个参与者的所有视频供稿
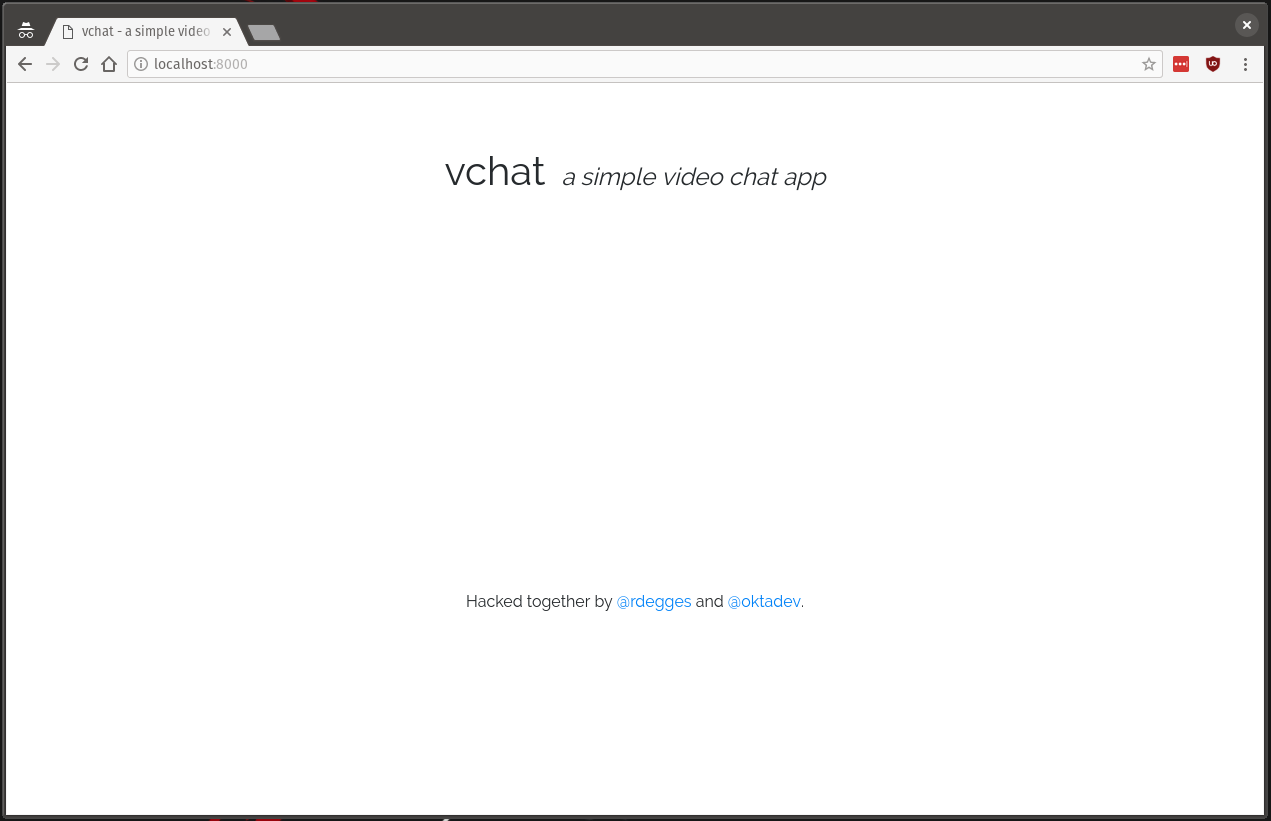
如果在浏览器中打开此页面,您会发现它看起来很糟糕。 但请放心,您将使它看起来足够快! ;)
接下来,您将要创建一个名为static的文件夹,其中包含另一个名为css文件夹。 然后,您需要将以下CSS复制到该文件夹内的新style.css文件中:
body {
  font-family: 'Raleway', sans-serif;
}

footer {
  text-align: center;
  margin-top: 2em;
}

h2 {
  font-style: italic;
}

header {
  text-align: center;
  margin: 4em;
}

header h1, header h2 {
  display: inline;
}

header h1 a, header h2 a, header h1 a:hover, header h2 a:hover {
  color: inherit;
  text-decoration: none;
}

header h2 {
  font-size: 24px;
  padding-left: .5em;
}

#remotes {
  visibility: hidden;
}

#url {
  text-align: center;
  display: none;
}

#login {
  display: none;
}

#roomIntro {
  font-weight: bold;
}

.videoContainer {
  object-fit: cover;
  margin: 0 auto;
  padding: 0;
}

.videoContainer video {
  width: 100%;
  height: 100%;
  border-radius: 10px;
  border: 5px double #f2f2f2;
}

.volume {
  position: absolute;
  left: 15%;
  width: 70%;
  bottom: 20px;
  height: 10px;
  display: none;
}

.connectionstate {
  position: absolute;
  top: 10px;
  width: 100%;
  text-align: center;
  color: #fff
}

.col-md-6 {
  margin-bottom: 1em;
}
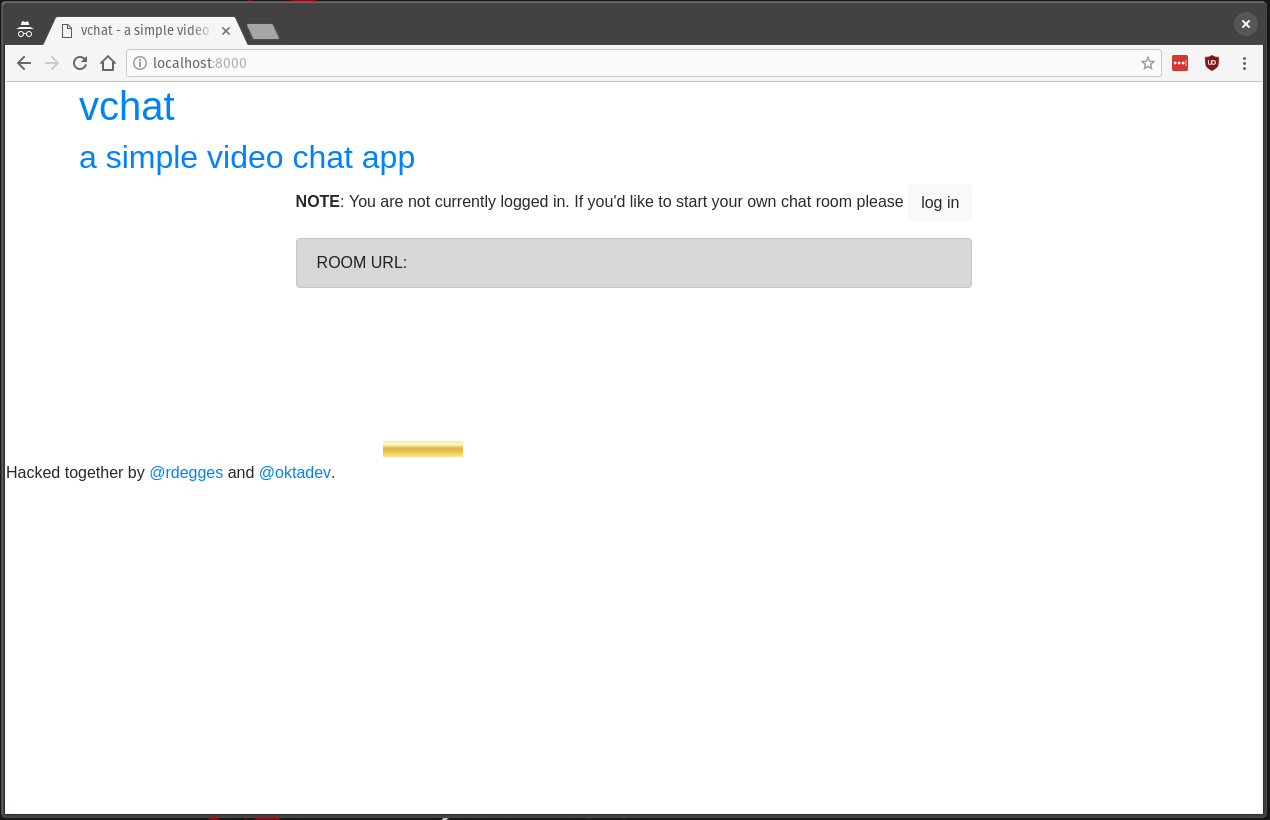
我不会详细解释每条CSS规则( 因为我不想让您感到厌烦 ),但是如果您将新创建的样式表添加到index.html页面中,则会注意到该Web应用现在看起来好多了:
<head>
  <title>vchat - a simple video chat app</title>
  <link rel="stylesheet" href="https://maxcdn.bootstrapcdn.com/bootstrap/4.0.0/css/bootstrap.min.css" integrity="sha384-Gn5384xqQ1aoWXA+058RXPxPg6fy4IWvTNh0E263XmFcJlSAwiGgFAW/dAiS6JXm" crossorigin="anonymous">
  <link href="https://fonts.googleapis.com/css?family=Raleway" rel="stylesheet">
  <link rel="stylesheet" href="/static/css/style.css">
</head>
设置Okta
现在您已经有了一个简单的网页,上面有一些样式,让我们使用Okta设置用户登录组件。 如果您还没有Okta开发者帐户, 请立即创建一个帐户,然后再回来(只需一秒钟)。
拥有Okta帐户并登录Okta仪表板后,您需要创建一个新的Okta应用程序(这是Okta知道您要构建哪种类型的应用程序以及允许哪种身份验证的方式) 。
为此,请从信息中心导航至“ 应用程序”选项卡,然后单击“ 添加应用程序”按钮。 在那里,单击“ 单页应用程序”图标(因为您正在构建SPA),然后单击“ 下一步” 。
进入“ 创建新应用程序”页面后,填写“ 应用程序设置”表单,其中包含以下信息:
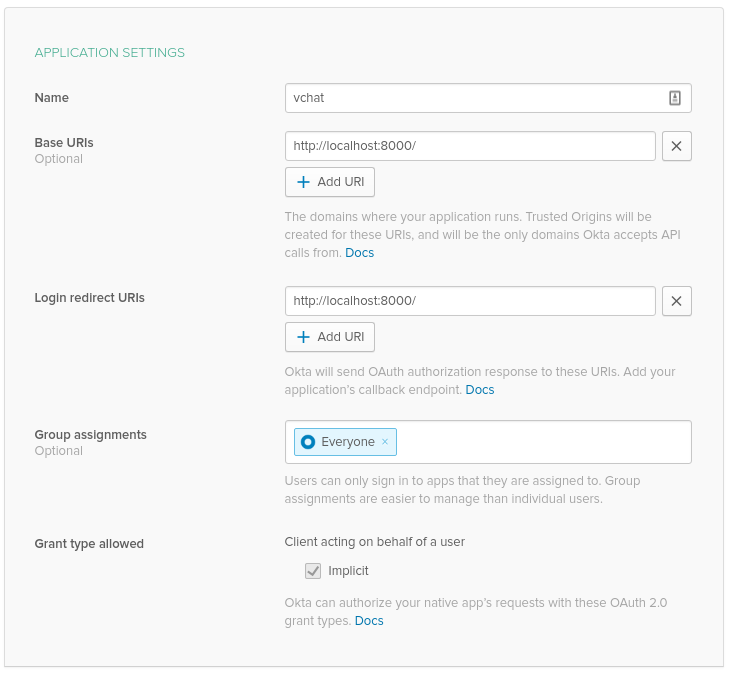
完成后,点击完成 。 Okta应用程序现在几乎可以使用了。
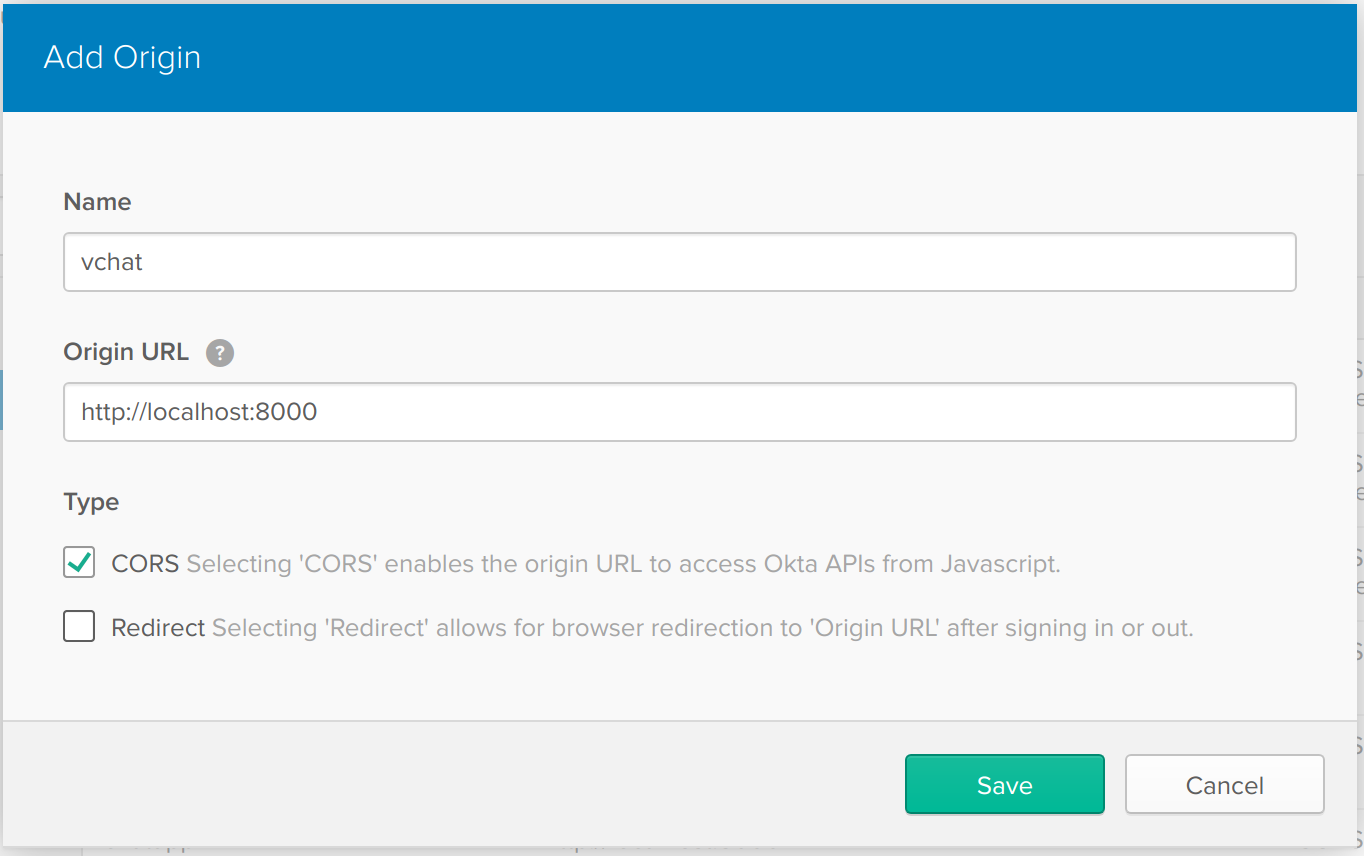
接下来需要做的是将本地计算机添加为“ 受信任的来源” —受信任的来源是允许从纯JavaScript环境与Okta进行交互的URL。 您需要显式创建一个。
为此,请从Okta仪表板中单击“ API”选项卡,然后单击“ 可信来源”选项卡。 要创建新的原点,现在单击添加原点按钮:
到达“ 添加来源”屏幕后,输入以下信息,告诉Okta允许您从本地测试环境使用Okta身份验证服务:
最后,既然您已经配置了Okta应用程序和所有必要的安全规则,则应该在Okta中创建一些用户帐户,以便以后登录。 您可以通过单击“ 用户”选项卡,然后单击“ 添加人”按钮来执行此操作:
使用Okta处理用户身份验证
现在,您已经配置好Okta,您需要将Okta插入您的Web应用程序,以便用户可以登录到您的视频聊天应用程序。
与Okta集成的方式有很多,但对于单页应用程序(如您今天要构建的应用程序),您将需要使用Okta Sign-In Widget 。
Okta登录小部件是一个纯JS库,您可以将其放入可为您处理用户身份验证的任何网页中。
在添加小部件的JS代码(如下)之前,您需要访问Okta仪表板,并从页面右上角获取组织URL值。
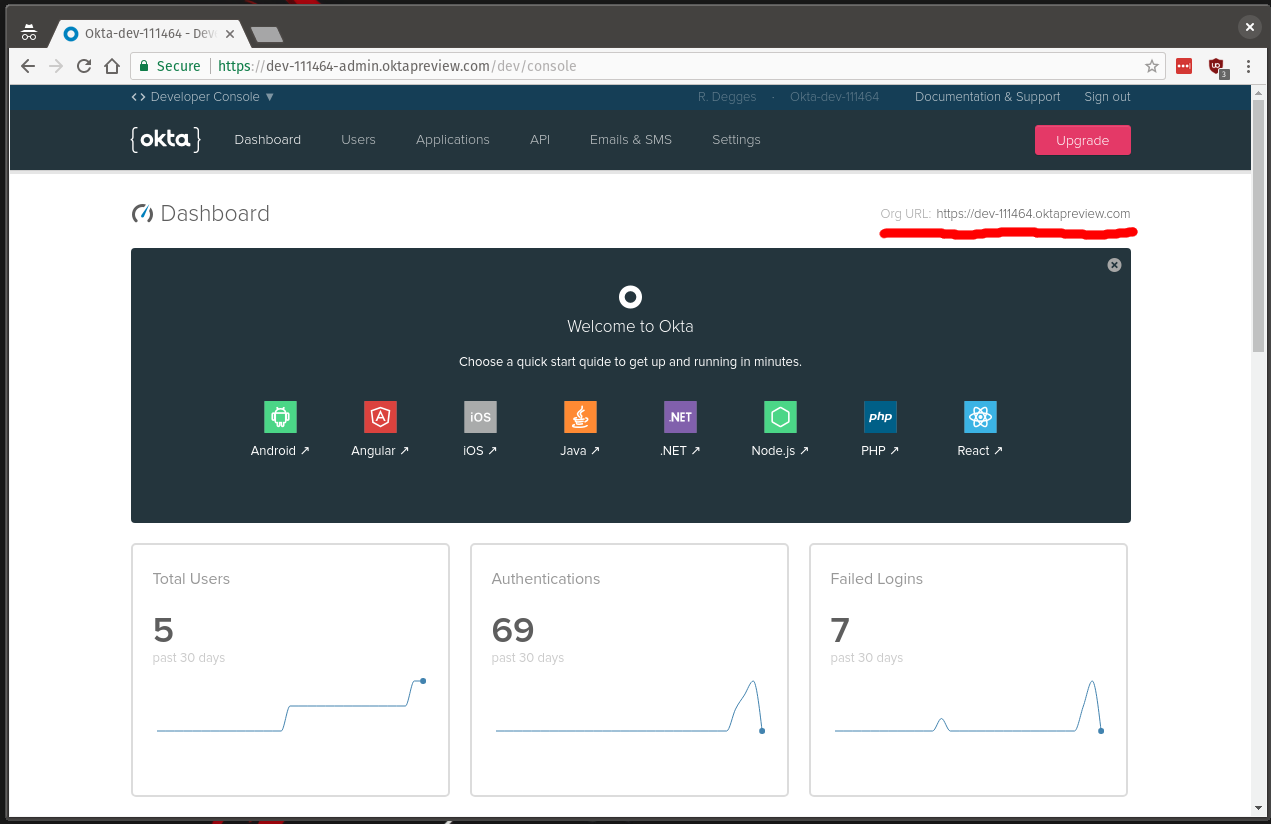
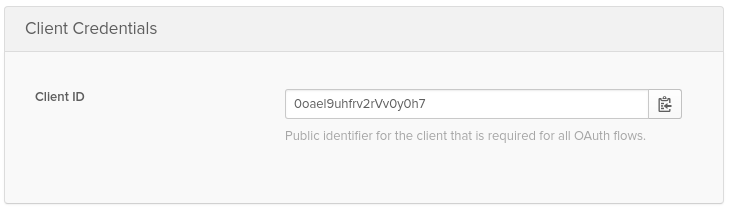
您还需要查看您之前创建的应用程序,以获取客户端ID值。 下面将使用这两个值(客户端ID和组织URL)。
现在您已经拥有了必要的凭据,让我们开始将小部件插入Web应用程序中。 打开您先前使用的index.html文件,并导入Okta登录微件依赖关系,并在脚本标签中的页面底部初始化微件。 确保用适合您应用的值替换{{OKTA_ORG_URL}}和{{CLIENT_ID}} 。
<!-- snip -->

<head>
  <title>vchat - a simple video chat app</title>
  <link rel="stylesheet" href="https://maxcdn.bootstrapcdn.com/bootstrap/4.0.0/css/bootstrap.min.css" integrity="sha384-Gn53
84xqQ1aoWXA+058RXPxPg6fy4IWvTNh0E263XmFcJlSAwiGgFAW/dAiS6JXm" crossorigin="anonymous">
  <link href="https://fonts.googleapis.com/css?family=Raleway" rel="stylesheet">
  <script src="https://ok1static.oktacdn.com/assets/js/sdk/okta-signin-widget/2.6.0/js/okta-sign-in.min.js" type="text/javas
cript"></script>
  <link href="https://ok1static.oktacdn.com/assets/js/sdk/okta-signin-widget/2.6.0/css/okta-sign-in.min.css" type="text/css"
 rel="stylesheet"/>
  <link href="https://ok1static.oktacdn.com/assets/js/sdk/okta-signin-widget/2.6.0/css/okta-theme.css" type="text/css" rel="
stylesheet"/>
  <link rel="stylesheet" href="/static/css/style.css">
</head>

<!-- snip -->

<footer>
  <p>Hacked together by <a href="https://twitter.com/rdegges">@rdegges</a>
    and <a href="https://twitter.com/oktadev">@oktadev</a>.</p>
</footer>

<script>
  var okta = new OktaSignIn({
    baseUrl: "{{OKTA_ORG_URL}}",
    clientId: "{{CLIENT_ID}}",
    authParams: {
      issuer: "{{OKTA_ORG_URL}}/oauth2/default",
      responseType: ["token", "id_token"],
      display: "page"
    }
  });

  // Render the login form.
  function showLogin() {
    okta.renderEl({ el: "#okta-login-container" }, function(res) {}, function(err) {
      alert("Couldn't render the login form, something horrible must have happened. Please refresh the page.");
    });
  }

  // Handle the user's login and what happens next.
  function handleLogin() {
    // If the user is logging in for the first time...
    if (okta.token.hasTokensInUrl()) {
      okta.token.parseTokensFromUrl(
        function success(res) {
          // Save the tokens for later use, e.g. if the page gets refreshed:
          okta.tokenManager.add("accessToken", res[0]);
          okta.tokenManager.add("idToken", res[1]);

          console.log("user just logged in");
        }, function error(err) {
          alert("We weren't able to log you in, something horrible must have happened. Please refresh the page.");
        }
      );
    } else {
      okta.session.get(function(res) {

        // If the user is logged in...
        if (res.status === "ACTIVE") {

          console.log("user is already logged in")
          return;
        }

        // If we get here, the user is not logged in.
        console.log("user not logged in");
        showLogin();
      });
    }
  }

  handleLogin();
</script>
上面的代码初始化Okta小部件,处理用户身份验证,并将一些消息记录到开发人员控制台以帮助您了解正在发生的事情。
您在上面创建的okta对象控制着小部件的功能:通过创建OktaSignIn类的新实例并为其提供特定于应用的详细信息,您实际上是在告诉Okta OpenID Connect服务器在哪里以及如何使用它(Okta使用OpenID Connect协议在幕后为该登录小部件提供动力)。
您在上面看到的handleLogin函数可以控制应用程序中的会话管理。 如果用户刚刚登录(作为OIDC流程的一部分),则该用户的访问和ID令牌将存储在HTML本地存储中,以便您的应用可以记住该用户是谁。 如果用户已经登录但正在查看页面,则会在控制台中显示一条消息。 如果用户根本没有登录,那么将显示登录表单(通过showLogin函数)。
现在您已经将小部件连接到应用程序,如果您在浏览器中查看您的应用程序,您将能够看到运行中的Okta登录小部件:它将呈现一个漂亮的登录表单。 如果填写Okta用户登录详细信息,您会注意到将触发相应的console.log消息:您尚未登录,刚刚登录或已经登录。

配置状态管理
接下来需要做的是为应用程序配置状态管理。 但是在深入探讨之前,让我们先谈谈应用程序的工作方式。
您正在构建的视频聊天应用程序将为每个注册用户提供他们自己的专用聊天室,他们可以随时使用这些聊天室,并且可以与任何外部人员共享。 当另一个人加入这些专用聊天室之一时,他们将立即进入视频聊天会话,而无需在该站点上建立帐户。
为了使此功能以简单的方式起作用,您将对应用程序进行结构设计,以使每个注册用户将拥有一个专用的聊天室,其URL为{{YOUR_SITE_URL}}?room={{email}} 。 这样,如果我的电子邮件地址是r@rdegges.com那么我将拥有一个专用的聊天室,我的朋友可以加入该聊天室,该聊天室是{{YOUR_SITE_URL}}?room=r@rdegges.com ,易于记忆且易于共享。
如果用户在带有room查询字符串的页面上,您将知道他们正在尝试加入特定的视频聊天室,并将使用该查询字符串值将其放入正确的会议室。 如果用户正在访问网站的主页(不带任何查询字符串),您将知道他们很可能尝试登录该应用程序,因此应向他们显示登录表单。
这是您将在下面实现的基本逻辑。 随着本指南的进展,我们将以此为基础,在视频聊天服务完全构建之前,将添加越来越多的功能。
首先,创建一个hasQueryString函数,该函数将有助于确定用户是在应用程序的主页上还是在特定的聊天室中:
// Determine whether or not we have a querystring.
function hasQueryString() {
  return location.href.indexOf("?") !== -1;
}
接下来,定义两个帮助器函数: getRoom和getRoomURL ,它们将确定聊天室名称(根据查询字符串)以及完全限定的会议室URL。 这些在以后编写视频聊天代码时将很有帮助:
// Determine the room name and public URL for this chat session.
function getRoom() {
  var query = location.search && location.search.split("?")[1];

  if (query) {
    return (location.search && decodeURIComponent(query.split("=")[1]));
  }

  return okta.tokenManager.get("idToken").claims.email;
}

// Retrieve the absolute room URL.
function getRoomURL() {
  return location.protocol + "//" + location.host + (location.path || "") + "?room=" + getRoom();
}
现在,您已经有了一些有用的帮助器函数,您将需要将handleLogin函数从以前修改为:
- 将登录的用户重定向到他们专用的聊天室(
{{YOUR_SITE_URL}}?room={{email}} - 通知未登录(但在视频聊天室中)的用户可以登录
// Handle the user's login and what happens next.
function handleLogin() {
  // If the user is logging in for the first time...
  if (okta.token.hasTokensInUrl()) {
    okta.token.parseTokensFromUrl(
      function success(res) {
        // Save the tokens for later use, e.g. if the page gets refreshed:
        okta.tokenManager.add("accessToken", res[0]);
        okta.tokenManager.add("idToken", res[1]);

        // Redirect to this user's dedicated room URL.
        window.location = getRoomURL();
      }, function error(err) {
        alert("We weren't able to log you in, something horrible must have happened. Please refresh the page.");
      }
    );
  } else {
    okta.session.get(function(res) {

      // If the user is logged in...
      if (res.status === "ACTIVE") {

        // If the user is logged in on the home page, redirect to their room page.
        if (!hasQueryString()) {
          window.location = getRoomURL();
        }

        return;
      }

      // If we get here, the user is not logged in.

      // If there's a querystring in the URL, it means this person is in a
      // "room" so we should display our passive login notice. Otherwise,
      // we'll prompt them for login immediately.
      if (hasQueryString()) {
        document.getElementById("login").style.display = "block";
      } else {
        showLogin();
      }
    });
  }
}
通过使用简单的帮助程序功能来处理重定向,您几乎可以完成状态管理方面所需的一切。
但是,还有一件小事要做:您需要确保login按钮将任何用户重定向到应用程序的主页,以便他们可以查看登录表单。 为此,只需在页面中的button元素上定义一个onclick处理程序:
<p id="login">
  <b>NOTE</b>: You are not currently logged in. If you'd like to start your own chat room please <button type="button" class="btn btn-light" onclick="document.location='/'">log in</button>
</p>
有了最后的更改,应用程序的状态管理现已完成!
时间到了有趣的东西:WebRTC的实时视频。
使用WebRTC启用实时视频聊天
为了使实时视频聊天在此应用中正常工作,我们将使用出色的SimpleWebRTC库。 该库提供了一些优秀的API,这些API包装了底层WebRTC API,使它们更易于使用。
要开始使用SimpleWebRTC,首先需要在Web应用程序的head部分包括所需的适配器库:
<head>
  <title>vchat - a simple video chat app</title>
  <link rel="stylesheet" href="https://maxcdn.bootstrapcdn.com/bootstrap/4.0.0/css/bootstrap.min.css" integrity="sha384-Gn5384xqQ1aoWXA+058RXPxPg6fy4IWvTNh0E263XmFcJlSAwiGgFAW/dAiS6JXm" crossorigin="anonymous">
  <link href="https://fonts.googleapis.com/css?family=Raleway" rel="stylesheet">
  <script src="https://ok1static.oktacdn.com/assets/js/sdk/okta-signin-widget/2.6.0/js/okta-sign-in.min.js" type="text/javascript"></script>
  <link href="https://ok1static.oktacdn.com/assets/js/sdk/okta-signin-widget/2.6.0/css/okta-sign-in.min.css" type="text/css" rel="stylesheet"/>
  <link href="https://ok1static.oktacdn.com/assets/js/sdk/okta-signin-widget/2.6.0/css/okta-theme.css" type="text/css" rel="stylesheet"/>
  <script src="https://webrtc.github.io/adapter/adapter-4.2.2.js"></script>
  <link rel="stylesheet" href="/static/css/style.css">
</head>
接下来,您需要修改之前创建的videoContainer div,该div将保存您的视频,以执行以下两项操作:
- 确保禁用对实时视频的右键单击(否则用户将获得无用的菜单),并且
- 添加一些良好的默认音量编号,以便视频显示中的音量栏正常工作
为此,您所需要做的就是用此更新的HTML替换videoContainer div:
<div class="videoContainer">
  <video id="selfVideo" oncontextmenu="return false;"></video>
  <meter id="localVolume" class="volume" min="-45" max="-20" high="-25" low="-40"></meter>
</div>
oncontextmenu属性仅告诉浏览器在右键单击video元素时不执行任何操作。 音量表上额外的min , max , high和low属性是SimpleWebRTC推荐的合理默认值,因此我们将使用它。
接下来,您需要定义一个loadSimpleWebRTC()函数,该函数将:
- 提示用户允许摄像头/麦克风访问网页
- 在屏幕上呈现视频供稿
- 根据用户正在访问的URL自动加入适当的聊天室
- 处理出现的任何错误(当有人断开连接时,视频供稿被丢弃等)
为此,您需要在JS代码中定义函数:
// Dynamically load the simplewebrtc script so that we can
// kickstart the video call.
function loadSimpleWebRTC() {
  var script = document.createElement("script");
  script.src = "https://simplewebrtc.com/latest-v3.js";
  document.head.appendChild(script);

  script.onload = function() {
    var webrtc = new SimpleWebRTC({
      localVideoEl: "selfVideo",
      // the id/element dom element that will hold remote videos
      remoteVideosEl: "",
      autoRequestMedia: true,
      debug: false,
      detectSpeakingEvents: true,
      autoAdjustMic: false
    });

    // Set the publicly available room URL.
    document.getElementById("roomUrl").innerText = getRoomURL();

    // Immediately join room when loaded.
    webrtc.on("readyToCall", function() {
      webrtc.joinRoom(getRoom());
    });

    function showVolume(el, volume) {
      if (!el) return;
      if (volume < -45) volume = -45; // -45 to -20 is
      if (volume > -20) volume = -20; // a good range
      el.value = volume;
    }

    // Display the volume meter.
    webrtc.on("localStream", function(stream) {
      var button = document.querySelector("form>button");
      if (button) button.removeAttribute("disabled");
      document.getElementById("localVolume").style.display = "block";
    });

    // If we didn't get access to the camera, raise an error.
    webrtc.on("localMediaError", function (err) {
      alert("This service only works if you allow camera access.Please grant access and refresh the page.");
    });

    // When another person joins the chat room, we'll display their video.
    webrtc.on("videoAdded", function(video, peer) {
      console.log("user added to chat", peer);
      var remotes = document.getElementById("remotes");

      if (remotes) {
        var outerContainer = document.createElement("div");
        outerContainer.className = "col-md-6";

        var container = document.createElement("div");
        container.className = "videoContainer";
        container.id = "container_" + webrtc.getDomId(peer);
        container.appendChild(video);

        // Suppress right-clicks on the video.
        video.oncontextmenu = function() { return false; };

        // Show the volume meter.
        var vol = document.createElement("meter");
        vol.id = "volume_" + peer.id;
        vol.className = "volume";
        vol.min = -45;
        vol.max = -20;
        vol.low = -40;
        vol.high = -25;
        container.appendChild(vol);

        // Show the connection state.
        if (peer && peer.pc) {
          var connstate = document.createElement("div");
          connstate.className = "connectionstate";
          container.appendChild(connstate);

          peer.pc.on("iceConnectionStateChange", function(event) {
            switch (peer.pc.iceConnectionState) {
              case "checking":
                connstate.innerText = "connecting to peer...";
                break;
              case "connected":
              case "completed": // on caller side
                vol.style.display = "block";
                connstate.innerText = "connection established";
                break;
              case "disconnected":
                connstate.innerText = "disconnected";
                break;
              case "failed":
                connstate.innerText = "connection failed";
                break;
              case "closed":
                connstate.innerText = "connection closed";
                break;
            }
          });
        }

        outerContainer.appendChild(container);
        remotes.appendChild(outerContainer);

        // If we're adding a new video we need to modify bootstrap so we
        // only get two videos per row.
        var remoteVideos = document.getElementById("remotes").getElementsByTagName("video").length;

        if (!(remoteVideos % 2)) {
          var spacer = document.createElement("div");
          spacer.className = "w-100";
          remotes.appendChild(spacer);
        }
      }
    });

    // If a user disconnects from chat, we need to remove their video feed.
    webrtc.on("videoRemoved", function(video, peer) {
      console.log("user removed from chat", peer);
      var remotes = document.getElementById("remotes");
      var el = document.getElementById("container_" + webrtc.getDomId(peer));
      if (remotes && el) {
        remotes.removeChild(el.parentElement);
      }
    });

    // If our volume has changed, update the meter.
    webrtc.on("volumeChange", function(volume, treshold) {
      showVolume(document.getElementById("localVolume"), volume);
    });

    // If a remote user's volume has changed, update the meter.
    webrtc.on("remoteVolumeChange", function(peer, volume) {
      showVolume(document.getElementById("volume_" + peer.id), volume);
    });

    // If there is a P2P failure, we need to error out.
    webrtc.on("iceFailed", function(peer) {
      var connstate = document.querySelector("#container_" + webrtc.getDomId(peer) + " .connectionstate");
      console.log("local fail", connstate);
      if (connstate) {
        connstate.innerText = "connection failed";
        fileinput.disabled = "disabled";
      }
    });

    // remote p2p/ice failure
    webrtc.on("connectivityError", function (peer) {
      var connstate = document.querySelector("#container_" + webrtc.getDomId(peer) + " .connectionstate");
      console.log("remote fail", connstate);
      if (connstate) {
        connstate.innerText = "connection failed";
        fileinput.disabled = "disabled";
      }
    });
  }
}
尽管要吸收很多代码,但并不全部复杂。
我们在上述功能中要做的第一件事是动态加载SimpleWebRTC库(这将提示用户在浏览器中进行麦克风/摄像机访问并处理视频连接逻辑):
var script = document.createElement("script");
script.src = "https://simplewebrtc.com/latest-v3.js";
document.head.appendChild(script);
SimpleWebRTC库完全加载后,简单代码的下一部分将运行,并根据用户正在访问的页面URL自动将用户放入正确的聊天室。
例如,如果用户尝试查看?room=test聊天室,则将其放入名为test的聊天室中。 通过简单地通过querystring参数处理此逻辑,我们就可以避免使用任何服务器端逻辑。
这是处理房间加入的代码片段:
script.onload = function() {
  var webrtc = new SimpleWebRTC({
    localVideoEl: "selfVideo",
    // the id/element dom element that will hold remote videos
    remoteVideosEl: "",
    autoRequestMedia: true,
    debug: false,
    detectSpeakingEvents: true,
    autoAdjustMic: false
  });

  // Set the publicly available room URL.
  document.getElementById("roomUrl").innerText = getRoomURL();

  // Immediately join room when loaded.
  webrtc.on("readyToCall", function() {
    webrtc.joinRoom(getRoom());
  });

  // snip
现在,您已经完成了困难的视频片段,您只需要定义一个函数enableVideo ,它将显示视频框并初始化您刚定义的SimpleWebRTC代码:
// Enable video on the page.
function enableVideo() {
  document.getElementById("url").style.display = "block";
  document.getElementById("remotes").style.visibility = "visible";
  loadSimpleWebRTC();
}
最后,您现在必须返回并修改handleLogin函数,以便在适当的时候调用新的enableVideo函数:
// Handle the user's login and what happens next.
function handleLogin() {
  // If the user is logging in for the first time...
  if (okta.token.hasTokensInUrl()) {
    okta.token.parseTokensFromUrl(
      function success(res) {
        // Save the tokens for later use, e.g. if the page gets refreshed:
        okta.tokenManager.add("accessToken", res[0]);
        okta.tokenManager.add("idToken", res[1]);

        // Redirect to this user's dedicated room URL.
        window.location = getRoomURL();
      }, function error(err) {
        alert("We weren't able to log you in, something horrible must have happened. Please refresh the page.");
      }
    );
  } else {
    okta.session.get(function(res) {

      // If the user is logged in, display the app.
      if (res.status === "ACTIVE") {

        // If the user is logged in on the home page, redirect to their room page.
        if (!hasQueryString()) {
          window.location = getRoomURL();
        }

        return enableVideo();
      }

      // If we get here, the user is not logged in.

      // If there's a querystring in the URL, it means this person is in a
      // "room" so we should display our passive login notice. Otherwise,
      // we'll prompt them for login immediately.
      if (hasQueryString()) {
        document.getElementById("login").style.display = "block";
        enableVideo();
      } else {
        showLogin();
      }
    });
  }
}
通过在上面适当的时候调用enableVideo ,一切现在应该可以正常工作了! 您可以通过打开页面并尝试一下来进行测试:
还不错吧?
放在一起
现在,您已经完成了构建应用程序的过程,您应该拥有一个外观漂亮的单页应用程序。
为了完整起见,这是单个index.html文件中的最终版本(减去前面显示的CSS):
<!DOCTYPE html>
<html>
  <head>
    <title>vchat - a simple video chat app</title>
    <link rel="stylesheet" href="https://maxcdn.bootstrapcdn.com/bootstrap/4.0.0/css/bootstrap.min.css" integrity="sha384-Gn5384xqQ1aoWXA+058RXPxPg6fy4IWvTNh0E263XmFcJlSAwiGgFAW/dAiS6JXm" crossorigin="anonymous">
    <link href="https://fonts.googleapis.com/css?family=Raleway" rel="stylesheet">
    <script src="https://ok1static.oktacdn.com/assets/js/sdk/okta-signin-widget/2.6.0/js/okta-sign-in.min.js" type="text/javascript"></script>
    <link href="https://ok1static.oktacdn.com/assets/js/sdk/okta-signin-widget/2.6.0/css/okta-sign-in.min.css" type="text/css" rel="stylesheet"/>
    <link href="https://ok1static.oktacdn.com/assets/js/sdk/okta-signin-widget/2.6.0/css/okta-theme.css" type="text/css" rel="stylesheet"/>
    <script src="https://webrtc.github.io/adapter/adapter-4.2.2.js"></script>
    <link rel="stylesheet" href="/static/css/style.css">
  </head>
  <body>
    <div class="container">
      <header>
        <h1><a href="/">vchat</a></h1>
        <h2><a href="/">a simple video chat app</a></h2>
      </header>

      <div id="okta-login-container"></div>

      <div class="row">
        <div class="col"></div>
        <div class="col-md-auto align-self-center">
          <p id="login"><b>NOTE</b>: You are not currently logged in. If you'd like to start your own
            chat room please <button type="button" class="btn btn-light" onclick="document.location='/'">log in</button></p>
          <div id="url" class="alert alert-dark" role="alert">
            <span id="roomIntro">ROOM URL</span>: <span id="roomUrl"></span>
          </div>
        </div>
        <div class="col"></div>
      </div>

      <div id="remotes" class="row">
        <div class="col-md-6">
          <div class="videoContainer">
            <video id="selfVideo" oncontextmenu="return false;"></video>
            <meter id="localVolume" class="volume" min="-45" max="-20" high="-25" low="-40"></meter>
          </div>
        </div>
      </div>
    </div>

    <footer>
      <p>Hacked together by <a href="https://twitter.com/rdegges">@rdegges</a>
        and <a href="https://twitter.com/oktadev">@oktadev</a>.</p>
    </footer>

    <script>
      var okta = new OktaSignIn({
        baseUrl: "https://dev-111464.oktapreview.com",
        clientId: "0oaejf8gmll1TiDRz0h7",
        authParams: {
          issuer: "https://dev-111464.oktapreview.com/oauth2/default",
          responseType: ["token", "id_token"],
          display: "page"
        }
      });

      // Render the login form.
      function showLogin() {
        okta.renderEl({ el: "#okta-login-container" }, function(res) {}, function(err) {
          alert("Couldn't render the login form, something horrible must have happened. Please refresh the page.");
        });
      }

      // Determine the room name and public URL for this chat session.
      function getRoom() {
        var query = location.search && location.search.split("?")[1];

        if (query) {
          return (location.search && decodeURIComponent(query.split("=")[1]));
        }

        return okta.tokenManager.get("idToken").claims.email;
      }

      // Retrieve the absolute room URL.
      function getRoomURL() {
        return location.protocol + "//" + location.host + (location.path || "") + "?room=" + getRoom();
      }

      // Determine whether or not we have a querystring.
      function hasQueryString() {
        return location.href.indexOf("?") !== -1;
      }

      // Handle the user's login and what happens next.
      function handleLogin() {
        // If the user is logging in for the first time...
        if (okta.token.hasTokensInUrl()) {
          okta.token.parseTokensFromUrl(
            function success(res) {
              // Save the tokens for later use, e.g. if the page gets refreshed:
              okta.tokenManager.add("accessToken", res[0]);
              okta.tokenManager.add("idToken", res[1]);

              // Redirect to this user's dedicated room URL.
              window.location = getRoomURL();
            }, function error(err) {
              alert("We weren't able to log you in, something horrible must have happened. Please refresh the page.");
            }
          );
        } else {
          okta.session.get(function(res) {

            // If the user is logged in, display the app.
            if (res.status === "ACTIVE") {

              // If the user is logged in on the home page, redirect to their room page.
              if (!hasQueryString()) {
                window.location = getRoomURL();
              }

              return enableVideo();
            }

            // If we get here, the user is not logged in.

            // If there's a querystring in the URL, it means this person is in a
            // "room" so we should display our passive login notice. Otherwise,
            // we'll prompt them for login immediately.
            if (hasQueryString()) {
              document.getElementById("login").style.display = "block";
              enableVideo();
            } else {
              showLogin();
            }
          });
        }
      }

      // Enable video on the page.
      function enableVideo() {
        document.getElementById("url").style.display = "block";
        document.getElementById("remotes").style.visibility = "visible";
        loadSimpleWebRTC();
      }

      // Dynamically load the simplewebrtc script so that we can
      // kickstart the video call.
      function loadSimpleWebRTC() {
        var script = document.createElement("script");
        script.src = "https://simplewebrtc.com/latest-v3.js";
        document.head.appendChild(script);

        script.onload = function() {
          var webrtc = new SimpleWebRTC({
            localVideoEl: "selfVideo",
            // the id/element dom element that will hold remote videos
            remoteVideosEl: "",
            autoRequestMedia: true,
            debug: false,
            detectSpeakingEvents: true,
            autoAdjustMic: false
          });

          // Set the publicly available room URL.
          document.getElementById("roomUrl").innerText = getRoomURL();

          // Immediately join room when loaded.
          webrtc.on("readyToCall", function() {
            webrtc.joinRoom(getRoom());
          });

          function showVolume(el, volume) {
            if (!el) return;
            if (volume < -45) volume = -45; // -45 to -20 is
            if (volume > -20) volume = -20; // a good range
            el.value = volume;
          }

          // Display the volume meter.
          webrtc.on("localStream", function(stream) {
            var button = document.querySelector("form>button");
            if (button) button.removeAttribute("disabled");
            document.getElementById("localVolume").style.display = "block";
          });

          // If we didn't get access to the camera, raise an error.
          webrtc.on("localMediaError", function (err) {
            alert("This service only works if you allow camera access.Please grant access and refresh the page.");
          });

          // When another person joins the chat room, we'll display their video.
          webrtc.on("videoAdded", function(video, peer) {
            console.log("user added to chat", peer);
            var remotes = document.getElementById("remotes");

            if (remotes) {
              var outerContainer = document.createElement("div");
              outerContainer.className = "col-md-6";

              var container = document.createElement("div");
              container.className = "videoContainer";
              container.id = "container_" + webrtc.getDomId(peer);
              container.appendChild(video);

              // Suppress right-clicks on the video.
              video.oncontextmenu = function() { return false; };

              // Show the volume meter.
              var vol = document.createElement("meter");
              vol.id = "volume_" + peer.id;
              vol.className = "volume";
              vol.min = -45;
              vol.max = -20;
              vol.low = -40;
              vol.high = -25;
              container.appendChild(vol);

              // Show the connection state.
              if (peer && peer.pc) {
                var connstate = document.createElement("div");
                connstate.className = "connectionstate";
                container.appendChild(connstate);

                peer.pc.on("iceConnectionStateChange", function(event) {
                  switch (peer.pc.iceConnectionState) {
                    case "checking":
                      connstate.innerText = "connecting to peer...";
                      break;
                    case "connected":
                    case "completed": // on caller side
                      vol.style.display = "block";
                      connstate.innerText = "connection established";
                      break;
                    case "disconnected":
                      connstate.innerText = "disconnected";
                      break;
                    case "failed":
                      connstate.innerText = "connection failed";
                      break;
                    case "closed":
                      connstate.innerText = "connection closed";
                      break;
                  }
                });
              }

              outerContainer.appendChild(container);
              remotes.appendChild(outerContainer);

              // If we're adding a new video we need to modify bootstrap so we
              // only get two videos per row.
              var remoteVideos = document.getElementById("remotes").getElementsByTagName("video").length;

              if (!(remoteVideos % 2)) {
                var spacer = document.createElement("div");
                spacer.className = "w-100";
                remotes.appendChild(spacer);
              }
            }
          });

          // If a user disconnects from chat, we need to remove their video feed.
          webrtc.on("videoRemoved", function(video, peer) {
            console.log("user removed from chat", peer);
            var remotes = document.getElementById("remotes");
            var el = document.getElementById("container_" + webrtc.getDomId(peer));
            if (remotes && el) {
              remotes.removeChild(el.parentElement);
            }
          });

          // If our volume has changed, update the meter.
          webrtc.on("volumeChange", function(volume, treshold) {
            showVolume(document.getElementById("localVolume"), volume);
          });

          // If a remote user's volume has changed, update the meter.
          webrtc.on("remoteVolumeChange", function(peer, volume) {
            showVolume(document.getElementById("volume_" + peer.id), volume);
          });

          // If there is a P2P failure, we need to error out.
          webrtc.on("iceFailed", function(peer) {
            var connstate = document.querySelector("#container_" + webrtc.getDomId(peer) + " .connectionstate");
            console.log("local fail", connstate);
            if (connstate) {
              connstate.innerText = "connection failed";
              fileinput.disabled = "disabled";
            }
          });

          // remote p2p/ice failure
          webrtc.on("connectivityError", function (peer) {
            var connstate = document.querySelector("#container_" + webrtc.getDomId(peer) + " .connectionstate");
            console.log("remote fail", connstate);
            if (connstate) {
              connstate.innerText = "connection failed";
              fileinput.disabled = "disabled";
            }
          });
        }
      }

      handleLogin();
    </script>
  </body>
</html>
只需付出一点点的努力,您就可以使用WebRTC来构建实时视频聊天应用程序,以支持视频聊天,使用Okta来构建用户身份验证。
如果您想查看该项目的组织化版本,可以在这里查看我的GitHub存储库,其中包含清理后的源代码:https://github.com/rdegges/chatapp
如果您喜欢本文,但没有看完本教程,则可能想做的一件事是创建一个Okta开发人员帐户 (它们是免费的)来处理任何用户管理,身份验证,授权,单点登录,社交登录等等。它是一个非常强大的工具,在构建Web应用程序(尤其是那些没有服务器端后端的Web应用程序)时非常有用。
如果您想看到更多类似的文章,请发给我们@oktadev,并告诉我! 您还可以在Okta开发人员博客上找到大量其他有趣的开发人员文章。
奖励:使用Netlify实时部署您的网站
如果您像我一样,那么您就讨厌下面的教程,只是发现您正在构建的应用程序只能在localhost上运行。 如果您想以一种简单的方式将新的Okta + WebRTC应用程序实时发布到世界各地,我强烈建议您使用Netlify 。
Netlify是我最喜欢的服务之一–它是一个静态网站托管工具,可与GitHub同步,使部署静态网站变得轻而易举。 对于像这样的没有后端的项目,Netlify具有不可思议的价值,因为它可以自动完成100%的部署,并免费为其快速CDN托管您的站点!
要开始使用Netlify,您首先需要在其网站上创建一个帐户 。
拥有一个帐户后,您需要创建一个新的Netlify应用程序(您可以根据需要创建任意数量的应用程序,每个运行的网站可以拥有一个)。 只需单击仪表板右上方的Git中的“ 新建站点”按钮,然后选择托管服务提供商(在我的情况下为GitHub),找到您的项目,然后对其进行配置。
这对我来说是这样的:
在短短的几秒钟内,我就可以将我的GitHub存储库与Netlify同步,以便它可以将我的网站实时自动部署到其CDN(通过SSL)—太神奇了,对吗? 从现在开始,每当您向存储库中推送新的提交时(取决于Netlify的配置方式),它将自动将静态站点部署到其CDN。
而且…一旦您在Netlify中完成所有站点的设置,接下来要做的就是对其进行优化! Netlify具有一些强大的功能,每次按下新代码时,它们都会自动优化图像,CSS,HTML等。
要启用此功能,您可以访问站点设置 -> 构建和部署菜单:
只需单击几下,您就可以通过压缩所有图像,JS和CSS来极大地加快网站的速度。
如果您想使用真实的URL而不是Netlify的默认项目URL,则可以通过“ 域管理”标签轻松地做到这一点,该标签允许您执行诸如设置自己的DNS,免费生成SSL证书等工作。
总的来说,这是一个非常不错的服务,我对我所有的项目都非常喜欢。
无论如何:我希望本教程对您有所帮助!
From: https://www.sitepoint.com/build-a-video-chat-service-with-javascript-webrtc-and-okta/


 被折叠的 条评论
为什么被折叠?
被折叠的 条评论
为什么被折叠?
 到【灌水乐园】发言


