


之前上班做spring+spring mvc +hibernate开发, 2年之久不做想复习一下aop的使用,结果配置遇见aop不生效,解决而记录!
先上代码直接看反例效果会明显:
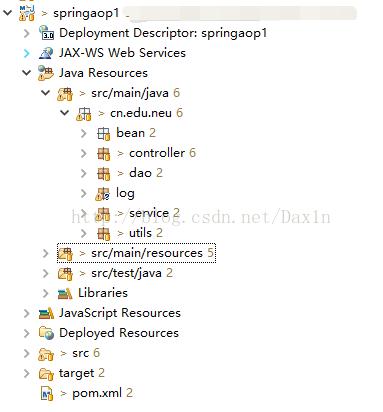
首先看一下我的代码的包路径:
接下来看Spring-MVC的配置文件部分代码:
-
xml version="1.0" encoding="UTF-8"
-
<beans xmlns="http://www.springframework.org/schema/beans"
-
xmlns:xsi= "http://www.w3.org/2001/XMLSchema-instance" xmlns:p= "http://www.springframework.org/schema/p"
-
xmlns:context= "http://www.springframework.org/schema/context"
-
xmlns:mvc= "http://www.springframework.org/schema/mvc" xmlns:tx= "http://www.springframework.org/schema/tx"
-
xmlns:aop= "http://www.springframework.org/schema/aop"
-
xsi:schemaLocation= "http://www.springframework.org/schema/beans
-
http://www.springframework.org/schema/beans/spring-beans-4.0.xsd
-
http://www.springframework.org/schema/aop
-
http://www.springframework.org/schema/aop/spring-aop-4.0.xsd
-
http://www.springframework.org/schema/context
-
http://www.springframework.org/schema/context/spring-context-4.0.xsd
-
http://www.springframework.org/schema/tx
-
http://www.springframework.org/schema/tx/spring-tx-4.0.xsd
-
http://www.springframework.org/schema/cache http://www.springframework.org/schema/cache/spring-cache-4.0.xsd">
-
-
<context:component-scan base-package="cn.edu.neu" />
-
-
...............//省略其他配置
-
-
</beans>
在看一下Spring的配置文件:
-
xml version="1.0" encoding="UTF-8"
-
<beans xmlns="http://www.springframework.org/schema/beans"
-
xmlns:xsi= "http://www.w3.org/2001/XMLSchema-instance" xmlns:p= "http://www.springframework.org/schema/p"
-
xmlns:context= "http://www.springframework.org/schema/context"
-
xmlns:mvc= "http://www.springframework.org/schema/mvc" xmlns:tx= "http://www.springframework.org/schema/tx"
-
xmlns:aop= "http://www.springframework.org/schema/aop"
-
xsi:schemaLocation= "http://www.springframework.org/schema/beans
-
http://www.springframework.org/schema/beans/spring-beans-4.0.xsd
-
http://www.springframework.org/schema/aop
-
http://www.springframework.org/schema/aop/spring-aop-4.0.xsd
-
http://www.springframework.org/schema/context
-
http://www.springframework.org/schema/context/spring-context-4.0.xsd
-
http://www.springframework.org/schema/tx
-
http://www.springframework.org/schema/tx/spring-tx-4.0.xsd
-
http://www.springframework.org/schema/cache http://www.springframework.org/schema/cache/spring-cache-4.0.xsd">
-
-
-
<!-- 自动扫描
-
<context:component-scan base-package="cn.edu.neu" />
-
<!-- aop 日志管理 -->
-
<aop:aspectj-autoproxy expose-proxy="true" />
-
<aop:config proxy-target-class="true">
-
<aop:aspect id="aspectId" ref="aopLog"> <!--调用日志类 -->
-
<!-- cn.edu.neu.service.impl.UserServiceImpl -->
-
<aop:pointcut id="log"
-
expression= "execution(* cn.edu.neu.service.*.*(..))" /> <!--配置在log包下所有的类在调用之前都会被拦截 -->
-
<aop:before method="before" pointcut-ref="log"/> <!--在log包下面所有的类的所有方法被调用之前都调用MyLog中的before方法 -->
-
<aop:after method="after" pointcut-ref="log"/>
-
<!--在log包下面所有的类的所有方法被调用之前都调用MyLog中的after方法 -->
-
</aop:aspect>
-
</aop:config>
-
-
</beans>
web.xml配置文件如下:
-
xml version="1.0" encoding="UTF-8"
-
<web-app xmlns:xsi="http://www.w3.org/2001/XMLSchema-instance"
-
xmlns= "http://java.sun.com/xml/ns/javaee"
-
xsi:schemaLocation= "http://java.sun.com/xml/ns/javaee http://java.sun.com/xml/ns/javaee/web-app_3_0.xsd"
-
version= "3.0">
-
<display-name>Archetype Created Web Application </display-name>
-
<!-- 配置资源的加载顺序:context-param -> listener -> filter -> servlet -->
-
-
<!-- Spring和mybatis的配置文件 -->
-
<context-param>
-
<param-name>contextConfigLocation </param-name>
-
<param-value>classpath:spring-mybatis.xml </param-value>
-
</context-param>
-
-
-
<!-- Spring监听器 -->
-
<listener>
-
<listener-class>org.springframework.web.context.ContextLoaderListener </listener-class>
-
</listener>
-
-
-
<!-- 编码过滤器 -->
-
<filter>
-
<filter-name>encodingFilter </filter-name>
-
<filter-class>org.springframework.web.filter.CharacterEncodingFilter </filter-class>
-
<async-supported>true </async-supported>
-
<init-param>
-
<param-name>encoding </param-name>
-
<param-value>UTF-8 </param-value>
-
</init-param>
-
</filter>
-
<filter-mapping>
-
<filter-name>encodingFilter </filter-name>
-
<url-pattern>/* </url-pattern>
-
</filter-mapping>
-
-
-
<!-- Spring MVC servlet -->
-
<servlet>
-
<servlet-name>SpringMVC </servlet-name>
-
<servlet-class>org.springframework.web.servlet.DispatcherServlet </servlet-class>
-
<!-- -->
-
<init-param>
-
<param-name>contextConfigLocation </param-name>
-
<param-value>classpath:spring-mvc.xml </param-value>
-
</init-param>
-
<load-on-startup>1 </load-on-startup>
-
<async-supported>true </async-supported>
-
</servlet>
-
<servlet-mapping>
-
<servlet-name>SpringMVC </servlet-name>
-
<!-- 此处可以可以配置成*.do,对应struts的后缀习惯 -->
-
<url-pattern>/ </url-pattern>
-
</servlet-mapping>
-
-
<welcome-file-list>
-
<welcome-file>/index.jsp </welcome-file>
-
</welcome-file-list>
-
-
</web-app>
以上的配置之后以为大功告成,结果一运行,恩?不好使?,接下来分析一下原因:
我们知道web.xml中加载顺序是:context-param -> listener -> filter -> servlet ,所以在加载完参数之后开始启动spring的监听器,监听器加载完成之后,就完成了bean加载到容器的过程。但是你可能到现在还没有注意的是,在上面springmvc和spring的配置文件都配置了<context:component-scan base-package="cn.edu.neu" />,所以导致在Spring的DispatcherServlet启动过程中又一次把springmvc.xml扫描到的组件(就是类)再一次添加到spring的容器中,此次会覆盖前面加载的,所以这个就是为什么spring aop不生效的原因!!!
到此是不是还是有点不明白呢?那就在具体说一下:因为在第一次spring加载组件的时候会给pointcut对象生成代理(aop实现原始是动态代理),放到容器中。但是第二次加载时候生成的对象没有代理,第二次覆盖了第一次存在代理的对象,因此导致aop不生效!
接下来说一下解决方案:
方案1:将spring和spring mvc的配置文件放到一个配置文件中,即可避免两次加载覆盖。
方案2:如果非要两个文件都配置扫描的代码的话,那就把需要生成代理的包路径在spring中配置扫描,确保spring mvc的扫描路径不包括“需要生成代理的路径”即可。(而spring mvc的controller组件扫描必要要在spring mvc中配置)
例如方案2代码如下:
spring的配置文件:
扫描非controller路径
-
xml version="1.0" encoding="UTF-8"
-
<beans xmlns="http://www.springframework.org/schema/beans"
-
xmlns:xsi= "http://www.w3.org/2001/XMLSchema-instance" xmlns:p= "http://www.springframework.org/schema/p"
-
xmlns:context= "http://www.springframework.org/schema/context"
-
xmlns:mvc= "http://www.springframework.org/schema/mvc" xmlns:tx= "http://www.springframework.org/schema/tx"
-
xmlns:aop= "http://www.springframework.org/schema/aop"
-
xsi:schemaLocation= "http://www.springframework.org/schema/beans
-
http://www.springframework.org/schema/beans/spring-beans-4.0.xsd
-
http://www.springframework.org/schema/aop
-
http://www.springframework.org/schema/aop/spring-aop-4.0.xsd
-
http://www.springframework.org/schema/context
-
http://www.springframework.org/schema/context/spring-context-4.0.xsd
-
http://www.springframework.org/schema/tx
-
http://www.springframework.org/schema/tx/spring-tx-4.0.xsd
-
http://www.springframework.org/schema/cache http://www.springframework.org/schema/cache/spring-cache-4.0.xsd">
-
-
-
-
<!-- 自动扫描 -->
-
<context:component-scan base-package="cn.edu.neu.dao,cn.edu.neu.service,cn.edu.neu.log" />
-
-
-
-
<!-- aop 日志管理 -->
-
<aop:aspectj-autoproxy expose-proxy="true" />
-
<aop:config proxy-target-class="true">
-
<aop:aspect id="aspectId" ref="aopLog"> <!--调用日志类 -->
-
<!-- cn.edu.neu.service.impl.UserServiceImpl -->
-
<aop:pointcut id="log"
-
expression= "execution(* cn.edu.neu.service.*.*(..))" /> <!--配置在log包下所有的类在调用之前都会被拦截 -->
-
-
<aop:before method="before" pointcut-ref="log"/> <!--在log包下面所有的类的所有方法被调用之前都调用MyLog中的before方法 -->
-
<aop:after method="after" pointcut-ref="log"/>
-
<!--在log包下面所有的类的所有方法被调用之前都调用MyLog中的after方法 -->
-
</aop:aspect>
-
-
</aop:config>
-
-
</beans>
spring-mvc配置文件:
spring mvc配置文件只负责扫描contrller的组件
-
xml version="1.0" encoding="UTF-8"
-
<beans xmlns="http://www.springframework.org/schema/beans"
-
xmlns:xsi= "http://www.w3.org/2001/XMLSchema-instance" xmlns:p= "http://www.springframework.org/schema/p"
-
xmlns:context= "http://www.springframework.org/schema/context"
-
xmlns:mvc= "http://www.springframework.org/schema/mvc" xmlns:tx= "http://www.springframework.org/schema/tx"
-
xmlns:aop= "http://www.springframework.org/schema/aop"
-
xsi:schemaLocation= "http://www.springframework.org/schema/beans
-
http://www.springframework.org/schema/beans/spring-beans-4.0.xsd
-
http://www.springframework.org/schema/aop
-
http://www.springframework.org/schema/aop/spring-aop-4.0.xsd
-
http://www.springframework.org/schema/context
-
http://www.springframework.org/schema/context/spring-context-4.0.xsd
-
http://www.springframework.org/schema/tx
-
http://www.springframework.org/schema/tx/spring-tx-4.0.xsd
-
http://www.springframework.org/schema/cache http://www.springframework.org/schema/cache/spring-cache-4.0.xsd">
-
-
-
-
<!-- 自动扫描该包,使SpringMVC认为包下用了@controller注解的类是控制器 -->
-
<context:component-scan base-package="cn.edu.neu.controller" />
-
</beans>
核心结论:就是需要生成代理的类一定不要被重复覆盖加载(Spring bean的加载支持覆盖),否则就会aop不起作用!
补充:
你通过配置方案1或者方案2之后,你在eclipse中启动tomcat可能会发现还是加载两次!!!这个问题坑了我一上午,记录一下自己的心得吧!
得到下面结论的运行环境是:
1:Tomcat部署目录默认的webapps,而且webapps中部署了一个该验证的项目。
2:eclipse版本:Version: Mars.1 Release (4.5.1),tomcat版本:apache-tomcat-7.0.53-windows-x64
结论先行:
1:从新解压一个全新的tomcat,然后将项目放到webapps中启动发现只会加载一次,这是就可以确定原因了就是原来tomcat或eclipse的问题!接下来看如下分析:
2:只要你的tomcat配置过eclipse的话,当你使用eclipse启动tomcat之后,会在tomcat的server.xml中生成如下代码:
<Context docBase="C:\install\tmp\apache-tomcat-7.0.53-windows-x641\apache-tomcat-7.0.53\webapps\springaop" path="/neuweb" reloadable="true" source="org.eclipse.jst.jee.server:springaop"/>
从此之后无论你是使用eclipse启动tomcat还是bin/startup.bat启动tomcat都会加载两次bean!(Context docBase只要给项目起别名了的话就会加载两次,但是如果当path的名字和docBase的最后的名字一样的话就不会触发加载两次了,一样的话其实就是起了一个和原来名字一样的别名与没起别名是一样的。)
即如下不如加载两次:
<Context docBase="C:\install\tmp\apache-tomcat-7.0.53-windows-x641\apache-tomcat-7.0.53\webapps\springaop" path="/springaop" reloadable="true" source="org.eclipse.jst.jee.server:springaop"/>所以到此就可以确定原因了:就是因为项目有别名访问导致最终实现两次加载!
解决办法:删除Context代码之后,使用tomcat脚本启动tomcat,这时候bean就会加载一次!(如果使用eclipse启动tomcat的话还是会生成context,还是加载两次)
context docbase作用:就是你给的项目起一个访问的别名,例如:你有一个叫appweb的项目,这时候就可以使用localhost:8080/appweb访问该项目了,但是如果你还想使用localhost:8080/website路径访问appweb的话,就需要使用context docbase配置。具体配置不细说了,自行找资料学习!
本文转载:https://blog.csdn.net/dax1n/article/details/77131548


 271
271


 被折叠的 条评论
为什么被折叠?
被折叠的 条评论
为什么被折叠?
 到【灌水乐园】发言


