


本文是我们学院课程的一部分,标题为Redis NoSQL键值存储 。
这是Redis的速成班。 您将学习如何安装Redis并启动服务器。 此外,您将在Redis命令行中乱七八糟。 接下来是更高级的主题,例如复制,分片和集群,同时还介绍了Redis与Spring Data的集成。 在这里查看 !
目录
1.简介
创建Redis是为了解决实际软件系统的实际问题。 到目前为止,我们已经探索了非常丰富的Redis功能集,但实际上并没有在实际的应用程序中使用它们。 为了填补这一空白,本教程的最后一部分专门介绍了此主题。 我们将构建一个使用Redis和出色的Spring Data Redis ( http://projects.spring.io/spring-data-redis/ )项目以及Spring Framework ( http://projects.spring.io )的简单Java应用程序。 / spring-framework / ),请参阅Spring项目组合( http://spring.io/ )。 撰写本文时, Spring Data Redis和Spring Framework的最新发布版本分别为1.2.0和4.0.2 。
在深入探讨细节之前,值得一提的是,Redis支持各种应用程序框架和编程语言。 客户端的完整列表可在此处找到: http : //redis.io/clients 。
本教程的其余部分假定读者能够使用Java进行编程,并且对Spring Framework ( http://projects.spring.io/spring-framework/ )具有基本的了解。
2.先决条件
Java开发人员的常用工具集包括JDK(Java开发工具包)和诸如Eclipse或Intellij IDEA之类的IDE,以促进应用程序开发过程。 我们将使用的最新JDK版本是1.7_51 ,可以从http://www.oracle.com/technetwork/java/javase/downloads/index.html下载。
IDE的选择是Eclipse ,它的最新版本是4.3.2 ,可以从https://www.eclipse.org/downloads/下载( 适用于Java开发人员的 Eclipse IDE,适用于Java EE开发人员的Eclipse IDE或Spring Tool Suite版本很好)。
3.选择Redis Java客户端
有几种Java客户端可用于从Java应用程序访问Redis( Spring Data Redis也支持下面列出的所有客户端):
- 杰迪斯: https : //github.com/xetorthio/jedis
- JRedis: https : //github.com/alphazero/jredis
- 生菜: https : //github.com/wg/lettuce
从功能的角度来看,它们都很相似,但是Jedis已获得越来越多的普及并被广泛使用。 话虽如此, Jedis也是我们应用程序的选择。
4. Java应用程序依赖性和Eclipse
我们将要构建的项目将介绍到目前为止已经讨论过的所有重要Redis功能,但这些功能来自应用程序开发人员。 我们将从一个基本示例开始,假设有一个独立的Redis实例并在某个地方运行(让我们将其称为redis-host )。 大多数方案将以一个小的JUnit ( http://junit.org/ )测试片段的形式呈现。
Java世界中事实上的构建和依赖性管理工具仍然是Apache Maven ( http://maven.apache.org/ ),我们将使用的版本是3.1.1,可以从http://maven.apache下载。 org / docs / 3.1.1 / release-notes.html 。 实际上,我们不会使用太多的Apache Maven来让Eclipse代表我们完成这项工作,但是我们将研究基本的依赖项描述文件,该文件通常称为pom.xml 。
<project
    xmlns="http://maven.apache.org/POM/4.0.0"
    xmlns:xsi="http://www.w3.org/2001/XMLSchema-instance"
    xsi:schemaLocation="
        http://maven.apache.org/POM/4.0.0
        http://maven.apache.org/xsd/maven-4.0.0.xsd">
    <modelVersion>4.0.0</modelVersion>

    <groupId>com.javacodegeeks</groupId>
    <artifactId>redis</artifactId>
    <version>0.0.1-SNAPSHOT</version>
    <packaging>jar</packaging>

    <properties>
        <project.build.sourceEncoding>UTF-8</project.build.sourceEncoding>
        <spring.version>4.0.2.RELEASE</spring.version>
    </properties>

    <dependencies>
        <dependency>
            <groupId>org.springframework.data</groupId>
            <artifactId>spring-data-redis</artifactId>
            <version>1.2.0.RELEASE</version>
        </dependency>

        <dependency>
            <groupId>redis.clients</groupId>
            <artifactId>jedis</artifactId>
            <version>2.4.1</version>
        </dependency>

        <dependency>
            <groupId>org.springframework</groupId>
            <artifactId>spring-core</artifactId>
            <version>${spring.version}</version>
        </dependency>

        <dependency>
            <groupId>org.springframework</groupId>
            <artifactId>spring-tx</artifactId>
            <version>${spring.version}</version>
        </dependency>

        <dependency>
            <groupId>org.springframework</groupId>
            <artifactId>spring-context</artifactId>
            <version>${spring.version}</version>
        </dependency>

        <dependency>
            <groupId>ch.qos.logback</groupId>
            <artifactId>logback-classic</artifactId>
            <version>1.0.13</version>
        </dependency>

        <dependency>
            <groupId>org.springframework</groupId>
            <artifactId>spring-test</artifactId>
            <version>${spring.version}</version>
            <scope>test</scope>
        </dependency>

        <dependency>
            <groupId>org.hamcrest</groupId>
            <artifactId>hamcrest-all</artifactId>
            <version>1.3</version>
            <scope>test</scope>
        </dependency>

        <dependency>
              <groupId>com.jayway.awaitility</groupId>
              <artifactId>awaitility</artifactId>
              <version>1.5.0</version>
              <scope>test</scope>
        </dependency>

        <dependency>
            <groupId>junit</groupId>
            <artifactId>junit</artifactId>
            <version>4.11</version>
            <scope>test</scope>
        </dependency>
    </dependencies>

    <build>
        <plugins>
            <plugin>
                <groupId>org.apache.maven.plugins</groupId>
                <artifactId>maven-compiler-plugin</artifactId>
                <configuration>
                    <source>1.7</source>
                    <target>1.7</target>
                </configuration>
            </plugin>
        </plugins>
    </build>
</project> 如果您是经验丰富的Java开发人员,那么pom.xml文件应该非常熟悉。 但是对于新手来说,一些评论可能会有所帮助。 基本上,我们声明名为com.javacodegeeks.redis的项目取决于:
- 杰迪斯(
redis.clients.jedis) - Spring Data Redis(
org.springframework.data.spring-data-redis) - Spring框架(
org.springframework.spring-core,org.springframework.spring-context,org.springframework.spring-tx,org.springframework.spring-test) - JUnit和随附的测试脚手架(
junit.junit,org.hamcrest.hamcrest-all,com.jayway.awaitility.awaitility)
至此,我们可以使用Existing Maven Project功能的Import(菜单文件-> Import…)将pom.xml导入Eclipse 。
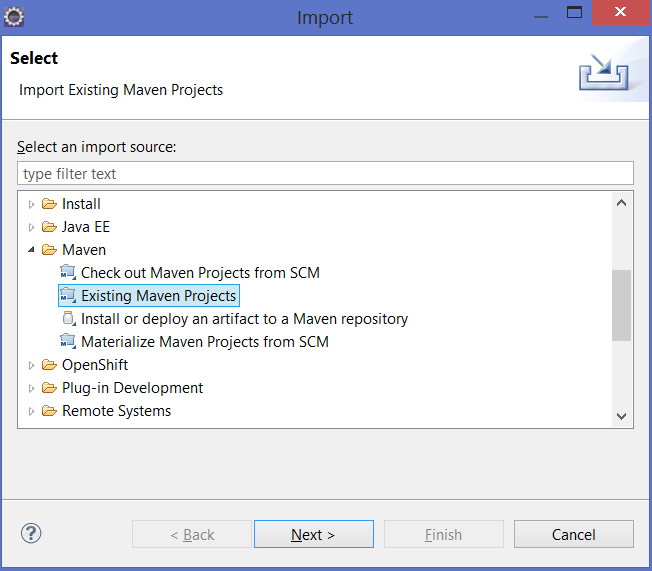
图1:将现有的Maven项目导入Eclipse
导入完成后,名为com.javacodegeeks.redis的项目(或只是redis ,具体取决于您的导入设置)应出现在Eclipse Project Explorer视图中。
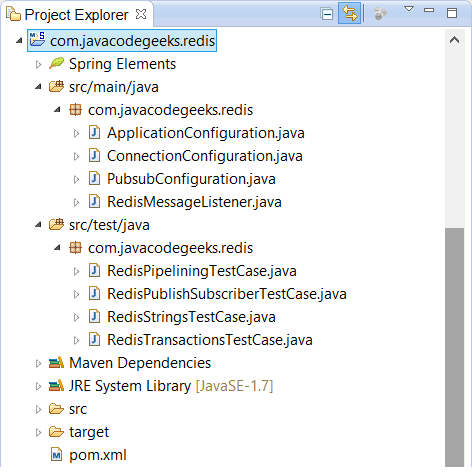
图2. Eclipse Project视图中的com.javacodegeeks.redis
5.在Spring数据Redis上配置独立Redis
Jedis的Redis配置从定义JedisConnectionFactory开始。 默认情况下,Jedis使用连接池( http://en.wikipedia.org/wiki/Connection_pool ),以便每次都不创建到Redis服务器的连接,而是从可用连接池中借用它们。 总的来说,这被认为是一种好的做法,因为创建网络连接的过程是一个相对昂贵的操作。
让我们将连接池和连接工厂定义为单独的Spring配置bean,以便可以由不同的应用程序配置独立地导入它。
package com.javacodegeeks.redis;

import org.springframework.context.annotation.Bean;
import org.springframework.context.annotation.Configuration;
import org.springframework.data.redis.connection.jedis.JedisConnectionFactory;

import redis.clients.jedis.JedisPoolConfig;
import redis.clients.jedis.Protocol;

@Configuration
public class ConnectionConfiguration  {
    @Bean
    public JedisPoolConfig poolConfig() {
        final JedisPoolConfig jedisPoolConfig =  new JedisPoolConfig();
        jedisPoolConfig.setTestOnBorrow( true );
        jedisPoolConfig.setMaxTotal( 10 );
        return jedisPoolConfig;
    }

    @Bean
    public JedisConnectionFactory connectionFactory() {
        final JedisConnectionFactory connectionFactory =
            new JedisConnectionFactory( poolConfig() );
        connectionFactory.setHostName( "redis-host" );
        connectionFactory.setDatabase( Protocol.DEFAULT_DATABASE );
        connectionFactory.setPort( Protocol.DEFAULT_PORT );
        return connectionFactory;
    }
} 在此代码段中,我们将连接工厂配置为在具有最多10个连接池的redis-host上运行的Redis实例。 test on borrow设置实际上确保从池借用的连接仍然有效并且可以使用(否则将重新创建连接)。
6.配置与分片(分区)Redis的连接
在第4部分 Redis Sharding中 ,我们讨论了客户端分区。 实际上,Jedis提供了此功能,但不幸的是Spring Data Redis尚不支持此功能。
7.配置与Redis群集的连接
在第5部分“ Redis群集”中 ,我们发现了Redis的群集功能,并提到客户端应该支持和识别Redis协议中的更改,以便向正确的节点发出命令。 Jedis已经提供了对Redis群集的支持,但是不幸的是Spring Data Redis尚不支持此功能。
8.使用Spring Data Redis访问Redis
Spring Data Redis在不同的Redis客户端上提供一致而简洁的编程抽象(请参阅选择Redis Java客户端)。 这种抽象的核心是模板的概念:最简单的方法提供对所需功能的访问,而无需花费大量时间编写样板代码。 如果是Redis,则为RedisTemplate 。
从本教程的前面的部分中,我们知道Redis支持多种原始数据类型:字符串和数字。 但是Java类型系统比这要丰富得多,这就是为什么RedisTemplate要求键的类型和值的类型(以及这些类型的序列化器)进行操作的原因。 我们将从一个简单的示例开始,在该示例中,键和值只是字符串(实际上, Spring Data Redis已经包含了一个名为StringRedisTemplate的类,但尽管如此,让我们看一下一般概念)。
package com.javacodegeeks.redis;

import org.springframework.beans.factory.annotation.Autowired;
import org.springframework.context.annotation.Bean;
import org.springframework.context.annotation.Configuration;
import org.springframework.context.annotation.Import;
import org.springframework.data.redis.connection.jedis.JedisConnectionFactory;
import org.springframework.data.redis.core.RedisTemplate;
import org.springframework.data.redis.serializer.StringRedisSerializer;

@Configuration
@Import( value = ConnectionConfiguration.class )
public class ApplicationConfiguration {
    @Bean @Autowired
    public RedisTemplate< String, String > redisTemplate(
            final JedisConnectionFactory connectionFactory ) {
        final RedisTemplate< String, String > template =
            new RedisTemplate< String, String >();
        template.setConnectionFactory( connectionFactory );
        template.setKeySerializer( new StringRedisSerializer() );
        template.setHashValueSerializer( new StringRedisSerializer() );
        template.setHashKeySerializer( new StringRedisSerializer() );
        template.setValueSerializer( new StringRedisSerializer() );
        template.setStringSerializer( new StringRedisSerializer() );
        return template;
    }
}
这样,我们就可以编写我们的第一个测试了。 我们将要创建的所有测试用例的容器是一个名为RedisStringsTestCase的类,该类大量使用Spring Test脚手架提供的测试功能。
package com.javacodegeeks.redis;

import static org.hamcrest.Matchers.equalTo;
import static org.junit.Assert.assertThat;

import org.junit.runner.RunWith;
import org.springframework.beans.factory.annotation.Autowired;
import org.springframework.data.redis.core.RedisTemplate;
import org.springframework.test.context.ContextConfiguration;
import org.springframework.test.context.junit4.SpringJUnit4ClassRunner;

@RunWith( SpringJUnit4ClassRunner.class )
@ContextConfiguration( classes = ApplicationConfiguration.class )
public class RedisStringsTestCase {
    @Autowired private RedisTemplate< String, String > template;

    // Out tests are going to be there
} 通常,对于Redis命令的每种类别(请参阅第2部分 , Redis命令–使用Redis命令行 ), RedisTemplate具有从“ ops ”(opsForValue,opsForList,opsForHash等)开始的façade方法,该方法从字面上返回一对一的一种类别特定命令到Java方法调用的映射。 第一个测试使用SET命令存储一些键/值,并立即使用GET命令来验证它是否正确存储。
@Test
public void testSetAndGet() {
    template.opsForValue().set( "mykey", "myvalue" );
    assertThat( template.opsForValue().get( "mykey"), equalTo( "myvalue" ) );
} 为了确保测试不会失败,我们可以使用redis-cli工具并连接到redis-host实例来检查mykey值是否为“ myvalue ”。
图3.验证mykey值是否确实存储在redis-host实例上
在转到下一个测试用例之前,需要考虑一个问题:上一个测试完成执行后, mykey将保留在Redis中,直到有人将其删除为止。 这种行为可能会导致其他测试用例失败,通常被认为是不良做法。 最好使用干净的数据库开始每个测试,实际上我们将使它像这样工作。 清除当前Redis数据库的命令是FLUSHDB 。 它不是直接由RedisTemplate公开的,但是可以通过使用execute()方法并在基础RedisConnection上调用flushDb()来轻松访问和触发。
@Before
public void setUp() {
    template.execute( new RedisCallback< Void >() {
        @Override
        public Void doInRedis( RedisConnection connection ) throws DataAccessException {
            connection.flushDb();
            return null;
        }
    } );
} 我们将要探索的下一个操作是INCREMENT命令,该命令演示了字符串和包含数字的字符串之间的透明操作是如何进行的。
@Test
public void testSetAndIncrementAndGet() {
    template.opsForValue().set( "mykey", "10" );
    template.opsForValue().increment( "mykey", 5 );
    assertThat( template.opsForValue().get( "mykey"), equalTo( "15" ) );
}
足够简单,让我们进入更复杂的数据结构:列表,集合和排序集合。 第一个测试用例创建一个值列表“ a ”,“ b ”,“ c ”,“ d ”(使用RPUSH命令)。 然后它检查列表(大小LLEN命令),请求由索引(该列表的最后一个元素LINDEX命令),最后从列表(弹出所述第一元件LPOP命令)。
@Test
public void testPushToListAndGetElementByIndexAndPopFirstElement() {
    template.opsForList().rightPushAll( "mykey", "a", "b", "c", "d" );
    assertThat( template.opsForList().size( "mykey" ), equalTo( 4L ) );
    assertThat( template.opsForList().index( "mykey", 3 ), equalTo( "d" ) );
    assertThat( template.opsForList().leftPop( "mykey" ), equalTo( "a" ) );
    assertThat( template.opsForList().size( "mykey"), equalTo( 3L ) );
}
该代码看起来非常紧凑且易读。 让我们从列表转到集,然后下一个测试用例创建一组值“ a ”,“ b ”,“ c ”,“ d ”(使用SADD命令)。 然后,它检查集合的大小(使用SCARD命令),并询问“ c ”和“ e ”是否是该集合的成员(使用SISMEMBER命令)。
@Test
public void testAddToSetAndCheckElementExists() {
    template.opsForSet().add( "mykey", "a", "b", "c", "d" );
    assertThat( template.opsForSet().size( "mykey" ), equalTo( 4L ) );
    assertThat( template.opsForSet().isMember( "mykey", "c" ), equalTo( true ) );
    assertThat( template.opsForSet().isMember( "mykey", "e" ), equalTo( false ) );
}
组示出了全功率向上在帧间的一组操作:交叉点( SINTER命令),接头( SUNION命令)和差( SDIFF命令)。 下面的测试案例通过将这些操作应用于两组来演示该操作。
@Test
public void testIntersetOperations() {
    template.opsForSet().add( "mykey1", "a", "b", "c", "d" );
    template.opsForSet().add( "mykey2", "c", "d", "e", "f" );

    assertThat( template.opsForSet().intersect( "mykey1", "mykey2" ),
         equalTo( set( "c", "d" ) ) );

    assertThat( template.opsForSet().union( "mykey1", "mykey2" ),
        equalTo( set( "a", "b", "c", "d",  "e", "f" ) ) );

    assertThat( template.opsForSet().difference( "mykey1", "mykey2" ),
        equalTo( set( "a", "b" ) ) );
} 为了完成数据收集类型,我们将介绍Spring Data Redis称为ZSets的排序集。 下面的测试用例创建一个排序集( ZADD命令),然后要求Redis返回按分数从高到低排序的所有成员(带有WITHSCORE选项的ZREVRANGEBYSCORE命令)。
@Test
public void testAddToSortedSetAndCheckElementsAreSortedByScore() {
    template.opsForZSet().add( "mykey", "a", 6.15d );
    template.opsForZSet().add( "mykey", "b", 9.95d );
    template.opsForZSet().add( "mykey", "c", 8.45d );

    assertThat( template.opsForZSet().reverseRangeByScoreWithScores( "mykey", 0d, 10d ),
        equalTo(
           set(
                ( TypedTuple< String > )new DefaultTypedTuple< String >( "b", 9.95d ),
                ( TypedTuple< String > )new DefaultTypedTuple< String >( "a", 6.15d ),
                ( TypedTuple< String > )new DefaultTypedTuple< String >( "c", 8.45d )
           )
        )
     );
}
由于需要进行通用类型转换,因此代码有点冗长,但通常也很简单且可读性强。
最后,我们将把注意力转移到哈希上。 Redis哈希可以被认为是Java中的数据对象:属性(或字段)及其值的容器。 下一个测试用例(使用HSET命令)创建具有两个属性(或字段),“ prop1 ”和“ prop2 ”的哈希 。 然后,它验证所有属性及其值是否正确存储(使用HGETALL命令),从哈希中删除所有属性(字段)(使用HDEL命令),并检查它们是否确实被删除(使用HGET命令)。
@Test
public void testHashOperations() {
    template.opsForHash().put( "mykey", "prop1", "value1"  );
    template.opsForHash().put( "mykey", "prop2", "value2" );

    assertThat( template.opsForHash().entries( "mykey" ),
        equalTo( map( "prop1", "value1", "prop2", "value2" ) ) );

    assertThat( template.opsForHash().get( "mykey", "prop1" ),
        equalTo( ( Object )"value1" ) );

    template.opsForHash().delete( "mykey", "prop1", "prop2" );
    assertThat( template.opsForHash().get( "mykey", "prop1" ),
        equalTo( null ) );
}在本节中,我们介绍了Spring Data Redis的一些基础知识,并很好地理解了Redis命令如何映射到其API。 我们开发的测试用例的数量只是瞥了一眼丰富的Spring Data Redis功能集。 在接下来的三个部分中,我们将研究高级API模式:事务,管道和发布/订阅。
9.使用Spring Data Redis进行事务
尽管Redis交易支持在一定程度上受到限制,但是在需要时它仍然是一个非常有用的功能。 为了展示Spring Data Redis如何支持Redis事务语义,我们将创建一个测试用例:
- 为两个键分配一些值:
mykey1(SET命令)和mykey2(SADD命令) - 验证成员“ a ”不在
mykey2集中(SISMEMBER命令) - 开始监视密钥
mykey1(WATCH命令) - 启动事务(
MULTI命令) - 递增
mykey1(INCREMENT命令) - 将新成员“ b ”添加到集合
mykey2(SADD命令) - 通过发出
EXEC命令来完成事务
@Test
public void testTransaction() {
    template.opsForValue().set( "mykey1", "10" );

    template.opsForSet().add( "mykey2", "a" );
    assertThat( template.opsForSet().isMember( "mykey2", "b"), equalTo( false ) );

    template.execute( new SessionCallback< List< Object > >() {
        @SuppressWarnings("unchecked")
        @Override
        public< K, V > List<Object> execute( final RedisOperations< K, V > operations )
                throws DataAccessException {

            operations.watch( ( K )"mykey1" );
            operations.multi();

            operations.opsForValue().increment( ( K )"mykey1", 5 );
            operations.opsForSet().add( ( K )"mykey2", ( V )"b" );

            return operations.exec();
        }
    } );

    assertThat( template.opsForValue().get( "mykey1"), equalTo( "15" ) );
    assertThat( template.opsForSet().isMember( "mykey2", "b"), equalTo( true ) );
}
但是,我们忽略了template.execute()方法调用的返回值,它返回每个命令的结果。 在我们的测试案例中, INCREMENT的结果为15 , SADD的结果为1 。
10.使用Spring Data Redis进行流水线
我们大部分时间访问Redis的方式是单个命令/响应序列:为了发送新命令,客户端应等待Redis服务器返回上一个命令的结果。 但是,有一种方法可以将多个命令发送到服务器,而无需等待任何响应,最后一步即可读取所有响应。 这种技术称为pipelining 。
Redis从很早的发行版开始就支持流水线化,因此无论您运行的是哪个版本,都可以在Redis中使用流水线化(有关更多详细信息,请参见http://redis.io/topics/pipelining )。
流水线可通过减少网络延迟来显着提高应用程序的性能。 但是有一个陷阱:当任何客户端使用流水线技术发送命令时,服务器将被迫将响应排队在内存中。 如果需要通过管道传递大量命令,则最好将这些命令发送到给定的合理数量(以便将它们拆分为多个管道)。 性能将几乎相同,但使用的额外内存将受到限制。
以下测试案例演示了如何使用Spring Data Redis进行流水线操作。 我们将使用流水线发送100条命令,并通过将计数器的值与预期值进行比较来验证是否已发送并处理了所有命令。
@Test
public void testPipelining() {
    template.opsForValue().set( "mykey1", "10" );

    template.executePipelined( new RedisCallback< Object >() {
        @Override
        public Object doInRedis(RedisConnection connection) throws DataAccessException {
            for( int i = 0; i < 100; ++i ) {
                template.opsForValue().increment( "mykey1", 1 );
            }
            return null;
        }
    } );

    assertThat( template.opsForValue().get( "mykey1"), equalTo( "110" ) );
} 与Redis事务测试用例一样,我们忽略了template.executePipelined()方法调用的返回值,但它返回每个命令的结果(总共100个结果)。 另外,如果您想知道为什么我们从RedisCallback返回null ,则是有原因的:此返回值将被响应中的实际值(收到时)覆盖,因此该回调不允许返回非null值(请参阅请访问http://docs.spring.io/spring-data/data-redis/docs/1.2.0.RELEASE/reference/html/redis.html#pipeline了解更多信息)。
11.使用Spring Data Redis发布/订阅
Redis支持发布/订阅消息传递范例, Spring Data Redis也提供对此功能的全面支持。
从本质上讲,发布/订阅消息传递至少涉及两个参与者:发布消息的发布者和侦听发布者的消息的订阅者(通常是多对多关系,但我们已将其简化为单个发布者/订阅者模型)。
为此开发一个健壮的测试用例可能会有些棘手。 发布是很容易的部分,但是在特定渠道(或模式)上侦听消息需要做一些工作。 我们首先定义称为RedisMessageListener的订户类。 它不会做很多,但会计算到目前为止已收到的所有消息。
package com.javacodegeeks.redis;

import java.util.concurrent.atomic.AtomicInteger;

import org.springframework.data.redis.connection.Message;
import org.springframework.data.redis.connection.MessageListener;

public class RedisMessageListener implements MessageListener {
    private AtomicInteger count = new AtomicInteger( 0 );

    @Override
    public void onMessage(Message message, byte[] pattern) {
        count.incrementAndGet();
    }

    public int getCount() {
        return count.get();
    }
} 接下来,我们应该使用RedisMessageListener和RedisMessageListenerContainer其他bean扩展配置。 后者的作用非常重要:它将听众和他们正在收听的频道粘合在一起。 PubsubConfiguration我们开始所需的最低配置( PubsubConfiguration )(请注意,我们正在导入之前创建的ApplicationConfiguration )。
package com.javacodegeeks.redis;

import org.springframework.beans.factory.annotation.Autowired;
import org.springframework.context.annotation.Bean;
import org.springframework.context.annotation.Configuration;
import org.springframework.context.annotation.Import;
import org.springframework.data.redis.connection.MessageListener;
import org.springframework.data.redis.connection.jedis.JedisConnectionFactory;
import org.springframework.data.redis.listener.ChannelTopic;
import org.springframework.data.redis.listener.RedisMessageListenerContainer;

@Configuration
@Import( value = ApplicationConfiguration.class )
public class PubsubConfiguration  {
    @Bean @Autowired
    public RedisMessageListenerContainer container(
            final JedisConnectionFactory connectionFactory ) {

        final RedisMessageListenerContainer container =
            new RedisMessageListenerContainer();

        container.setConnectionFactory( connectionFactory );
        container.addMessageListener( listener(), new ChannelTopic( "test-channel" ) );

        return container;
    }

    @Bean
    public MessageListener listener() {
        return new RedisMessageListener();
    }
}
为了提供一些背景信息,我们将侦听器附加到名为“ test-channel ” 的通道 ,这就是我们要向其发布消息的通道。
发布/订阅消息传递通信本质上是异步的,这是在开发这种功能的测试用例时的又一个复杂问题。 订户将不会立即接收消息,但是会有些延迟。 如果要连接到本地计算机上运行的Redis服务器,则可能需要花费毫秒,但是如果要访问云中的某个实例,则可能需要一段时间。 一种可能的处理方法是引入某种合理的延迟,以便给订户一些时间来接收所有消息(这也是我们在测试案例中使用的技巧)。
package com.javacodegeeks.redis;

import static com.jayway.awaitility.Awaitility.await;
import static java.util.concurrent.TimeUnit.SECONDS;
import static org.hamcrest.Matchers.equalTo;
import static org.junit.Assert.assertThat;


import java.util.concurrent.Callable;

import org.junit.Test;
import org.junit.runner.RunWith;
import org.springframework.beans.factory.annotation.Autowired;
import org.springframework.data.redis.core.RedisTemplate;
import org.springframework.test.context.ContextConfiguration;
import org.springframework.test.context.junit4.SpringJUnit4ClassRunner;

@RunWith( SpringJUnit4ClassRunner.class )
@ContextConfiguration( classes = PubsubConfiguration.class )
public class RedisPublishSubscriberTestCase {
    @Autowired private RedisTemplate< String, String > template;
    @Autowired private RedisMessageListener listener;

    @Test
    public void testPublishSubscribe() {
        assertThat( listener.getCount(), equalTo( 0 ) );

        template.convertAndSend( "test-channel", "Test Message 1!" );
        template.convertAndSend( "test-channel", "Test Message 2!" );
        template.convertAndSend( "test-channel", "Test Message 3!" );

        await().atMost( 1, SECONDS ).until(
            new Callable< Integer >() {
                @Override
                public Integer call() throws Exception {
                    return listener.getCount();
                }
            },
            equalTo( 3 )
        );
    }
} 这个新的测试案例使用我们的PubsubConfiguration类实例化Spring测试上下文。 在测试用例本身中,我们将三个消息发布到Redis服务器上的“ test-channel ” 通道 。 然后,我们给消息侦听器一些时间(但不超过一秒),以消耗通道上发布的所有消息。 之后,我们期望侦听器收到所有3条消息,这就是我们最后要验证的内容。
12.结论
Redis的发展非常Swift。 跟上它的所有新功能和命令非常困难。 这样,您可能会发现Spring Data Redis尚不支持最新Redis发行版中提供的某些最新功能(甚至Java客户端也需要一些时间来添加对它的支持)。 一个很好的例子是Redis Cluster, Spring Data Redis尚不支持它。
这是Redis教程的最后一部分,但这只是通往Redis世界的开始。 如果您想关注Redis的最新发展,可以参考以下两个资源:
- http://antirez.com/:Redis的创建者Salvatore Sanfilippo的博客
- http://aphyr.com/posts/283-call-me-maybe-redis :关于Redis群集可用性的非常有用的见解
翻译自: https://www.javacodegeeks.com/2015/09/spring-data-and-redis.html


 7768
7768

 被折叠的 条评论
为什么被折叠?
被折叠的 条评论
为什么被折叠?
 到【灌水乐园】发言


