


一、Yii框架的路由配置
首先,取消index.php
这两种方法都是在自动添加index.php
方法一:使用.htaccess
添加.htaccess文件 与index.php同级
RewriteEngine on
# if a directory or a file exists, use the request directly
RewriteCond %{REQUEST_FILENAME} !-f
RewriteCond %{REQUEST_FILENAME} !-d
# otherwise forward the request to index.php
RewriteRule . index.php
方法二:vhost
<VirtualHost *:80>
    ServerName public.oa.com
    DocumentRoot "D:\phpStudy\PHPTutorial\WWW\OA\frontend\web"
    <Directory "D:\phpStudy\PHPTutorial\WWW\OA\frontend\web">
      # use mod_rewrite for pretty URL support
      RewriteEngine on
      # If a directory or a file exists, use the request directly
      RewriteCond %{REQUEST_FILENAME} !-f
      RewriteCond %{REQUEST_FILENAME} !-d
      # Otherwise forward the request to index.php
      RewriteRule . index.php
      # use index.php as index file
      DirectoryIndex index.php
      # ...other settings...
      # Apache 2.4
      Require all granted
      ## Apache 2.2
      # Order allow,deny
      # Allow from all
    </Directory>
</VirtualHost>
Yii配置
'urlManager' => [
  //美化路由
  'enablePrettyUrl' => true,
  //不启用严格解析
  'enableStrictParsing' => false,
  //index.php是否显示
  'showScriptName' => false,
  //伪静态化 seo
  'suffix' => '.html',
  //美化规则
  'rules' => [
    //第一条:文章详细页
    '<controller:\w+>/<id:\d+>'=>'<controller>/detail',
    //第二条:文章列表页
    'post'=>'post/index',
  ],
],
二、ThinkPHP框架路由的定义与使用
ThinkPHP框架具体壮大的路由界说功能,根基上能知足网站路由的所有要求,包罗法则路由、正则路由、静态路由,还对路由的闭包撑持。下面介绍ThinkPHP框架路由的界说与利用。
路由的界说
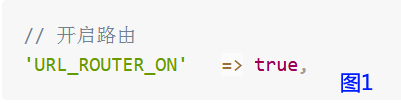
1、启用路由。ThinkPHP路由设置装备摆设生效需要知足三个前提:
(1)在设置装备摆设文件中开启路由功能,如下图1;
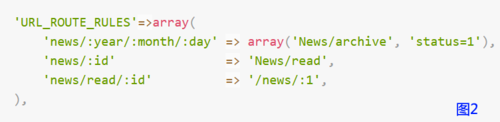
(2)URL撑持PATH_INFO模式或者兼容URL模式;
(3)设置装备摆设文件中利用URL_ROUTE_RULES参数进行设置装备摆设,如下图2。
2、路由界说格局。界说的格局有两种:
(1) ‘路由表达式’=>'路由地址和传入参数;
(2)array(‘路由表达式’,‘路由地址’,‘传入参数’)。

3、路由参数设置。这些参数的感化是限拟定义的路由法则的生效前提,本家儿要有三种感化,别离是限制URL后缀、限制请求类型、自界说检测。

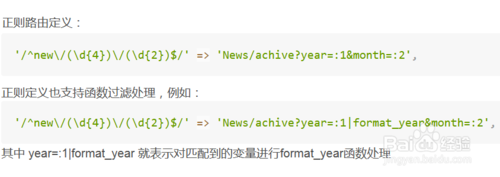
4、正则路由,必需以“/”开首,表达式不单撑持正则的界说,并且还撑持函数过滤处置。
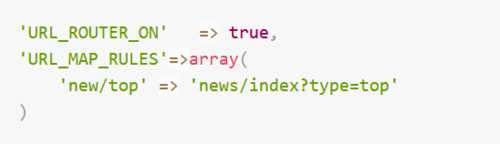
5、静态路由,表达式中路由的界说不包含动态参数,执行效率高,但感化有限。静态路由的格局为:[节制器/操作?]参数1=值1&参数2=值2。
注重:为了不影响动态路由的遍历效率,静态路由采用URL_MAP_RULES界说和动态路由区分隔来。
6、利用闭包的体例界说路由。这种体例不需要执行节制器的操作方式,如下图。

三、Laravel框架路由配置及设置技巧
Laravel框架在PHP开发中使用十分广泛,本文主要对Laravel框架中的路由设置作详细的介绍,Laravel的路由配置非常灵活,如何设置好路由对PHP应用来说也是相当关键的。
基本路由
您的应用程序的绝大多数路由将在 app/routes.php 文件中定义。Laravel 中最简单的路由由一个 URI 和一个闭包调用组成。
基本 GET 路由
Route::get('/', function(){return 'Hello World';
});
基本 POST 路由
Route::post('foo/bar', function(){return 'Hello World';
});
注册一个路由以响应所有 HTTP 方法
Route::any('foo', function(){   return 'Hello World';
});
强制一个路由必须通过 HTTPS 访问
Route::get('foo', array('https', function(){    return 'Must be over HTTPS';
}));
经常您需要根据路由产生 URLs,您可以通过使用 URL::to 方法:加粗样式
$url = URL::to('foo');
加粗样式路由参数
Route::get('user/{id}', function($id){return 'User '.$id;
});
可选的路由参数
Route::get('user/{name?}', function($name = null){return $name;
});
带默认值的可选的路由参数
Route::get('user/{name?}', function($name = 'John'){return $name;
});
带正则表达式约束的路由
Route::get('user/{name}', function($name){//})
->where('name', '[A-Za-z]+');
Route::get('user/{id}', function($id){//})
->where('id', '[0-9]+');
路由过滤器
路由过滤器提供了一种限制访问指定路由的简单的方法,这在您需要为您的站点创建需要认证区域的时候非常有用。Laravel 框架中包含了一些路由过滤器,比如 auth 过滤器、auth.basic 过滤器、guest 过滤器、以及 csrf 过滤器。它们被存放在 app/filters.php 文件中。
定义一个路由过滤器
Route::filter('old', function(){if (Input::get('age') < 200)
{return Redirect::to('home');
}
});
如果一个响应从一个路由过滤器中返回,这个响应即被认为是这个请求的响应,路由将不被执行,任何关于这个路由的 after 过滤器也将被取消执行。
为一个路由指定一个路由过滤器
Route::get('user', array('before' => 'old', function(){return 'You are over 200 years old!';
}));
为一个路由指定多个路由过滤器
Route::get('user', array('before' => 'auth|old', function(){return 'You are authenticated and over 200 years old!';
}));
指定路由过滤器参数
Route::filter('age', function($route, $request, $value){//});
Route::get('user', array('before' => 'age:200', function(){return 'Hello World';
}));
当路由过滤器接收到作为第三个参数的响应 $response:
Route::filter('log', function($route, $request, $response, $value){//});
基本路由过滤器的模式
您可能希望根据 URI 为一组路由指定过滤器。
Route::filter('admin', function(){//});
Route::when('admin/*', 'admin');
在上面的例子中,admin 过滤器将应用带所有以 admin/ 开头的路由。星号作为一个通配符,将适配到所有字符的组合。
您也可以通过指定 HTTP 方法约束模式过滤器:
Route::when('admin/*', 'admin', array('post'));
过滤器类
对于高级的过滤器,您可以使用一个类代替闭包函数。因为过滤器类是位于应用程序之外的 IoC 容器,您能够在过滤器中使用依赖注入,更易于测试。
定义一个过滤器类
class FooFilter {public function filter(){// Filter logic...}
}
注册一个基于类的过滤器
Route::filter('foo', 'FooFilter');
命名路由
命名路由在更易于在生成跳转或 URLs 时指定路由。您可以像这样为路由指定一个名字:
Route::get('user/profile', array('as' => 'profile', function(){//}));
您也可以为控制器的方法指定路由名字:
Route::get('user/profile', array('as' => 'profile', 'uses' =>
'UserController@showProfile'));
现在您在生成 URLs 或跳转的时候使用路由的名字:
$url = URL::route('profile');
$redirect = Redirect::route('profile');
您可以使用 currentRouteName 方法获取一个路由的名字:
$name = Route::currentRouteName();
路由组
有些时候您可能希望应用过滤器到一组路由。您不必要为每个路由指定过滤器,可以使用路由组:
Route::group(array('before' => 'auth'), function(){
Route::get('/', function(){// Has Auth Filter});
Route::get('user/profile', function(){// Has Auth Filter});
});
子域名路由
Laravel 路由也能够处理通配符的子域名,并且从域名中获取通配符参数:
注册子域名路由
Route::group(array('domain' => '{account}.myapp.com'), function(){
Route::get('user/{id}', function($account, $id){//});
});
路由前缀
一组路由可以通过在属性数组中使用 prefix 选项为路由组添加前缀:
为路由组添加前缀
Route::group(array('prefix' => 'admin'), function(){
Route::get('user', function(){//});
});
路由模型绑定
模型绑定提供了一个简单的方法向路由中注入模型。比如,不仅注入一个用户的 ID,您可以根据指定的 ID 注入整个用户模型实例。首先使用 Route::model 方法指定所需要的模型:
为模型绑定一个变量
Route::model('user', 'User');
然后, 定义一个包含 {user} 参数的路由:
Route::get('profile/{user}', function(User $user){//});
因为我们已经绑定 {user} 参数到 User 模型,一个 User 实例将被注入到路由中。因此,比如一个 profile/1 的请求将注入一个 ID 为 1 的 User 实例。
注意: 如果在数据库中没有找到这个模型实例,将引发404错误。
如果您希望指定您自己定义的没有找到的行为,您可以为 model 方法传递一个闭包作为第三个参数:
Route::model('user', 'User', function(){throw new NotFoundException;
});
有时您希望使用自己的方法处理路由参数,可以使用 Route::bind 方法:
Route::bind('user', function($value, $route){return User::where('name', $value)->first();
});
引发404错误
有两种方法在路由中手动触发一个404错误。首先,您可以使用 App::abort 方法:
App::abort(404);
其次,您可以抛出一个 Symfony\Component\HttpKernel\Exception\NotFoundHttpException 的实例。
路由至控制器
Laravel 不仅允许您路由至闭包,也可以路由至控制器类,甚至允许创建 资源控制器.
四、CI框架的url路由配置
在application/config/routes.php中添加路由规则。
$route['default_controller'] ='pages/view';//默认controller
$route['(:any)'] ='pages/view/$1';
//(:num) 匹配数字
//(:any) 匹配任意字符
$route['products/([a-z]+)/(\d+)'] ="$1/id_$2"
$route['404_override'] ='errors/page_missing';//设置处理错误的路由。
1.首先说URL默认路由设置
$route['default_controller']='defaultFunction';
这个是设置的默认访问的路由,对应的访问对应的类,也就是默认的controllers,如果没有任何参数,则会访问controllers 对应的index函数
2.设置404错误页面
$route['404_oberride']='';
这里设置的是404错误页面,可以自定义,一般的默认的是对应的view中的index.html
3,上面连个都是固定的写法,下面对自定义的url路由进行解释
默认的定义为
forasp.cn/className/function/id
这样默认的路由为 调用className的controllers类,调用内部方法为function,传递第三个值为id,那在route路由中怎么实际设置呢
比如要新闻 展示 序号为100的内容,请求url为
$route['news/show/(:num)']='news/show/$1';
上面的意思是 调用controllers为news,方法为show 参数为$1 也就是序号,在 controllers里面获取参数为 举例 route为:
$route['pages/(:any)/(:any)'] = 'pages/view/$1/$2';
定义controllers里面pages为
class Pages extends CI_Controller {
	public function view($p1,$p2){
	echo $p1.$p2;
	}
}
那访问 forasp.cn/index.php/pages/1/2
则会输出 12
说一下后面参数的配置,目前有两种参数
:num 将匹配一个只包含有数字的segment(段).
:any 将匹配一个包含任何字符的segment.
这就是codeIgniter中route路由设置相关情况
五、使用Yaf框架进行URL的重写
YAF的URL重写方式主要有以下几种,可以综合使用
方式1:在配置文件中进行
;a rewrite route match request /product/*/*
routes.route_name.type="rewrite"
routes.route_name.match="/product/:name/:value"
routes.route_name.route.controller=product
routes.route_name.route.action=info

;a regex route match request /list/*/*
routes.route_name1.type="regex"
routes.route_name1.match="#^list/([^/]*)/([^/]*)#"
routes.route_name1.route.controller=Index
routes.route_name1.route.action=action
routes.route_name1.map.1=name
routes.route_name1.map.2=value

;a simple route match /**?c=controller&a=action&m=module
routes.route_name2.type="simple"
routes.route_name2.controller=c
routes.route_name2.module=m
routes.route_name2.action=a

;a simple router match /**?r=PATH_INFO
routes.route_name3.type="supervar"
routes.route_name3.varname=r

;a map route match any request to controller
routes.route_name4.type="map"
routes.route_name4.controllerPrefer=TRUE
routes.route_namer.delimiter="#!"
之后在Bootstrap.php中添加初始化函数,函数名可按自己需求取,必需以_开头才会被调用
<?php
class Bootstrap extends Yaf_Bootstrap_Abstract{
  public function _initConfig() {
    $config = Yaf_Application::app()->getConfig();
    Yaf_Registry::set("config", $config);
  }

  public function _initRoute(Yaf_Dispatcher $dispatcher) {
    $router = $dispatcher->getRouter();
    /**
     * we can add some pre-defined routes in application.ini
     */
    $router->addConfig(Yaf_Registry::get("config")->routes);
    /**
     * add a Rewrite route, then for a request uri:
     * http://***/product/list/22/foo
     * will be matched by this route, and result:
     *
     * [module] =>
     * [controller] => product
     * [action] => info
     * [method] => GET
     * [params:protected] => Array
     *   (
     *     [id] => 22
     *     [name] => foo
     *   )
     *
     */
    $route = new Yaf_Route_Rewrite(
      "/product/list/:id/:name",
      array(
        "controller" => "product",
        "action"   => "info",
      )
    );

    $router->addRoute('dummy', $route);
  }
?>
方式2:直接在程序中,以数组方式配置
以下函数是放在Bootstrap.php中
public function _initRoute(Ap_Dispatcher $dispatcher) {
  //在这里注册自己的路由协议,默认使用static路由
  $router = Ap_Dispatcher::getInstance()->getRouter();
  $routeConfig = array(
  $router = Ap_Dispatcher::getInstance()->getRouter();
  $routeConfig = array(
    "item" => array(
      "type" => "regex",
      "match" => "#^/(software|game)/(.*).html$#",
      "route" => array('action' => 'item'),
      "map" => array( 1 => 'data_type', 2 => 'docid' ),
    ),
    //正则匹配
    "category" => array(
      "type" => "regex",
      "match" => "#^/(software|game|video)/(.*)/(list_(.*).html)?$#",
      "route" => array('action' => 'list' ),
      "map" => array( 1 => 'data_type', 2 => 'cid',4 => 'page_num' ),
    ),
    //使用动态结果 :a 表示action
    "name" => array(
      "type" => "rewrite",    //Yaf_Route_Rewrite route
      "match" => "/user-list/:a/:id", //match only /user-list/开头的
      "route" => array(
        'controller' => "user", //route to user controller,
        'action'   => ":a", //使用动态的action
      ),
    ),
  );
  $router->addConfig(new Ap_Config_Simple($routeConfig));
}
方式3:

/**
* Add a rewrite route to Yaf_Router route stack
*/
Yaf_Dispatcher::getInstance()->getRouter()->addRoute("name",
  new Yaf_Route_rewrite(
    "/product/:name/:id/*", //match request uri leading "/product"
    array(
      'controller' => "product", //route to product controller,
    ),
  )
);
六 、Zend Framework中路由router及路由协议route详解
1)概述:
路由器主要负责解析一个请求并且决定什么module、controller、action被请求;它同时也定义了一种方法来实现用户自定义路由,这也使得它成为最有用的一个MVC组组件;
2)设计:
作为一个应用中的路由组件是很专业的,理所当然的路由组件是抽象的,这样允许作为开发者的我们很容易的设计出我们自定义的路由协议。 然而,默认的路由组件其实已经服务得我们很好了。记住,如果我们需要一个非标准的路由协议时候,我们就可以自定义一个自己的路由协议,而不用采用默认的路 由协议。
事实上,路由组件有两个部分:路由器(或者称路由对象《the router》)和路由协议 (或者称 路由过程《the route》)。 路由器主要负责管理和运行路由链,路由过程事实上主要负责匹配我们预先定义好的路由协议,意思就是我们只有一个路由器,但我们可以有许多路由协议。 (ps:不知道这样理解是不是有问题,原文是这样的:The router actually has two parts, the router and the route. The router is responsible for managing and running the route chain, and a route is responsible for actually matching the request against the predefined rule of the route. This means that we have one router to many routes.看到后面就会清楚一点的。)
路由组件基于两个接口:Zend_Controller_Router_Interface 和 Zend_Controller_Router_Route_Interface;同样路由组件的两个抽象类:Zend_Controller_Router_Abstact和Zend_Controller_Router_Route_Abstract分 别是实现了上面对应的两个接口,同时这两个抽象类也就提供给我们一些基本的函数来操作路由组件。如果我们需要创建我们自定义的路由器(the router)或者路由协议(the route),我们就可以分别继承上面的两个抽象类。路由的过程发生派遣过程的最开始,并且路由解析仅仅发生一次。路由协议在任何控制器动作 (controller action)被派遣之前被解析,一旦路由协议被解析后,路由器将会把解析出得到的信息传递给请求对象(Request object),这些信息包括moduel、controller、action、用户params等。然后派遣器(Dispatcher)就会按照这些 信息派遣正确的控制器动作。路由器也有两个前端控制器插件钩子,就是在我们之前提到过的routeStartup和routeShutdown,他们在路 由解析前后分别被调用。
3) 默认情况:
默认条件下,我们的路由器是使用Zend_Controller_Router_Rewrite,是基于HTTP路由的,意味着它期望一个请 求是HTTP请求并且请求对象是使用Zend_Controller_Request_Http(或者是继承它的对象),这两个默认类,在我们之前的那个 表中都有见到过。默认条件下,路由协议是使用Zend_Controller_Router_Route_Module类。
4) 使用路由:
使用路由既可以让之很复杂,同时也能让它很简单,这是归于你的应用。然而使用一个路由是很简单的,你可以创建一个路由器让它管你的路由协议,然后你可以添加你的路由协议给路由器,这样就OK了!
不同的路由协议如下所示:
Zend_Controller_Router_Route
Zend_Controller_Router_Route_Static
Zend_Controller_Router_Route_Regex
Zend_Controller_Router_Route_Hostname
Zend_Controller_Router_Route_Chain
Default Routes
其中我们使用到的最基本的路由协议类数Zend_Controller_Router_Route,它提供给们少量的控制。如果想要更精密的控 制,我们可以采用正则路由协议:Zend_Controller_Router_Route_Regex,它提供给我们可以通过PHP的正则来使用,很强 大。其他的几个路由协议类分别有不同的专业化。到此为止,首先让我们来看看路由器是如何让路由协议与之一起工作的。
在我们添加任何路由协议之前我们必须要得到一个路由器(the router)实例,我们可以通过自己创建一个新的路由器或者是通过前端控制器(Front Controller)来得到一个默认的路由器:
//我们实例化一个默认的路由器
$router = new Zend_Controller_Router_Rewrite();
//或者我们可以通过前端控制器的getRouter()方法得到一个默认的路由器实例
$router = $front->getRouter()
一旦我们有了路由器实例,我们就能通过它来添加我们自定义的一些路由协议:
$router->addRoute('myRoute',$route);
$router->addRoute('myRoute1',$route)
除此之外,我们还可以通过Zend_Config_Ini和Zend_Config_Xml对象来添加我们的路由协议:
$config = new Zend_Config_Ini('/path/to/config.ini', 'production');
$router->addConfig($config, 'routes');
其实路由器也提供给我们不同的方法来得到和设置包含在它内部的信息,一些重要的方法如下:
addDefaultRoutes() and removeDefaultRoutes()//添加或者移除默认的路由协议。
assemble()//基于给定的路由协议确定URI,这个方法通过Url视图助手(View Helper)使用提供它的链接地址。
getCurrentRoute() and getCurrentRouteName()
getRoute(), getRoutes(), hasRoute(), and removeRoute();
5)路由协议详解:
【A】Zend_Controller_Router_Route
Zend_Controlloer_Router_Route路由协议提供了我们很强的功能,同时也提供了一些简单的操作,为了能够使用该路由协议,我们必须先实例化它,然后用路由器加载它:
//创建一个路由器实例
$router = new Zend_Controller_Router_Rewrite();
//创建一个路由协议实例
$route = new Zend_Controller_Router_Route(
  'product/:ident',
  array(
    'controller' => 'products',
    'action' => 'view'
  )
);
//使用路由器装载路由协议
$router->addRoute('product', $route);
在这个例子中,我们试图匹配Url指定到一个单一的产品,就像http://domain.com/product/choclolat-bar。 为了实现这点,我们在路由协议中传递了2个变量到路由协议Zend_Controller_Router_Route的构造其中。第一个变量 (‘product/:indent’)就是匹配的路径,第二个变量(array变量)是路由到的动作控制器;其实路由协议也提供了第三个变量用于正则匹 配,我们将在第二个路由协议中见到;
路径使用一个特别的标识来告诉路由协议如何匹配到路径中的每一个段,这个标识有有两种,可以帮助我们创建我们的路由协议,如下所示:
a) :
b) *
冒号(? 指定了一个段,这个段包含一个变量用于传递到我们动作控制器中的变量,我们要设置好事先的变量名,比如在上面我们的变量名就是’ident’,因此,倘若 我们访问http://domian.com/product/chocoloate-bar将会创建一个变量名为ident并且其值是 'chocoloate-bar’的变量,我们然后就可以在我们的动作控制器ProductsController/viewAction下获取到它的 值:$this->_getParam(‘ident’);同时我们还可以在路由协议中设置ident的默认的值,即可以在路由协议类的第二个数组变量中增加一个元素(比如我们在这定义了ident默认值为unknown):
$route = new Zend_Controller_Router_Route(
  'product/:ident',
  array(
    'controller' => 'products',
    'action' => 'view',
    'ident' => 'unknown'
  )
);
星号()被用做一个通配符,意思就是在Url中它后面的所有段都将作为一个通配数据被存储。例如,如果我们有路径’path/product /:ident/’(就是路由协议中设置的第一个变量),并且我们访问的Url为http://domain.com/product /chocolate-bar/test/value1/another/value2,那么所有的在’chocolate-bar’后面的段都将被做成 变量名/值对,因此这样会给我们下面的结果:
ident = chocolate-bar
test = value1
another = value2
这种行为也就是我们平常默认使用的路由协议的行为,记住变量名/值要成对出现,否则像/test/value1/这样的将不会这种另一个变量,我们 有静态的路由协议部分,这些部分简单地被匹配来满足我们的路由协议,在我们的例子中,静态部分就是product;就像你现在看到的那样,我们的 Router_Route路由协议提供给我们极大的灵活性来控制我们的路由;然而,这就就很像正则匹配了,正则匹配使我们能够提供而外的约束力来限制我们 的路由(这里的正则匹配是使用PHP的preg引擎)。在我们的产品实例中,我们得到了用户想观看的’ident’的产品特性,即我们通过用户传递过来的 参数,通过数据库的搜索得到正确的产品信息。然而,如果我们得到的需求是系统仅仅只能接受产品ID号作为我们的产品的标识,那么我们可以使用路由协议来实 现这点:
考虑下面两中路由:
//创建路由器
$router = new Zend_Controller_Router_Rewrite();
//创建路由协议
$route = new Zend_Controller_Router_Route(
  'product/:ident',
  array(
    'controller' => 'products',
    'action' => 'view'
  ),
  array(
    // match only alpha, numbers and _-
    'ident' => '[a-zA-Z-_0-9]+'
  )
);
//让路由器装载路由协议
$router->addRoute('productident', $route);
//再定义一个路由协议
$route = new Zend_Controller_Router_Route(
  'product/:id',
  array(
    'controller' => 'products',
    'action' => 'view'
  ),
  array(
    // match only digits
    'id' => '\d+'
  )
);
//让我们的路由器再装载一个路由协议
$router->addRoute('productid', $route);
为了达到我们的需求,我们创建了2种路由协议。第一种路由协议对Zend_Controller_Router_Route的构造函数添加了第三个 变量–一个正则表达式的变量ident,这个需求就是用户提供的ident必须是字母、数字和-以及下划线组成。我们的第二个路由协议试图匹配一个产品 的ID数,我们利用\d+正则来匹配数字。通过我们增加的路由协议,如果我们现在浏览http://domain.com/product/12,这个id变量就会被设置,如果我们浏览http://domain.com/product/chocoloate-bar,那么这个ident变量就会被设置,然后我们可以在同一个动作控制中接受不同的参数来显示同样的信息!!
【B】Zend_Controller_Router_Route_Static
标准路由协议,如果我们不需要任何匹配的变量,我们可以通过使用标准路由协议来实现。这个路由协议匹配到一个静态URL并且创建一个静态的路由协议,我们仅仅需要像之前那样实例化它并把它加载到路由器中就行了:
$route = new Zend_Controller_Router_Route_Static(
  'products/rss',
  array(
    'controller' => 'feed',
    'action' => 'rss'
  )
);
$router->addRoute('rss', $route);
就像你看到那样,Router_Route_Static路由协议就是Router_Route一个非常简单的版本,在我们的例子中,http://domain.com/products/rss就会去访问FeedController和rss控制器;
【C】Zend_Controller_Router_Route_Regex
正则路由协议。到目前为止,我们之前的路由协议(Router_Route、Router_Route_Static)都很好的完成了基本的路由操作,我 们常用的也是他们,然而它们会有一些限制,这就是我们为什么要引进正则路由(Router_Route_Regex)的原因。正则路由给予我们preg正则的全部力量,但同时也使得我们的路由协议变得更加复杂了一些。即使是他们有点复杂,我还是希望你能好好掌握它,因为它比标准路由协议(Router_Route)要快一点点。
一开始,我们先对之前的产品案例改用使用正则路由:
$route = new Zend_Controller_Router_Route_Regex(
  'product/([a-zA-Z-_0-9]+)',
    array(
      'controller' => 'products',
      'action' => 'view'
  )
);
$router->addRoute('product', $route);
你可以看到,我们现在移动我们的正则到我们的path(构造函数的第一个参数)中来了,就像之前的那样,这个正则路由协议现在应该是匹配是一个数 字、字母、-和_组成的ident变量的字符提供给我们,但是,你一定会问,ident变量在哪呢?好,如果你使用了这个正则路由协议,我们可以通过变量1(one) 来获取其值,即可以在控制器里用:$this->_getParam(1)来获取,其实这里如果看过正则的都知道这就是反向引用中的\1。然而,你 一定会想为什么要定义的这么的垃圾,我们不能够记住或者弄清每一个数字代表的是什么变量(其实我刚开始看的时候也是一样的感受)。为了改变这点,正则路由 协议的构造函数提供了第3个参数来完成数字到变量名的映射:
$route = new Zend_Controller_Router_Route_Regex(
  'product/([a-zA-Z-_0-9]+)',
  array(
    'controller' => 'products',
    'action' => 'view'
  ),
  array(
    //完成数字到字符变量的映射
    1 => 'ident'
  )
);
$router->addRoute('product', $route);
这样,我们就简单的将变量1映射到了ident变量名,这样就设置了ident变量,同时你也可以在控制器里面获取到它的值。(如果你不是很了解正则,我建议你可以看下那个正则入门30分钟…)。
另外,东西总是就两面性的,连正则路由也不例外。正则路由的一个负面作用就是表现在其他zf组件如url视图助手 ($this->baseUrl())不能够解析正则路由协议成URL,围绕这点,我们可以为我们的路由协议提供一个反向重写,就像 sprintf()工作的那样:
为了达到重写的目的,我们将正则路由协议(Router_Route_Regex)的构造函数中添加第四个变量:
$route = new Zend_Controller_Router_Route_Regex(
  'product/([a-zA-Z]+)/([a-zA-Z-_0-9]+)',
  array(
    'controller' => 'products',
    'action' => 'view'
  ),
  array(
    1 => 'category'
    2 => 'ident'
  ),
  //重写路由协议
  'product/%s/%s'
);
$router->addRoute('product', $route);
那现在我们已经增加了一个反向重写(reverse rewrite),我们的路由协议能够很容易的被连接到。如果你看到上面的路由协议,我们实际上可以看作是一类参数的捕获。我们然后提供了反向重写 product/%s%s,因此路由协议能够为我们提供变量。记住,这里反向重写可以先熟悉下sprintf()这个函数。
由于我们感觉这个过程相当复杂,然我们再用一个实例来说明。
设想一下,假设我们一直在忙于我们老商城应用的重构而采用了zf框架。我们已经决定我们想让我们的产品的URl有一个好的印象针对于搜索引擎。然而 由于我们的产品已经开发完成了很久了,并且里面的url已经很多的被搜索引擎给收录了,我们不想失去这些链接,为了完成这些,我们正好可以使用正则路由的 力量。
我们老的URL格式:
http://storefront/products.php/category/{categoryID}/product/{productID}
我们新的URL的格式:
http://storefront/product/{categoryName}/{productID}-{productIdent}.html
因此,一开始,我们就想重定义我们老的请求URL到我们新的请求,我们可以通过这样做:
//我们老的url匹配的正则路由协议
$route = new Zend_Controller_Router_Route_Regex(
  'products.php/category/(\d+)/product/(\d+)',
  array(
    'controller' => 'products',
    'action' => 'old'
  ),
  array(
    1 => 'categoryID',
    2 => 'productID'
  )
);
在这里,我们将我们老的url中的category和product值分别得到后分别映射到了cateforyID和productID两个变量,并且将 这两个变量传递到我们的ProductsController/oldAction中去,因此,我们可以在我们的old动作中再次重定向到我们新的URl 中:
public function oldAction(){
  $catID = $this->_getParam( 'categoryID' );
  $productID = $this->_getParam( 'productID' );
  // model finds the product ident and category names
  //....
  $ident = 'coolproduct';
  $catName = 'coolstuff';
//重定向到新的url
  $this->_redirect( '/product/' . $catName . '/' . $productID . '-'. $ident . '.html',
    array( 'code' => 301 )
  );
}
这样我们old动作控制器拿取匹配的变量从路由协议中并且使用它们重定向到一个使用一个301的新的url中去,记住,我们不应当直接将我们获取到的变量直接应用到我们的一个重定向请求中,因为这样会牵扯到安全问题。
那现在我们创建一个新的路由协议来接收我们老的URls映射过来的URLs:
//新url的正则路由协议
$route = new Zend_Controller_Router_Route_Regex(
  'product/([a-zA-Z-_0-9]+)/(\d+)-([a-zA-Z-_0-9]+).html',
  array(
    'controller' => 'products',
    'action' => 'view'
  ),
  array(
    1 => 'categoryIdent',
    2 => 'productID',
    3 => 'productIdent'
  ),
  'product/%s/%d-%s.html'
);
这个路由协议匹配我们新的URLs,这个正则包含3个捕获组,分别是产品类名(categoryIdent),产品ID(productID),以及产品特性(ident)。这个’product/%s/%d-%s.html’就是匹配原来的{categoryName}/{productID}-{productIdent}.html这种格式。最后,建议好好玩玩这个正则路由协议,我可以保证你以后会用得到的。
【D】Zend_Controller_Router_Route_Hostname
主机域名路由协议,看名字就知道他是关于处理域名的路由协议。一个常见使用就是一个域名下有按用户的子域名,如,如果我们有一个公共的外部 站点www.domain.com,现在我们的注册用户有一个帐号url像ues1.domain.com,那么我们就可以使用域名路由协议来重写这个请 求:
$route = new Zend_Controller_Router_Route_Hostname(
  ':username.domain.com',
  array(
    'controller' => 'account',
    'action' => 'index'
  ),
  array(
    // Match subdomain excluding www.
    'username' => '(?!.*www)[a-zA-Z-_0-9]+'
  )
  );
$router->addRoute('account', $route);
正如你所见,域名路由协议(Router_Route_Hostname)很像基本路由协议(Router_Route),我们能够得到变量,设置默认值,同时还能通过正则匹配,在这里的正则匹配我们过掉了www。
6)在配置文件中配置Zend_Config
当我们有许多路由协议的时候,管理他们就开始变得很棘手了,这样我们就可以通过路由器来调用配置文件。
[production]
routes.rss.type = "Zend_Controller_Router_Route_Static"
routes.rss.route = "products/rss"
routes.rss.defaults.controller = feed
routes.rss.defaults.action = rss

routes.oldproducts.type = "Zend_Controller_Router_Route_Regex"
routes.oldproducts.route = "products.php/category/(\d+)/product/(\d+)"
routes.oldproducts.defaults.controller = products
routes.oldproducts.defaults.action = old
routes.oldproducts.map.categoryID = 1
routes.oldproducts.map.productID = 2

routes.product.type = "Zend_Controller_Router_Route_Regex"
routes.product.route = "product/([a-zA-Z-_0-9]+)/(\d+)-([a-zA-Z-_0-9]+).html"
routes.product.defaults.controller = products
routes.product.defaults.action = view
routes.product.map.categoryIdent = 1
routes.product.map.productID = 2
routes.product.map.productIdent = 3
routes.product.reverse = "product/%s/%d-%s.html"

routes.user.route = "user/profile/:username/*"
routes.user.defaults.controller = user
routes.user.defaults.action = profile
routes.user.defaults.username = "Unknown"
routes.user.reqs.username = "([a-zA-Z-_0-9]+)"
一旦我们创建了一个ini文件,我们就能把它加载到路由器中:
$config = new Zend_Config_Ini('config.ini', 'production');
$router = new Zend_Controller_Router_Rewrite();
$router->addConfig($config, 'routes');
7)总结
路由器属于ZF mvc组件中很重要的一个,我们上面描述的这些路由是经常可以用到的。可能在一开始的时候就去用router会感觉不适应,你可以先熟悉了解它,但我希望 你还是对这个有个比较详细的了解,再次建议,你应该好好的用一下上面的路由,如果你想掌握它的话!!


 8373
8373


 被折叠的 条评论
为什么被折叠?
被折叠的 条评论
为什么被折叠?
 到【灌水乐园】发言


