


PHP文件上传及预览
使用thinkphp+HHuploadify
thinkphp下载地址:http://www.thinkphp.cn/down.html。
thinkphp可以作为初学者使用的框架,容易上手,而且使用composer也极易做扩展,像路由,模型,视图,缓存,日志,中间件等等都可以在里面实现,对于一般的网站应用足够了。而HHuploadify.js是网络上某个程序员写的,性能很不错,可以独立于jquery框架运行,干净,小巧。
服务端代码
使用make:controller指令创建上传控制器,我这里命名为Upload.php
<?php

namespace app\index\controller;

use think\Controller;
use think\Request;

class Upload extends Controller
{
    /**
     * 显示资源列表
     *
     * @return \think\Response
     */
    public function index()
    {
        //
        $file = request()->file('file');
        if($file){
            $info = $file->move(ROOT_PATH . 'public' . DS . 'uploads');
            echo 'success';
            return;
        }
        return $this->fetch();
    }

    /**
     * 显示创建资源表单页.
     *
     * @return \think\Response
     */
    public function create()
    {
        //
    }

    /**
     * 保存新建的资源
     *
     * @param  \think\Request  $request
     * @return \think\Response
     */
    public function save(Request $request)
    {
        //
    }

    /**
     * 显示指定的资源
     *
     * @param  int  $id
     * @return \think\Response
     */
    public function read($id)
    {
        //
    }

    /**
     * 显示编辑资源表单页.
     *
     * @param  int  $id
     * @return \think\Response
     */
    public function edit($id)
    {
        //
    }

    /**
     * 保存更新的资源
     *
     * @param  \think\Request  $request
     * @param  int  $id
     * @return \think\Response
     */
    public function update(Request $request, $id)
    {
        //
    }

    /**
     * 删除指定资源
     *
     * @param  int  $id
     * @return \think\Response
     */
    public function delete($id)
    {
        //
    }
}
可以看到实际编写的代码非常少,加上符号一共只有七行代码。当然需要做一些简单的配置,在Route.php中添加一条路由地址,这个不是必须的,也可以通过路径访问
<?php
// +----------------------------------------------------------------------
// | ThinkPHP [ WE CAN DO IT JUST THINK ]
// +----------------------------------------------------------------------
// | Copyright (c) 2006~2018 http://thinkphp.cn All rights reserved.
// +----------------------------------------------------------------------
// | Licensed ( http://www.apache.org/licenses/LICENSE-2.0 )
// +----------------------------------------------------------------------
// | Author: liu21st <liu21st@gmail.com>
// +----------------------------------------------------------------------

return [
    '__pattern__' => [
        'name' => '\w+',
    ],
    '[hello]'     => [
        ':id'   => ['index/hello', ['method' => 'get'], ['id' => '\d+']],
        ':name' => ['index/hello', ['method' => 'post']],
    ],
    'upload'=>['upload/index', []],
];
其中’upload’=>[‘upload/index’, []]是新添加的
前端代码
thinkphp是使用模板的方式来渲染视图,所以视图文件就当作我们的前端了
<!DOCTYPE html>
<link rel="stylesheet" href="/static/css/HHuploadify.css">
<style>
.clear {
  clear: both;
}
</style>

<script src="/static/js/HHuploadify.js"></script>
<h4>With upload button:</h4>
<div id="upload1"></div>
<script>
new HHuploadify({
	container: '#upload1',
	url: '/upload',
})
</script>

<h4 class="clear">Auto upload:</h4>
<div id="upload2"></div>
<script>
new HHuploadify({
	container: '#upload2',
	url: '/upload',
  auto: true,
})
</script>

<h4 class="clear">Single upload:</h4>
<div id="upload3"></div>
<script>
new HHuploadify({
	container: '#upload3',
	url: '/upload',
  auto: true,
  single: true,
  chooseText: 'Photo',
})
</script>

<h4 class="clear">Use server side response image:</h4>
<div id="upload30"></div>
<script>
new HHuploadify({
	container: '#upload30',
	url: '/upload',
  auto: true,
  single: true,
  chooseText: 'Photo',
  showPreview: 2,
})
</script>

<h4 class="clear">process percent:</h4>
<div id="upload4"></div>
<script>
new HHuploadify({
	container: '#upload4',
	url: '/upload',
  auto: true,
  showUploadProcess: 'percent',
})
</script>

<h4 class="clear">process bar:</h4>
<div id="upload5"></div>
<script>
new HHuploadify({
	container: '#upload5',
	url: '/upload',
  auto: true,
  showUploadProcess: 'bar',
})
</script>

<h4 class="clear">Reset Images:</h4>
<div id="upload6"></div>
<script>
new HHuploadify({
	container: '#upload6',
	url: '/upload',
  auto: true,
  files: [],
})
</script>
HHuploadify git地址:https://github.com/tangshuang/HHuploadify,
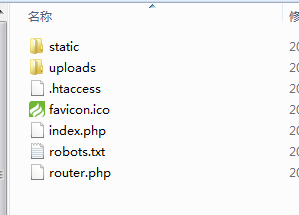
直接把对应的文件拷贝到public/static目录下即可
实现效果


结语
通过使用纯js+php和使用框架的方式实现图片上传及预览的对比,还是使用框架的方式方便,代码量少而且功能更加丰富,但是对于初学者需要对程序的基本原理要了解,不能图省事,只有懂得原理,才能有更进一步的提高。
下一篇介绍网站数据的动态加载,使用php做api接口,为前端提供数据。


 1197
1197


 被折叠的 条评论
为什么被折叠?
被折叠的 条评论
为什么被折叠?
 到【灌水乐园】发言


