


应用的集群部署或分布式部署,经常遇到session共享的问题,要么在nginx代理解决(比如ip hash),要么在tomcat的context.xml配置redis。spring boot也提供了session用redis解决共享的方法。
pom.xml
<parent>
            <groupId>org.springframework.boot</groupId>
            <artifactId>spring-boot-starter-parent</artifactId>
            <version>1.5.2.RELEASE</version>
        </parent>

	<dependencies>
	    <dependency>
	        <groupId>org.springframework.boot</groupId>
	        <artifactId>spring-boot-starter-web</artifactId>
	       <!--  <version>${spring_versin}</version> -->

	        <exclusions>
                <exclusion>
                    <groupId>org.springframework.boot</groupId>
                    <artifactId>spring-boot-starter-tomcat</artifactId>
                </exclusion>
            </exclusions>

	    </dependency>
	    <dependency>
        	<groupId>org.springframework.boot</groupId>
       	 	<artifactId>spring-boot-starter-tomcat</artifactId>
       	    <!-- <version>${spring_versin}</version> -->
        	<scope>provided</scope>
		</dependency>

	<dependency>
    		<groupId>org.springframework.boot</groupId>
    		<artifactId>spring-boot-starter-redis</artifactId>
    	 	<version>1.4.6.RELEASE</version>
		</dependency>


       <dependency>
    	<groupId>org.springframework.session</groupId>
    	<artifactId>spring-session-data-redis</artifactId>

	</dependency>

		</dependencies>
application.yml的配置
logging:
  config: classpath:logback.xml
  path: d:/logs
server:
  port: 8080
  session-timeout: 60

spring:
    redis:
       database: 0
       host: 127.0.0.1
       port: 6379
       password:
       timeout: 0
       pool:
           max-active: 8
           max-wait: -1
           max-idle: 8
           min-idle: 0
    session:
      store-type: none
RedisSessionConfig.java
package com.fei.springboot.config;

import org.springframework.context.annotation.Configuration;
import org.springframework.session.data.redis.config.annotation.web.http.EnableRedisHttpSession;

@Configuration
//maxInactiveIntervalInSeconds 默认是1800秒过期,这里测试修改为60秒
@EnableRedisHttpSession(maxInactiveIntervalInSeconds=60)
public class RedisSessionConfig{

}
如果不需要做特殊处理,只需直接使用注解@EnableRedisHttpSession即可,打开 @EnableRedisHttpSession源码,发现maxInactiveIntervalInSeconds session的过期时间默认是1800秒即30分钟,如果需要修改,注解时进行修改即可。如果想对redisSession做一些特殊处理。看@EnableRedisHttpSession源码,头部的注释,也给出了一些方案。
注解@interface EnableRedisHttpSession的源码
/*
 * Copyright 2014-2016 the original author or authors.
 *
 * Licensed under the Apache License, Version 2.0 (the "License");
 * you may not use this file except in compliance with the License.
 * You may obtain a copy of the License at
 *
 *      http://www.apache.org/licenses/LICENSE-2.0
 *
 * Unless required by applicable law or agreed to in writing, software
 * distributed under the License is distributed on an "AS IS" BASIS,
 * WITHOUT WARRANTIES OR CONDITIONS OF ANY KIND, either express or implied.
 * See the License for the specific language governing permissions and
 * limitations under the License.
 */

package org.springframework.session.data.redis.config.annotation.web.http;

import java.lang.annotation.Documented;
import java.lang.annotation.Retention;
import java.lang.annotation.Target;

import org.springframework.context.annotation.Configuration;
import org.springframework.context.annotation.Import;
import org.springframework.data.redis.connection.RedisConnectionFactory;
import org.springframework.session.SessionRepository;
import org.springframework.session.config.annotation.web.http.EnableSpringHttpSession;
import org.springframework.session.data.redis.RedisFlushMode;

/**
 * Add this annotation to an {@code @Configuration} class to expose the
 * SessionRepositoryFilter as a bean named "springSessionRepositoryFilter" and backed by
 * Redis. In order to leverage the annotation, a single {@link RedisConnectionFactory}
 * must be provided. For example: <pre>
 * <code>
 * {@literal @Configuration}
 * {@literal @EnableRedisHttpSession}
 * public class RedisHttpSessionConfig {
 *
 *     {@literal @Bean}
 *     public JedisConnectionFactory connectionFactory() throws Exception {
 *         return new JedisConnectionFactory();
 *     }
 *
 * }
 * </code> </pre>
 *
 * More advanced configurations can extend {@link RedisHttpSessionConfiguration} instead.
 *
 * @author Rob Winch
 * @since 1.0
 * @see EnableSpringHttpSession
 */
@Retention(java.lang.annotation.RetentionPolicy.RUNTIME)
@Target({ java.lang.annotation.ElementType.TYPE })
@Documented
@Import(RedisHttpSessionConfiguration.class)
@Configuration
public @interface EnableRedisHttpSession {
	int maxInactiveIntervalInSeconds() default 1800;

	/**
	 * <p>
	 * Defines a unique namespace for keys. The value is used to isolate sessions by
	 * changing the prefix from "spring:session:" to
	 * "spring:session:<redisNamespace>:". The default is "" such that all Redis
	 * keys begin with "spring:session".
	 * </p>
	 *
	 * <p>
	 * For example, if you had an application named "Application A" that needed to keep
	 * the sessions isolated from "Application B" you could set two different values for
	 * the applications and they could function within the same Redis instance.
	 * </p>
	 *
	 * @return the unique namespace for keys
	 */
	String redisNamespace() default "";

	/**
	 * <p>
	 * Sets the flush mode for the Redis sessions. The default is ON_SAVE which only
	 * updates the backing Redis when
	 * {@link SessionRepository#save(org.springframework.session.Session)} is invoked. In
	 * a web environment this happens just before the HTTP response is committed.
	 * </p>
	 * <p>
	 * Setting the value to IMMEDIATE will ensure that the any updates to the Session are
	 * immediately written to the Redis instance.
	 * </p>
	 *
	 * @return the {@link RedisFlushMode} to use
	 * @since 1.1
	 */
	RedisFlushMode redisFlushMode() default RedisFlushMode.ON_SAVE;
}
spring boot中的session redis配置就如此简单。
写个controller测试下
package com.fei.springboot.controller;

import javax.servlet.http.HttpServletRequest;

import org.springframework.stereotype.Controller;
import org.springframework.web.bind.annotation.RequestMapping;
import org.springframework.web.bind.annotation.ResponseBody;

@Controller
@RequestMapping("/")
public class TestController {

	@RequestMapping(value="/getSessionId")
	@ResponseBody
	public String getSessionId(HttpServletRequest request){

		Object o = request.getSession().getAttribute("springboot");
		if(o == null){
			o = "spring boot 牛逼了!!!有端口"+request.getLocalPort()+"生成";
			request.getSession().setAttribute("springboot", o);
		}

		return "端口=" + request.getLocalPort() +  " sessionId=" + request.getSession().getId() +"<br/>"+o;
	}

}
写个启动类
package com.fei.springboot;

import org.springframework.boot.SpringApplication;
import org.springframework.boot.autoconfigure.EnableAutoConfiguration;
import org.springframework.boot.autoconfigure.SpringBootApplication;
import org.springframework.boot.builder.SpringApplicationBuilder;
import org.springframework.boot.context.embedded.ConfigurableEmbeddedServletContainer;
import org.springframework.boot.context.embedded.EmbeddedServletContainerCustomizer;
import org.springframework.boot.web.support.SpringBootServletInitializer;
import org.springframework.context.annotation.ComponentScan;

@EnableAutoConfiguration
@ComponentScan(basePackages={"com.fei.springboot"})
@SpringBootApplication
public class Application extends SpringBootServletInitializer implements EmbeddedServletContainerCustomizer{

	 @Override
    protected SpringApplicationBuilder configure(SpringApplicationBuilder application) {
        return application.sources(Application.class);
    }


	 public static void main(String[] args) throws Exception {
	        SpringApplication.run(Application.class, args);
	    }

	public void customize(ConfigurableEmbeddedServletContainer configurableEmbeddedServletContainer) {
	//	configurableEmbeddedServletContainer.setPort(9090);
	}
}
修改application.yml中的server.port的端口为80,执行启动类,然后修改为8080,再次执行启动类。
浏览器测试
http://127.0.0.1/getSessionId
得得的结果是
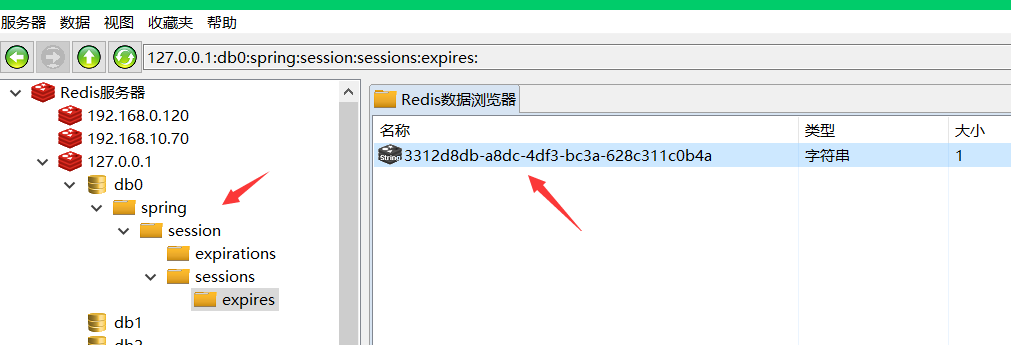
端口=80 sessionId=3312d8db-a8dc-4df3-bc3a-628c311c0b4a
spring boot 牛逼了!!!有端口80生成得到的结果是
端口=8080 sessionId=3312d8db-a8dc-4df3-bc3a-628c311c0b4a
spring boot 牛逼了!!!有端口80生成
使用redis-client,查看
注意事项:
如果启动时发现报错:
ERR Unsupported CONFIG parameter: notify-keyspace-events; nested exception is redis.clients.jedis.exceptions.JedisDataException
这是因为redis服务器版本和jar包版本不一致造成的。
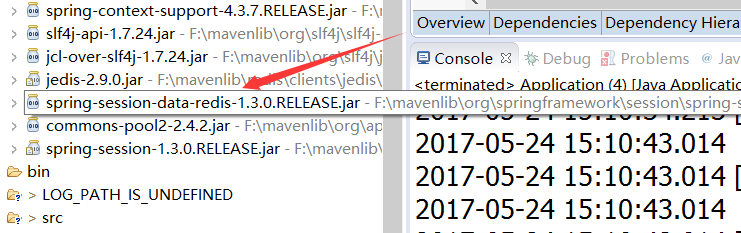
比如说,我这用的spring-session-data-redis版本是1.3.0,到maven 仓库中查询http://mvnrepository.com/
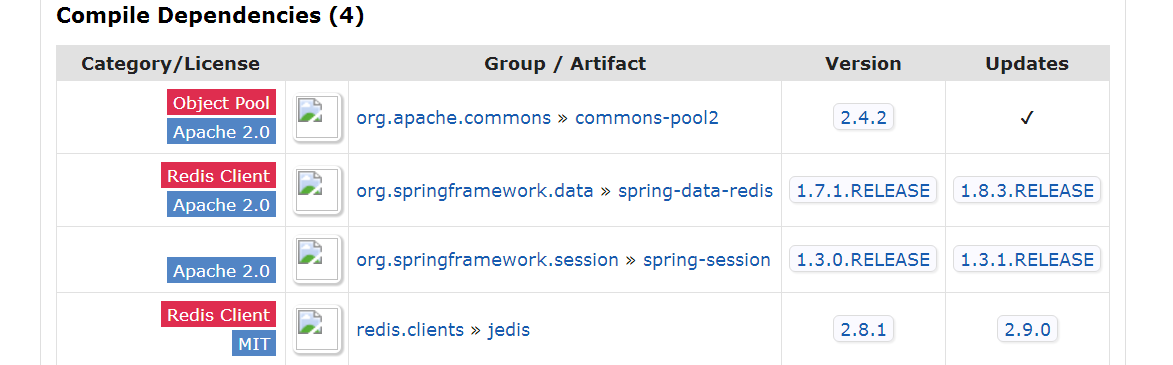
发现redis是2.8.1,看了下我用的服务器是2.6的,我立刻下载了个最新版的3.x,我是本地测试的,用window的。更换redis服务器后,不再报错了。


 703
703

 被折叠的 条评论
为什么被折叠?
被折叠的 条评论
为什么被折叠?
 到【灌水乐园】发言


