


参考Apache官方文档《Building Tomcat》
1. 准备工作
(1)Java环境:安装高版本的JDK,如JDK7,环境变量配置不再赘述
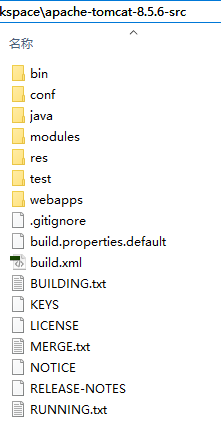
(2)下载tomcat8.5.6源码:apache-tomcat-8.5.6-src.zip
解压后,如下图:
(3)下载ant1.9.5:apache-ant-1.9.7-bin.zip
2. 利用ant下载tomcat依赖关系
(1)tomcat 8 利用ant进行构建和管理
(2)配置下载依赖关系本地库:拷贝源码文件夹中build.properties.default为build.properties,修改base.path值(也可以采用默认),注意路径分隔符为“/”,不能为“\”
# ----- Default Base Path for Dependent Packages -----
# Please note this path must be absolute, not relative,
# as it is referenced with different working directory
# contexts by the various build scripts.
base.path=${user.home}/tomcat-build-libs- 注:user.name可由System.getProperty(“user.home”)得到
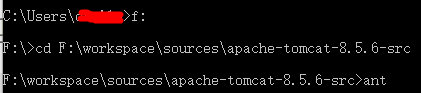
(3)在命令提示符窗口中切换至源码所在路径,然后执行ant命令,如下图:
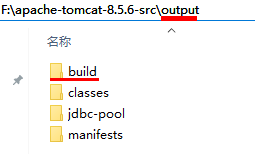
(4)下载成功标志:源码文件加中出现/output/build目录,如下图:
3. 使用Eclipse构建Tomcat项目
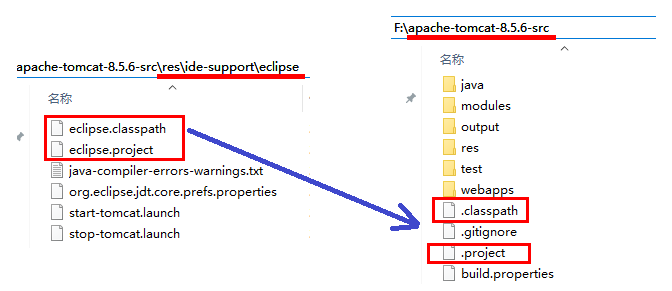
(1)在命令提示符窗口中切换至源码所在路径,然后执行ant ide-eclipse命令,开始下载相关的依赖,并将源码路径下res/ide-support/eclipse目录中的eclipse.classpath和eclipse.project拷贝至源码路径下,改名为.project和.classpath,如下图:
(2)在eclipse中创建Classpath Variables(window->preferences->Java->Build Path->Classpath Variables),新增TOMCAT_LIBS_BASE和ANT_HOME两个变量
| 名称 | 路径 |
|---|---|
| TOMCAT_LIBS_BASE | 取build.properties文件中的base.path值 |
| ANT_HOME | ant的安装路径 |
- 设置原因:满足.classpath文件中由环境变量(
kind="var")引入的jar包
<?xml version="1.0" encoding="UTF-8"?>
<classpath>
<classpathentry kind="src" path="java"/>
<classpathentry excluding="deployment/|tld/|webapp*/|webresources/" kind="src" path="test"/>
<classpathentry kind="src" path="webapps/examples/WEB-INF/classes"/>
<classpathentry kind="con" path="org.eclipse.jdt.launching.JRE_CONTAINER/org.eclipse.jdt.internal.debug.ui.launcher.StandardVMType/JavaSE-1.7"/>
<classpathentry kind="con" path="org.eclipse.jdt.junit.JUNIT_CONTAINER/4"/>
<classpathentry exported="true" kind="var" path="ANT_HOME/lib/ant.jar"/>
<classpathentry exported="true" kind="var" path="TOMCAT_LIBS_BASE/jaxrpc-1.1-rc4/geronimo-spec-jaxrpc-1.1-rc4.jar"/>
<classpathentry exported="true" kind="var" path="TOMCAT_LIBS_BASE/wsdl4j-1.6.2/wsdl4j-1.6.2.jar"/>
<classpathentry exported="true" kind="var" path="TOMCAT_LIBS_BASE/ecj-4.5.1/ecj-4.5.1.jar"/>
<classpathentry exported="true" kind="var" path="TOMCAT_LIBS_BASE/easymock-3.2/easymock-3.2.jar"/>
<classpathentry exported="true" kind="var" path="TOMCAT_LIBS_BASE/hamcrest-1.3/hamcrest-core-1.3.jar"/>
<classpathentry kind="output" path=".settings/output"/>
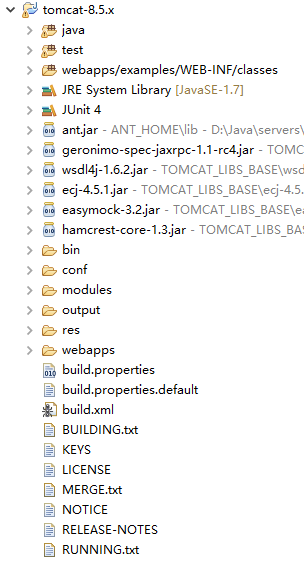
</classpath> (3)导入源码路径下的tomcat项目至Eclipse:File->Import…-> Existing Projects into Workspace->select root directory->选中源码目录路径->finish,导入成功后如下图:


 1345
1345

 被折叠的 条评论
为什么被折叠?
被折叠的 条评论
为什么被折叠?
 到【灌水乐园】发言


