


vs自定义项模板,提供了可以让我们自定义任何xaml布局的窗口或者用户控件,就像使用WPF自带的窗口一样,方便重用。我所创建的项模板很简单,窗口继承自INotifyPropertyChanged接口,并实现方法,然后定义2个属性字段,下面开始步骤:
首先创建一个WPF项目:WpfApplication1,紧接着创建一个名为BaseWindow的Window。
<Window x:Class="WpfApplication1.BaseWindow"
        xmlns="http://schemas.microsoft.com/winfx/2006/xaml/presentation"
        xmlns:x="http://schemas.microsoft.com/winfx/2006/xaml"
        xmlns:d="http://schemas.microsoft.com/expression/blend/2008"
        xmlns:mc="http://schemas.openxmlformats.org/markup-compatibility/2006"
        xmlns:local="clr-namespace:WpfApplication1"
        mc:Ignorable="d"  WindowStartupLocation="CenterScreen"
   SizeToContent="WidthAndHeight"
        Title="BaseWindow" Height="800" Width="800">
    <Window.Resources>
    </Window.Resources>
    <Grid>
        <StackPanel Margin="20">
        </StackPanel>
    </Grid>
</Window>
后台代码:
using System;
using System.Collections.Generic;
using System.Collections.ObjectModel;
using System.ComponentModel;
using System.Linq;
using System.Text;
using System.Threading.Tasks;
using System.Windows;
using System.Windows.Controls;
using System.Windows.Data;
using System.Windows.Documents;
using System.Windows.Input;
using System.Windows.Media;
using System.Windows.Media.Imaging;
using System.Windows.Shapes;
using System.Windows.Threading;

namespace WpfApplication1
{
    /// <summary>
    /// BaseWindow.xaml 的交互逻辑
    /// </summary>
    public partial class BaseWindow : Window, INotifyPropertyChanged
    {
        public BaseWindow()
        {
            InitializeComponent();
            this.DataContext = this;
        }

        #region 属性
        private Guid _id = Guid.NewGuid();
        public Guid Id
        {
            get
            {
                return _id;
            }
            set
            {
                _id = value;
                RaisedPropertyChanged("Id");
            }
        }
        private string _name = string.Empty;
        public string FirstName {
            get
            {
                return _name;
            }

            set
            {
                _name = value;
                RaisedPropertyChanged("FirstName");
            }
        }
        #endregion
        #region 当前线程调度器
        private static readonly Dispatcher _dispatcher = Dispatcher.CurrentDispatcher;
        #endregion

        #region 属性更改通知
        public event PropertyChangedEventHandler PropertyChanged = delegate { };
        protected void RaisedPropertyChanged(string property)
        {
            PropertyChanged(this, new PropertyChangedEventArgs(property));
        }
        #endregion
    }
}

选择“导出模板”:
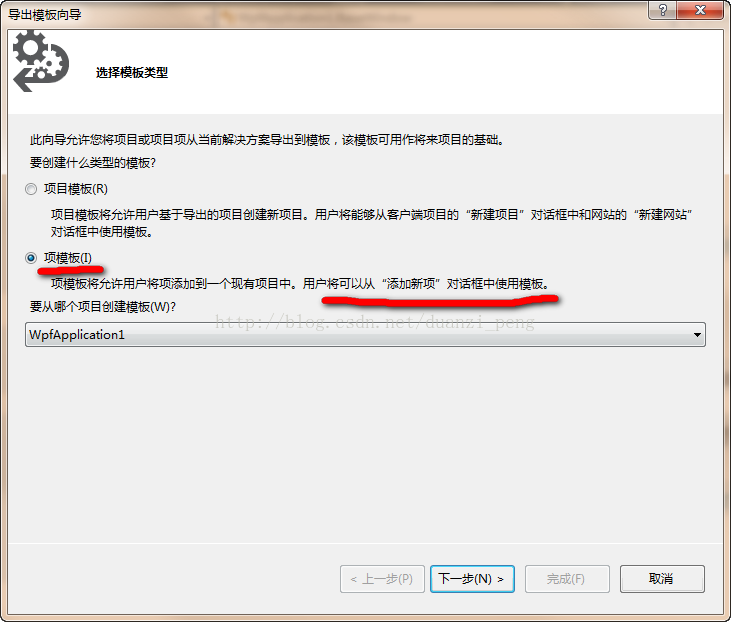
选择“项模板”:注意右侧画红线的部分说明。点击“下一步”:
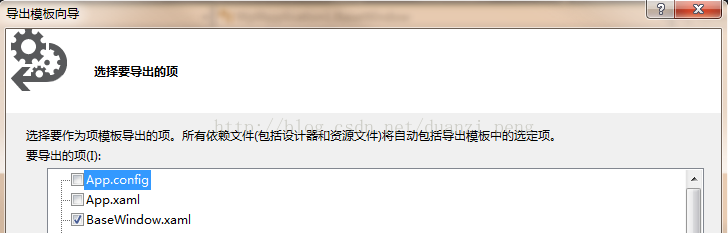
选择创建的“BaseWindow":点击”下一步”:
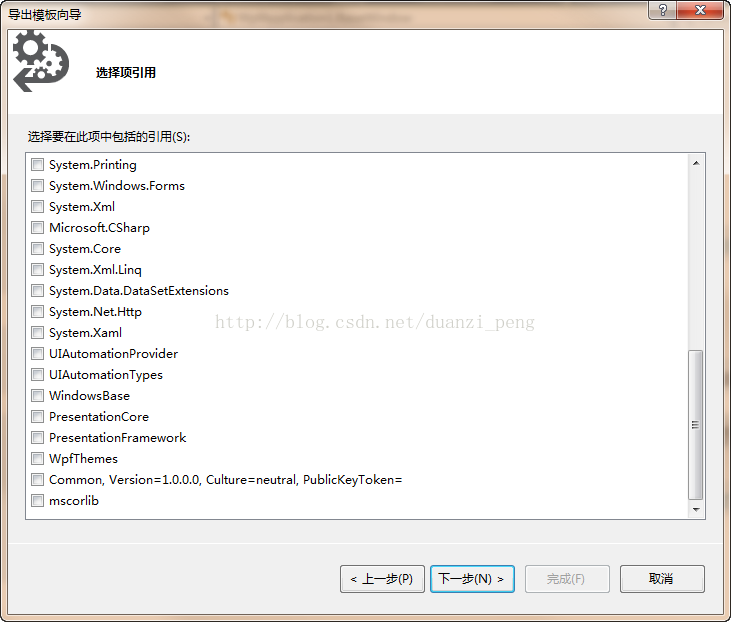
因为我的是在wpf工程中使用,“选择项引用”这步什么都不选,如果选择了,会把引用一块打包到zip文件中。点击“下一步”:
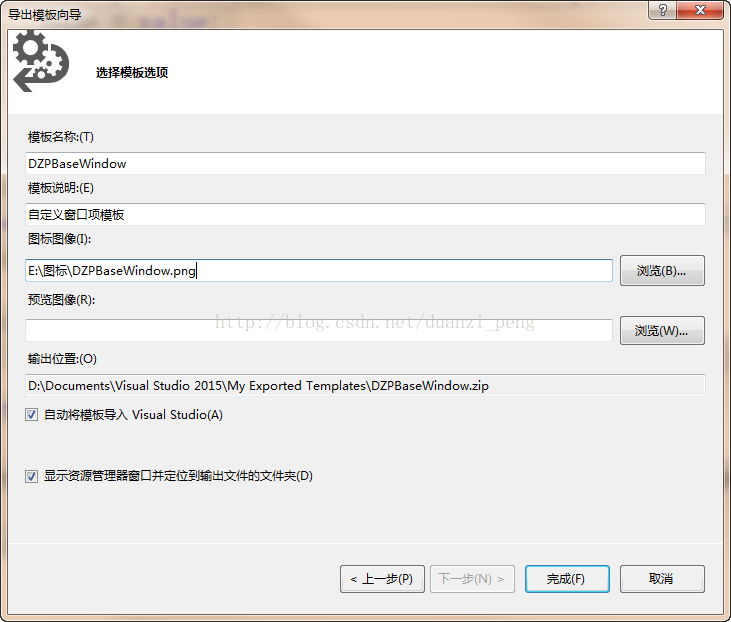
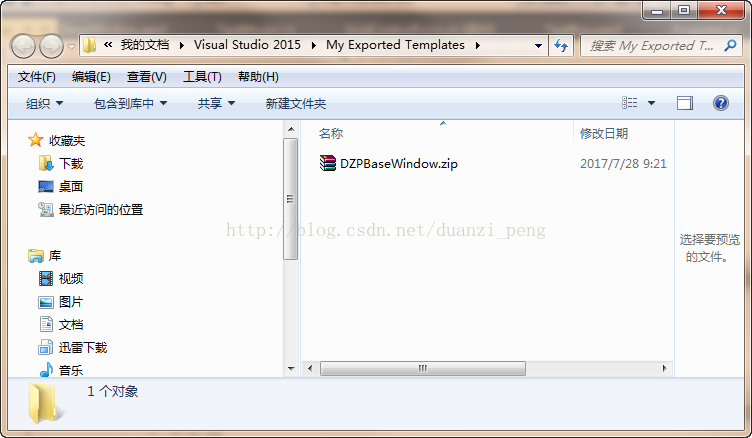
输入“模板名称”,“模板说明”与“图标图像”可选,我这里使用了一个png的图像。 注意“输出位置”,这个位置就是到处的位置,点击“完成”按钮之后会生成到这个路径下,成功之后会自动打开该路径下的文件夹:
重新启动VS,打开原来的WpfApplication1项目,右键选中项目-添加-新建项:
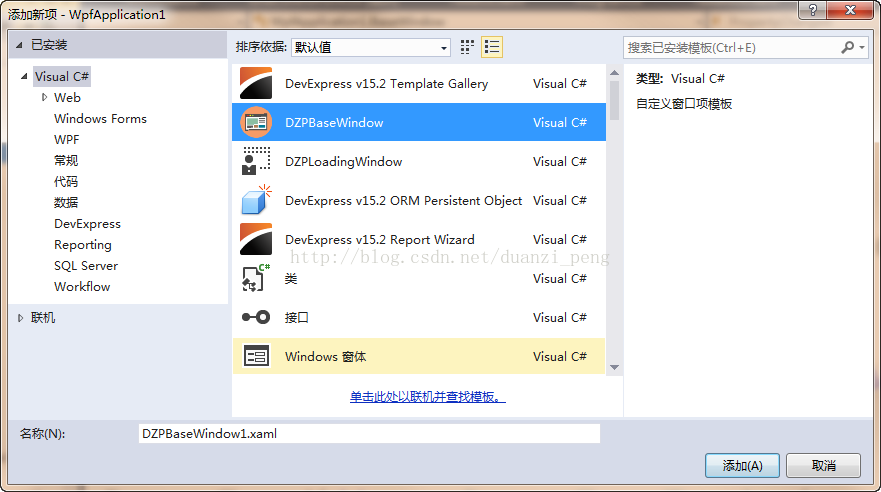
列表中就会显示导出的项模板“DZPBaseWindow",就可以像普通的Window来使用它了。


 1908
1908


 被折叠的 条评论
为什么被折叠?
被折叠的 条评论
为什么被折叠?
 到【灌水乐园】发言


