


Druid 是国内开发者常用的数据库连接池,下面就接着上一节,测试一下对 Druid 数据源配置的支持。
1. pom 文件加入相关依赖,这里需要排除 Spring Boot 默认支持的 Hikari
        <dependency>
			<groupId>org.springframework.boot</groupId>
			<artifactId>spring-boot-starter-data-jdbc</artifactId>
			<exclusions>
				<exclusion>
					<groupId>com.zaxxer</groupId>
					<artifactId>HikariCP</artifactId>
				</exclusion>
			</exclusions>
		</dependency>
                <dependency>
			<groupId>com.alibaba</groupId>
			<artifactId>druid-spring-boot-starter</artifactId>
			<version>1.1.21</version>
		</dependency>
2. 设置配置
登录到 Nacos 修改配置,Data ID 仍为 nacos-demo-springcloud.yml ,改为 Druid 数据源配置
spring:
      datasource:
          type: com.alibaba.druid.pool.DruidDataSource
          driver-class-name: com.mysql.cj.jdbc.Driver
          url: jdbc:mysql://localhost:3306/test?useSSL=false&characterEncoding=utf8&serverTimezone=GMT%2B8
          username: root
          password: root
          druid:
              initial-size: 2
              min-idle: 1
              max-active: 2
              filters: stat,wall
              web-stat-filter:
                  enabled: true
              stat-view-servlet:
                  enabled: true
                  login-username: admin
                  login-password: admin
logging:
    level:
      root: info
      com.alibaba.druid: debug
      org.springframework.jdbc: debug
3. 启动应用进行验证
访问 http://localhost:8080/demo/users/1 返回 {“id”:1,“name”:“测试用户1871704203”,“age”:33}
表示数据源配置成功
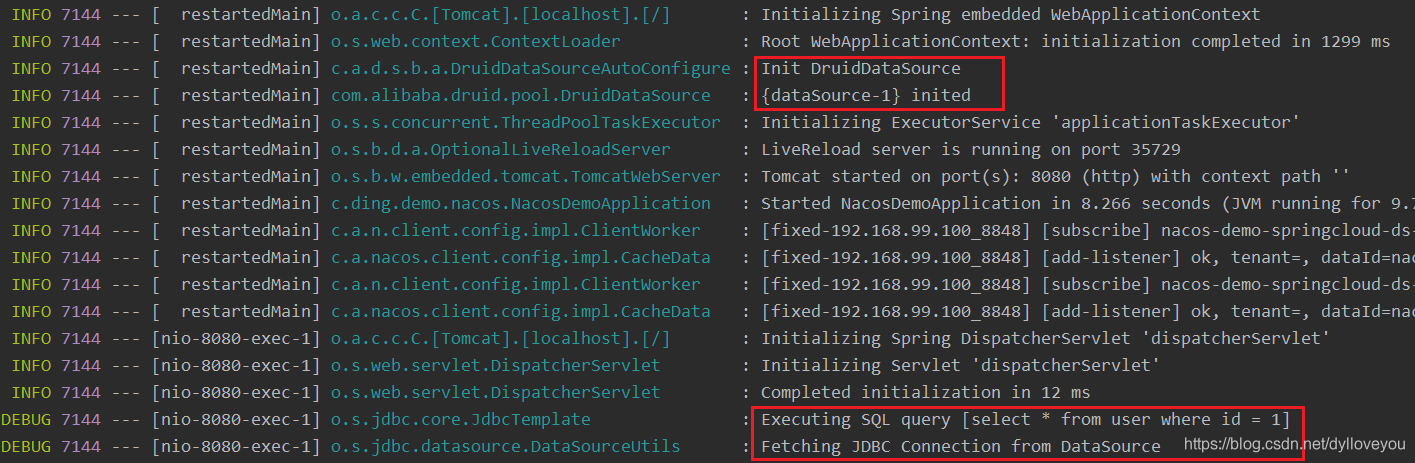
可以看到打印的日志,Druid 和 Hikari 不同,是在 Spring 容器启动时就初始化了 DataSource(参见 @Bean(initMethod = “init”))。执行第一个 sql 时从 DataSource 获取连接。
改动配置信息,看数据源是否能及时刷新
password: root
改为
password: root2
从打印的日志可以看出,这里并没有像 Hikari 那样由于配置变更,数据源先关闭,然后又基于更新后的配置创建一个新的,然后执行 sql ,数据源并没有先关闭再建新的。

访问 http://localhost:8080/demo/users/1 返回 {“id”:1,“name”:“测试用户1871704203”,“age”:33}
说明数据源并没有改变。
如果改 druid 的配置信息,把
druid:
max-active: 2
改为
druid:
max-active: 3
从打印的日志可以看出,maxActive属性已经改变

通过 Druid 的监控再确认一下,最大连接数已经变为 3
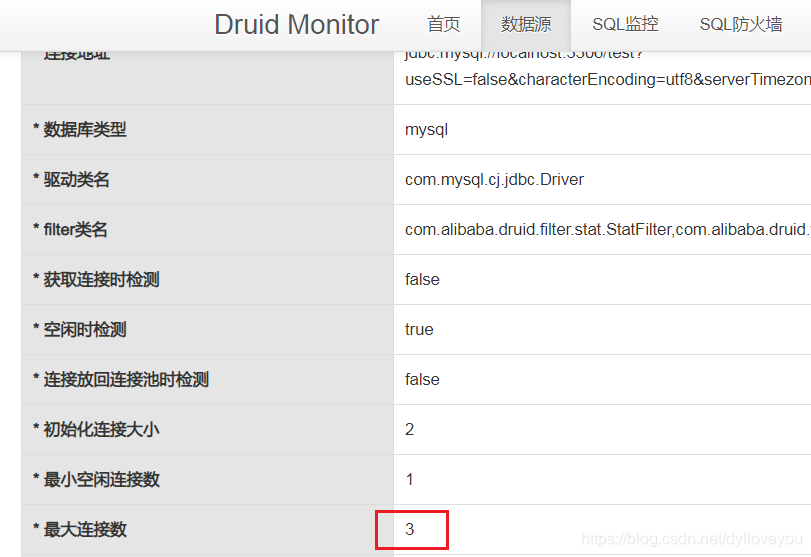
也就是说 spring.datasource 下面的配置没有自动变更,spring.datasource.druid 下面的配置可以自动变更。
4. 源码分析
通过跟踪源码发现,DruidDataSourceWrapper 实现了 InitializingBean,在 afterPropertiesSet() 中判断如果没有 spring.datasource.druid 开始的 jdbc 相关属性,则以 spring.datasource 开始的属性替换。
@Override
    public void afterPropertiesSet() throws Exception {
        //if not found prefix 'spring.datasource.druid' jdbc properties ,'spring.datasource' prefix jdbc properties will be used.
        if (super.getUsername() == null) {
            super.setUsername(basicProperties.determineUsername());
        }
        if (super.getPassword() == null) {
            super.setPassword(basicProperties.determinePassword());
        }
        if (super.getUrl() == null) {
            super.setUrl(basicProperties.determineUrl());
        }
        if (super.getDriverClassName() == null) {
            super.setDriverClassName(basicProperties.getDriverClassName());
        }
    }
我们配置的是
spring.datasource.password: root
...
而不是
spring.datasource.druid.password: root
...
所以,初始化 DataSource 时,上面的 super.getPassword() 肯定为 null,DruidDataSource 的 password 值通过 DataSourceProperties 获取的设置。
当我们改动 spring.datasource.password 的值后,比如由 root 改为 root2,Client 端监听到数据的改变并进行刷新,然后 rebind DataSource
这时 spring.datasource.password 对应的值改为了 root2,但DataSourceWrapper#getPassword() 对应的值仍为 root ,也就是非 null,所以执行了 afterPropertiesSet(),数据源的 password 其实没变。
5. 解决方案
使用 @RefreshScope 注解(请参考[1]),当配置变动时,先销毁 Bean,需要时重新再生成 Bean 。
修改 DruidDataSourceAutoConfigure 源码,加上 @RefreshScope
@Bean(initMethod = "init")
    @ConditionalOnMissingBean
    @RefreshScope
    public DruidDataSource dataSource() {
        LOGGER.info("Init DruidDataSource");
        return new DruidDataSourceWrapper();
    }
再次测试,配置变更能及时刷新。
6. 参考文档
[1] https://blog.csdn.net/dylloveyou/article/details/103707048


 9286
9286


 被折叠的 条评论
为什么被折叠?
被折叠的 条评论
为什么被折叠?
 到【灌水乐园】发言


