


前言
自己在网上搜了一大堆,大体就两种方法,而我选择的是其中代码少的的方法,不过他们或多或少留下了少许的坑,(按他们的方法我是上传成功,但不能发布到jCenter上去,也可能是我自己的问题o(≧v≦)o~~),文章中我会提到那些坑,希望能帮你减少没必要的时间。
如何把自己写的项目让别人依赖呢,像compile ‘com.google.code.gson:gson:2.6.2’一样?
上面的依赖library需要3各部分,即:GROUP_ID:ARTIFACT_ID:VERSION,其中GROUP_ID是com.google.code.gson(库的包名),ARTIFACT_ID是gson(类库名称),VERSION是2.6.2(版本号)。
怎么上传你的类库到jcenter仓库?
基本上大致的步骤可以慨括为,在AndroidStudio上准备好要上传的库项目,配置相关gradle代码,然后上传到bintray网站上,最后同步到jcenter仓库里。
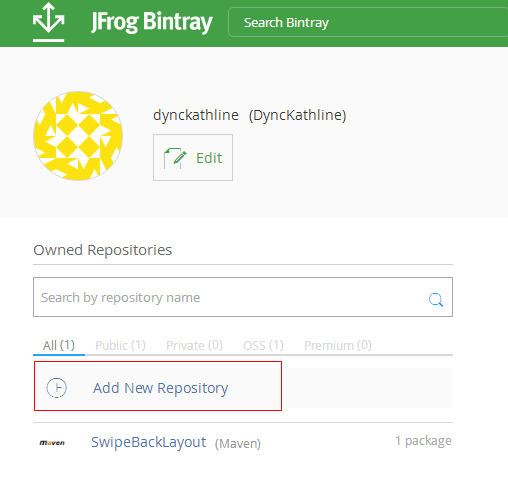
1. 在bintray.com上面注册一个账号,可使用github账号登录。
2. 创建一个新的仓库,如下图所示
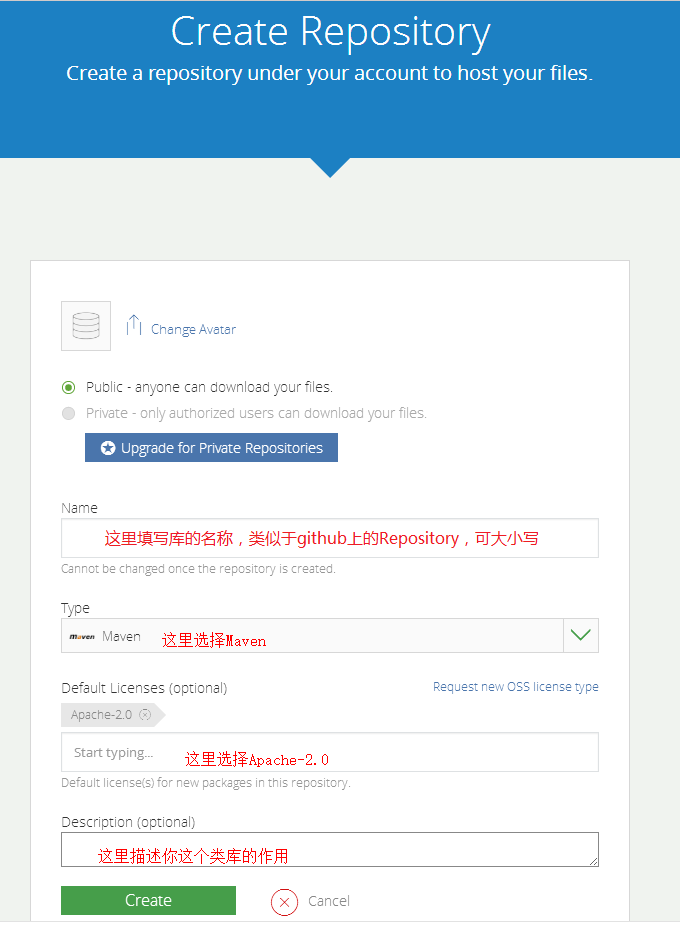
坑一
图中的Name编辑框处,他们都是填写maven,其实是可以填写任意英文的,可以大小写混写
3. Create Package成功后,就可以看到我们刚创建的Package,如下图所示
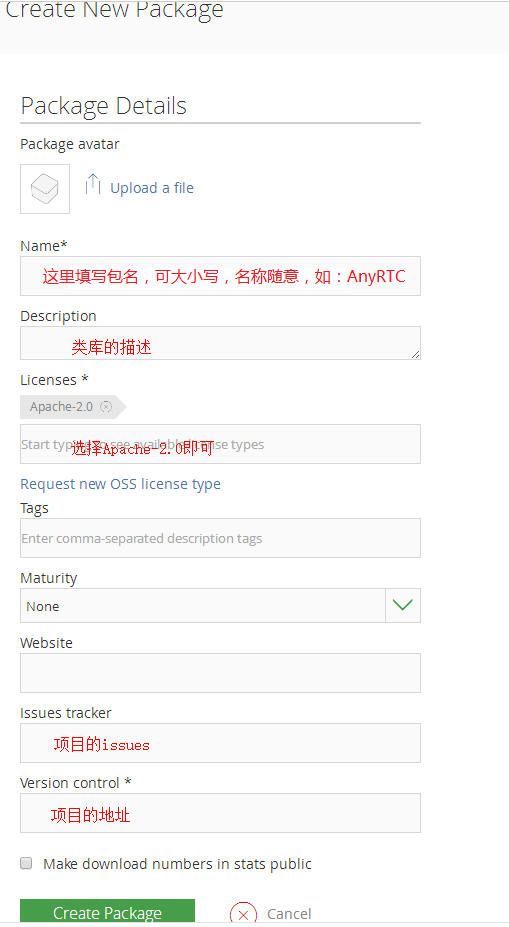
上面的 Issues tracker,例如:https://github.com/DyncKathline/SwipeBackLayout/issues
Version control *, 例如:https://github.com/DyncKathline/SwipeBackLayout
把自己的Android Studio类库pull到jcenter上去
在这里我们将要上传的是Android Library module,如下图所示。
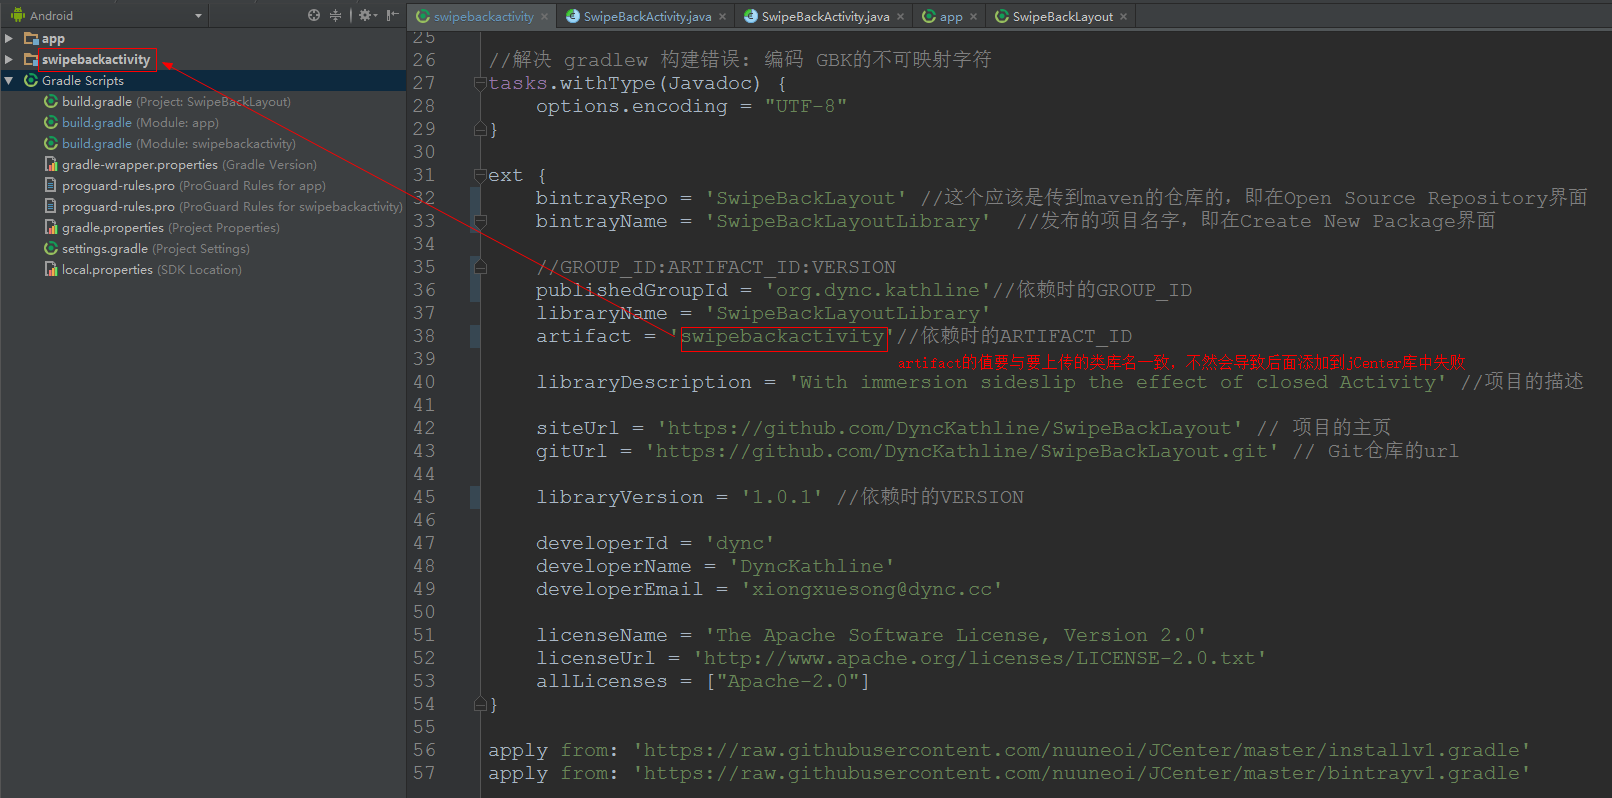
坑二
图中的module下的build.gradle红色框中artifact的值必须要和module项目名称相同,不然添加到jCenter库中审核会失败,原因是存在两种路径,我之前就是看到其他文章都没解释,导致我的库一直不能通过审核。可参考我的https://dl.bintray.com/dynckathline/SwipeBackLayout/,如果你的和我的类似,审核应该是会通过的。
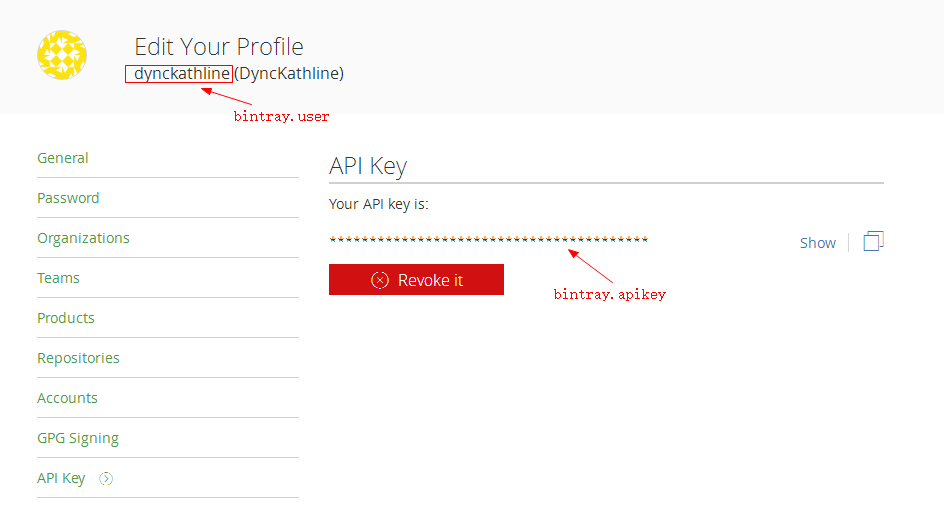
然后我们需要设置bintray的username和API Key来进行bintray的加密认证,这些信息将写在local.properties文件里。写在local.properties的原因在于,bintray的username和APIKey是敏感的私人信息,自己应该保管好,而不是把它上传到github上,正好把local.properties文件写在.gitignore里面过滤掉不会影响上传的github项目。
代码如下:
bintray.user=YOUR_BINTRAY_USERNAME
bintray.apikey=YOUR_BINTRAY_API_KEY
这里的username就是你bintray账号的用户名,APIKey可以在bintray页面的Edit Profile找到。
在要上传的类库module的build.gradle文件里添加如下代码:
apply plugin: 'com.android.library'

android {
    compileSdkVersion 23
    buildToolsVersion '23.0.3'

    defaultConfig {
        minSdkVersion 11
        targetSdkVersion 23
        versionCode 1
        versionName "1.0"
    }
    buildTypes {
        release {
            minifyEnabled false
            proguardFiles getDefaultProguardFile('proguard-android.txt'), 'proguard-rules.pro'
        }
    }
}

dependencies {
    compile fileTree(dir: 'libs', include: ['*.jar'])
    compile 'com.android.support:appcompat-v7:23.4.0'
}

//解决 gradlew 构建错误: 编码 GBK的不可映射字符
tasks.withType(Javadoc) {
    options.encoding = "UTF-8"
}

ext {
    bintrayRepo = 'SwipeBackLayout' //这个应该是传到maven的仓库的,即在Open Source Repository界面
    bintrayName = 'SwipeBackLayoutLibrary'  //发布的项目名字,即在Create New Package界面

    //GROUP_ID:ARTIFACT_ID:VERSION
    publishedGroupId = 'org.dync.kathline'//依赖时的GROUP_ID
    libraryName = 'SwipeBackLayoutLibrary'
    artifact = 'swipebackactivity'//依赖时的ARTIFACT_ID,这里要与类库名保持一致,即项目的module名

    libraryDescription = 'With immersion sideslip the effect of closed Activity' //项目的描述

    siteUrl = 'https://github.com/DyncKathline/SwipeBackLayout' // 项目的主页
    gitUrl = 'https://github.com/DyncKathline/SwipeBackLayout.git' // Git仓库的url

    libraryVersion = '1.0.1' //依赖时的VERSION

    developerId = 'dync'
    developerName = 'DyncKathline'
    developerEmail = 'xiongxuesong@dync.cc'

    licenseName = 'The Apache Software License, Version 2.0'
    licenseUrl = 'http://www.apache.org/licenses/LICENSE-2.0.txt'
    allLicenses = ["Apache-2.0"]
}

apply from: 'https://raw.githubusercontent.com/nuuneoi/JCenter/master/installv1.gradle'
apply from: 'https://raw.githubusercontent.com/nuuneoi/JCenter/master/bintrayv1.gradle'
这里可以参考以下图
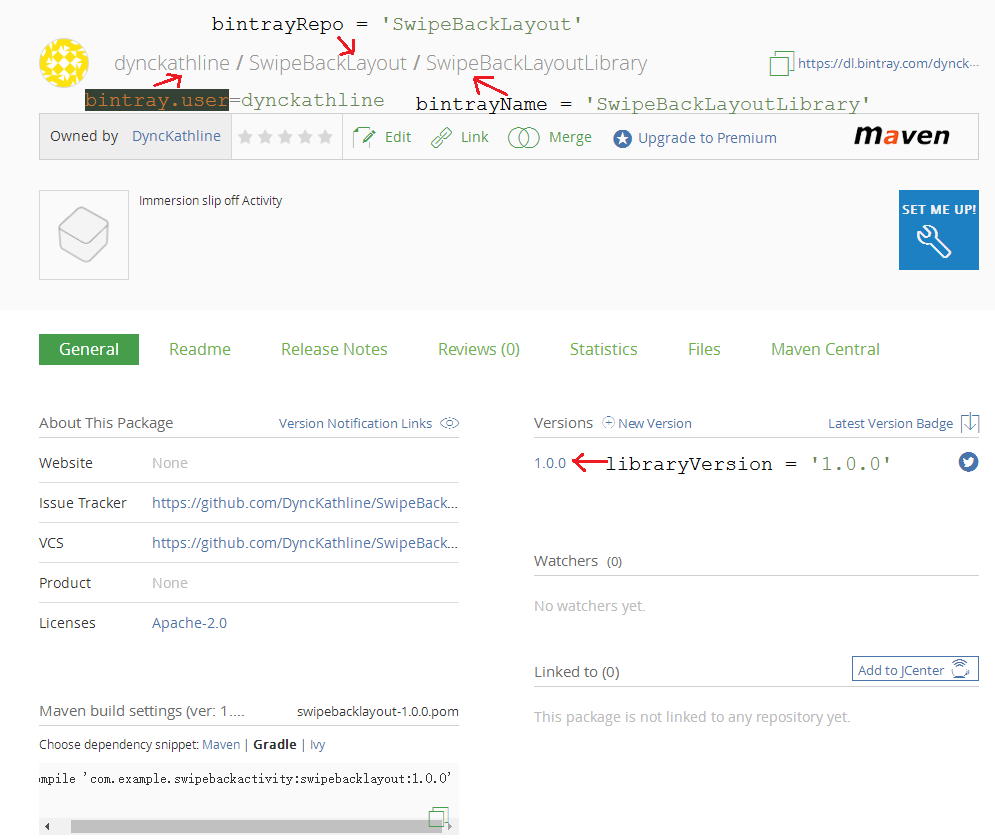
在这里需要把bintrayName写成之前Create Pacakge所填写的package name,publishedGroupId就是我们之前提到的GROUP_ID,artifact就是之前提到的ARTIFACT_ID,libraryVersion就是VERSION。
然后在project的build.gradle里添加以下代码:
// Top-level build file where you can add configuration options common to all sub-projects/modules.

buildscript {
    repositories {
        jcenter()
    }
    dependencies {
        classpath 'com.android.tools.build:gradle:2.1.3'

        // NOTE: Do not place your application dependencies here; they belong
        // in the individual module build.gradle files
        classpath 'com.jfrog.bintray.gradle:gradle-bintray-plugin:1.6'
        classpath 'com.github.dcendents:android-maven-gradle-plugin:1.5'
    }
}

allprojects {
    repositories {
        jcenter()
    }
}

task clean(type: Delete) {
    delete rootProject.buildDir
}
最后在AndroidStudio提供的Terminal窗口执行如下命令:
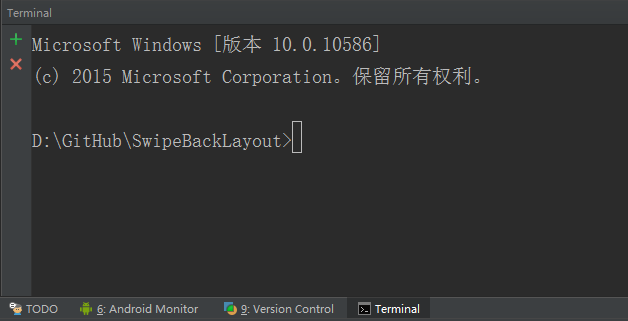
gradlew install如果顺利的话,过几分钟就会出现
BUILD SUCCESSFUL接下来需要把build成功的文件upload到bintray上
gradlew bintrayUpload顺利的话,也会出现
BUILD SUCCESSFUL最后你可以在jcenter上看到如下图所示:
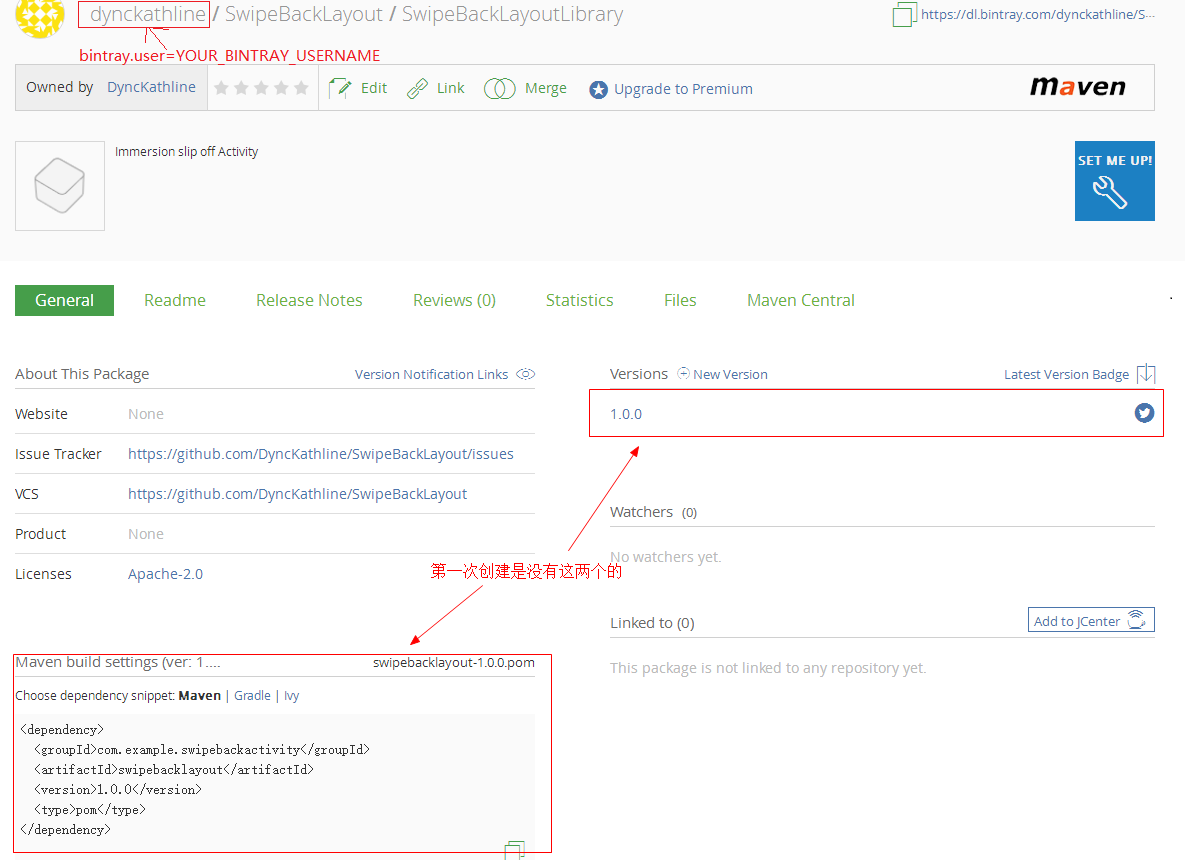
到了这里我们只要在上图点击“Add 头jCenter”,如下图所示:
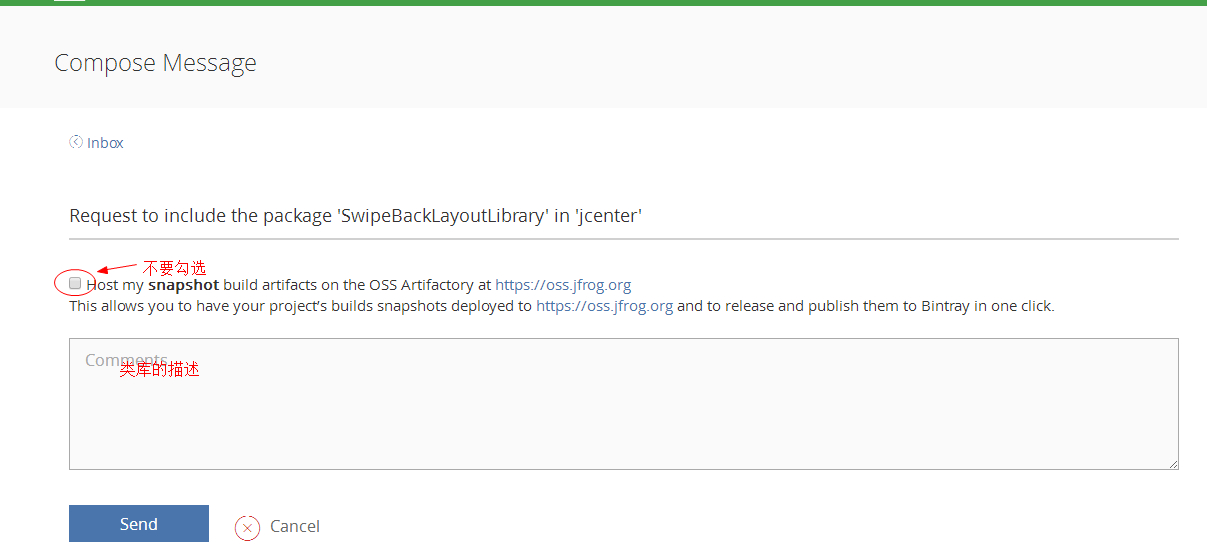
接下来会跳到一个Request to include package GradientUI in jcenter的页面,什么都不用做,直接点击Send按钮就可以了。
大概过个把小时,通过jcenter那边的审核就会在bintray上收到jcenter那边的同意消息提醒。
至此就要恭喜你,你的类库上传到jcenter成功了!
到这里大家就可以用自己的类库了,仅仅只需要添加一行代码:
dependencies {
    compile 'org.dync.kathline:swipebackactivity:1.0.1'
}
转载请注明出处,谢谢!


 1047
1047

 被折叠的 条评论
为什么被折叠?
被折叠的 条评论
为什么被折叠?
 到【灌水乐园】发言


