


最近我一直在尝试优化自己的网站,思考如何让用户以有趣且合理的方式访问。就像Google和Edge浏览器中的断网小游戏一样,我们可以在工作中找到娱乐。于是,我想到了一个有趣的想法——“有趣地禁用浏览器开发者工具”。
为什么要禁用浏览器开发者工具呢?主要是为了保护网站信息安全。然而,我认为彻底消除信息就是绝对的安全。虽然本文主要讨论的是技术实现,但并未充分展示安全性措施。
那么,有什么方法可以彻底消除信息痕迹呢?答案是黑洞。黑洞是一种天体,由质量足够大的恒星在燃料耗尽后发生的引力坍缩而形成。黑洞的引力极其强大,使得视界内的逃逸速度大于光速。因此,我们说“黑洞是时空曲率大到光都无法从其事件视界逃脱的天体”。
这样一来,如果将页面的所有信息都吸收掉,用户就无法看到了吗?
线上体验地址(也是本人搭建的一个在线工具网站,谢谢支持):https://www.v-box.cn
使用快捷键:F12 或者 CTRL+SHIFT+I 就可以触发效果
下面就跟着笔者一起感受黑洞吧。
首先需要构建JS文件,能够在控制台使用,达到吸收页面所有元素的效果,经过我多方查阅,最终编写脚本如下:
//添加全局样式,后面删除动画需要用到
var styleNode = document.createElement("style");

styleNode.type = "text/css";
styleNode.textContent = ".hole-removed{visibility: hidden;} .hole-attracted{ animation: attraction 2.1s infinite linear; } @keyframes attraction {from {transform: rotate(0deg) scale(1);}to { transform: rotate(359deg) scale(0);}};";

document.head.appendChild (styleNode);
document.body.style['overflow-x'] = 'hidden';

//获取所有页面元素,排除你不需要删除的元素
var all_elements = document.querySelectorAll('*:not(html, head, title, link, meta, script, style, noscript, body)');
all_elements = Array.from(all_elements);

//获取网站中心点,后面用来设置黑洞位置
var screen_width = Math.min(document.body.scrollWidth, window.innerWidth);
var screen_height = Math.max(document.body.scrollHeight, window.innerHeight);

//开始递归执行
var recursion = 0;
absorbElement();

function absorbElement(){
    if(all_elements.length == 0 || recursion > 20) return;

    var random = Math.floor( Math.random() * all_elements.length );
    var el = all_elements[random];

    var childs = el.querySelectorAll('*:not(.hole-flagged)');

    if(typeof el == 'undefined' || childs.length > 100){
        recursion++;
        absorbElement();
        return;
    }else{
        resursion = 0;
    }

    childs.forEach(function(node){
        node.classList.add('hole-flagged');
    });

    var el_width = el.offsetWidth;
    var el_height = el.offsetHeight;
    var el_offset_x = el.offsetLeft;
    var el_offset_y = el.offsetTop;

    var el_clone = el.cloneNode(true);
    el_clone.classList.add('hole-attracted');
    el.classList.add('hole-removed');
    el.classList.add('hole-flagged');

    document.body.appendChild(el_clone);

    el_clone.style["position"] = "absolute";
    el_clone.style["width"] = el_width+'px';
    el_clone.style["height"] = el_height+'px';
    el_clone.style["top"] = el_offset_y+'px';
    el_clone.style["left"] = el_offset_x+'px';
    el_clone.style["transition"] = 'all 2s ease-out';
    el_clone.style["transform-origin"] = 'center';
    el_clone.style["z-index"] = 999999;

    setTimeout(function(){
        el_clone.style['top'] = ((screen_height*0.5)-(el_height/2)) + 'px';
        el_clone.style['left'] = ((screen_width*0.5)-(el_width/2)) + 'px';
    }, 1);

    setTimeout(function(){
        el_clone.parentNode.removeChild(el_clone);
    }.bind(null, el_clone), 2000);

    all_elements = all_elements.filter(function(node){
        return !node.classList.contains('hole-flagged');
    });

    setTimeout(absorbElement, 50);
}
在控制台执行脚本效果如下:
黑洞脚本执行结果
可以看出,这个距离“黑洞”效果还是差很多的。至少还缺一个洞!
先把这段脚本编写到实际项目中(blackhole.js),并添加一个回调,方便通知业务
function initBlackHole(callback) {
  var styleNode = document.createElement("style");

  styleNode.type = "text/css";
  styleNode.textContent =
    ".hole-removed{visibility: hidden;} .hole-attracted{ animation: attraction 2.1s infinite linear; } @keyframes attraction {from {transform: rotate(0deg) scale(1);}to { transform: rotate(359deg) scale(0);}};";

  document.head.appendChild(styleNode);

  document.body.style["overflow-x"] = "hidden";

  var all_elements = document.querySelectorAll(
    "*:not(html,head, title, link, meta, script, style, noscript, body)"
  );
  all_elements = Array.from(all_elements);

  var screen_width = Math.min(document.body.scrollWidth, window.innerWidth);
  var screen_height = Math.max(document.body.scrollHeight, window.innerHeight);

  var recursion = 0;
  absorbElement();

  function absorbElement() {
    if (all_elements.length == 0 || recursion > 20) {
      callback();
      return;
    }

    var random = Math.floor(Math.random() * all_elements.length);
    var el = all_elements[random];

    var childs = el.querySelectorAll("*:not(.hole-flagged)");

    if (typeof el == "undefined" || childs.length > 100) {
      recursion++;
      absorbElement();
      return;
    } else {
      resursion = 0;
    }

    //Flag all the child so they can't be selected on the next iterations
    childs.forEach(function (node) {
      node.classList.add("hole-flagged");
    });

    var el_width = el.offsetWidth;
    var el_height = el.offsetHeight;
    var el_offset_x = el.offsetLeft;
    var el_offset_y = el.offsetTop;

    var el_clone = el.cloneNode(true);
    el_clone.classList.add("hole-attracted");
    el.classList.add("hole-removed");
    el.classList.add("hole-flagged");

    document.body.appendChild(el_clone);

    //Style the cloned element
    el_clone.style["position"] = "absolute";
    el_clone.style["width"] = el_width + "px";
    el_clone.style["height"] = el_height + "px";
    el_clone.style["top"] = el_offset_y + "px";
    el_clone.style["left"] = el_offset_x + "px";
    el_clone.style["transition"] = "all 2s ease-out";
    el_clone.style["transform-origin"] = "center";
    el_clone.style["z-index"] = 999999;

    setTimeout(function () {
      el_clone.style["top"] = screen_height * 0.5 - el_height / 2 + "px";
      el_clone.style["left"] = screen_width * 0.5 - el_width / 2 + "px";
    }, 1);

    setTimeout(
      function () {
        el_clone.parentNode.removeChild(el_clone);
      }.bind(null, el_clone),
      2000
    );

    all_elements = all_elements.filter(function (node) {
      return !node.classList.contains("hole-flagged");
    });

    setTimeout(absorbElement, 50);
  }
}
接下来,就是在HTML中添加一个黑洞,定义一个 DIV
<!DOCTYPE html>
<html>
  <head>
    <meta charset="utf-8" />
  </head>
  <body>
    <div id="hole"></div>
    <app-root></app-root>
  </body>
</html>
用JS动态设置黑洞的样式,在触发黑洞的时候调用,当然也可以直接写在CSS中。 代码如下(blackhole.js)
function createHoleElement() {
    // 获取要添加圆球的元素
    const hole= document.getElementById("hole");

    // 设置圆球的初始位置和大小
    let x = screen_width * 0.5;
    let y = screen_height * 0.5;

    // 添加圆球到页面中
    hole.style.overflow = "hidden";
    hole.style.position = "absolute";
    hole.style.left = x + "px";
    hole.style.top = y + "px";
    hole.style.width = 200 + "px";
    hole.style.height = 200 + "px";
    hole.style.borderRadius = "50%";
    hole.style.backgroundColor = "#000";
    hole.style.transform = "translate(-50%, -50%) scale(0)";
    hole.style.zIndex = 999998;
  }
元素创建好,需要在黑洞脚本中排除掉当前这个节点,不然黑洞会一起把这个元素删除
 ...
 var all_elements = document.querySelectorAll(
    "*:not(html,head, title, link, meta, script, style, noscript, body, #hole)"
  );
 ...
当然,单单添加一个洞肯定不行,黑洞肯定要像游戏一样越吸越大,直到吞噬整个页面。
CSS:
@keyframes black-hole-animation {
        0% {
          opacity: 1;
          transform: translate(-50%, -50%) scale(0);
        }
        100% {
          opacity: 1;
          transform: translate(-50%, -50%) scale(1);
        }
      }
JS:
function createHoleElement() {
    // 获取要添加圆球的元素
    const hole = document.getElementById("hole");

    // 设置圆球的初始位置和大小
    let x = screen_width * 0.5;
    let y = screen_height * 0.5;

    // 添加圆球到页面中
    hole.style.overflow = "hidden";
    hole.style.position = "absolute";
    hole.style.left = x + "px";
    hole.style.top = y + "px";

	var diagonal = Math.sqrt(Math.pow(screen_width , 2) + Math.pow(screen_height , 2));

    // 这里是修改的代码
    hole.style.width = 200 + "px";
    hole.style.height = 200 + "px";

    hole.style.borderRadius = "50%";
    hole.style.backgroundColor = "#000";
    hole.style.transform = "translate(-50%, -50%) scale(0)";
    hole.style.zIndex = 999998;

    // 以下是添加的代码
    hole.style.animation = "black-hole-animation 15s linear infinite";
    hole.style.animationIterationCount = 1; // 动画只执行一边
    hole.style.animationFillMode = "forwards"; // 动画定格在最后一帧
  }
本以为设置黑洞的直径为窗口对角的距离,利用勾股定律就可以吞噬整页,结果效果简直掩耳盗铃。虽然可视的画面被吞噬了,但页面滑动到最下面,还是一个圆弧,无法遮住两个角。
这样不行,那就换一种思路,把黑洞的直径设置为网页最长的那条边,并在吞噬效果结束前把黑洞的圆角值设置为0,修改后的代码如下:
CSS:
@keyframes black-hole-animation {
        0% {
          opacity: 1;
          transform: translate(-50%, -50%) scale(0);
        }
        95% {
          opacity: 1;
          transform: translate(-50%, -50%) scale(1);
          border-radius: 50%;
        }
        /* 96% {
          opacity: 1;
          transform: translate(-50%, -50%) scale(1);
          border-radius: 40%;
        }
        97% {
          opacity: 1;
          transform: translate(-50%, -50%) scale(1);
          border-radius: 30%;
        }
        98% {
          opacity: 1;
          transform: translate(-50%, -50%) scale(1);
          border-radius: 20%;
        }
        99% {
          opacity: 1;
          transform: translate(-50%, -50%) scale(1);
          border-radius: 10%;
        } */
        100% {
          opacity: 1;
          transform: translate(-50%, -50%) scale(1);
          border-radius: 0%;
        }
      }
JS:
  function createHoleElement() {
    // 获取要添加圆球的元素
    const hole = document.getElementById("hole");

    // 设置圆球的初始位置和大小
    let x = screen_width * 0.5;
    let y = screen_height * 0.5;

    var diagonal = screen_width>screen_height?screen_width:screen_height;

    // 添加圆球到页面中
    hole.style.overflow = "hidden";
    hole.style.position = "absolute";
    hole.style.left = x + "px";
    hole.style.top = y + "px";
    hole.style.width = diagonal + "px";
    hole.style.height = diagonal + "px";
    hole.style.borderRadius = "50%";
    hole.style.backgroundColor = "#000";
    hole.style.transform = "translate(-50%, -50%) scale(0)";
    hole.style.animation = "black-hole-animation 15s linear infinite";
    hole.style.animationIterationCount = 1;
    hole.style.animationFillMode = "forwards";
    hole.style.zIndex = 999998;
    hole.style.opacity = 0;
  }
到这里整个黑洞代码已经完成,整合一下blackhole.js代码如下:
function initBlackHole(callback) {
  var styleNode = document.createElement("style");

  styleNode.type = "text/css";
  styleNode.textContent =
    ".hole-removed{visibility: hidden;} .hole-attracted{ animation: attraction 2.1s infinite linear; } @keyframes attraction {from {transform: rotate(0deg) scale(1);}to { transform: rotate(359deg) scale(0);}};";

  document.head.appendChild(styleNode);

  document.body.style["overflow-x"] = "hidden";

  var all_elements = document.querySelectorAll(
    "*:not(html,head, title, link, meta, script, style, noscript, body, li, p, span,#hole)"
  );
  all_elements = Array.from(all_elements);

  var screen_width = Math.min(document.body.scrollWidth, window.innerWidth);
  var screen_height = Math.max(document.body.scrollHeight, window.innerHeight);

  var recursion = 0;
  createHoleElement();
  absorbElement();

  function absorbElement() {
    if (all_elements.length == 0 || recursion > 20) {
      callback();
      return;
    }
    var random = Math.floor(Math.random() * all_elements.length);
    var el = all_elements[random];

    var childs = el.querySelectorAll("*:not(.hole-flagged)");

    if (typeof el == "undefined" || childs.length > 100) {
      recursion++;
      absorbElement();
      return;
    } else {
      resursion = 0;
    }

    childs.forEach(function (node) {
      node.classList.add("hole-flagged");
    });

    var el_width = el.offsetWidth;
    var el_height = el.offsetHeight;
    var el_offset_x = el.offsetLeft;
    var el_offset_y = el.offsetTop;

    var el_clone = el.cloneNode(true);
    el_clone.classList.add("hole-attracted");
    el.classList.add("hole-removed");
    el.classList.add("hole-flagged");

    document.body.appendChild(el_clone);

    el_clone.style["position"] = "absolute";
    el_clone.style["width"] = el_width + "px";
    el_clone.style["height"] = el_height + "px";
    el_clone.style["top"] = el_offset_y + "px";
    el_clone.style["left"] = el_offset_x + "px";
    el_clone.style["transition"] = "all 2s ease-out";
    el_clone.style["transform-origin"] = "center";
    el_clone.style["z-index"] = 999999;

    setTimeout(function () {
      el_clone.style["top"] = screen_height * 0.5 - el_height / 2 + "px";
      el_clone.style["left"] = screen_width * 0.5 - el_width / 2 + "px";
    }, 1);

    setTimeout(
      function () {
        el_clone.parentNode.removeChild(el_clone);
      }.bind(null, el_clone),
      2000
    );

    all_elements = all_elements.filter(function (node) {
      return !node.classList.contains("hole-flagged");
    });

    setTimeout(absorbElement, 50);
  }

  function createHoleElement() {
    // 获取要添加圆球的元素
    const hole = document.getElementById("hole");

    // 设置圆球的初始位置和大小
    let x = screen_width * 0.5;
    let y = screen_height * 0.5;

    var diagonal = screen_width>screen_height?screen_width:screen_height;

    // 添加圆球到页面中
    hole.style.overflow = "hidden";
    hole.style.position = "absolute";
    hole.style.left = x + "px";
    hole.style.top = y + "px";
    hole.style.width = diagonal + "px";
    hole.style.height = diagonal + "px";
    hole.style.borderRadius = "50%";
    hole.style.backgroundColor = "#000";
    hole.style.transform = "translate(-50%, -50%) scale(0)";
    hole.style.animation = "black-hole-animation 15s linear infinite";
    hole.style.animationIterationCount = 1;
    hole.style.animationFillMode = "forwards";
    hole.style.zIndex = 999998;
    hole.style.opacity = 0;
  }
}
接下来就是在自己网站中引入JS,触发事件,本人使用的是NG-ZORRO框架,去掉逻辑代码具体实现如下:
import { Component } from '@angular/core';
import { EventManager } from '@angular/platform-browser';
import 'src/assets/custom/blackhole.js';
declare var initBlackHole: any;

@Component({
  selector: 'app-root',
  templateUrl: './app.component.html',
  styleUrls: ['./app.component.less'],
})
export class AppComponent {
  constructor(
    private eventManager: EventManager,
  ) {
    eventManager.addGlobalEventListener(
      'window',
      'keydown',
      (event: KeyboardEvent) => {
        let that = this;
        if (event.keyCode === 123 || event.ctrlKey && event.shiftKey && event.keyCode === 73) {
          event.preventDefault();
          that.startBlackHole();
        }
      }
    );
  }

  ngOnInit(): void {}

  startBlackHole() {
    new initBlackHole(this.blackHoleCallBack, this);
  }

  blackHoleCallBack(self: any) {

  }
}
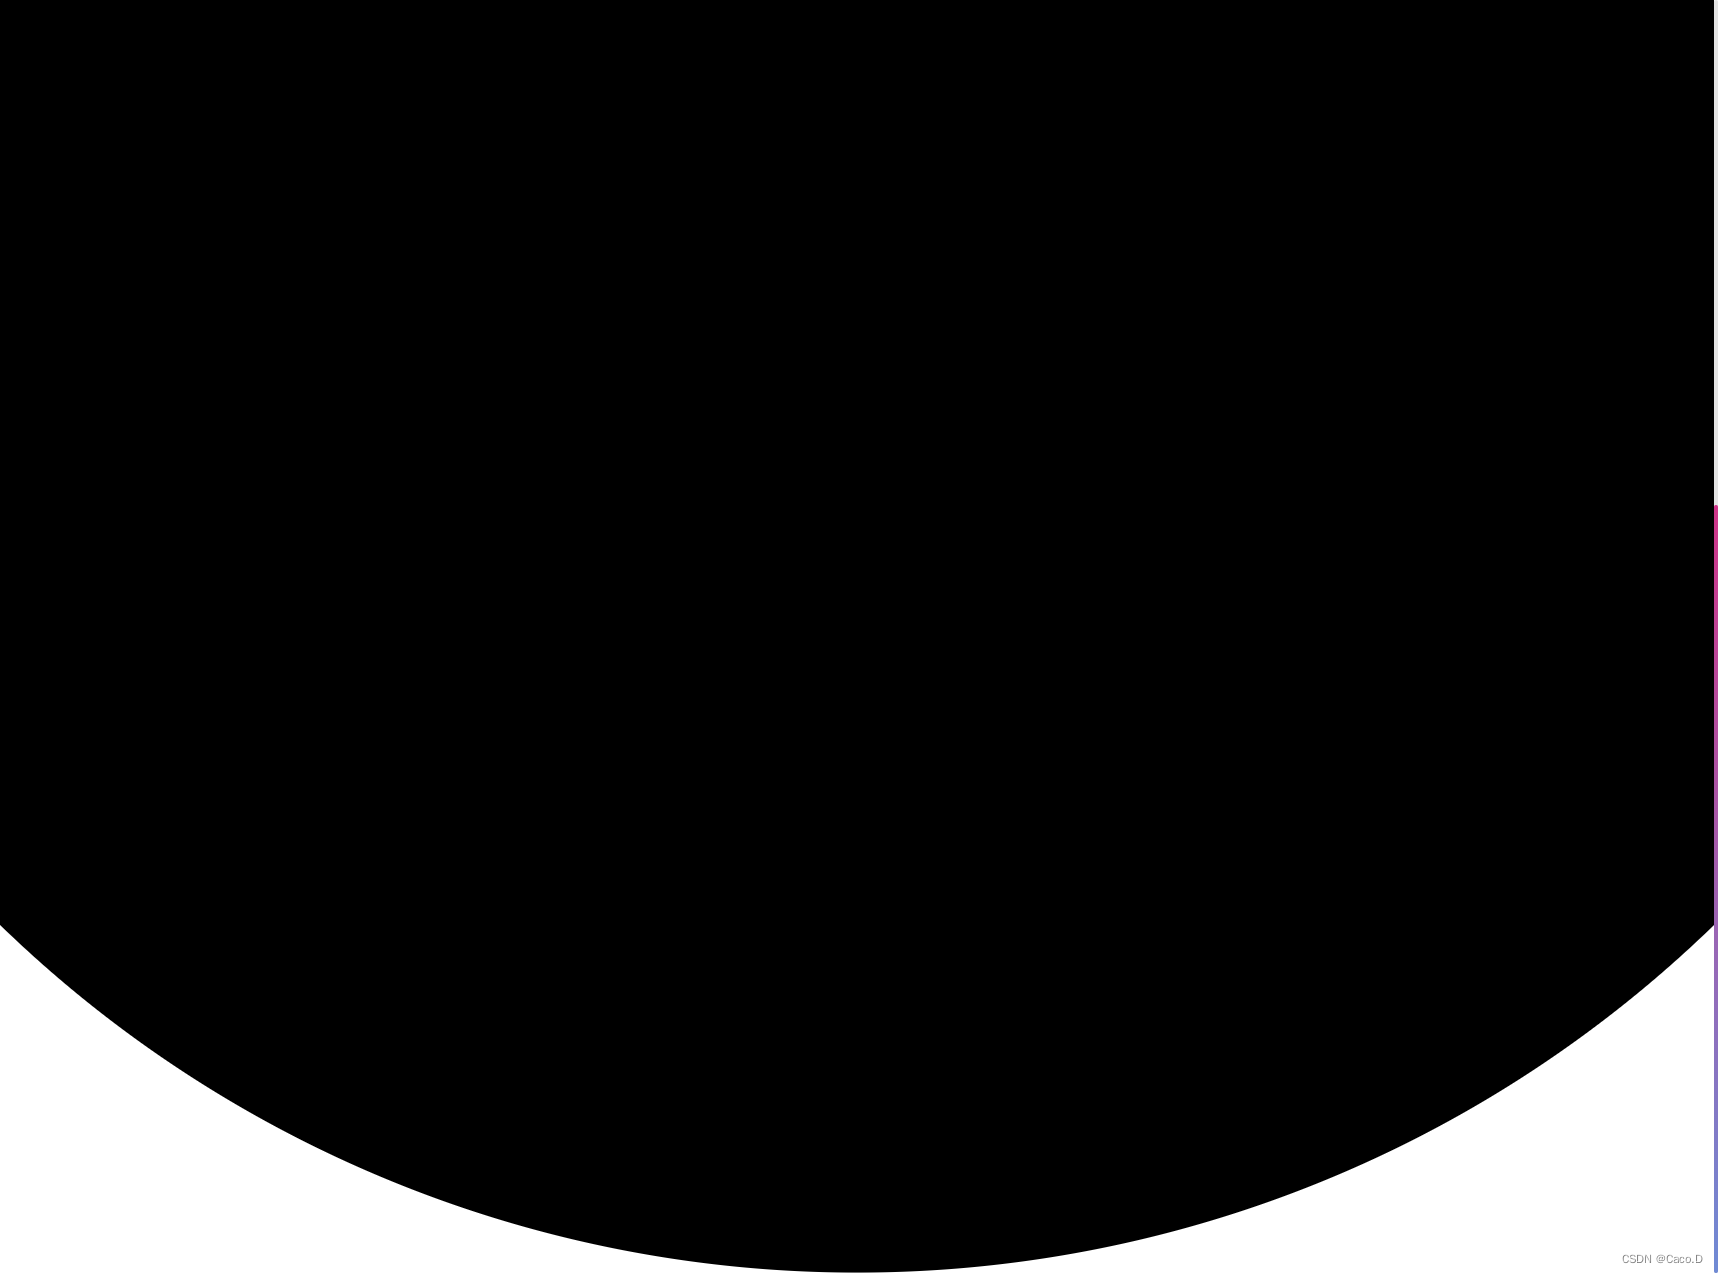
最终优化效果如下图:
黑洞最终效果
参考文献:https://playvairus.com/?blackhole


 648
648

 被折叠的 条评论
为什么被折叠?
被折叠的 条评论
为什么被折叠?
 到【灌水乐园】发言


