


首先,先来介绍下这两个组件:
Recylerview:
Google官方定义:
RecyclerView 小组件比 ListView 更高级且更具灵活性。
此小组件是一个用于显示庞大数据集的容器,可通过保持有限数量的视图进行非常有效的滚动操作。如果您有数据集合,其中的元素将因用户操作或网络事件而发生改变,请使用 RecyclerView 小组件。
如果要使用 RecyclerView 小组件,必须指定一个适配器和一个布局管理器。要创建一个适配器,需扩展 RecyclerView.Adapter 类别,RecyclerView 提供这些内置布局管理器:
- LinearLayoutManager 以垂直或水平滚动列表方式显示项目。
- GridLayoutManager 在网格中显示项目。
- StaggeredGridLayoutManager 在分散对齐网格中显示项目。
Cardview
CardView 小组件可拥有阴影和圆角。
RecyclerView 与 CardView 小组件为 v7 支持内容库的一部分。使用前需添加依赖项。
compile 'com.android.support:cardview-v7:21.0.+'
compile 'com.android.support:recyclerview-v7:21.0.+'
1.打开Android Studio,新建一个Android项目。
2.在build.gradle中添加依赖,然后sync your project。
3.新建activity_main.xml文件,并添加RecylerView
<?xml version="1.0" encoding="utf-8"?>
<RelativeLayout
    xmlns:android="http://schemas.android.com/apk/res/android"
    xmlns:tools="http://schemas.android.com/tools"
    android:layout_width="match_parent"
    android:layout_height="match_parent"
    tools:context=".MainActivity">

    <android.support.v7.widget.RecyclerView
        xmlns:android="http://schemas.android.com/apk/res/android"
        android:id="@+id/my_recycler_view"
        android:layout_width="match_parent"
        android:layout_height="match_parent"
        android:clipToPadding="false"
        android:paddingBottom="16dp"
        android:paddingTop="16dp"
        android:scrollbars="vertical"
         />

</RelativeLayout>
4.使用CardView 创建RecylerView每一行的布局item_list.xml。
- 如果要在布局中设置圆角半径,请使用 card_view:cardCornerRadius 属性。
- 如果要设置卡片的背景颜色,请使用 card_view:cardBackgroundColor 属性。
<?xml version="1.0" encoding="utf-8"?>
<android.support.v7.widget.CardView xmlns:android="http://schemas.android.com/apk/res/android"
    xmlns:card_view="http://schemas.android.com/apk/res-auto"
    android:id="@+id/card_view"
    android:layout_width="match_parent"
    android:layout_height="80dp"
    android:layout_marginBottom="8dp"
    android:layout_marginLeft="16dp"
    android:layout_marginRight="16dp"
    android:background="#C5CAE9"
    android:foreground="?attr/selectableItemBackground"
    android:theme="@style/ThemeOverlay.AppCompat.Dark.ActionBar">
<RelativeLayout
    android:layout_width="match_parent"
    android:gravity="center"
    android:layout_height="match_parent">

    <ImageView
        android:id="@+id/list_avatar"
        android:layout_width="40dp"
        android:layout_height="40dp"
        android:layout_centerVertical="true"
        android:layout_alignParentLeft="true"
        android:layout_marginLeft="10dp"
        android:scaleType="centerCrop"
        android:src="@drawable/icon" />

    <TextView
        android:id="@+id/list_title"
        android:layout_centerVertical="true"
        android:layout_width="match_parent"
        android:layout_height="wrap_content"
        android:layout_marginLeft="16dp"
        android:layout_toRightOf="@+id/list_avatar"
        android:text="Androidwarriors "
        android:textColor="#000000"
        android:textAppearance="?attr/textAppearanceListItem"
        android:textSize="16sp" />

    <TextView
        android:id="@+id/list_desc"
        android:layout_width="match_parent"
        android:layout_height="wrap_content"
        android:layout_below="@+id/list_title"
        android:layout_marginLeft="16dp"
        android:layout_toRightOf="@+id/list_avatar"
        android:textColor="#000000"
        android:ellipsize="end"
        android:singleLine="true"
        android:text="Place to dive into android programming"
        android:textAppearance="?attr/textAppearanceListItem"
        android:textSize="14sp" />
</RelativeLayout>
</android.support.v7.widget.CardView>
5.创建RecylerView的适配器MyAdapter 。
需要实现三个方法:
- onCreateViewHolder()
- onBindViewHolder()
- getItemCount()
public class MyAdapter extends RecyclerView.Adapter {
    @Override
    public RecyclerView.ViewHolder onCreateViewHolder(ViewGroup parent, int viewType) {
        return null;
    }

    @Override
    public void onBindViewHolder(RecyclerView.ViewHolder holder, int position) {

    }

    @Override
    public int getItemCount() {
        return 0;
    }
}
6.通过继承RecyclerView.ViewHolder 创建自定义ViewHolder.
   // 重写的自定义ViewHolder
   public static class ViewHolder extends RecyclerView.ViewHolder {

       public TextView mTextView;
       public ImageView mImageView;

       public ViewHolder(View v) {
           super(v);
           mTextView = (TextView) v.findViewById(R.id.list_title);
           mImageView = (ImageView) v.findViewById(R.id.list_avatar);
       }
   }
7.用以下代码替换MyAdapter 中的。
@Override
public ViewHolder onCreateViewHolder(ViewGroup parent, int viewType) {
// 给ViewHolder设置布局文件
View v = inflater.inflate(R.layout.item_list, parent, false);
ViewHolder vh = new ViewHolder(v);
return vh;
}
@Override
public void onBindViewHolder(ViewHolder holder, int position) {
// 给ViewHolder设置元素
ItemBean p = ItemBeans.get(position);
holder.mTextView.setText(p.getTv());
holder.mImageView.setImageResource(p.getImg());
}
@Override
public int getItemCount() {
// 返回数据总数
return ItemBeans == null ? 0 : ItemBeans.size();
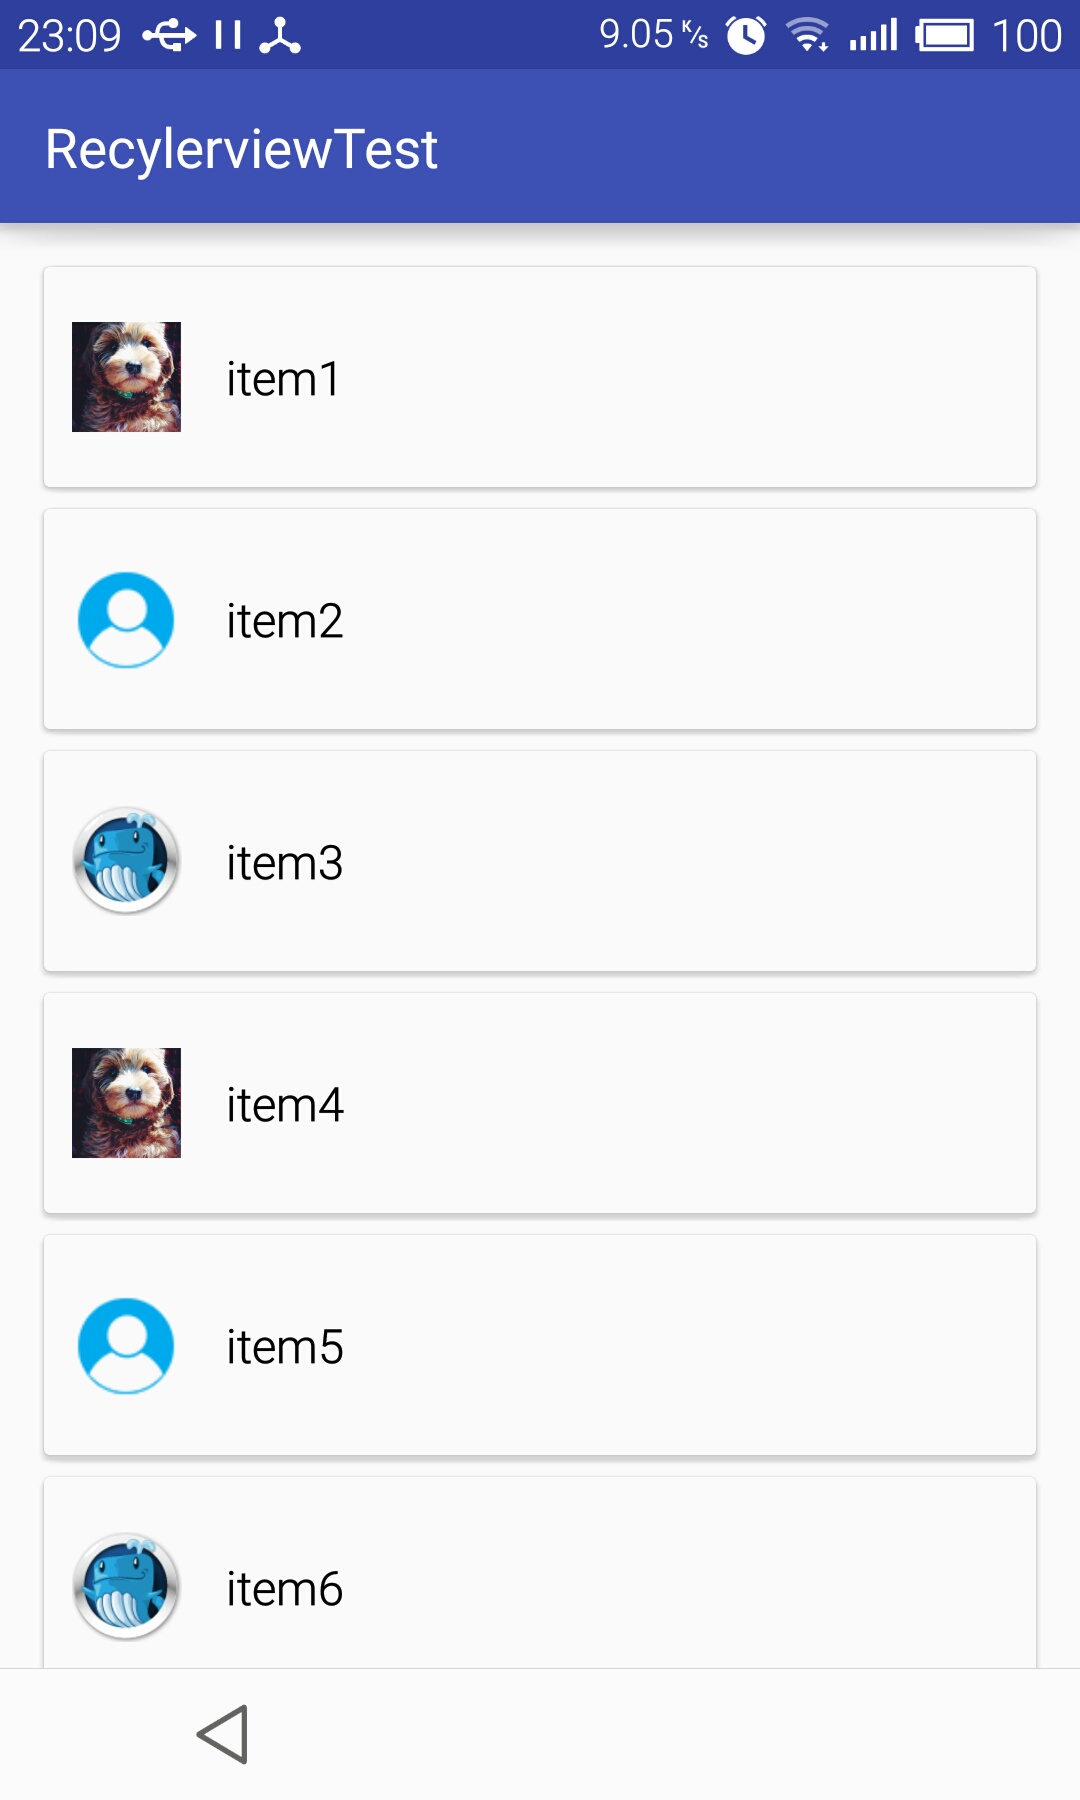
}8.在MainActivity完成View的初始化以及RecylerView的数据适配。
mRecyclerView = (RecyclerView) findViewById(R.id.my_recycler_view);
        // 设置LinearLayoutManager
        mRecyclerView.setLayoutManager(new LinearLayoutManager(this));

        mAdapter = new MyAdapter(this, itemList);
        mRecyclerView.setAdapter(mAdapter);
运行效果:


 1812
1812

 被折叠的 条评论
为什么被折叠?
被折叠的 条评论
为什么被折叠?
 到【灌水乐园】发言


