一、新建Native C++工程
- 打开Android Studio
- 选择

- 选择新建Native C++工程
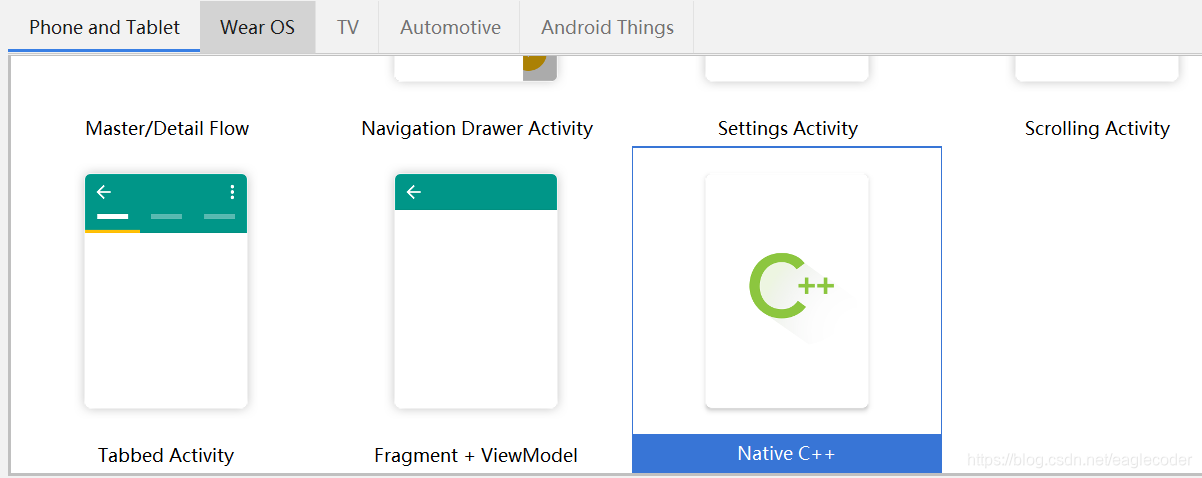
- 依次往下,完成工程创建
二、绘制UI界面
- 添加Button
- 绘制如下界面
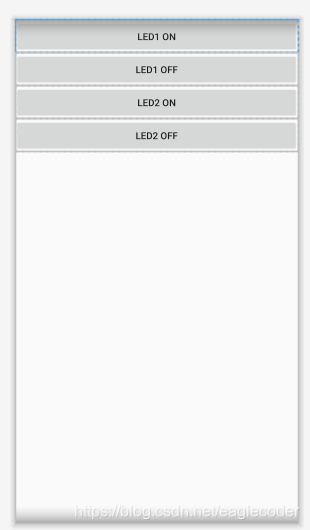
- xml文件
<?xml version="1.0" encoding="utf-8"?>
<LinearLayout xmlns:android="http://schemas.android.com/apk/res/android"
    android:orientation="vertical" android:layout_width="match_parent"
    android:layout_height="match_parent">

    <Button
        android:id="@+id/button"
        android:layout_width="match_parent"
        android:layout_height="wrap_content"
        android:text="LED1 ON" />

    <Button
        android:id="@+id/button2"
        android:layout_width="match_parent"
        android:layout_height="wrap_content"
        android:text="LED1 OFF" />

    <Button
        android:id="@+id/button3"
        android:layout_width="match_parent"
        android:layout_height="wrap_content"
        android:text="LED2 ON" />

    <Button
        android:id="@+id/button4"
        android:layout_width="match_parent"
        android:layout_height="wrap_content"
        android:text="LED2 OFF" />
</LinearLayout>
三、编写原生代码
#include <jni.h>
#include <string>
#include <stdio.h>
#include <stdlib.h>
#include <fcntl.h>
#include <errno.h>
#include <unistd.h>
#include <sys/types.h>
#include <sys/stat.h>
#include <stdint.h>
#include <termios.h>
#include <android/log.h>
#include <sys/ioctl.h>

int fd=0;

extern "C" JNIEXPORT jint JNICALL
Java_com_example_leds_MainActivity_Open(JNIEnv* env, jobject obj) {
	fd = open("/dev/leds", O_RDWR|O_NDELAY|O_NOCTTY);
    return 0;
}

extern "C" JNIEXPORT jint JNICALL
Java_com_example_leds_MainActivity_Ioctl(JNIEnv* env, jobject obj, jint num, jint en) {
	ioctl(fd, en, num);
    return 0;
}
四、编写应用程序
package com.example.leds;

import androidx.appcompat.app.AppCompatActivity;

import android.os.Bundle;
import android.view.View;
import android.widget.Button;
import android.widget.TextView;

public class MainActivity extends AppCompatActivity {

    private Button button1,button2,button3,button4;

    // Used to load the 'native-lib' library on application startup.
    static {
        System.loadLibrary("native-lib");
    }

    @Override
    protected void onCreate(Bundle savedInstanceState) {
        super.onCreate(savedInstanceState);
        setContentView(R.layout.main);

        button1=(Button)findViewById(R.id.button);
        button2=(Button)findViewById(R.id.button2);
        button3=(Button)findViewById(R.id.button3);
        button4=(Button)findViewById(R.id.button4);

        Open();

        button1.setOnClickListener(new View.OnClickListener() {
            @Override
            public void onClick(View view) {
                Ioctl(0,1);
            }
        });

        button2.setOnClickListener(new View.OnClickListener() {
            @Override
            public void onClick(View view) {
                Ioctl(0,0);
            }
        });

        button3.setOnClickListener(new View.OnClickListener() {
            @Override
            public void onClick(View view) {
                Ioctl(1,1);
            }
        });

        button4.setOnClickListener(new View.OnClickListener() {
            @Override
            public void onClick(View view) {
                Ioctl(1,0);
            }
        });
    }

    /**
     * A native method that is implemented by the 'native-lib' native library,
     * which is packaged with this application.
     */
    public native int Ioctl(int num, int en);
    public native int Open();
}
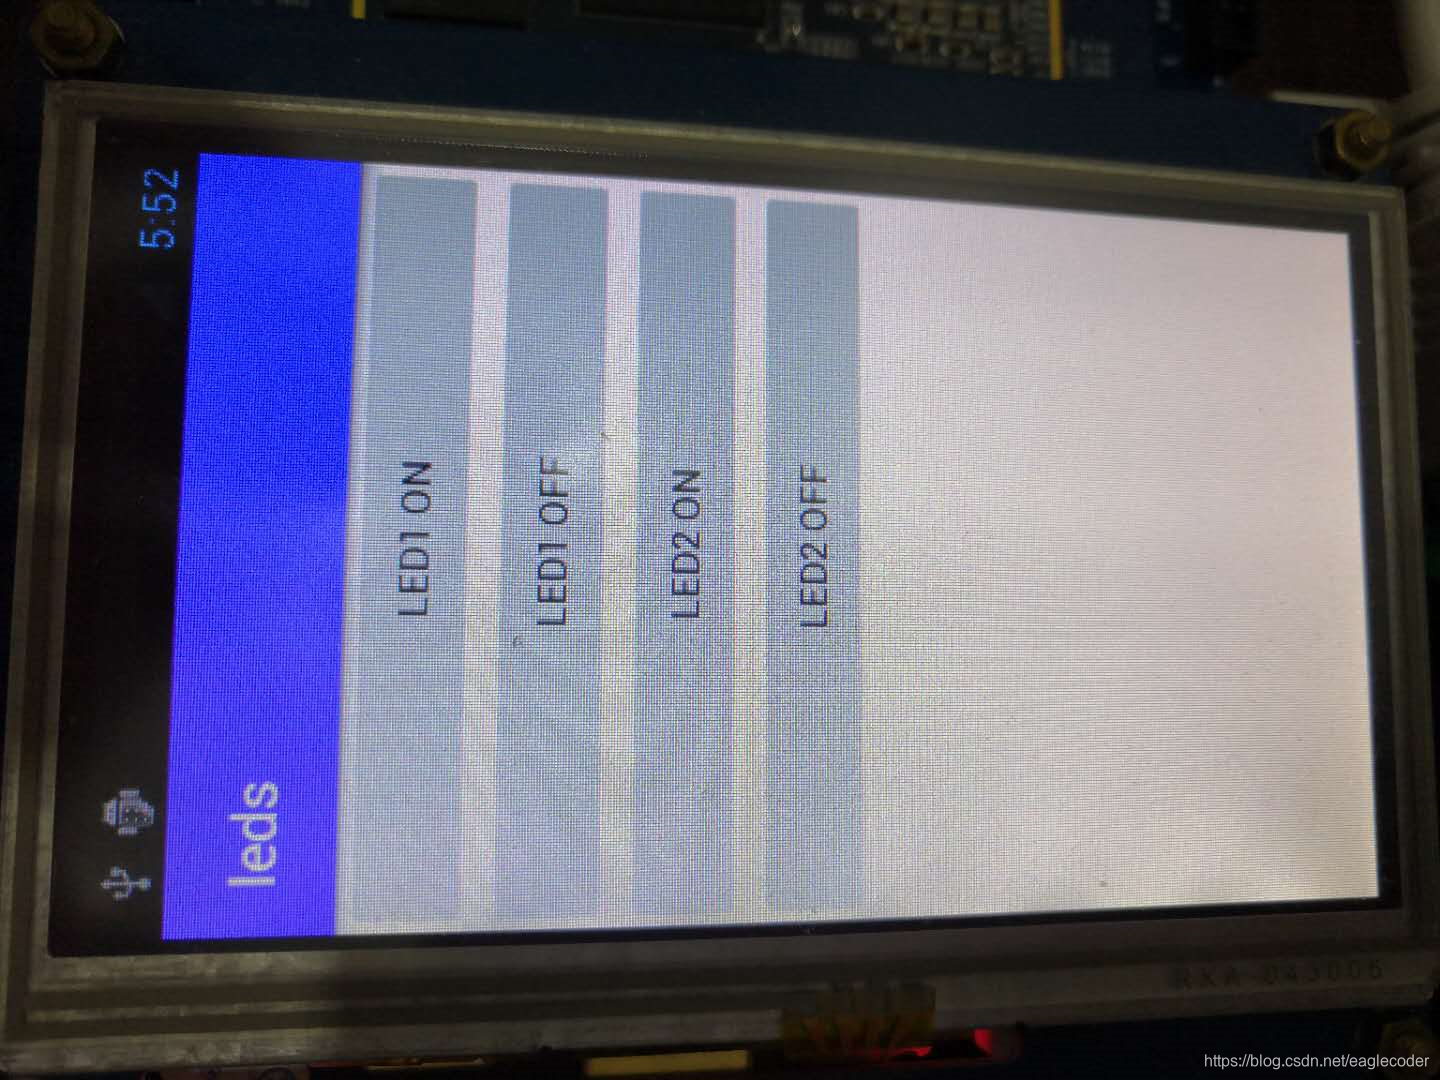
五、调试运行


 525
525

 被折叠的 条评论
为什么被折叠?
被折叠的 条评论
为什么被折叠?
 到【灌水乐园】发言


