


头像存储、获取及展示
一:需求

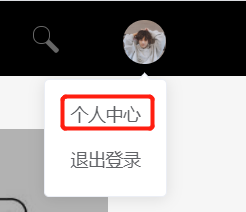
二:问题描述
1.刷新浏览器后,导航栏头像和个人中心内容及头像,数据获取不到。
2.个人中心头像获取有延迟(会出现闪一下的情况)。
三:解决方法
思路1:
(头部导航头像样式代码二 + 个人中心头像样式代码一)
(头部导航头像样式代码一 + 个人中心头像样式代码一)
将获取个人中心的方法放到mounted中,虽然可以解决每次刷新浏览器获取不到数据的问题,但是不仅会出现,刚开始进项目后,拦截用户未登录状态的提示会弹出两次,还会出现,虽然打印显示数据都被赋值,但是头部导航头像样式不改变的情况。
拦截用户未登录状态的提示会弹出两次,是因为在获取个人中心数据的方法中调用的两个接口都需要用户登录,正常情况是,用户刚进项目是不需要登录提示的,因为首页不用登录也可以查看。(不可行)
头部导航头像样式不改变,有人说是因为项目中使用的vue版本问题,虽然值被改变但是并不能触发样式的改变,之前获取头像样式的代码是this.userInfo.photoUrl = res;,这样直接赋值并不能触发样式的变化,后来将代码改为如下就可以触发样式的改变了,
this.$store.dispatch("getFileImg",response.data.data.headImg).then((res) => {
    let temp = JSON.parse(JSON.stringify(this.userInfo)); //防止原数据被改变
    temp.photoUrl = res;
    this.userInfo = temp;
});
但是这样还会导致打开个人中心页面头像获取有延迟的问题(因为走接口了)。
解决头像获取有延迟的问题,将获取个人中心的方法放在点击打开个人中心页面的方法中,并设置几毫秒后再打开个人中心的页面,如此还可以解决拦截用户未登录状态的提示会弹出两次的问题,代码如下:
// 点击头像触发的动作
handleCommand(command) {
    switch (command) {
        case "logout": {
            this.userLogout();
        }break;
        case "login": {
            this.userLogin();
        }break;
        case "goUserInfo": {
           // 设置8毫秒后再打开,解决打开个人中心头像闪一下的问题(因为获取头像需要走接口)
           setTimeout(()=>{
                this.getList(); //获取个人中心页面的内容
                // 打开抽屉
                this.drawer = true;
            },800)
            this.drawer = true;
        }break;
    }
},
此法虽然可以解决问题,但还是会有些不足之处:打开个人中心页面被延迟了8毫秒,用户体验不太好;由于是走接口获取的数据,导航栏头像获取有延迟。
思路2:
(头部导航头像样式代码三 + 个人中心头像样式代码二)
在mounted只放获取头像样式的代码(可以同时解决头部导航头像和个人中心头像获取有延迟的问题):
if (!this.user.avatar) {
   this.$store.commit("SET_AVATAR", localStorage.getItem("avatar") ? localStorage.getItem("avatar") : '');
}
let avatar = this.user.avatar;
// 如果avatar为空就不执行 格式转换了
if (avatar) {
    // 请求服务器获取字节流,然后转成base64格式的图片
    this.$store.dispatch("getFileImg", avatar).then((res) => {
        this.avatar = res;
    });
} else {
    this.avatar = "../../static/images/defaultAvatar.png";
}
将获取个人中心的方法放在点击打开个人中心页面的方法中(可以解决拦截用户未登录状态的提示会弹出两次的问题),代码如下:
// 点击头像触发的动作
handleCommand(command) {
    switch (command) {
        case "logout": {
            this.userLogout();
        }break;
        case "login": {
            this.userLogin();
        }break;
        case "goUserInfo": {
            this.getList(); //获取个人中心页面的内容
            this.drawer = true;
        }break;
    }
},
附1:头部导航头像和个人中心头像样式代码:
头部导航头像样式代码一:
<span class="el-dropdown-link">
	<img
	     v-if="!isLogin || userInfo.photoUrl == undefined"
	     src="../../static/images/defaultAvatar.png"
	 />
	 <img v-if="isLogin && userInfo.photoUrl == undefined"
	      src="https://wpimg.wallstcn.com/f778738c-e4f8-4870-b634-56703b4acafe.gif">
	 <img
	     v-if="isLogin && userInfo.photoUrl != undefined"
	     :src="userInfo.photoUrl"
	 />
</span>
头部导航头像样式代码二:
<span class="el-dropdown-link">
    <img :src="userInfo.photoUrl"/>
</span>
头部导航头像样式代码三:
<span class="el-dropdown-link">
   <img :src="avatar"/>
</span>
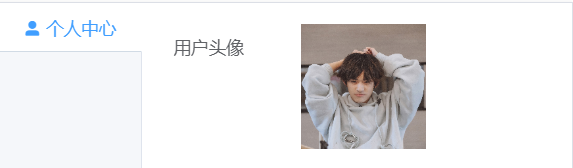
个人中心头像样式代码一:
<el-form-item label="用户头像" :label-width="labelWidth" >
   <div class="imgBody" v-if="userInfo.photoUrl">
        <img
            @mouseover="icon = true"
            @mouseout="icon = false"
            v-bind:src="userInfo.photoUrl"
        />
    </div>
    <div v-else class="uploadImgBody" @click="checkPhoto">
        <i class="el-icon-plus avatar-uploader-icon"></i>
    </div>
</el-form-item>
个人中心头像样式代码二:
<el-form-item label="用户头像" :label-width="labelWidth" >
   <div class="imgBody" v-if="avatar">
        <img
            @mouseover="icon = true"
            @mouseout="icon = false"
            v-bind:src="avatar"
        />
    </div>
    <div v-else class="uploadImgBody" @click="checkPhoto">
        <i class="el-icon-plus avatar-uploader-icon"></i>
    </div>
</el-form-item>
附2:查看vue版本方法
vue -V或者是vue --version查询的是vue-cli的版本,也就是vue脚手架的版本,如果想要查看vue的版本,直接去项目中,找到package.json文件夹 找"dependencies"然后就可以看到vue的版本了。
"dependencies": {
  "core-js": "^2.6.5",
  "vue": "^2.6.10",
  "vue-router": "^3.1.3"
},
附3:头像格式转化代码
后台传给前端的是图片格式是字节流,需要将其转化为base64的格式还可以显示,又由于多处使用头像,故使用vuex存储头像。
1.store 文件夹下的 user.js 组件:
//import  {getUserAvatar}  from "../api/user"; //getUserAvatar是接口方法,但需要的是url
import  urlData  from "../api_list/index"; //index组件中存放的是url
import axios from "axios";
const app = {
  // 全局状态
   state: {
       avatar: '',//头像
   },

   // getters是对数据的包装,例如对数据进行拼接,或者过滤
   getters: {
   },

   // 如果我们需要更改store中的状态,一定要通过mutations来进行操作
   mutations: {
       // 传入自定义参数---头像
       SET_AVATAR: (state, avatar) => {
           state.avatar = avatar
       },
   },

   // actions是我们定义的一些操作,正常情况下,我们很少会直接调用actions方法来改变state
   actions: {
       // 获取头像字节流并转成base64格式
       getFileImg({ commit, state }, avatar) {
           //由于图片接口的请求和其他接口的请求不一样,需单独写请求方法
           return axios.create()({
               url: urlData.getUserAvatar,
               data: {filePath:avatar},
               method: "post",
               responseType: "arraybuffer",
               headers: {
                   rtoken: localStorage.getItem("rtoken")
               },
           }).then(function (response) {
             return "data:image/png;base64," + btoa(new Uint8Array(response.data).reduce((data, byte) => data + String.fromCharCode(byte), ""));
           })
       },
   }
}
export default app
2.用户登录后对头像的处理:
// 把头像放到store中
this.$store.commit("SET_AVATAR", response.data.data.userInfo.headImg ? response.data.data.userInfo.headImg : '');
// 把头像存到本地
if (response.data.data.userInfo.headImg){
    localStorage.setItem("avatar", response.data.data.userInfo.headImg);
}else {
    window.localStorage.removeItem("avatar");
}
3.在其他组件中引用头像
import { mapState } from "vuex"; //先引入vuex
export default {
    ...mapState(["user"]),
    mounted() {
        // 头像
        debugger
        if (!this.user.avatar) {
            this.$store.commit("SET_AVATAR", localStorage.getItem("avatar") ? localStorage.getItem("avatar") : '');
        }
        let avatar = this.user.avatar;
        // 如果avatar为空就不执行 格式转换了
        if (avatar) {
            // 请求服务器获取字节流,然后转成base64格式的图片
            this.$store.dispatch("getFileImg", avatar).then((res) => {
                this.avatar = res;
            });
        } else {
            this.avatar = "../../static/images/defaultAvatar.png";
        }
    },
}
附4:为什么将改变头像的方法放在mounted中而不是放在created中
这就涉及到vue中的时间周期问题了,详细描述见:不来看看这些 VUE 的生命周期钩子函数?
数据挂载发生在created之后,即使在created中改变了头像的样式,但是在数据挂载后又恢复了原样,但是mounted是在数据挂载之后发生的,所以在方法中改变的头像样式不会被顶替下来。


 被折叠的 条评论
为什么被折叠?
被折叠的 条评论
为什么被折叠?
 到【灌水乐园】发言


