


随着spring在实际项目开发过程中的广泛应用,springboot的地位日渐凸显,我们相比都有体会,spring虽然好用,也有那么强大的注解功能,但是他还是需要很多配置,当我们初始创建项目的时候,仍然需要那么多的jar包,写那么多的配置,一不小心还容易出错误,调试好久,那么,从看到这篇博文起,你将不会再受这样的困扰,因为springboot正在来解救你!
一、springboot简介
就像开头说的,springboot是用来简化新Spring应用的初始搭建以及开发过程。该框架使用了特定的方式来进行配置,从而使开发人员不再需要定义样板化的配置,甚至不需要再去配置一些繁琐的xml配置文件。
框架特点:
1:创建独立的spring应用。
2:嵌入Tomcat, Jetty Undertow 而且不需要部署他们。
3:提供的“starters”poms来简化Maven配置
4:尽可能自动配置spring应用。
5:提供生产指标,健壮检查和外部化配置
6:绝对没有代码生成和XML配置要求
二、走进springboot
我的基础环境
jdk7+maven3+Servlet3容器
1. 创建项目
- 添加Spring Boot相关POM配置
<?xml version="1.0" encoding="UTF-8"?>
<project xmlns="http://maven.apache.org/POM/4.0.0" xmlns:xsi="http://www.w3.org/2001/XMLSchema-instance"
         xsi:schemaLocation="http://maven.apache.org/POM/4.0.0 http://maven.apache.org/xsd/maven-4.0.0.xsd">
  <modelVersion>4.0.0</modelVersion>

  <groupId>com.mu.test</groupId>
  <artifactId>spring-boot-demo</artifactId>
  <version>0.0.1-SNAPSHOT</version>
  <packaging>war</packaging>

  <name>springBootTest</name>
  <description>Demo project for Spring WebMvc</description>
    <!-- spring-boot-starter-parent是一个特殊的starter,它提供了有用的Maven默认设置。 -->
  <parent>
    <groupId>org.springframework.boot</groupId>
    <artifactId>spring-boot-starter-parent</artifactId>
    <version>1.2.5.RELEASE</version>
    <relativePath/>
  </parent>

  <properties> <!-- 修改兼容 jdk版本 -->
    <project.build.sourceEncoding>UTF-8</project.build.sourceEncoding>
    <java.version>1.7</java.version>
  </properties>

  <dependencies>
    <dependency><!-- 这个必须,spring相关的基础依赖 -->
      <groupId>org.springframework.boot</groupId>
      <artifactId>spring-boot-starter-web</artifactId>
    </dependency>
    <dependency><!-- thymeleaf 可以替代jsp的标签库  看情况可以不加   -->
      <groupId>org.springframework.boot</groupId>
      <artifactId>spring-boot-starter-thymeleaf</artifactId>
    </dependency>
  </dependencies>

  <build>
    <plugins>
      <plugin><!-- 必须   -->
        <groupId>org.springframework.boot</groupId>
        <artifactId>spring-boot-maven-plugin</artifactId>
      </plugin>
    </plugins>
  </build>
</project>- 创建代码
在/src/main/java/com/mu/test/包路径下创建Application.java文件
package com.mu.test;

import org.springframework.boot.SpringApplication;
import org.springframework.boot.autoconfigure.SpringBootApplication;
import org.springframework.boot.builder.SpringApplicationBuilder;
import org.springframework.boot.context.web.SpringBootServletInitializer;
import org.springframework.web.bind.annotation.RequestMapping;
import org.springframework.web.bind.annotation.RestController;

@SpringBootApplication
@RestController
public class Application{

    @RequestMapping("/")
    public String greeting() {
        return "Hello World!";
    }

    public static void main(String[] args) {
        SpringApplication.run(Application.class, args);
    }
}
执行 main 函数
控制台打印:
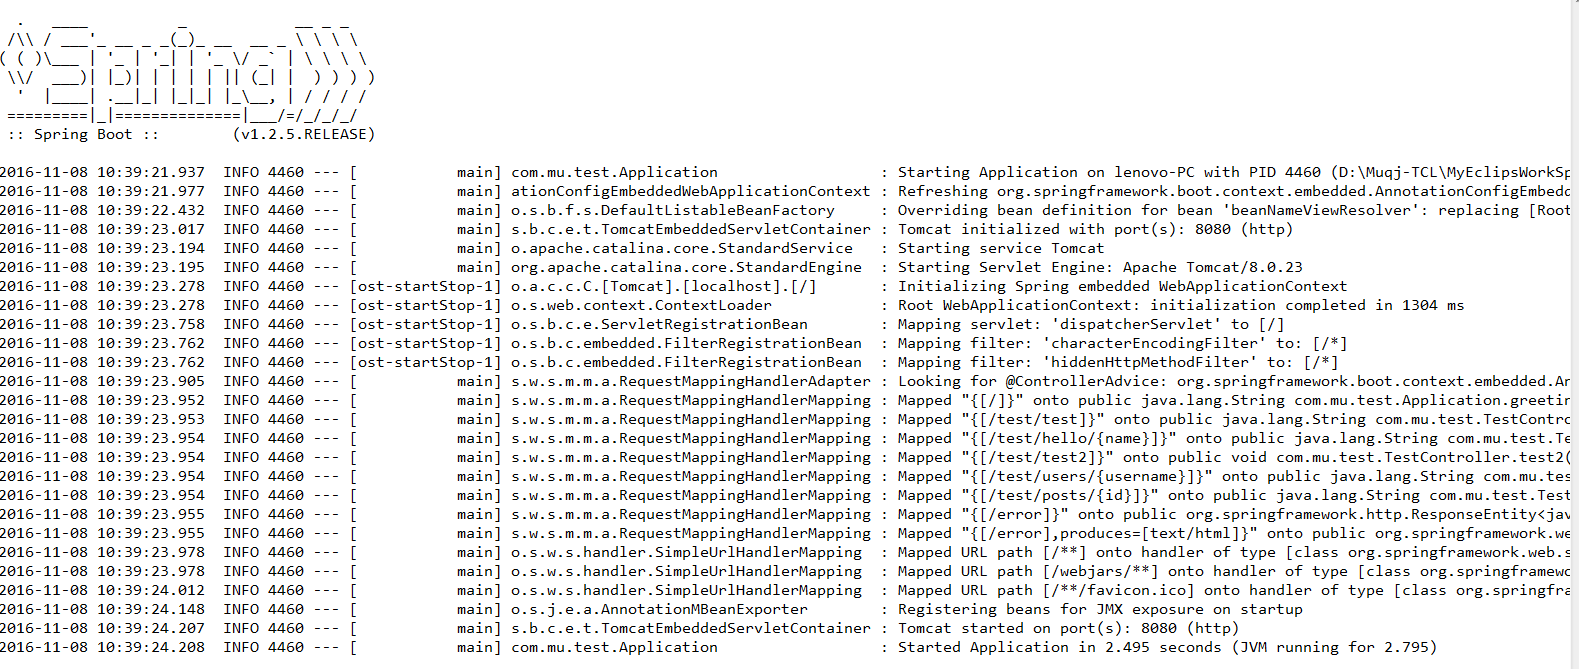
恭喜你,就差一步
访问:http://localhost:8080/
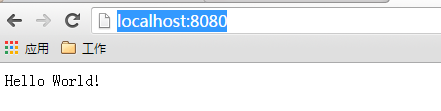
一个简单的基于springboot的hello,world就成功了!
三、springboot 打war
1、 修改pom.xml
<packaging>jar</packaging>修改成
<packaging>war</packaging> 2、新增如下到pom.xml文件中
<dependency>
    <groupId>org.springframework.boot</groupId>
    <artifactId>spring-boot-starter-tomcat</artifactId>
    <scope>provided</scope>
</dependency>
3、Application类继承SpringBootServletInitializer类,并重载
@Override
protected SpringApplicationBuilder configure(SpringApplicationBuilder application) {
return application.sources(Application.class);
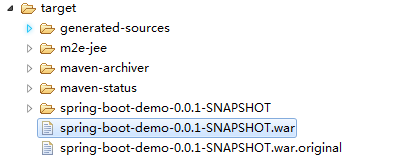
} 4、maven执行 clean install,查看目录
四、@PathVariable 用法
在实际应用中,我们经常遇到浏览器地址会有变化的情况,此种方式也可以用作传递参数
例如: http://localhost:8080/test/users/erbao

例如: http://localhost:8080/test/users/zhangsan

后台使用方式
@RequestMapping("/users/{username}")
    @ResponseBody
    public String userProfile(@PathVariable("username") String username) {
        return String.format("user %s", username);
    }


 6964
6964

 被折叠的 条评论
为什么被折叠?
被折叠的 条评论
为什么被折叠?
 到【灌水乐园】发言


