


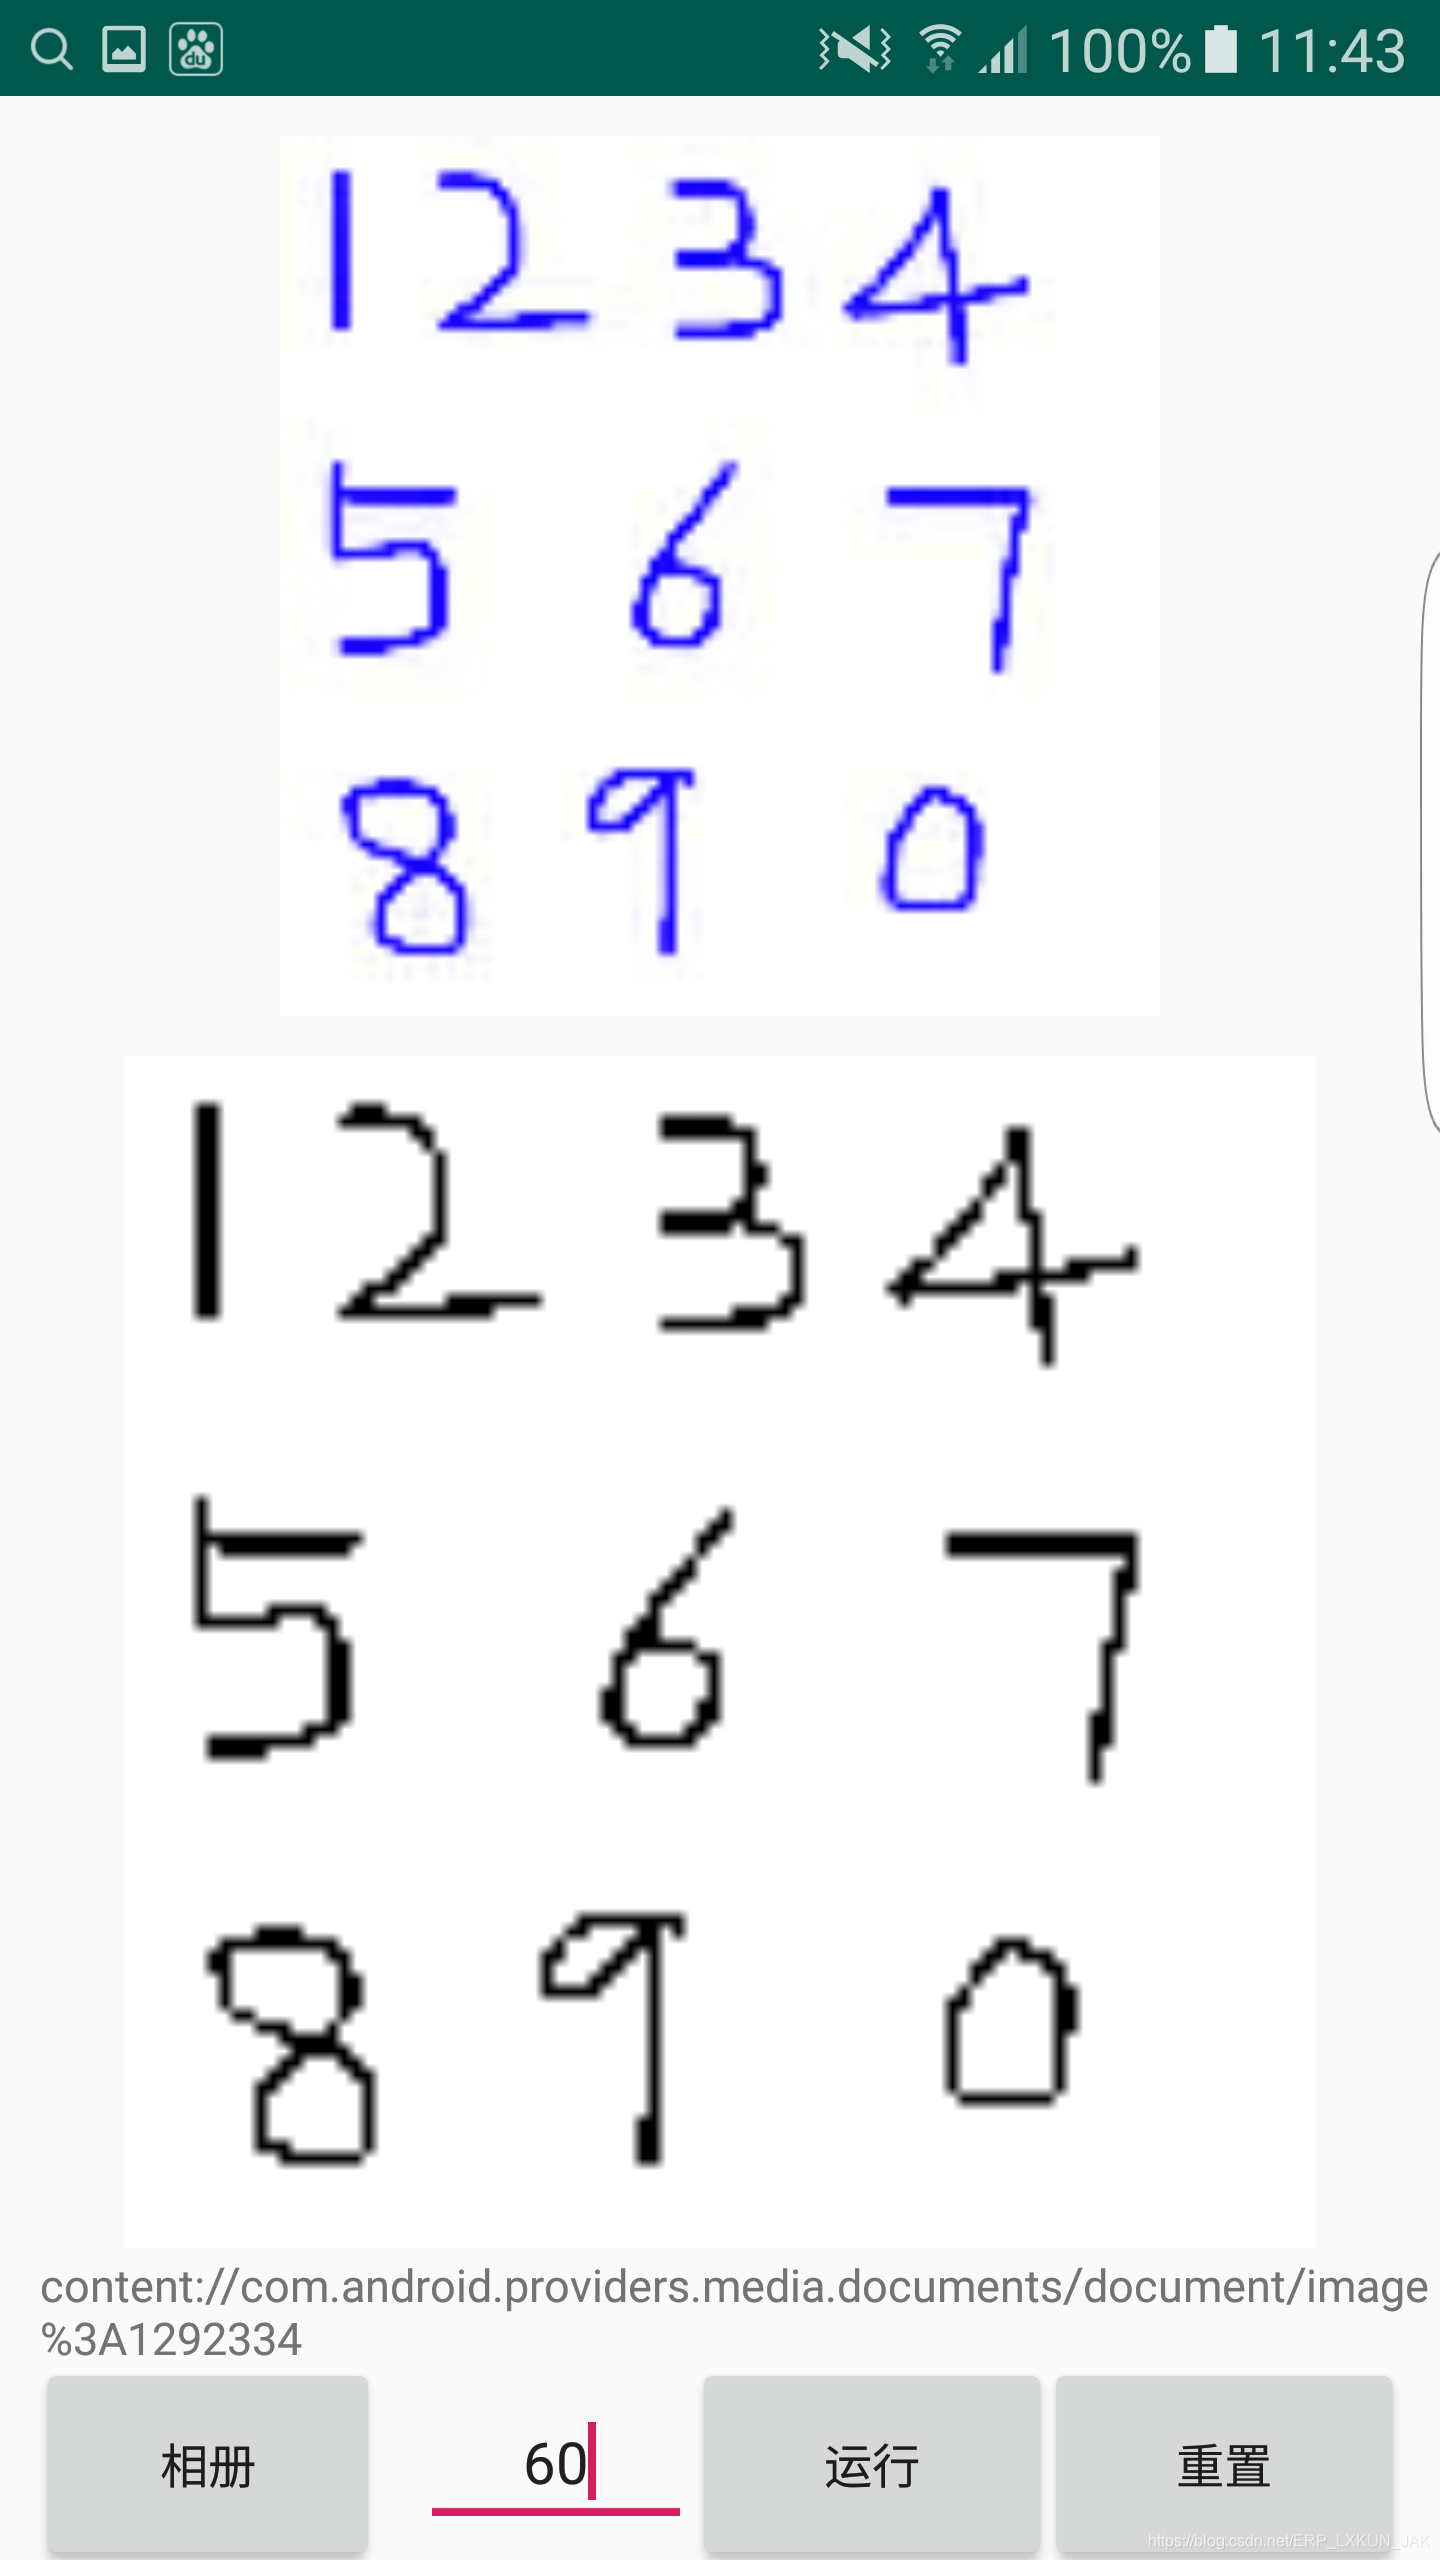
从相册选择一张图片,通过手动设置计算值域,得到一张绝对黑白图像,并在后台生成图像矩阵(0,1矩阵),不压缩显示。
.
开发工具:Android Studio
每一步操作均有详细注释,创建工程后代码直接复制可用
效果图:

二值化后后台打印输出的矩阵效果:电脑屏幕太小,图片太大了,像素点太多矩阵庞大,没法全部直观显示,为了效果直观,这里换一张较小的图片测试效果,
后台Log打印显示结果: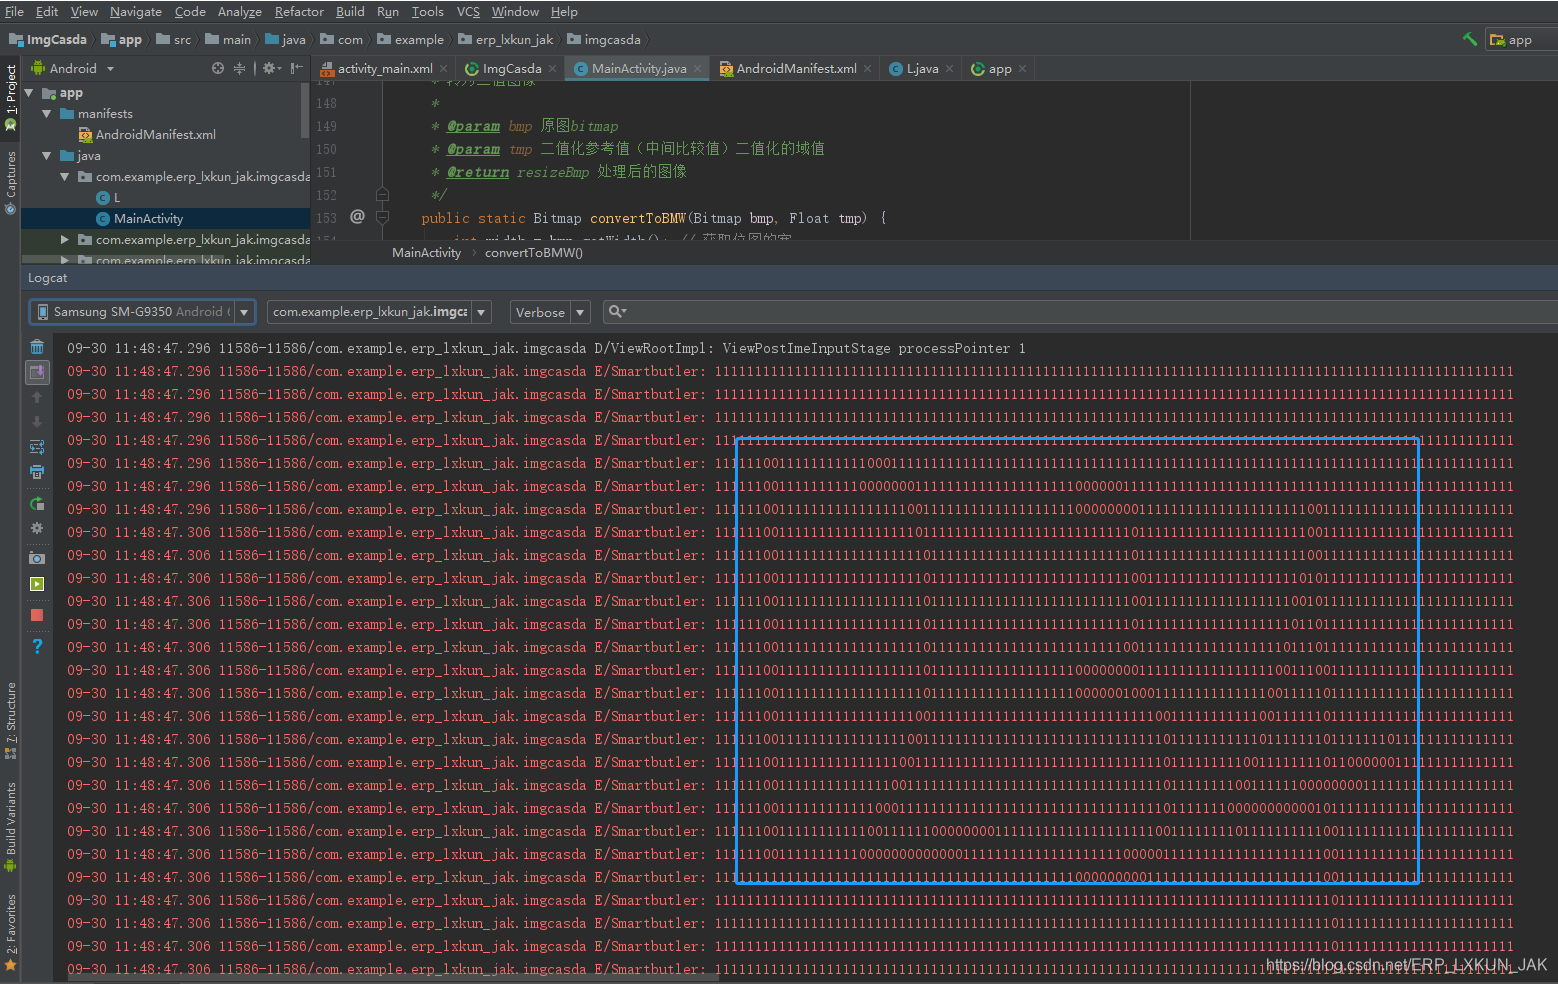
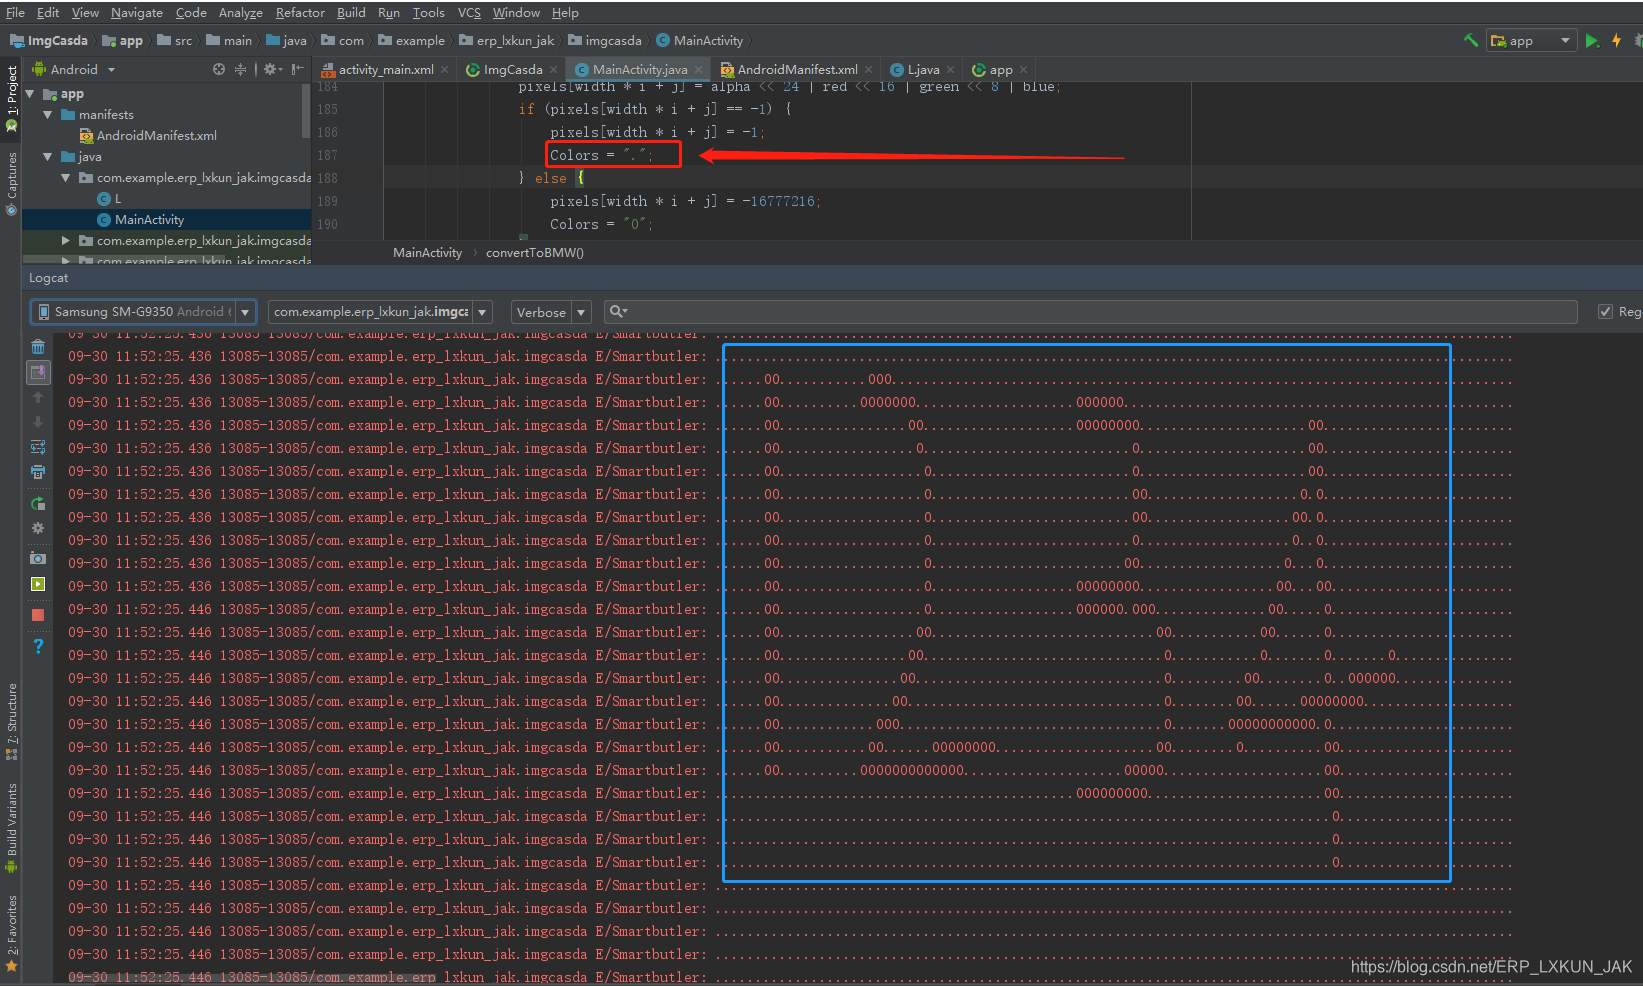
为了更加直观,这里将打印结果“1”修改为“.”,结果如下:
工程文档结构:
Log调试类【L.java】
public class L {

    //开关
    public static final boolean DEBUG = true;
    //TAG
    public static final String TAG = "Smartbutler";

    public static void e(String text){
        if(DEBUG){
            Log.e(TAG,text);
        }
    }
}
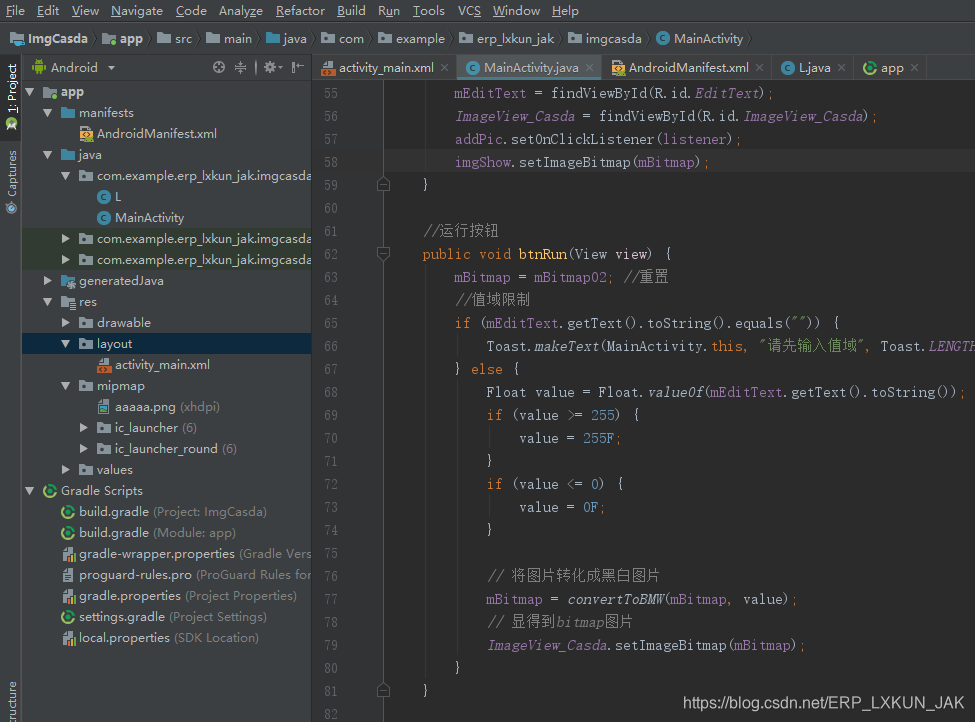
业务逻辑主类【MainActivity】
public class MainActivity extends Activity {

    private final String IMAGE_TYPE = "image/*";
    private final int IMAGE_CODE = 0; // 这里的IMAGE_CODE是自己任意定义的
    private static ImageView ImageView_Casda;
    private Button addPic;
    private ImageView imgShow;
    private TextView imgPath;
    private EditText mEditText;
    private Bitmap mBitmap = null;
    private Bitmap mBitmap02 = null;

    @Override
    public void onCreate(Bundle savedInstanceState) {
        super.onCreate(savedInstanceState);
        setContentView(R.layout.activity_main);
        //从源文件中取出一张图片
        mBitmap = BitmapFactory.decodeResource(getResources(), R.mipmap.aaaaa);
        mBitmap02 = mBitmap;        //保存用于重置
        init();
    }

    private void init() {
        addPic = findViewById(R.id.btn_add);
        imgPath = findViewById(R.id.img_path);
        imgShow = findViewById(R.id.imgShow);
        mEditText = findViewById(R.id.EditText);
        ImageView_Casda = findViewById(R.id.ImageView_Casda);
        addPic.setOnClickListener(listener);
        imgShow.setImageBitmap(mBitmap);
    }

    //运行按钮
    public void btnRun(View view) {
        mBitmap = mBitmap02; //重置
        //值域限制
        if (mEditText.getText().toString().equals("")) {
            Toast.makeText(MainActivity.this, "请先输入值域", Toast.LENGTH_SHORT).show();
        } else {
            Float value = Float.valueOf(mEditText.getText().toString());
            if (value >= 255) {
                value = 255F;
            }
            if (value <= 0) {
                value = 0F;
            }

            // 将图片转化成黑白图片
            mBitmap = convertToBMW(mBitmap, value);
            // 显得到bitmap图片
            ImageView_Casda.setImageBitmap(mBitmap);
        }
    }

    //重置按钮
    public void btnReset(View view) {
        ImageView_Casda.setImageBitmap(mBitmap02);
        mBitmap = mBitmap02; //重置
    }

    private View.OnClickListener listener = new View.OnClickListener() {

        @Override
        public void onClick(View v) {
            // TODO Auto-generated method stub
            Button btn = (Button) v;
            switch (btn.getId()) {
                case R.id.btn_add:
                    setImage();
                    break;
            }
        }

        private void setImage() {
            // TODO Auto-generated method stub
            // 使用intent调用系统提供的相册功能,使用startActivityForResult是为了获取用户选择的图片的地址
            Intent getAlbum = new Intent(Intent.ACTION_GET_CONTENT);
            getAlbum.setType(IMAGE_TYPE);
            startActivityForResult(getAlbum, IMAGE_CODE);
        }
    };

    protected void onActivityResult(int requestCode, int resultCode, Intent data) {

        // RESULT_OK 是系统自定义得一个常量
        if (resultCode != RESULT_OK) {
            L.e("onActivityResult,返回的resultCode出错");
            return;
        }
        // 外界的程序访问ContentProvider所提供数据 可以通过ContentResolver接口
        ContentResolver resolver = getContentResolver();
        // 判断接收的Activity是不是选择图片的
        if (requestCode == IMAGE_CODE) {
            try {
                // 获得图片的地址Uri
                Uri originalUri = data.getData();
                // 新建一个字符串数组用于存储图片地址数据。
                String[] proj = {MediaStore.Images.Media.DATA};
                // android系统提供的接口,用于根据uri获取数据
                Cursor cursor = managedQuery(originalUri, proj, null, null, null);
                // 获得用户选择图片的索引值
                int column_index = cursor.getColumnIndexOrThrow(MediaStore.Images.Media.DATA);
                L.e("获得用户选择图片的索引值:" + column_index);
                // 将游标移至开头 ,防止引起队列越界
                cursor.moveToFirst();
                // 根据图片的URi生成bitmap
                mBitmap = MediaStore.Images.Media.getBitmap(resolver, originalUri);
                mBitmap02 = mBitmap; //保存用于重置
                // 显得到bitmap图片
                imgShow.setImageBitmap(mBitmap);
                imgPath.setText(String.valueOf(originalUri));
            } catch (IOException e) {
                Log.e("getImg", e.toString());
            }
        }
    }

    /**
     * 转为二值图像
     *
     * @param bmp 原图bitmap
     * @param tmp 二值化参考值(中间比较值)二值化的域值
     * @return resizeBmp 处理后的图像
     */
    public static Bitmap convertToBMW(Bitmap bmp, Float tmp) {
        int width = bmp.getWidth(); // 获取位图的宽
        int height = bmp.getHeight(); // 获取位图的高
        int[] pixels = new int[width * height]; // 通过位图的大小创建像素点数组
        bmp.getPixels(pixels, 0, width, 0, 0, width, height);
        int alpha = 0xFF << 24;
        String Colors = null;
        for (int i = 0; i < height; i++) {
            StringBuilder sb = new StringBuilder();    //创建一个 StringBuilder 对象,用来储存矩阵数据
            for (int j = 0; j < width; j++) {
                int grey = pixels[width * i + j];
                // 分离三原色
                alpha = ((grey & 0xFF000000) >> 24);
                int red = ((grey & 0x00FF0000) >> 16);
                int green = ((grey & 0x0000FF00) >> 8);
                int blue = (grey & 0x000000FF);
                if (red > tmp) {
                    red = 255;
                } else {
                    red = 0;
                }
                if (blue > tmp) {
                    blue = 255;
                } else {
                    blue = 0;
                }
                if (green > tmp) {
                    green = 255;
                } else {
                    green = 0;
                }
                pixels[width * i + j] = alpha << 24 | red << 16 | green << 8 | blue;
                if (pixels[width * i + j] == -1) {
                    pixels[width * i + j] = -1;
                    Colors = ".";
                } else {
                    pixels[width * i + j] = -16777216;
                    Colors = "0";
                }
                sb.append(Colors);
            }
            L.e("" + sb.toString());
        }
        L.e("二值化的域值:" + tmp);
        // 新建图片
        Bitmap newBmp = Bitmap.createBitmap(width, height, Bitmap.Config.ARGB_8888);
        // 设置图片数据
        newBmp.setPixels(pixels, 0, width, 0, 0, width, height);
        Bitmap resizeBmp = ThumbnailUtils.extractThumbnail(newBmp, width, height);
        return resizeBmp;
    }
}
布局文件【activity_main.xml】
<RelativeLayout xmlns:android="http://schemas.android.com/apk/res/android"
    android:layout_width="match_parent"
    android:layout_height="match_parent">

    <LinearLayout
        android:id="@+id/LinearLayout"
        android:layout_width="match_parent"
        android:layout_height="wrap_content"
        android:layout_alignParentBottom="true"
        android:layout_marginLeft="10dp"
        android:layout_marginRight="10dp"
        android:orientation="horizontal">

        <Button
            android:id="@+id/btn_add"
            android:layout_width="wrap_content"
            android:layout_height="wrap_content"
            android:layout_weight="1"
            android:text="相册"
            android:textSize="16sp" />

        <EditText
            android:id="@+id/EditText"
            android:layout_width="70dp"
            android:maxLength="3"
            android:inputType="number"
            android:layout_height="wrap_content"
            android:gravity="center"
            android:layout_marginStart="10dp"
            android:hint="值域" />
        <Button
            android:layout_width="wrap_content"
            android:layout_height="wrap_content"
            android:onClick="btnRun"
            android:text="运行"
            android:textSize="16sp" />

        <Button
            android:layout_width="wrap_content"
            android:layout_height="wrap_content"
            android:onClick="btnReset"
            android:text="重置"
            android:textSize="16sp" />
    </LinearLayout>


    <TextView
        android:id="@+id/img_path"
        android:layout_width="wrap_content"
        android:layout_height="wrap_content"
        android:layout_above="@+id/LinearLayout"
        android:layout_marginStart="10dp"
        android:hint="图片路径" />

    <ImageView
        android:id="@+id/imgShow"
        android:layout_width="match_parent"
        android:layout_height="220dp"
        android:layout_margin="10dp" />


    <ImageView
        android:id="@+id/ImageView_Casda"
        android:layout_below="@+id/imgShow"
        android:layout_above="@+id/LinearLayout"
        android:layout_width="match_parent"
        android:layout_height="wrap_content"
        android:textSize="5sp"
        android:layout_marginBottom="30dp"
        android:text="123"/>

</RelativeLayout>
如果嫌麻烦,给你准备了源码:
https://download.csdn.net/download/erp_lxkun_jak/11830011
我是 易君,和你一起在安卓开发之路


 4343
4343


 被折叠的 条评论
为什么被折叠?
被折叠的 条评论
为什么被折叠?
 到【灌水乐园】发言


