


Mybatis-Plus
快速入门
简介
MyBatis-Plus (opens new window)(简称 MP)是一个 MyBatis (opens new window)的增强工具,在 MyBatis 的基础上只做增强不做改变,为简化开发、提高效率而生。
愿景
我们的愿景是成为 MyBatis 最好的搭档,就像 魂斗罗 中的 1P、2P,基友搭配,效率翻倍。

特性
-
无侵入:只做增强不做改变,引入它不会对现有工程产生影响,如丝般顺滑
-
损耗小:启动即会自动注入基本 CURD,性能基本无损耗,直接面向对象操作
-
强大的 CRUD 操作:内置通用 Mapper、通用 Service,仅仅通过少量配置即可实现单表大部分 CRUD 操作,更有强大的条件构造器,满足各类使用需求
-
支持 Lambda 形式调用:通过 Lambda 表达式,方便的编写各类查询条件,无需再担心字段写错
-
支持主键自动生成:支持多达 4 种主键策略(内含分布式唯一 ID 生成器 - Sequence),可自由配置,完美解决主键问题
-
支持 ActiveRecord 模式:支持 ActiveRecord 形式调用,实体类只需继承 Model 类即可进行强大的 CRUD 操作
-
支持自定义全局通用操作:支持全局通用方法注入( Write once, use anywhere )
-
内置代码生成器:采用代码或者 Maven 插件可快速生成 Mapper 、 Model 、 Service 、 Controller 层代码,支持模板引擎,更有超多自定义配置等您来使用
-
内置分页插件:基于 MyBatis 物理分页,开发者无需关心具体操作,配置好插件之后,写分页等同于普通 List 查询
-
分页插件支持多种数据库:支持 MySQL、MariaDB、Oracle、DB2、H2、HSQL、SQLite、Postgre、SQLServer 等多种数据库
-
内置性能分析插件:可输出 SQL 语句以及其执行时间,建议开发测试时启用该功能,能快速揪出慢查询
-
内置全局拦截插件:提供全表 delete 、 update 操作智能分析阻断,也可自定义拦截规则,预防误操作
支持数据库
任何能使用
mybatis进行 CRUD, 并且支持标准 SQL 的数据库
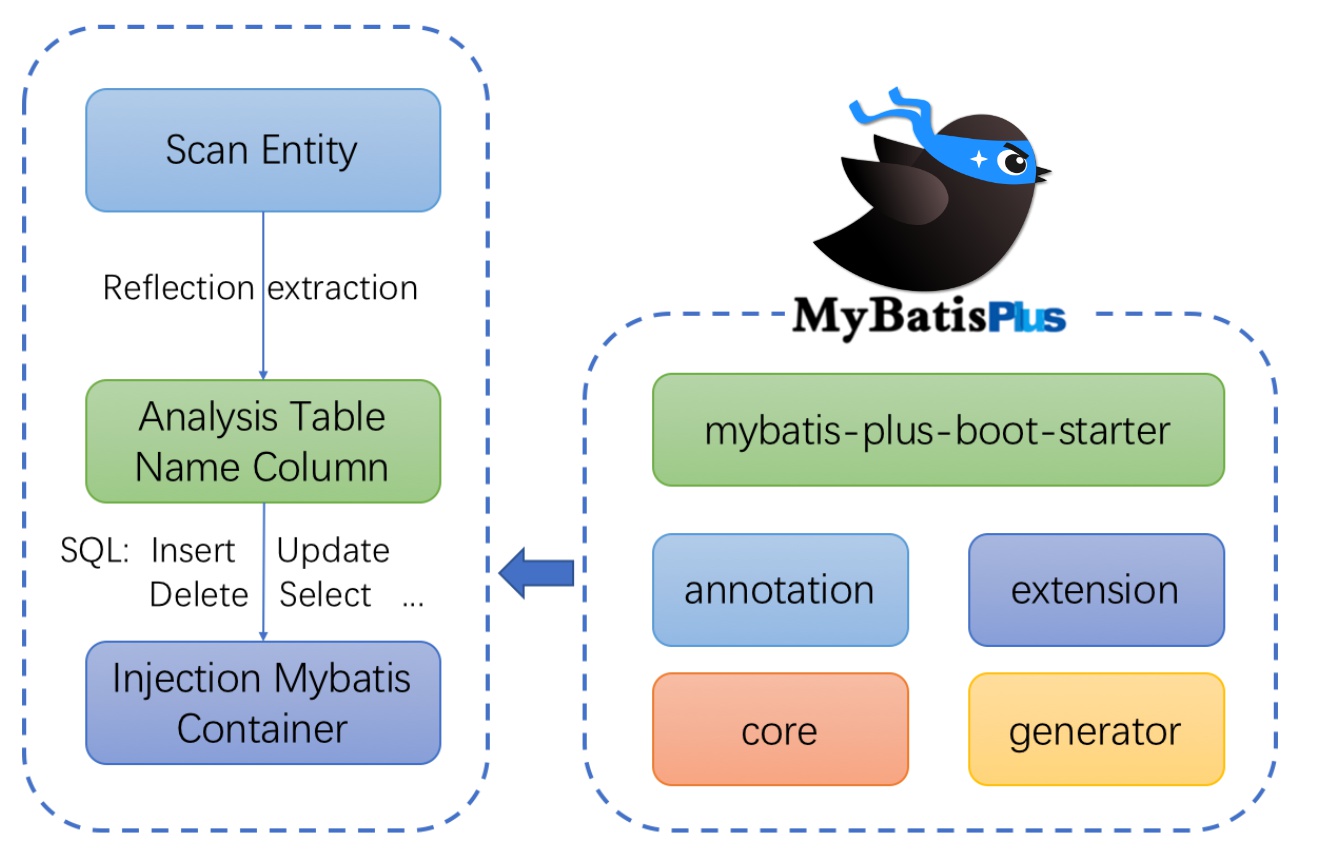
框架结构
快速开始
我们将通过一个简单的 Demo 来阐述 MyBatis-Plus 的强大功能,在此之前,我们假设您已经:
- 拥有 Java 开发环境以及相应 IDE
- 熟悉 Spring Boot
- 熟悉 Maven
Question:
如果从零开始用 MyBatis-Plus 来实现该表的增删改查我们需要做什么呢?
初始化工程
创建一个空的 Spring Boot 工程(工程将以 Mysql作为默认数据库进行演示)
TIP
可以使用 Spring Initializer (opens new window)快速初始化一个 Spring Boot 工程
添加依赖
引入 Spring Boot Starter 父工程:
<parent>
        <groupId>org.springframework.boot</groupId>
        <artifactId>spring-boot-starter-parent</artifactId>
        <version>2.5.4</version>
        <relativePath/>
</parent>
引入 spring-boot-starter、spring-boot-starter-test、mybatis-plus-boot-starter、mysql 依赖:
<?xml version="1.0" encoding="UTF-8"?>
<project xmlns="http://maven.apache.org/POM/4.0.0" xmlns:xsi="http://www.w3.org/2001/XMLSchema-instance"
         xsi:schemaLocation="http://maven.apache.org/POM/4.0.0 https://maven.apache.org/xsd/maven-4.0.0.xsd">
    <modelVersion>4.0.0</modelVersion>
    <parent>
        <groupId>org.springframework.boot</groupId>
        <artifactId>spring-boot-starter-parent</artifactId>
        <version>2.5.4</version>
        <relativePath/> <!-- lookup parent from repository -->
    </parent>
    <groupId>com.wsh</groupId>
    <artifactId>quick_start</artifactId>
    <version>0.0.1-SNAPSHOT</version>
    <name>quick_start</name>
    <description>Demo project for Spring Boot</description>
    <properties>
        <java.version>1.8</java.version>
    </properties>
    <dependencies>
        <dependency>
            <groupId>org.springframework.boot</groupId>
            <artifactId>spring-boot-starter-web</artifactId>
        </dependency>

        <dependency>
            <groupId>mysql</groupId>
            <artifactId>mysql-connector-java</artifactId>
            <scope>runtime</scope>
        </dependency>
        <dependency>
            <groupId>org.projectlombok</groupId>
            <artifactId>lombok</artifactId>
            <optional>true</optional>
        </dependency>
        <dependency>
            <groupId>org.springframework.boot</groupId>
            <artifactId>spring-boot-starter-test</artifactId>
            <scope>test</scope>
        </dependency>
        <!--idea2020以前的版本需要加这个依赖,之前junit一直报错 -->
        <dependency>
            <groupId>org.junit.platform</groupId>
            <artifactId>junit-platform-launcher</artifactId>
            <scope>test</scope>
        </dependency>

        <dependency>
            <groupId>com.baomidou</groupId>
            <artifactId>mybatis-plus-boot-starter</artifactId>
            <version>3.4.3</version>
        </dependency>


    </dependencies>

    <build>
        <plugins>
            <plugin>
                <groupId>org.springframework.boot</groupId>
                <artifactId>spring-boot-maven-plugin</artifactId>
                <configuration>
                    <excludes>
                        <exclude>
                            <groupId>org.projectlombok</groupId>
                            <artifactId>lombok</artifactId>
                        </exclude>
                    </excludes>
                </configuration>
            </plugin>
        </plugins>
    </build>

</project>
配置
在 application.properties 配置文件中添加 mysql数据库的相关配置:
# DataSource Config
spring.datasource.url=jdbc:mysql://localhost:3309/mybatis-plus
spring.datasource.driver-class-name=com.mysql.jdbc.Driver
spring.datasource.username=root
spring.datasource.password=root
在 Spring Boot 启动类中添加 @MapperScan 注解,扫描 Mapper 文件夹:
@SpringBootApplication
@MapperScan("com.wsh.quick_start.mapper")
public class QuickStartApplication {

    public static void main(String[] args) {
        SpringApplication.run(QuickStartApplication.class, args);
    }

}
编码
编写实体类 User.java(此处使用了 Lombok (opens new window)简化代码)
@Data
public class User {
    private Long id;
    private String name;
    private Integer age;
    private String email;
}
编写Mapper类 UserMapper.java
public interface UserMapper extends BaseMapper<User> {

}
开始使用
添加测试类,进行功能测试:
@SpringBootTest
class QuickStartApplicationTests {
    @Autowired
    private UserMapper userMapper;
    @Test
    void contextLoads() {
        System.out.println(("----- selectAll method test ------"));
        List<User> userList = userMapper.selectList(null);
        userList.forEach(System.out::println);
    }

}
UserMapper 中的 selectList() 方法的参数为 MP 内置的条件封装器 Wrapper,所以不填写就是无任何条件
控制台输出:
...
User(id=1, name=Jone, age=18, email=test1@baomidou.com)
User(id=2, name=Jack, age=20, email=test2@baomidou.com)
User(id=3, name=Tom, age=28, email=test3@baomidou.com)
User(id=4, name=Sandy, age=21, email=test4@baomidou.com)
User(id=5, name=Billie, age=24, email=test5@baomidou.com)
2021-08-20 20:26:06.298  INFO 1148 --- [ionShutdownHook] com.zaxxer.hikari.HikariDataSource       : HikariPool-1 - Shutdown initiated...
2021-08-20 20:26:06.316  INFO 1148 --- [ionShutdownHook] com.zaxxer.hikari.HikariDataSource       : HikariPool-1 - Shutdown completed.

Process finished with exit code 0
完整的代码示例请移步:https://gitee.com/EthanYYDS/mybatis-plus.git
小结
通过以上几个简单的步骤,我们就实现了 User 表的 CRUD 功能,甚至连 XML 文件都不用编写!
从以上步骤中,我们可以看到集成MyBatis-Plus非常的简单,只需要引入 starter 工程,并配置 mapper 扫描路径即可。
但 MyBatis-Plus 的强大远不止这些功能,想要详细了解 MyBatis-Plus 的强大功能?那就继续往下看吧!
核心功能
1.代码生成器
AutoGenerator 是 MyBatis-Plus 的代码生成器,通过 AutoGenerator 可以快速生成 Entity、Mapper、Mapper XML、Service、Controller 等各个模块的代码,极大的提升了开发效率。
在使用前要准备好数据库!
演示效果图:
使用教程
添加依赖
<?xml version="1.0" encoding="UTF-8"?>
<project xmlns="http://maven.apache.org/POM/4.0.0" xmlns:xsi="http://www.w3.org/2001/XMLSchema-instance"
         xsi:schemaLocation="http://maven.apache.org/POM/4.0.0 https://maven.apache.org/xsd/maven-4.0.0.xsd">
    <modelVersion>4.0.0</modelVersion>
    <parent>
        <groupId>org.springframework.boot</groupId>
        <artifactId>spring-boot-starter-parent</artifactId>
        <version>2.5.4</version>
        <relativePath/> <!-- lookup parent from repository -->
    </parent>
    <groupId>com.wsh</groupId>
    <artifactId>mybatis-plus-generator</artifactId>
    <version>0.0.1-SNAPSHOT</version>
    <name>mybatis-plus-generator</name>
    <description>Demo project for Spring Boot</description>
    <properties>
        <java.version>1.8</java.version>
    </properties>
    <dependencies>
        <dependency>
            <groupId>org.springframework.boot</groupId>
            <artifactId>spring-boot-starter-web</artifactId>
        </dependency>

        <dependency>
            <groupId>org.springframework.boot</groupId>
            <artifactId>spring-boot-starter-test</artifactId>
            <scope>test</scope>
        </dependency>
        <!-- mysql驱动 -->
        <dependency>
            <groupId>mysql</groupId>
            <artifactId>mysql-connector-java</artifactId>
            <version>5.1.38</version>
        </dependency>
		<!-- mybatis-plus-starter启动器 -->
        <dependency>
            <groupId>com.baomidou</groupId>
            <artifactId>mybatis-plus-boot-starter</artifactId>
            <version>3.4.1</version>
        </dependency>
        <!--MyBatis-Plus 从 3.0.3 之后移除了代码生成器与模板引擎的默认依赖,需要手动添加相关依赖: -->
        <dependency>
            <groupId>com.baomidou</groupId>
            <artifactId>mybatis-plus-generator</artifactId>
            <version>3.4.1</version>
        </dependency>
        <!-- Freemarker模板引擎(MyBatis-Plus 支持 Velocity(默认)、Freemarker、Beetl) -->
        <dependency>
            <groupId>org.freemarker</groupId>
            <artifactId>freemarker</artifactId>
            <version>2.3.31</version>
        </dependency>
        <!-- lombok用于简化实体类开发 -->
        <dependency>
            <groupId>org.projectlombok</groupId>
            <artifactId>lombok</artifactId>
            <version>1.18.20</version>
        </dependency>

    </dependencies>

    <build>
        <plugins>
            <plugin>
                <groupId>org.springframework.boot</groupId>
                <artifactId>spring-boot-maven-plugin</artifactId>
            </plugin>
        </plugins>
    </build>

</project>
编写配置
更多详细配置,请参考代码生成器配置一文
package com.wsh.mybatisplusgenerator;

import ...;

@SpringBootApplication
public class MybatisPlusGeneratorApplication {

    /**
     * <p>
     * 读取控制台内容
     * </p>
     */
    public static String scanner(String tip) {
        Scanner scanner = new Scanner(System.in);
        StringBuilder help = new StringBuilder();
        help.append("请输入" + tip + ":");
        System.out.println(help.toString());
        if (scanner.hasNext()) {
            String ipt = scanner.next();
            if (StringUtils.isNotBlank(ipt)) {
                return ipt;
            }
        }
        throw new MybatisPlusException("请输入正确的" + tip + "!");
    }

    public static void main(String[] args) {
        // 代码生成器
        AutoGenerator mpg = new AutoGenerator();

        // 全局配置
        GlobalConfig gc = new GlobalConfig();
        String projectPath = System.getProperty("user.dir");
        gc.setOutputDir(projectPath + "/mybatis-plus-generator/src/main/java");
        gc.setAuthor("Ethan");
        gc.setOpen(false);
        // gc.setSwagger2(true); 实体属性 Swagger2 注解
        mpg.setGlobalConfig(gc);

        // 数据源配置
        DataSourceConfig dsc = new DataSourceConfig();
        dsc.setUrl("jdbc:mysql://localhost:3309/ant?useUnicode=true&useSSL=false&characterEncoding=utf8");
        // dsc.setSchemaName("public");
        dsc.setDriverName("com.mysql.jdbc.Driver");
        dsc.setUsername("root");
        dsc.setPassword("root");
        mpg.setDataSource(dsc);

        // 包配置
        PackageConfig pc = new PackageConfig();
        pc.setModuleName(scanner("模块名"));
        pc.setParent("com.wsh.ant");
        mpg.setPackageInfo(pc);

        // 自定义配置
        InjectionConfig cfg = new InjectionConfig() {
            @Override
            public void initMap() {
                // to do nothing
            }
        };

        // 如果模板引擎是 freemarker
        String templatePath = "/templates/mapper.xml.ftl";
        // 如果模板引擎是 velocity
        // String templatePath = "/templates/mapper.xml.vm";

        // 自定义输出配置
        List<FileOutConfig> focList = new ArrayList<>();
        // 自定义配置会被优先输出
        focList.add(new FileOutConfig(templatePath) {
            @Override
            public String outputFile(TableInfo tableInfo) {
                // 自定义输出文件名 , 如果你 Entity 设置了前后缀、此处注意 xml 的名称会跟着发生变化!!
                return projectPath + "/src/main/resources/mapper/" + pc.getModuleName()
                        + "/" + tableInfo.getEntityName() + "Mapper" + StringPool.DOT_XML;
            }
        });
        /*
        cfg.setFileCreate(new IFileCreate() {
            @Override
            public boolean isCreate(ConfigBuilder configBuilder, FileType fileType, String filePath) {
                // 判断自定义文件夹是否需要创建
                checkDir("调用默认方法创建的目录,自定义目录用");
                if (fileType == FileType.MAPPER) {
                    // 已经生成 mapper 文件判断存在,不想重新生成返回 false
                    return !new File(filePath).exists();
                }
                // 允许生成模板文件
                return true;
            }
        });
        */
        cfg.setFileOutConfigList(focList);
        mpg.setCfg(cfg);

        // 配置模板
        TemplateConfig templateConfig = new TemplateConfig();

        // 配置自定义输出模板
        //指定自定义模板路径,注意不要带上.ftl/.vm, 会根据使用的模板引擎自动识别
        // templateConfig.setEntity("templates/entity2.java");
        // templateConfig.setService();
        // templateConfig.setController();

        templateConfig.setXml(null);
        mpg.setTemplate(templateConfig);

        // 策略配置
        StrategyConfig strategy = new StrategyConfig();
        strategy.setNaming(NamingStrategy.underline_to_camel);
        strategy.setColumnNaming(NamingStrategy.underline_to_camel);
        strategy.setSuperEntityClass("");
        strategy.setEntityLombokModel(true);
        strategy.setRestControllerStyle(true);
        // 公共父类
        strategy.setSuperControllerClass("");
        // 写于父类中的公共字段
        strategy.setSuperEntityColumns("id");
        strategy.setInclude(scanner("").split(","));
        strategy.setControllerMappingHyphenStyle(true);
        strategy.setTablePrefix(pc.getModuleName() + "_");
        mpg.setStrategy(strategy);
        mpg.setTemplateEngine(new FreemarkerTemplateEngine());
        mpg.execute();
    }

}
右击运行main程序


小结
在任何一个类中都可以把模板复制进去,关键是这个类得加上@SpringBootApplication注解,也就是说这个代码自动生成类要为一个启动类。这个生产类必须要一个模板引擎(否则会报找不到模板引擎的错),且生成是只支持这三个模板引擎: Velocity(默认)、Freemarker、Beetl ,那有人不会用这几个模板引擎这个功能不就废了嘛,我开始也是这么想的,后来我来了个偷梁换柱的想法。
他只是生成的时候需要这三个模板引擎中的一个,那么我就等他生成完后,在pom.xml文件把freemark换成了Thymeleaf,我测试完发现,完全阔以。因为代码生成出来后,只要是idea支持的模板引擎就阔以。
2.CRUD(增删改查)BaseMapper 接口
增删改查可谓是mybatis的最基本也最核心的功能,它的增强版mybatis-plus也是如此。
Tips:mybatis-plus进行CRUD有两种实现方式
//mapper接口
@Mapper
public interface UserMapper extends BaseMapper<User>{

}
/*我们在继承BaseMapper时,指定了泛型是<User>,
BaseMapper基于反射获取到User的字节码,
然后默认就把类的名称作为表名称、把类中的字段作为数据库字段。*/
这是BaseMapper的大部分方法

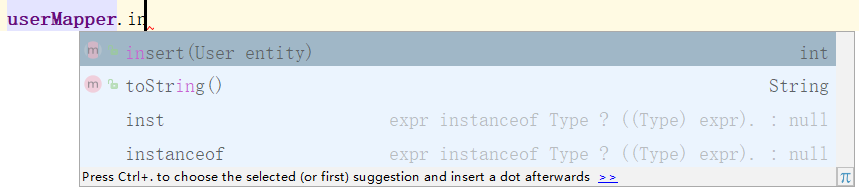
BaseMapper示例:
Insert方法就这一个

update方法
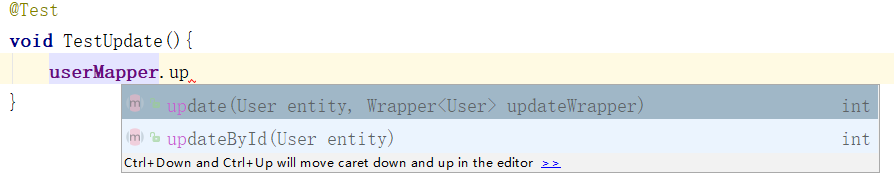

这里有个条件对象Wrapper updateWrapper,我之前没有加条件(条件构造器=null)就等于没有where语句,所以数据库所以名字都是欧泪哇了,我哭辽,应该要这样改

select方法


结果如下:


delete方法


3、Iservice的CRUD
MybatisPlus除了提供BaseMapper,还提供了通用的Service接口:IService
下面是CRUD接口(继承IService)的官网使用介绍
https://mp.baomidou.com/guide/crud-interface.html#crud-%E6%8E%A5%E5%8F%A3
首先得有个mapper接口实现BaseMapper

而后在Service包里边用接口继承Iservice接口,用实现类实现这个接口,并继承ServiceImpl这个Mybatis-Plus提供的Iservice实现类
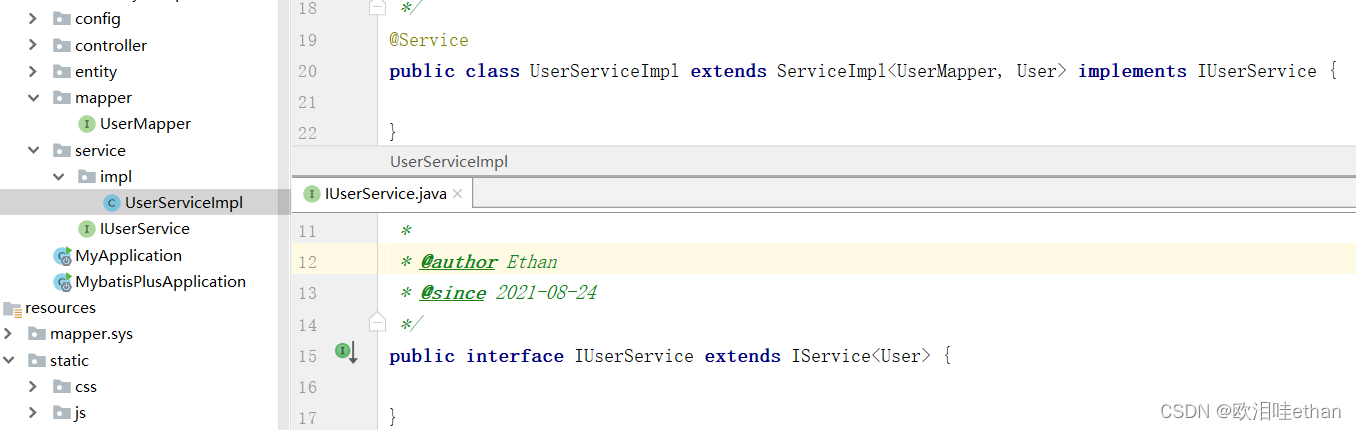
//mapper接口
public interface UserMapper extends BaseMapper<User> {

}
//service接口
public interface IUserService extends IService<User> {

}
//service实现类
@Service
public class UserServiceImpl extends ServiceImpl<UserMapper, User> implements IUserService {

}
插入方法:


查询方法
查询一个
查询多个

@Test
    void selectTest(){
        //查询id为14的数据
        User user = userService.getById(14);
        //查询所以数据
        List<User> list = userService.list();
        for (User user1 : list) {
            System.out.println(user1);
        }
        //根据ID集合查询数据
        List<User> list1 = userService.listByIds(Arrays.asList(1, 2, 3));
        for (User user1 : list1) {
            System.out.println(user1);
        }
        //链式查询
        // select * from tb_user where id >= 17 and id <= 19 and name like "%x%"
        // >=       ge
        // >        gt
        // <=       le   less than and equals
        // <        lt   less than
        // like     like
        // between  between
        // group by
        List<User> list2 = userService.query().ge("id", 17).le("id", 19).
                like("username", "test").list();
        for (User user2 : list2) {
            System.out.println(user2);
        }
    }
2021-11-09 19:57:02.946  WARN 2176 --- [           main] c.b.m.core.metadata.TableInfoHelper      : This primary key of "id" is primitive !不建议如此请使用包装类 in Class: "com.wsh.mybatisplus.entity.User"
2021-11-09 19:57:06.420  INFO 2176 --- [           main] c.wsh.mybatisplusgenerator.IserviceTest  : Started IserviceTest in 10.02 seconds (JVM running for 13.053)
2021-11-09 19:57:07.147  INFO 2176 --- [           main] com.zaxxer.hikari.HikariDataSource       : HikariPool-1 - Starting...
2021-11-09 19:57:07.812  INFO 2176 --- [           main] com.zaxxer.hikari.HikariDataSource       : HikariPool-1 - Start completed.
2021-11-09 19:57:07.825 DEBUG 2176 --- [           main] c.w.m.mapper.UserMapper.selectById       : ==>  Preparing: SELECT id,username,password,tel FROM user WHERE id=?
2021-11-09 19:57:07.860 DEBUG 2176 --- [           main] c.w.m.mapper.UserMapper.selectById       : ==> Parameters: 14(Integer)
2021-11-09 19:57:07.881 DEBUG 2176 --- [           main] c.w.m.mapper.UserMapper.selectById       : <==      Total: 1
2021-11-09 19:57:07.986 DEBUG 2176 --- [           main] c.w.m.mapper.UserMapper.selectList       : ==>  Preparing: SELECT id,username,password,tel FROM user
2021-11-09 19:57:07.986 DEBUG 2176 --- [           main] c.w.m.mapper.UserMapper.selectList       : ==> Parameters:
2021-11-09 19:57:07.990 DEBUG 2176 --- [           main] c.w.m.mapper.UserMapper.selectList       : <==      Total: 9
User{id=1, username='呜呜呜', password='666666', tel='106666'}
User{id=2, username='欧泪哇', password='1123', tel='074666'}
User{id=3, username='宋嫣', password='199099', tel='999999'}
User{id=14, username='最爱喝AD钙', password='123', tel='666666'}
User{id=15, username='test1', password='password1', tel='tel1'}
User{id=16, username='test2', password='password1', tel='tel2'}
User{id=17, username='test3', password='password1', tel='tel3'}
User{id=18, username='test4', password='password1', tel='tel4'}
User{id=19, username='test5', password='password1', tel='tel5'}
2021-11-09 19:57:07.993 DEBUG 2176 --- [           main] c.w.m.mapper.UserMapper.selectBatchIds   : ==>  Preparing: SELECT id,username,password,tel FROM user WHERE id IN ( ? , ? , ? )
2021-11-09 19:57:07.993 DEBUG 2176 --- [           main] c.w.m.mapper.UserMapper.selectBatchIds   : ==> Parameters: 1(Integer), 2(Integer), 3(Integer)
2021-11-09 19:57:07.995 DEBUG 2176 --- [           main] c.w.m.mapper.UserMapper.selectBatchIds   : <==      Total: 3
User{id=1, username='呜呜呜', password='666666', tel='106666'}
User{id=2, username='欧泪哇', password='1123', tel='074666'}
User{id=3, username='宋嫣', password='199099', tel='999999'}
2021-11-09 19:57:08.024 DEBUG 2176 --- [           main] c.w.m.mapper.UserMapper.selectList       : ==>  Preparing: SELECT id,username,password,tel FROM user WHERE (id >= ? AND id <= ? AND username LIKE ?)
2021-11-09 19:57:08.025 DEBUG 2176 --- [           main] c.w.m.mapper.UserMapper.selectList       : ==> Parameters: 17(Integer), 19(Integer), %test%(String)
2021-11-09 19:57:08.029 DEBUG 2176 --- [           main] c.w.m.mapper.UserMapper.selectList       : <==      Total: 3
User{id=17, username='test3', password='password1', tel='tel3'}
User{id=18, username='test4', password='password1', tel='tel4'}
User{id=19, username='test5', password='password1', tel='tel5'}
2021-11-09 19:57:08.081  INFO 2176 --- [ionShutdownHook] com.zaxxer.hikari.HikariDataSource       : HikariPool-1 - Shutdown initiated...
2021-11-09 19:57:08.094  INFO 2176 --- [ionShutdownHook] com.zaxxer.hikari.HikariDataSource       : HikariPool-1 - Shutdown completed.
Update方法

方法和之前的baseMapper其实大同,这里记录一种新写法。
 @Test
    void updateTest(){
        //query链式查询
        // update tb_user set age = 15 where id >= 1 and id <= 3 and username like "%欧泪哇%"
        userService.update()
                .set("password", 666666)
                .ge("id", 1).le("id", 3).like("username", "欧泪哇")
                .update();//使用update方法对已设置好的条件进行更新

    }

Remove方法

@Test
    void deleteTest(){
        //删除id为14的数据
        userService.removeById(14);
        //delete from user where id>=15 and id<=19
        userService.remove(
        new QueryWrapper<User>().ge("id",15).le("id",19));
    }

3.分页插件
要想实现分页功能,首先得导入mybatis-plus的依赖
<dependency>
            <groupId>com.baomidou</groupId>
            <artifactId>mybatis-plus-boot-starter</artifactId>
            <version>3.4.1</version>
        </dependency>
然后就是配置分页了。建一个类用@Configuration注解标注其为一个配置类,然后在里面配置并注册分页拦截器。
@Configuration
public class MybatisPlusConfig {

    @Bean
    public MybatisPlusInterceptor mybatisPlusInterceptor() {
        MybatisPlusInterceptor interceptor = new MybatisPlusInterceptor();
        interceptor.addInnerInterceptor(new PaginationInnerInterceptor());
        return interceptor;
    }
}
mybatis-plus提供了这样一个Page类
package com.baomidou.mybatisplus.extension.plugins.pagination;
//导包

public class Page<T> implements IPage<T> {
    private static final long serialVersionUID = 8545996863226528798L;
    protected List<T> records; 		//分页结果
    protected long total;			//总记录数
    protected long size;			//一页多少记录
    protected long current;			//当前页
    protected List<OrderItem> orders;
    protected boolean optimizeCountSql;
    protected boolean isSearchCount;
    protected boolean hitCount;
    protected String countId;
    protected Long maxLimit;
    ...
    default long getPages() {		//该方法返回总页数
        if (this.getSize() == 0L) {
            return 0L;
        } else {
            long pages = this.getTotal() / this.getSize();
            if (this.getTotal() % this.getSize() != 0L) {
                ++pages;
            }

            return pages;
        }
    }
}
这个Page类呢,是mymybatis-plus用来保存分页信息的,在从数据库取出数据就可以用这个类的对象存储数据了。然后把数据绑定到Model返回到前端页面去
来看看我的controller
@Controller
public class UserController {
    @Autowired
    UserMapper userMapper;

    @GetMapping("/getpage1")
    public String getPage1(Model model, @RequestParam(value = "pn",defaultValue = "1") Long pn){
        Page<User> userPage = new Page<>(pn, 2);
        Page<User> userPage1 = userMapper.selectPage(userPage, null);
        System.out.println(userPage1.getCurrent());
        System.out.println(userPage1.getSize());
        List<User> records = userPage1.getRecords();

        model.addAttribute("userlist",records);
        model.addAttribute("page",userPage1);
        return "userList";
    }
}
<!DOCTYPE html>
<html lang="en" xmlns:th="http://www.w3.org/1999/xhtml">
<head>
<meta charset="UTF-8">
<title>Title</title>
</head>
<body>
<!-- 最新版本的 Bootstrap 核心 CSS 文件 -->
<link rel="stylesheet" href="https://stackpath.bootstrapcdn.com/bootstrap/3.4.1/css/bootstrap.min.css" integrity="sha384-HSMxcRTRxnN+Bdg0JdbxYKrThecOKuH5zCYotlSAcp1+c8xmyTe9GYg1l9a69psu" crossorigin="anonymous">
<!-- 可选的 Bootstrap 主题文件(一般不用引入) -->
<link rel="stylesheet" href="https://stackpath.bootstrapcdn.com/bootstrap/3.4.1/css/bootstrap-theme.min.css" integrity="sha384-6pzBo3FDv/PJ8r2KRkGHifhEocL+1X2rVCTTkUfGk7/0pbek5mMa1upzvWbrUbOZ" crossorigin="anonymous">
<!-- 最新的 Bootstrap 核心 JavaScript 文件 -->
<script src="https://stackpath.bootstrapcdn.com/bootstrap/3.4.1/js/bootstrap.min.js" integrity="sha384-aJ21OjlMXNL5UyIl/XNwTMqvzeRMZH2w8c5cRVpzpU8Y5bApTppSuUkhZXN0VxHd" crossorigin="anonymous"></script>
<table width="50%" cellspacing="0" border="1" align="center">
<tr>
<td>ID</td>
<td>Username</td>
<td>Password</td>
<td>Tel</td>
</tr>
<tr th:each="user : ${userlist}">
<td th:text="${user.id}"></td>
<td th:text="${user.username}"></td>
<td th:text="${user.password}"></td>
<td th:text="${user.tel}"></td>
</tr>
</table>
<div align="center" ><p class="text-info" style="font-size: large ;margin-top: 30px">
当前第 [[${page.current}]] 页
总计 [[${page.pages}]] 页
共 [[${page.total}]] 条记录</p></div>
<div align="center" >
<nav aria-label="Page navigation">
<ul class="pagination">
<li>
<a href="#" aria-label="Previous">
<span aria-hidden="true">«</span>
</a>
</li>
<li><a th:href="@{/getpage1(pn=${page.current>1?page.current-1:page.current})}">上一页</a></li>
<li th:each="num:${#numbers.sequence(1,page.pages)}"
th:class="${page.current == num ? 'active':''}">
<a th:href="@{/getpage1(pn=${num})}">[[${num}]]</a>
</li>
<li><a th:href="@{/getpage1(pn=${page.current<page.pages?page.current+1:page.current})}">下一页</a></li>
<li>
<a href="#" aria-label="Next">
<span aria-hidden="true">»</span>
</a>
</li>
</ul>
</nav>
</div>
</body>
</html><!DOCTYPE html>
效果是这样sai的,vue还没完全学废,用bootstrap凑凑。
小结


 2641
2641


 被折叠的 条评论
为什么被折叠?
被折叠的 条评论
为什么被折叠?
 到【灌水乐园】发言


