


通过学习 HttpClient 的工作机制 ,我们知道对于HTTP请求,HttpClient 实际上是构建了一个链式的处理流程:

在HttpBackend的处理流程中请求被发出。在HttpBackend的前面可以设置多个的拦截器,对请求进行处理。
HttpClient 的详细说明请参考:Angular 中的 HttpClient 请求详解
1、编写拦截器
要实现拦截器,就要实现一个实现了 HttpInterceptor 接口中的 intercept() 方法的类。
以下代码实现一个除了添加打印外,不做其他处理的拦截器:
import { Injectable } from "@angular/core";
import { HttpInterceptor, HttpHandler, HttpRequest, HttpEvent } from '@angular/common/http'
import { Observable } from "rxjs";
import { mergeMap } from "rxjs/operators";

@Injectable()
export class InterceptorA implements HttpInterceptor {

    intercept(req: HttpRequest<any>, next: HttpHandler): Observable<HttpEvent<any>> {
        req = this.handleRequest(req);
        return next.handle(req).pipe(
            mergeMap(evt => this.handleResponse(evt))
        );
    }

    /**
     * 请求参数拦截处理
     */
    handleRequest(req: any) {
        console.log(`拦截器A在请求发起前的拦截处理`);
        return req;
    }

    /**
     * 返回结果拦截处理
     */
    handleResponse(evt: any) {
        console.log("拦截器A在数据返回后的拦截处理");
        return new Observable<HttpEvent<any>>(observer => {
            observer.next(evt);
        });
    }
}
实际项目中,可以根据需求在上述 handleRequest() 方法 和 handleResponse() 方法中添加想要的拦截处理逻辑。
intercept() 方法中的 next 对象表示拦截器链表中的下一个拦截器,通过调用 next.handle() 达成链式调用效果。这个链表中的最后一个 next 对象就是 HttpClient 的后端处理器(HttpBackend),它会把请求发给服务器,并接收服务器的响应。
2、注册提供拦截器
这个 InterceptorA 就是一个由 Angular 依赖注入(DI)系统管理的服务。 像其它服务一样,你也必须先提供这个拦截器类,程序才能使用它。
由于拦截器是 HttpClient 服务的可选依赖,所以你必须在提供 HttpClient 的同一个(或其各级父注入器)注入器中注册提供这些拦截器。由于在 AppModule 中导入了 HttpClientModule,因此本应用在其根注入器中提供了 HttpClient。所以同样要在 AppModule 中注册提供这些拦截器。
import { HttpClientModule, HTTP_INTERCEPTORS } from '@angular/common/http';
import { APP_INITIALIZER, NgModule } from '@angular/core';
import { BrowserModule } from '@angular/platform-browser';
import { AppRoutingModule } from './app-routing.module';
import { AppComponent } from './app.component';
import { InterceptorA } from './core/kits/interceptor-a';

@NgModule({
  declarations: [AppComponent],
  imports: [
    BrowserModule,
    HttpClientModule,
    AppRoutingModule
  ],
  providers: [{ provide: HTTP_INTERCEPTORS, useClass: InterceptorA, multi: true }],   // InterceptorA 注册语句
  bootstrap: [AppComponent]
})
export class AppModule { }
注意 multi: true 选项。 这个必须的选项会告诉 Angular HTTP_INTERCEPTORS 是一个多重提供者的令牌,表示它会注入一个多值的数组,而不是单一的值。
3、拦截器效果
在组件中调用HttpClient get() 方法,以CSDN 获取热门搜索关键词列表为例:
    let url = `https://silkroad.csdn.net/api/v2/assemble/list/channel/search_hot_word?channel_name=pc_hot_word&size=10&platform=pc`;
    console.log(`组件调用请求方法`);
    this.http.get(url).subscribe(data => {
      console.log("组件拿到请求返回数据");
    });
调试程序,页面打印如下:
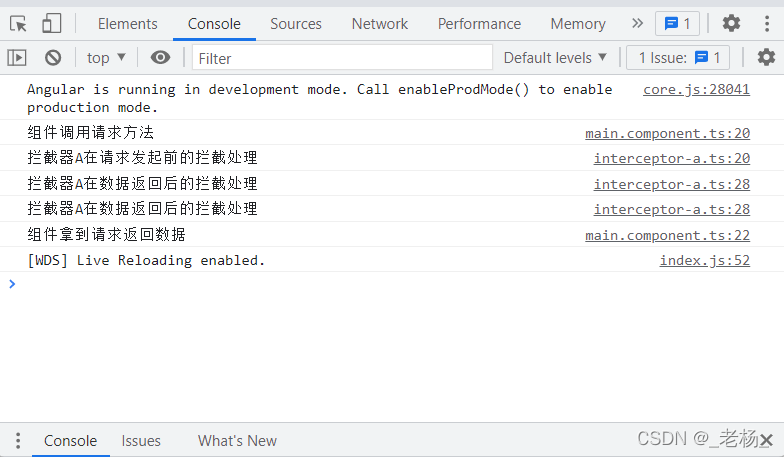
通过打印发现在数据返回后的拦截处理被触发了两次。这是因为正常情况下 HttpBackend 的处理过程中向外发出了两次数据通知。
一次是发送请求后立即发出了请求发出状态的通知:

这里发出的数据是 { type: 0 } 。
( 跟踪代码定义可以知道 HttpEventType[HttpEventType["Sent"] = 0] )
另一次是在 XMLHttpRequest 的 onLoad 事件中:

这里发出的数据是一个 HttpResponse 对象 。
根据两次发出的值,调整拦截器 InterceptorA 代码对发送状态和返回数据进行区分处理:
/**
* 返回结果拦截处理
*/
handleResponse(evt: any) {
return new Observable<HttpEvent<any>>(observer => {
if (evt instanceof HttpResponse) {
console.log("拦截器A在数据返回后的拦截处理");
} else {
console.log(`拦截器A接收到请求发出状态:${JSON.stringify(evt)}`);
}
observer.next(evt);
});
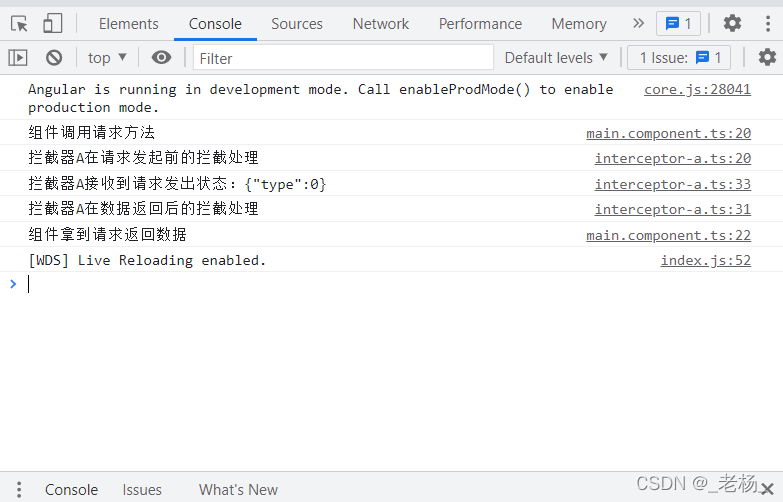
}调整后的拦截打印如下图所示:
4、多个拦截器
按照上诉流程再添加一个拦截器B,查看拦截效果。
在 AppModule 中添加 InterceptorB 的注册语句:
  providers: [
    { provide: HTTP_INTERCEPTORS, useClass: InterceptorA, multi: true },
    { provide: HTTP_INTERCEPTORS, useClass: InterceptorB, multi: true },
  ],
调试运行,页面打印如下:
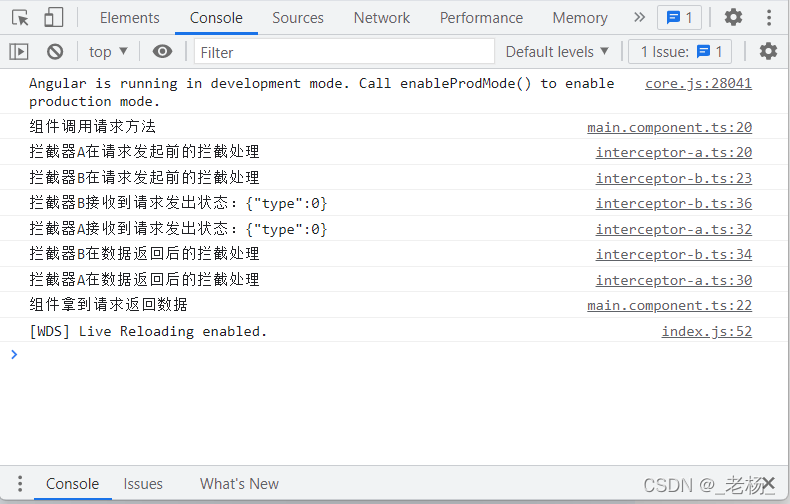
可以看出,排序靠后的拦截器在请求发出前会靠后进行请求参数的拦截处理,在处理请求返回值时,排序靠后的拦截器会优先对返回数据进行拦截处理。所有拦截器都处理完成后组件才拿到返回数据。
5、返回数据过滤
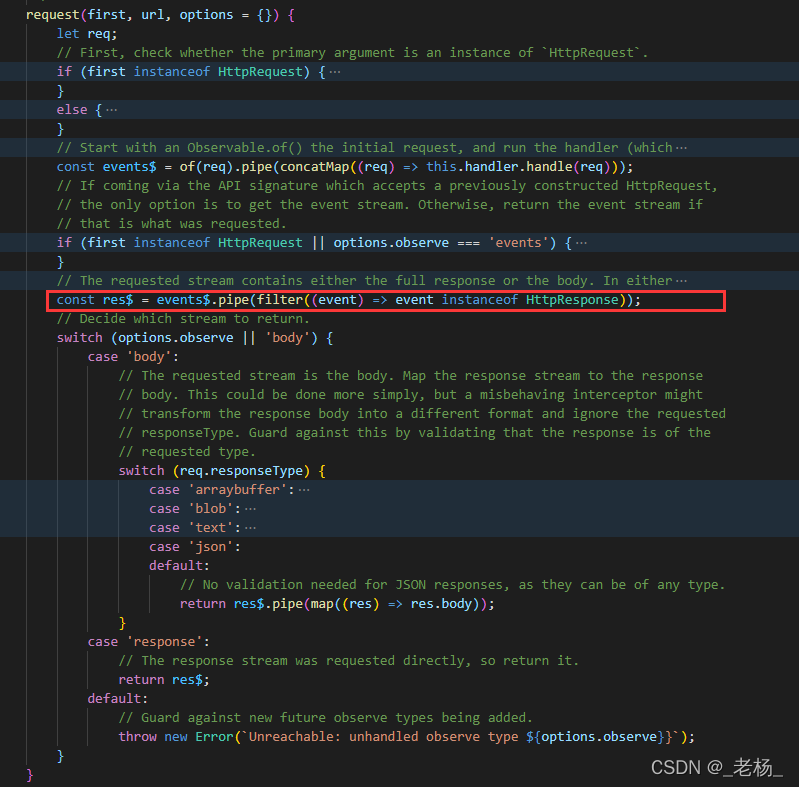
通过打印信息还可以发现,拦截器都捕获了请求的发出状态信息。但是组件里边并没有拿到,组件里只获取到了返回数据。
这是因为 HttpClient 在 HttpHandler 处理后又对数据作了过滤处理,只能返回 HttpResponse 信息:
6、默认拦截器
细心的同学经过断点就可以发现在实际程序中,存在的拦截器比自己注册的多了一个 (HttpXsrfInterceptor) :
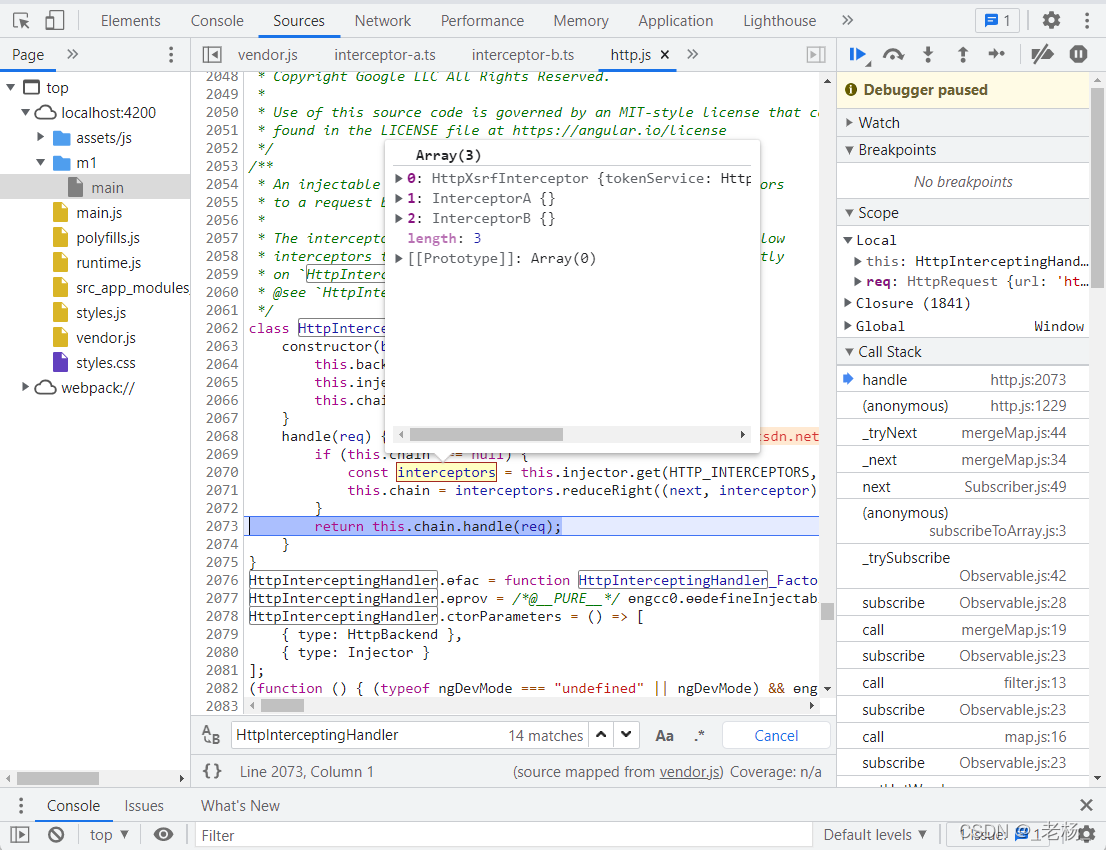
查看代码可以发现,HttpXsrfInterceptor 是在 HttpClientXsrfModule 中注册:
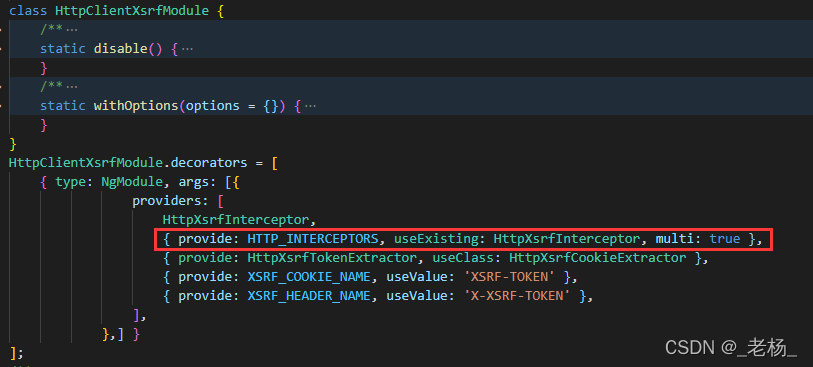
然后 HttpClientModule 引入了 HttpClientXsrfModule :
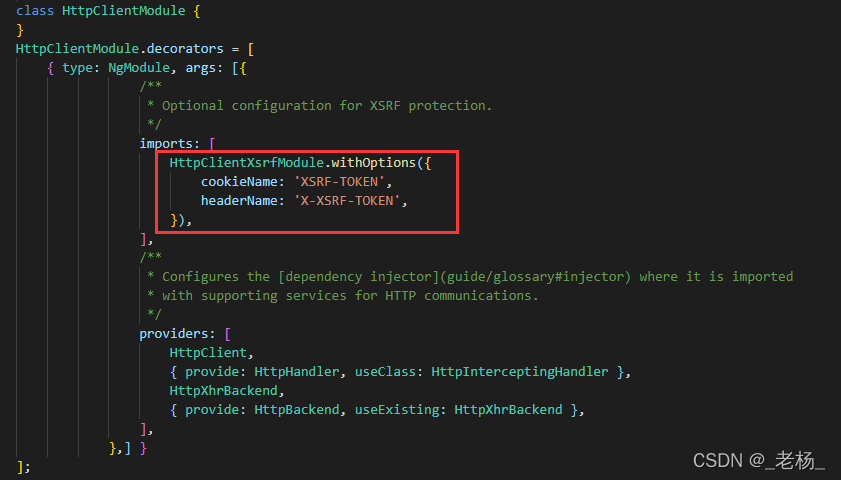
因为AppModule中就引入了HttpClientModule 所以程序中实际上默认就启用了拦截器 HttpXsrfInterceptor 。
查看 HttpXsrfInterceptor 定义:
/**
 * `HttpInterceptor` which adds an XSRF token to eligible outgoing requests.
 */
class HttpXsrfInterceptor {
    constructor(tokenService, headerName) {
        this.tokenService = tokenService;
        this.headerName = headerName;
    }
    intercept(req, next) {
        const lcUrl = req.url.toLowerCase();
        // Skip both non-mutating requests and absolute URLs.
        // Non-mutating requests don't require a token, and absolute URLs require special handling
        // anyway as the cookie set
        // on our origin is not the same as the token expected by another origin.
        if (req.method === 'GET' || req.method === 'HEAD' || lcUrl.startsWith('http://') ||
            lcUrl.startsWith('https://')) {
            return next.handle(req);
        }
        const token = this.tokenService.getToken();
        // Be careful not to overwrite an existing header of the same name.
        if (token !== null && !req.headers.has(this.headerName)) {
            req = req.clone({ headers: req.headers.set(this.headerName, token) });
        }
        return next.handle(req);
    }
}
注释说明,HttpInterceptor向符合条件的传出请求添加XSRF令牌。这里符合条件的请求指非变异请求和绝对URL(non-mutating requests and absolute URLs)。从代码中看来指同源的非GET和HEAD的请求。


 37
37

 被折叠的 条评论
为什么被折叠?
被折叠的 条评论
为什么被折叠?
 到【灌水乐园】发言


