


Configuring Your App For OpenEars
Conventions used in these instructions:
[OPENEARS] will be used to mean the path on your system to the OpenEars distribution folder after you downloaded and unzipped it. So, if you downloaded it to your Documents folder and your username is “username”, [OPENEARS] means:
/Users/username/Documents/OpenEars
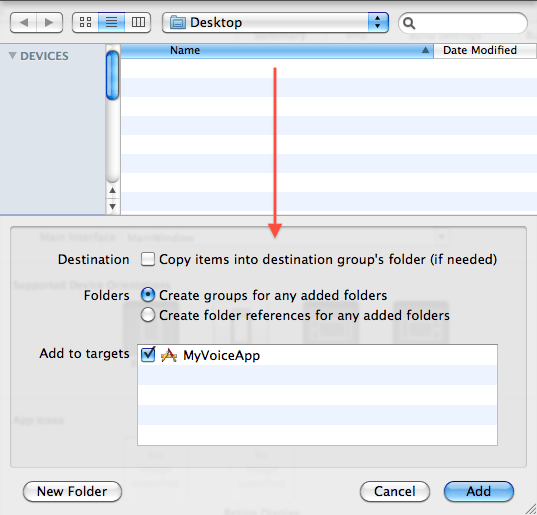
Whenever you are asked to add something to your project , this means very specifically that with your Xcode project open and in the foreground (your app project, not either of the projects that ship with OpenEars), go to the Xcode menubar and select File->Add files to (your project name), or press command-option-a. After you do this, you will always be shown the following window and you should always use the following settings for it:
What we’ll be doing:
Preparing your project to be able to use OpenEars by adding the files that the app needs, the header search paths, the frameworks, and the actual OpenEars library.
Before you begin:
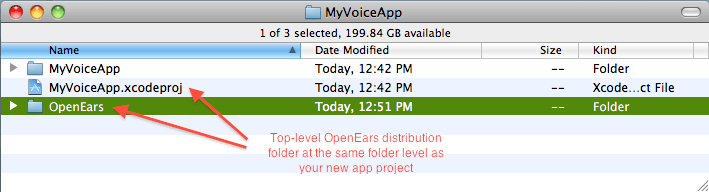
Step 1: using the [OPENEARS] folder that you successfully ran the sample app from in Getting Started With Openears, drag that [OPENEARS] folder into the root folder of your new app project, so that the project file for your app is at the same folder level as the OpenEars folder:
Next, add the following files to your app project (see “Conventions used in these instructions” above for the specifics of adding things to your project):
[OPENEARS]/OpenEarsLibrary/OpenEarsLibrary.xcodeproj
[OPENEARS]/OpenEarsLibrary/Classes/include/OpenEarsConfig.h
[OPENEARS]/CMULibraries/flite-1.4-release/include/OpenEarsVoiceConfig.h
[OPENEARS]/CMULibraries/pocketsphinx-0.6.1/model/lm/en_US/cmu07a.dic
And add the following folder to your project (make sure you add the entire folder, not its individual contents):
[OPENEARS]/CMULibraries/pocketsphinx-0.6.1/model/hmm/en_US/hub4wsj_sc_8k
Step 2: From Xcode, select your blue project icon for your app (not the OpenEarsLibrary project) in the Project Navigator and select its target under the TARGETS header in the left-hand column in the editor. Navigate to the tab Build Phases. Click “Target Dependencies”.
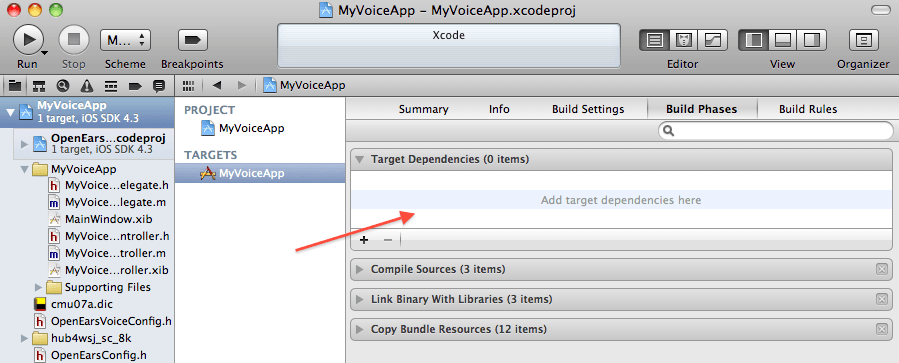
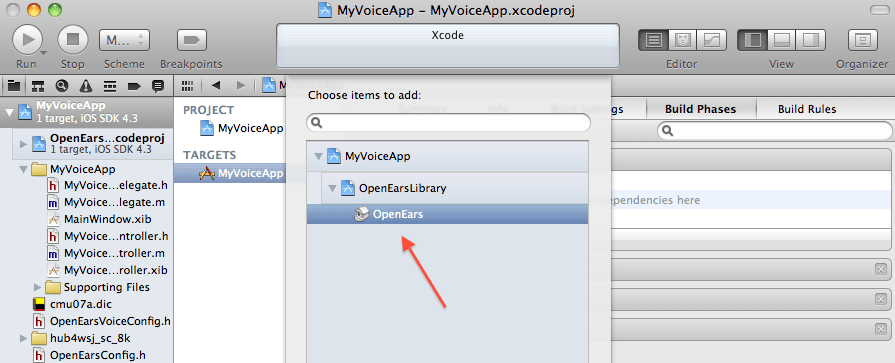
Click the plus button for Target Dependencies. Then select the gray OpenEarsLibrary icon in that dialog and click “Add”.
Step 3: In the same view, with the app target still selected underneath the header TARGETS in the left-hand pane of the editor window, navigate to the Build Phases pane and select “Link Binary With Libraries”.
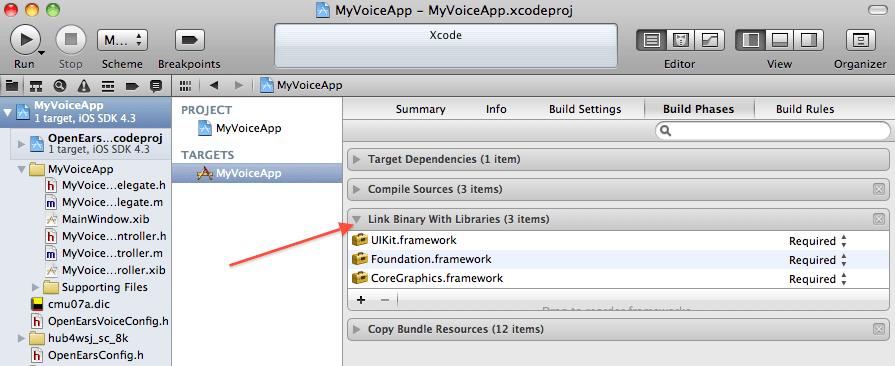
Tapping the plus button, add the OpenEars framework libOpenEarsLibrary.a found in a folder at the top called workspace:
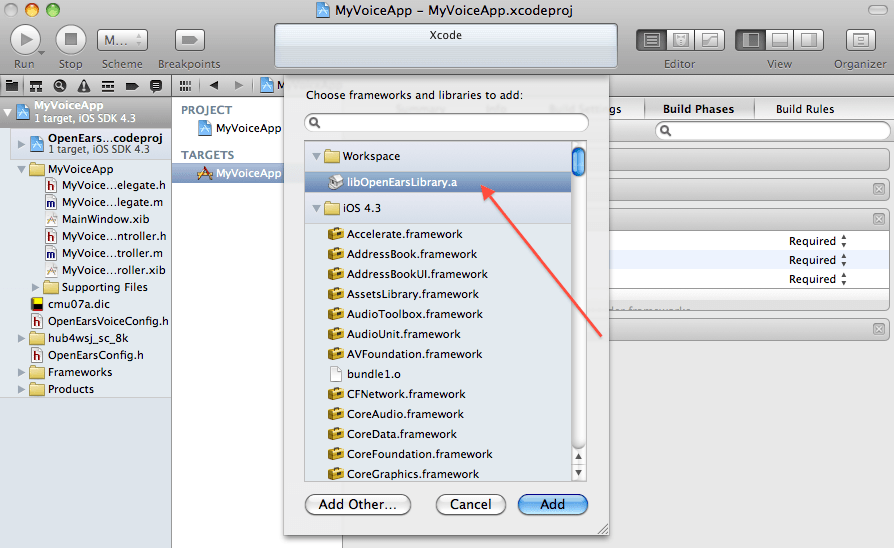
And also add the following iOS frameworks that are found in the same dialog:
AudioToolbox.framework
AVFoundation.framework
libiconv.2.4.0.dylib
Apple has informed me that it is fine to link to libiconv.2.4.0.dylib because its headers are public.
Step 4: In the same view, select your blue project icon in the left-hand editor pane under the header PROJECT and navigate to the tab “Build Settings”. Search for the build setting called Header Search Paths.
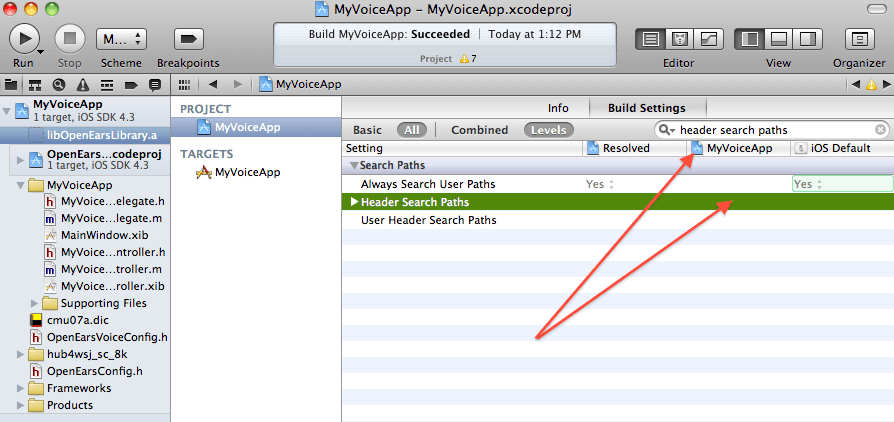
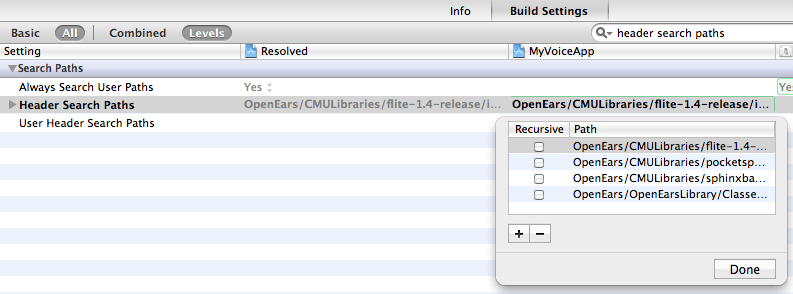
Under the column with the name of your app (as opposed to Resolved or iOS Default), double-click the Header Search Paths setting field and then click the plus button to add each of the following header search paths to your app:
OpenEars/CMULibraries/flite-1.4-release/include
OpenEars/CMULibraries/pocketsphinx-0.6.1/include
OpenEars/CMULibraries/sphinxbase-0.6.1/include
OpenEars/OpenEarsLibrary/Classes/include
None of them should have the “Recursive” checkbox checked.
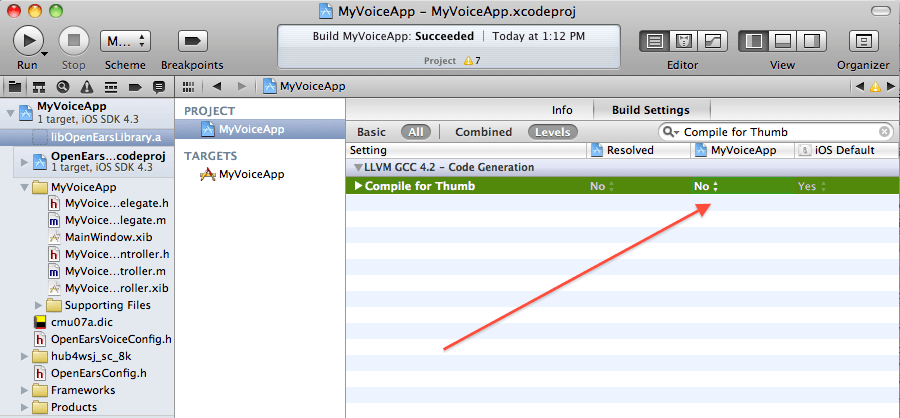
Step 6: While you are in the same view, search for the build setting “Compile for Thumb” and set it to “no”.
Step 6: Any class in which you intend to host PocketsphinxController and/or LanguageModelGenerator must have its suffix .m changed to .mm. So, if it is called MyClass.m you will need to rename it to MyClass.mm or you will get errors.
Step 7: In this class that you just renamed to mm, test whether your app is correctly configured for OpenEars by adding the lines:
#import "AudioSessionManager.h"
#import "PocketsphinxController.h"
#import "FliteController.h"
#import "OpenEarsEventsObserver.h"
#import "LanguageModelGenerator.h"
and then put the following methods anywhere (for testing purposes only, this is not the correct use of these classes at all), for example in viewDidLoad:
AudioSessionManager *audioSessionManager = [[AudioSessionManager alloc]init];
[audioSessionManager release];
PocketsphinxController *pocketsphinxController = [[PocketsphinxController alloc]init];
[pocketsphinxController release];
FliteController *fliteController = [[FliteController alloc]init];
[fliteController release];
LanguageModelGenerator *languageModelGenerator = [[LanguageModelGenerator alloc]init];
[languageModelGenerator release];
If the app can build and run, it is configured correctly to be able to use all the features of OpenEars and you’re done. Remove the test methods from the previous step since they will only cause confusion later if you leave them there, and continue on to “Using OpenEars in your app”.
If you can’t build and run, go carefully through the steps listed above again, making sure that the OpenEars folder is in the right location in your app project folder and that you haven’t made any typos in the Search Header entries or overlooked other small details.
If you continue to have issues, check out the FAQ/Support page , and if everything is working for you, congrats! Continue on to “Using OpenEars In Your App “.


 1073
1073

 被折叠的 条评论
为什么被折叠?
被折叠的 条评论
为什么被折叠?
 到【灌水乐园】发言


