


官方提供的测试方法写的比较简洁,可能对有些刚开始使用的同学来说不太友好,因此本文基于官网提供的案例进行详细说明,展示如何实现Flink任务的单元测试。
目录
测试用户自定义函数
对无状态、无时间限制的UDF进行单元测试
在日常开发中,经常需要实现一些自定义函数,这类函数不涉及到状态,也不是基于时间窗口进行计算的,这类函数在测试时会比较简单。咱们以两个无状态的MapFunction和FlatMapFunction为例,实现相同的+1功能(对数据原始值+1并返回),并对该功能进行测试,下面分别是两个Function的具体实现
public class IncrementMapFunction implements MapFunction<Integer, Integer> {
    @Override
    public Integer map(Integer value) throws Exception {
        return value + 1;
    }
}
public class IncrementFlatMapFunction implements FlatMapFunction<Integer, Integer> {
    @Override
    public void flatMap(Integer value, Collector out) throws Exception {
        out.collect(value + 1);
    }
}
MapFunction的单元测试比较简单,直接使用测试框架就可以进行测试,测试代码如下
@Test
public void testIncrement() throws Exception {
	// instantiate your function
	IncrementMapFunction incrementer = new IncrementMapFunction();
	// call the methods that you have implemented
	Assert.assertEquals(3, incrementer.map(2).intValue());
}
FlatMapFunction由于使用org.apache.flink.util.Collector收集结果,因此在进行测试时需要提供Collector的模拟对象,有两种方法可以提供模拟对象,一种是通过Mock,另一种是通过ListCollector。在使用Mockito时,非SpringBoot项目需要手动引入依赖,下面分别展示两种测试方法,日常开发时可根据测试框架或个人喜好进行选择
<dependency>
	<groupId>org.mockito</groupId>
	<artifactId>mockito-core</artifactId>
	<version>${mockito.version}</version>
	<scope>test</scope>
</dependency>
// use Mock to simulate objects
@Test
public void testCustomFlatMapFunction() throws Exception {
    // instantiate your function
    IncrementFlatMapFunction incrementer = new IncrementFlatMapFunction();
    Collector<Integer> collector = mock(Collector.class);
    // call the methods that you have implemented
    incrementer.flatMap(2, collector);
    //verify collector was called with the right output
    Mockito.verify(collector, times(1)).collect(3);
}

// use ListCollector to simulate objects
@Test
public void testCustomFlatMapFunction() throws Exception {
    // instantiate your function
    IncrementFlatMapFunction incrementer = new IncrementFlatMapFunction();
    List<Integer> list = new ArrayList<>();
    ListCollector<Integer> collector = new ListCollector<>(list);
    // call the methods that you have implemented
    incrementer.flatMap(2, collector);
    //verify collector was called with the right output
    Assert.assertEquals(Collections.singletonList(3), list);
}
对有状态或及时UDF和用户自定义算子进行单元测试
对使用管理状态或定时器的用户自定义函数的功能测试会步骤多一些,因为它涉及到测试用户代码和 Flink 运行时的交互。 为此,Flink 提供了一组所谓的测试工具,可用于测试用户自定义函数和自定义算子:
- OneInputStreamOperatorTestHarness (适用于 DataStream 上的算子)
- KeyedOneInputStreamOperatorTestHarness (适用于 KeyedStream 上的算子)
- TwoInputStreamOperatorTestHarness (适用于两个 DataStream 的 ConnectedStreams 算子)
- KeyedTwoInputStreamOperatorTestHarness (适用于两个 KeyedStream 上的 ConnectedStreams 算子)
要使用测试工具,还需要一组其他的依赖项,如果要为使用 DataStream API 构建的作业开发测试用例,则需要添加以下依赖项:
<dependency>
    <groupId>org.apache.flink</groupId>
    <artifactId>flink-test-utils_${scala.version}</artifactId>
    <version>${flink.version}</version>
    <scope>test</scope>
</dependency>
<dependency>
	<groupId>org.apache.flink</groupId>
	<artifactId>flink-runtime_2.11</artifactId>
	<version>${flink.version}</version>
	<scope>test</scope>
	<classifier>tests</classifier>
</dependency>
<dependency>
	<groupId>org.apache.flink</groupId>
	<artifactId>flink-streaming-java_2.11</artifactId>
	<version>${flink.version}</version>
	<scope>test</scope>
	<classifier>tests</classifier>
</dependency>
需要注意从1.15版本开始依赖就不一样了,只需添加如下依赖即可
<dependency>
    <groupId>org.apache.flink</groupId>
    <artifactId>flink-test-utils</artifactId>
    <version>1.15.0</version>
    <scope>test</scope>
</dependency>
该模块提供了 MiniCluster (一个可配置的轻量级 Flink 集群,能在 JUnit 测试中运行),可以直接执行作业。如果想本地测试 Table API 和 SQL 程序,除了前述提到的 flink-test-utils 之外,还要添加以下依赖项(该依赖是1.15.0版本中添加的,早期版本中没有该依赖):
<dependency>
    <groupId>org.apache.flink</groupId>
    <artifactId>flink-table-test-utils</artifactId>
    <version>1.15.0</version>
    <scope>test</scope>
</dependency>
有状态单元测试
我们以两个有状态的RichMapFunction和RichFlatMapFunction为例,实现相同的累加功能(将消息里的值进行累加,利用状态保存中间结果),并对该功能进行测试,下面分别是两个Function的具体实现
public class StatefulMapFunction extends RichMapFunction<Integer, Integer> {
    // cumulative value
    private transient ValueState<Integer> total;

    @Override
    public void open(Configuration parameters) throws Exception {
        total = getRuntimeContext().getState(
                new ValueStateDescriptor<>("totalValue", TypeInformation.of(Integer.class))
        );
    }

    @Override
    public Integer map(Integer value) throws Exception {
        if (null != total.value()) {
            value += total.value();
        }
        total.update(value);
        return value;
    }
}
public class StatefulFlatMapFunction extends RichFlatMapFunction<Integer, Integer> {

    // cumulative value
    private transient ValueState<Integer> total;

    @Override
    public void open(Configuration parameters) throws Exception {
        total = getRuntimeContext().getState(
                new ValueStateDescriptor<>("totalValue", Types.INT)
        );
    }

    @Override
    public void flatMap(Integer value, Collector out) throws Exception {
        if (null != total.value()) {
            value += total.value();
        }
        total.update(value);
        out.collect(value);
    }
}
测试方法如下所示,该测试方法主要展示了有状态的算子如何进行计算,由于自定义函数是基于KeyedStream使用的Keyed State,因此需要使用KeyedOneInputStreamOperatorTestHarness进行测试,为了偷懒,我这块的KeySelector是直接写了个固定值,指定所有测试数据的key都是1,并且指定key的类型是Int。每个方法都模拟了两条原始数据,在该场景下,每一条原始数据都会产生一条结果,因此结果集中也会有两个结果。
public class FlinkStatefulOperatorTest {

    @Test
    public void testStatefulMapFunction() throws Exception {
        //instantiate user-defined function
        StatefulMapFunction statefulMapFunction = new StatefulMapFunction();

        // wrap user defined function into a the corresponding operator
        KeyedOneInputStreamOperatorTestHarness<Integer, Integer, Integer> testHarness =
                new KeyedOneInputStreamOperatorTestHarness<>(
                        new StreamMap<>(statefulMapFunction),
                        x -> 1,
                        Types.INT);

        // open the test harness (will also call open() on RichFunctions)
        testHarness.open();

        //push (timestamped) elements into the operator (and hence user defined function)
        testHarness.processElement(2, 100L);
        testHarness.processElement(3, 102L);

        //retrieve list of emitted records for assertions
        Assert.assertEquals(testHarness.extractOutputValues(), Arrays.asList(2, 5));
    }

    @Test
    public void testStatefulFlatMapFunction() throws Exception {
        //instantiate user-defined function
        StatefulFlatMapFunction statefulFlatMapFunction = new StatefulFlatMapFunction();

        // wrap user defined function into a the corresponding operator
        KeyedOneInputStreamOperatorTestHarness<Integer, Integer, Integer> testHarness =
                new KeyedOneInputStreamOperatorTestHarness<>(
                        new StreamFlatMap<>(statefulFlatMapFunction),
                        x -> 1,
                        Types.INT);

        // open the test harness (will also call open() on RichFunctions)
        testHarness.open();

        //push (timestamped) elements into the operator (and hence user defined function)
        testHarness.processElement(3, 100L);
        testHarness.processElement(9, 102L);

        //retrieve list of emitted records for assertions
        Assert.assertEquals(testHarness.extractOutputValues(), Arrays.asList(3, 12));
    }
}
基于window的单元测试
还是先实现一个自定义的函数,根据key进行分组,统计每个key的单均价,代码如下
public class AvgPriceWindowFunction implements WindowFunction<Tuple2<Long, BigDecimal>, Tuple2<Long, BigDecimal>, Long, TimeWindow> {

    @Override
    public void apply(Long key, TimeWindow window, Iterable<Tuple2<Long, BigDecimal>> input, Collector<Tuple2<Long, BigDecimal>> out) throws Exception {
        int size = 0;
        BigDecimal totalPrice = BigDecimal.ZERO;
        for (Tuple2<Long, BigDecimal> in : input) {
            size += 1;
            totalPrice = totalPrice.add(in.f1);
        }
        out.collect(Tuple2.of(key, totalPrice.divide(BigDecimal.valueOf(size))));
    }
}
回忆下之前对有状态算子的测试步骤,其中有一步是通过KeyedOneInputStreamOperatorTestHarness包装自定义函数,在构建KeyedOneInputStreamOperatorTestHarness时,咱们传入了三个参数,分别是OneInputStreamOperator、KeySelector和TypeInformation,咱们主要说下OneInputStreamOperator,因为基于窗口的测试,在使用operator时会多一些步骤。首先先看下OneInputStreamOperator都有哪些实现
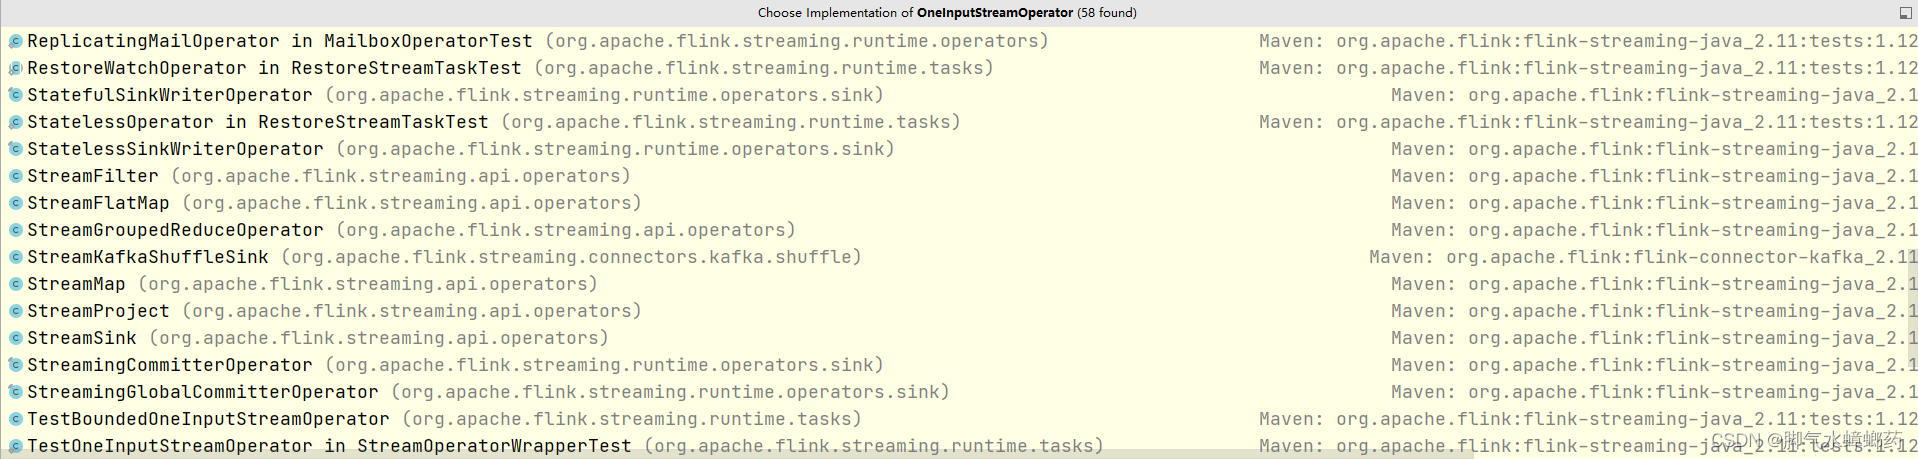
我这块只截了一部分,可以看到之前的测试中用到的StreamMap和StreamFlatMap这两个operator,那如果想做基于窗口的测试该用哪个operator呢,按名字联想咱们应该找一个和window有关的,和window有关的operator有两个,分别是EvictingWindowOperator和WindowOperator,EvictingWindowOperator是继承自WindowOperator,并在其基础上增加了对evictor的支持,因为咱们的测试中没有使用到evictor,所以用WindowOperator就行。再来看下WindowOperator的构造方法
public WindowOperator(
			WindowAssigner<? super IN, W> windowAssigner,
			TypeSerializer<W> windowSerializer,
			KeySelector<IN, K> keySelector,
			TypeSerializer<K> keySerializer,
			StateDescriptor<? extends AppendingState<IN, ACC>, ?> windowStateDescriptor,
			InternalWindowFunction<ACC, OUT, K, W> windowFunction,
			Trigger<? super IN, ? super W> trigger,
			long allowedLateness,
			OutputTag<IN> lateDataOutputTag)
先看下每种泛型代表的是什么意思
<K> – The type of key returned by the KeySelector.(keyby的key是什么类型)
<IN> – The type of the incoming elements.(数据输入类型)
<OUT> – The type of elements emitted by the InternalWindowFunction.(数据输出类型)
<W> – The type of Window that the WindowAssigner assigns.(窗口类型)
<ACC> – The type of the accumulator.(累加器类型)
再来看要传入哪些参数
- WindowAssigner :窗口分配器,生产时候要使用哪种窗口,测试的时候就指定哪种窗口,比如我用的是5秒的滚动窗口,那就传入
TumblingEventTimeWindows.of(Time.seconds(5)); - TypeSerializer<W>:窗口序列化器,这块可以直接使用TimeWindow,除了TimeWindow还有GlobalWindow,两个都有各自的Serializer,直接传入
new TimeWindow.Serializer(); - KeySelector<IN, K>:如何获取key;
- TypeSerializer<K>:key的序列化器,注意这和第二个的泛型,不要搞混了,可以通过
BasicTypeInfo来指定序列化器,比如上面代码里的key是Long类型的,那就可以传入BasicTypeInfo.LONG_TYPE_INFO.createSerializer(new ExecutionConfig()); - StateDescriptor:状态描述符,和算子里的对应,必须传入;
- InternalWindowFunction:窗口函数的内部接口,有很多实现,通过选择相应的实现来封装要测试的函数,比如我这块要测试的是WindowFunction,那我就可以通过选择
InternalIterableWindowFunction来进行封装; - Trigger:指定使用的触发器,比如我没单独实现trigger,并且又是基于事件时间的,那就可以传入
EventTimeTrigger.create(); - allowedLateness:是否允许迟到事件,该值必须≥0,不允许就设置成0;
- OutputTag:侧输出流的标记,可以为空。
了解了这些信息以后,就可以把我们的WindowOperator构建出来了,下面展示了整个测试代码
	private static final TypeInformation<Tuple2<Long, BigDecimal>> LONG_DEC_TUPLE =
            TypeInformation.of(new TypeHint<Tuple2<Long, BigDecimal>>() {
            });

    @Test
    public void testWindowFunction() throws Exception {

        AvgPriceWindowFunction function = new AvgPriceWindowFunction();

        SimpleKeySelector keySelector = new SimpleKeySelector();

        ListStateDescriptor<Tuple2<Long, BigDecimal>> stateDesc = new ListStateDescriptor<>("window-contents",
                LONG_DEC_TUPLE.createSerializer(new ExecutionConfig()));

        WindowOperator<Long, Tuple2<Long, BigDecimal>, Iterable<Tuple2<Long, BigDecimal>>, Tuple2<Long, BigDecimal>, TimeWindow> operator =
                new WindowOperator<>(
                        TumblingEventTimeWindows.of(Time.seconds(5)),
                        new TimeWindow.Serializer(),
                        keySelector,
                        BasicTypeInfo.LONG_TYPE_INFO.createSerializer(new ExecutionConfig()),
                        stateDesc,
                        new InternalIterableWindowFunction<>(function),
                        EventTimeTrigger.create(),
                        0,
                        null
                );

        KeyedOneInputStreamOperatorTestHarness<Long, Tuple2<Long, BigDecimal>, Tuple2<Long, BigDecimal>> testHarness =
                new KeyedOneInputStreamOperatorTestHarness<>(
                        operator,
                        keySelector,
                        Types.LONG);

        testHarness.open();

        testHarness.processElement(Tuple2.of(1L, BigDecimal.valueOf(13)), 1000);
        testHarness.processElement(Tuple2.of(1L, BigDecimal.valueOf(13)), 2000);
        testHarness.processElement(Tuple2.of(1L, BigDecimal.valueOf(13)), 4999);
        testHarness.processElement(Tuple2.of(2L, BigDecimal.valueOf(26)), 1000);

        testHarness.processWatermark(4999);

        ConcurrentLinkedQueue<Object> expectedOutput = new ConcurrentLinkedQueue<>();
        expectedOutput.add(new StreamRecord<>(Tuple2.of(1L, BigDecimal.valueOf(13)), 4999));
        expectedOutput.add(new StreamRecord<>(Tuple2.of(2L, BigDecimal.valueOf(26)), 4999));
        expectedOutput.add(new Watermark(4999));

        TestHarnessUtil.assertOutputEqualsSorted("AvgPriceWindowFunction test failed.", expectedOutput, testHarness.getOutput(), new Tuple2ResultSortComparator());
    }

    private class SimpleKeySelector implements KeySelector<Tuple2<Long, BigDecimal>, Long> {

        @Override
        public Long getKey(Tuple2<Long, BigDecimal> value) throws Exception {
            return value.f0;
        }
    }

    private static class Tuple2ResultSortComparator implements Comparator<Object>, Serializable {
        @Override
        public int compare(Object o1, Object o2) {
            if (o1 instanceof Watermark || o2 instanceof Watermark) {
                return 0;
            } else {
                StreamRecord<Tuple2<Long, BigDecimal>> sr0 = (StreamRecord<Tuple2<Long, BigDecimal>>) o1;
                StreamRecord<Tuple2<Long, BigDecimal>> sr1 = (StreamRecord<Tuple2<Long, BigDecimal>>) o2;
                if (sr0.getTimestamp() != sr1.getTimestamp()) {
                    return (int) (sr0.getTimestamp() - sr1.getTimestamp());
                }
                int comparison = sr0.getValue().f0.compareTo(sr1.getValue().f0);
                if (comparison != 0) {
                    return comparison;
                } else {
                    return sr0.getValue().f1.subtract(sr1.getValue().f1).intValue();
                }
            }
        }
    }
ProcessFunction单元测试
除了之前可以直接用于测试 ProcessFunction 的测试工具之外,Flink 还提供了一个名为 ProcessFunctionTestHarnesses 的测试工具工厂类,可以简化测试工具的实例化,附上官网提供的方法和其测试用例
public static class PassThroughProcessFunction extends ProcessFunction<Integer, Integer> {

	@Override
	public void processElement(Integer value, Context ctx, Collector<Integer> out) throws Exception {
        out.collect(value);
	}
}
通过传递合适的参数并验证输出,ProcessFunctionTestHarnesses 能更便捷的进行单元测试并验证输出
@Test
public void testPassThrough() throws Exception {
	//instantiate user-defined function
	PassThroughProcessFunction processFunction = new PassThroughProcessFunction();

	// wrap user defined function into a the corresponding operator
	OneInputStreamOperatorTestHarness<Integer, Integer> harness = ProcessFunctionTestHarnesses
		.forProcessFunction(processFunction);

	//push (timestamped) elements into the operator (and hence user defined function)
	harness.processElement(1, 10);

	//retrieve list of emitted records for assertions
	Assert.assertEquals(harness.extractOutputValues(), Collections.singletonList(1));
}
测试Flink作业
Apache Flink 提供了一个名为 MiniClusterWithClientResource 的 Junit 规则,用于针对本地嵌入式小型集群测试完整的作业。 叫做 MiniClusterWithClientResource。让我们用前面写的IncrementMapFunction做示例,演示下在本地 Flink 集群使用这个 MapFunction的简单 pipeline,代码如下
public class FlinkMiniClusterTest {

    @ClassRule
    public static MiniClusterWithClientResource flinkCluster =
            new MiniClusterWithClientResource(
                    new MiniClusterResourceConfiguration.Builder()
                            .setNumberSlotsPerTaskManager(2)
                            .setNumberTaskManagers(1)
                            .build());

    @Test
    public void testIncrementPipeline() throws Exception {
        StreamExecutionEnvironment env = StreamExecutionEnvironment.getExecutionEnvironment();

        // configure your test environment
        env.setParallelism(2);

        // values are collected in a static variable
        CollectSink.values.clear();

        // create a stream of custom elements and apply transformations
        env.fromElements(1, 21, 22)
                .map(new IncrementMapFunction())
                .addSink(new CollectSink());

        // execute
        env.execute();

        // verify your results
        assertTrue(CollectSink.values.containsAll(Arrays.asList(2, 22, 23)));
    }

    // create a testing sink
    private static class CollectSink implements SinkFunction<Integer> {

        // must be static
        public static final List<Integer> values = Collections.synchronizedList(new ArrayList<>());

        @Override
        public void invoke(Integer value, SinkFunction.Context context) throws Exception {
            values.add(value);
        }
    }

}


 2万+
2万+


 被折叠的 条评论
为什么被折叠?
被折叠的 条评论
为什么被折叠?
 到【灌水乐园】发言


